Johnny Five Tutorial
By Flavio Copes
Learn how to control an Arduino from Node.js with Johnny-Five, upload StandardFirmataPlus, connect the board, and blink its built-in LED.
Johnny-Five is a library that allows us to interface with electronic devices using JavaScript.
Devices like Arduino are usually programmed in the Arduino Language, which is a particular framework for C/C++.
Small microcontrollers generally do not run Node.js themselves. With Johnny-Five, the JavaScript program runs on a computer and sends commands to the board.
The two sides communicate through Firmata, a protocol for controlling a microcontroller from software on a host computer.
Johnny-Five gives us a friendly JavaScript API on top of that protocol.
Setting up your Arduino to work with Johnny-Five
Install the current Arduino IDE.
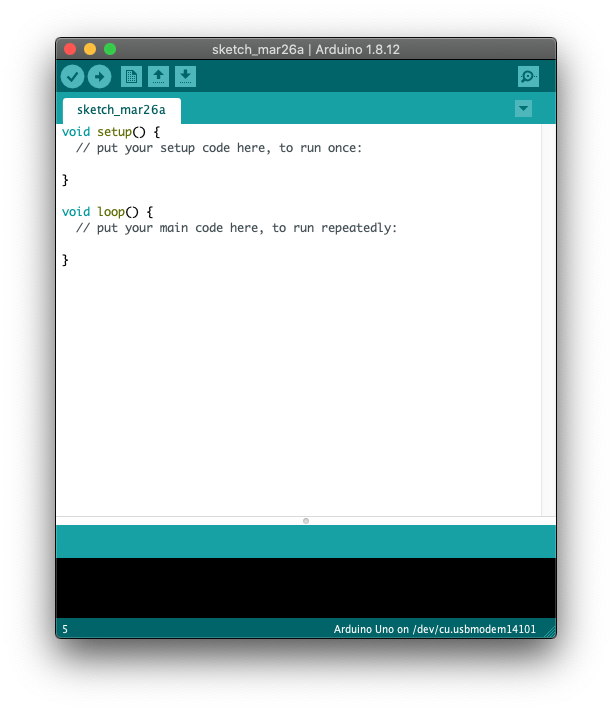
Open it, and you’ll see something like this:
Connect the Arduino board to your USB port.
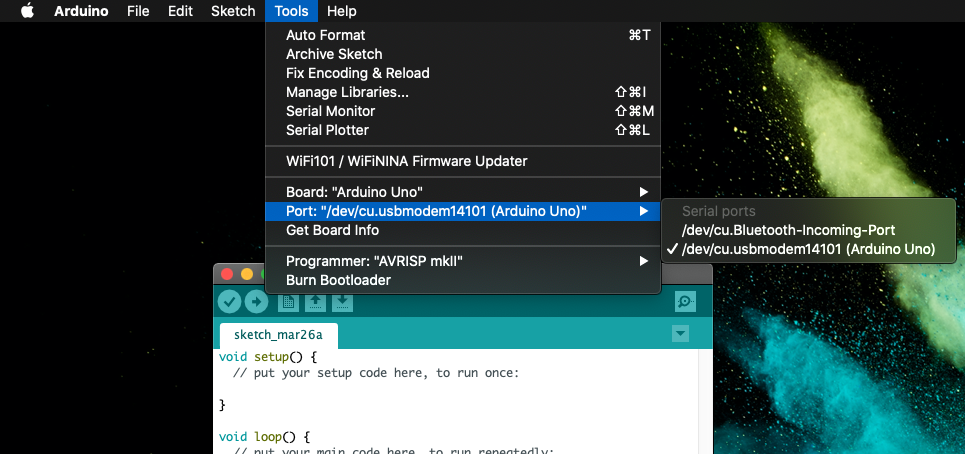
Go to Tools -> Port and make sure the port selected is the one the Arduino is connected to (in my case /dev/cu.usbmodem14101). You should have a few options, and Arduino IDE should already pre-detect it for you.
Go to Tools -> Board and make sure the device you have is correctly selected.
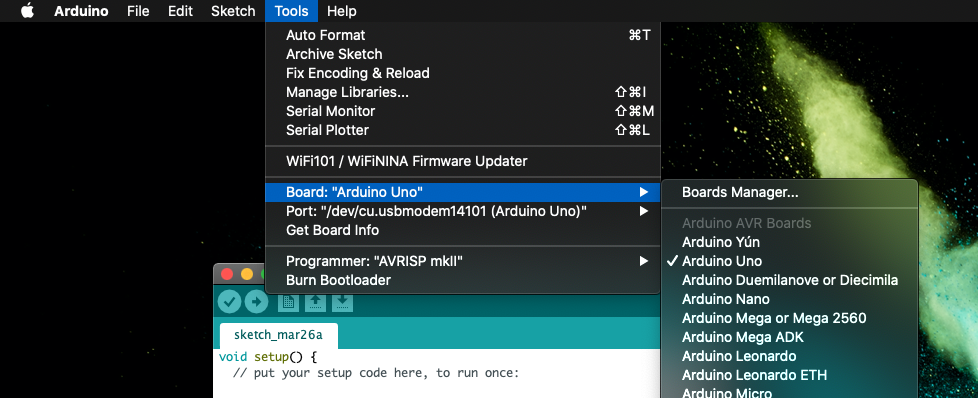
In my case, the device is an Arduino Uno compatible board.
Then go to File -> Examples -> Firmata and choose StandardFirmataPlus. This is still the firmware recommended for an Arduino Uno in the official Johnny-Five platform guide:
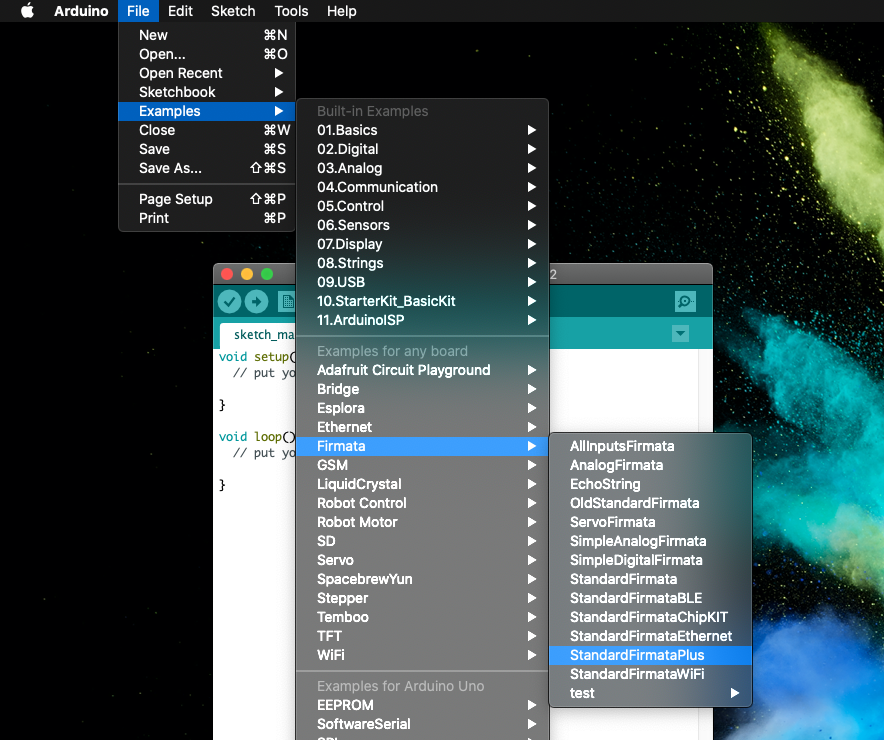
This will load a new window:
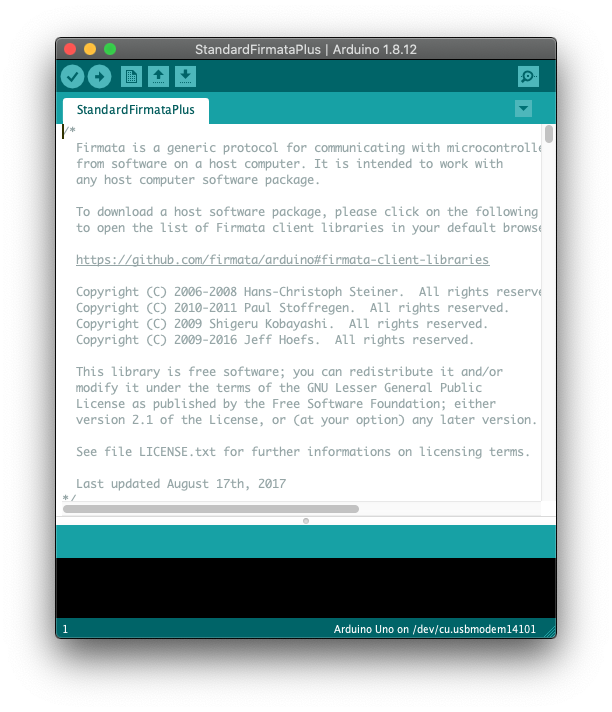
Click Upload to compile the sketch and load it on the Arduino board:
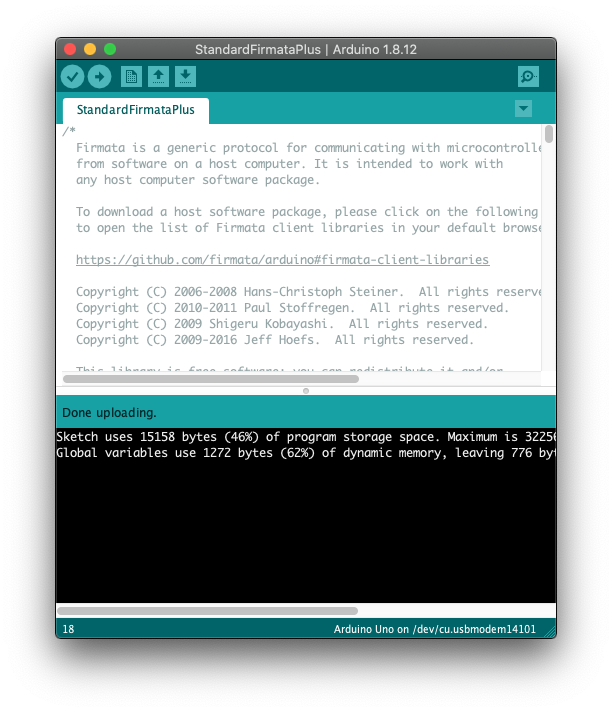
Great! Now you’re all set on the hardware side. Close the Serial Monitor and any other program using the board’s serial port before running Johnny-Five.
The Arduino device must remain connected
One thing that you need to note about this approach is that the Arduino must remain connected to the computer running the Node.js program.
Usually when you upload an Arduino sketch written in C/C++, you can disconnect the board from your computer. The sketch is stored in flash memory and starts again when the board is powered.
A classic Arduino Uno does not run a full operating system or Node.js. It runs the uploaded sketch together with the small Arduino core and, during startup, its bootloader.
The sketch loaded in flash memory now is StandardFirmataPlus. It implements the Firmata protocol, which Johnny-Five uses through the USB serial connection.
As soon as we disconnect the Arduino, the Johnny-Five program can no longer control it.
One way we can deploy the project somewhere is to use a Raspberry Pi, connect the Arduino to it, and run the Node.js app there. We can then access the Raspberry Pi using a VNC or SSH connection.
This is out of the scope of this lesson, but check out How to connect to a Raspberry Pi using a Mac and How to make sure the Raspberry Pi has always the same IP address if you’re interested in doing so.
For the sake of understanding how we can program electronics with JavaScript, however, it will be enough to have the device connected to our computer.
An overview of the functionality offered by Johnny-Five
Johnny-Five offers APIs for commonly used electronic components:
- LED
- Buttons
- Sensors
- Servo motors
- Stepper motors
- Thermometers
- LCD screens
- Joysticks
- Gyroscopes
- Accelerometers
and much more.
Install Johnny-Five
Create a folder for the project, initialize it, and install the johnny-five npm package:
mkdir johnny-five-blink
cd johnny-five-blink
npm init -y
npm install johnny-five
Create a file named blink.js:
const { Board, Led } = require('johnny-five')
const board = new Board()

board.on('ready', () => {
  const led = new Led(13)
  led.blink(500)
})
Run it:
node blink.jsJohnny-Five usually detects the serial port automatically. If you have several boards or serial devices connected, pass the port explicitly:
const board = new Board({ port: '/dev/tty.usbmodem1101' })On Windows, the value looks like COM3. Use the actual port shown by the Arduino IDE.
If the board does not become ready, check that:
- the correct board and port were selected when uploading
StandardFirmataPlus - the upload completed successfully
- the Arduino IDE Serial Monitor is closed
- the USB cable supports data, not just charging
- your user account has permission to access the serial port on Linux
The Board API documents connection options and the platform support page lists the firmware or I/O plugin required by each supported board.
Controlling the LED
The example creates a Led object for pin 13, which controls the built-in LED on a classic Arduino Uno.
Once you have the led object, you can call its methods, which include:
led.on()to turn it onled.off()to turn it offled.toggle()to toggle its current stateled.blink()to toggle it indefinitely, every 100ms by defaultled.stop()to stop the interval
Calling led.stop() does not necessarily turn the LED off. Use led.stop().off() when you want both actions.
See the official LED API for brightness, fading, pulsing, and other operations.
One final detail: put Johnny-Five code in a file and run it with Node.js. The project documentation warns against starting it directly inside Node’s own REPL because a board creates its own contextual REPL.
Want me to talk about your product? You can sponsor this site.
Related posts about js: