Richer input and navigation
SwiftUI forms: Stepper
Learn how to use the Stepper control in SwiftUI to adjust a number with minus and plus buttons, set a range and step, and format the bound value.
The Stepper view lets the user pick a number with a - and a + button. One tap, one step. It’s the control you see when choosing the number of guests or the print copies.
We link it to a @State property, in this case counter:
struct ContentView: View {
    @State private var counter = 0

    var body: some View {
        Form {
            Stepper("The counter is \(counter)", value: $counter)
        }
    }
}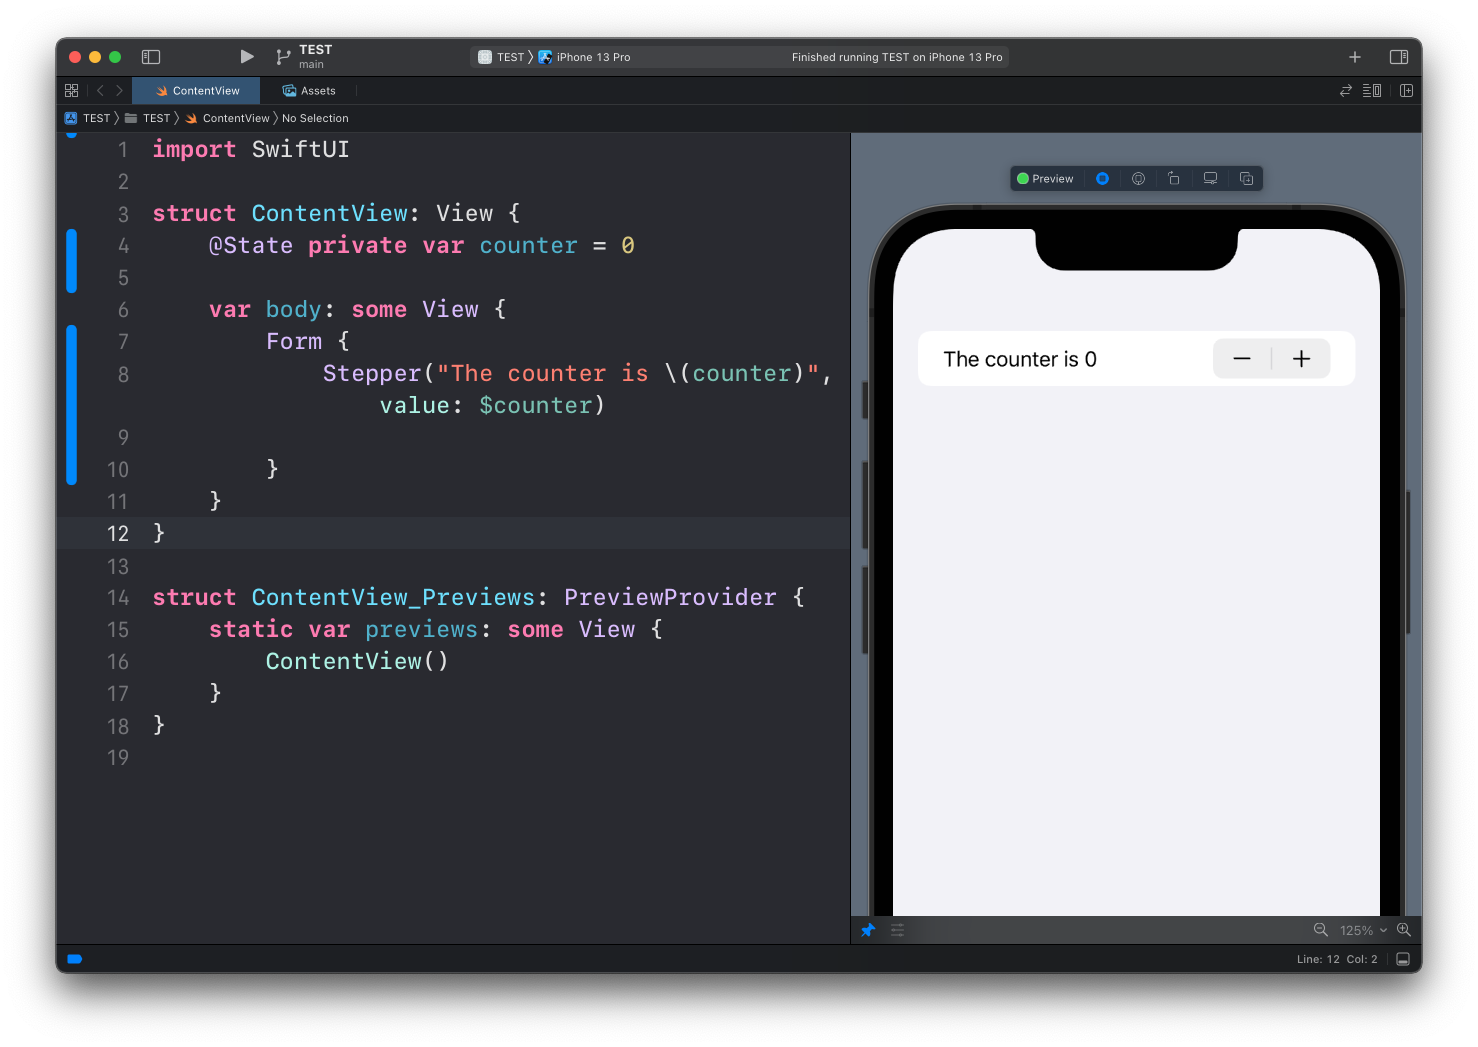
Notice the label interpolates the current value. The stepper itself never shows the number, only the two buttons, so putting the value in the label is the usual pattern. Tap + three times and the row reads “The counter is 3”.
Limiting the range
Use the in parameter to limit the values the stepper accepts:
Stepper("The counter is \(counter)", value: $counter, in: 0...10)When you reach a limit, the button in that direction turns gray and stops responding.
My advice is to always set a range. An unbounded stepper rarely makes sense. Nobody orders minus three coffees.
Stepping by more than 1
By default each tap changes the value by 1. The step parameter changes that:
Stepper("Font size: \(fontSize)", value: $fontSize, in: 8...72, step: 2)Now each tap moves the value by 2, staying inside the range.
Formatting the value
The bound value can be any numeric type, including Double. Interpolating a Double directly prints something like 20.500000, so format it in the label:
@State private var temperature = 20.5

Stepper("Target: \(temperature, specifier: "%.1f")°", value: $temperature, in: 15...30, step: 0.5)
The specifier keeps the display at one decimal place, so the row reads “Target: 20.5°”, while the underlying value stays precise.
Reacting while the user edits
Stepper accepts an onEditingChanged closure. It receives true when an editing session starts and false when it ends. This also covers press-and-hold, where the value auto-repeats:
Stepper("Quantity: \(quantity)", value: $quantity, in: 1...10) { editing in
    print(editing ? "editing started" : "editing ended")
}
You rarely need it, but it’s handy to hold off expensive work, like saving to disk, until the user is done tapping.
Stepper or Slider?
Use a stepper when the value is a small integer and precision matters: number of guests, item quantity, font size. One tap, one exact increment.
Use a slider for continuous ranges where roughly right is fine, like volume or brightness. A slider covering 1 to 5 feels clumsy, and a stepper covering 0 to 100 means a lot of tapping. Pick the control that matches the size and precision of the range.
Lesson completed