Railway: Effortless Web App Deployments
React Masterclass
Launching on November 4th
Railway (referral link!) is the easiest deployment platform I’ve used. No Docker knowledge required. No configuration files. No complex setup. Connect your GitHub repo, and it deploys. That’s it.
I’ve been using Railway for some of my projects for a long time. It’s my go-to when I want to ship fast without thinking about infrastructure. This guide covers everything you need to know about Railway.
What is Railway?
Railway is a deployment platform designed for developers who want to focus on building, not DevOps. It’s like Heroku, if you’re an old timer like me, but modern, faster, and more affordable.
You can deploy from GitHub with zero configuration. Every pull request gets an instant preview deployment. PostgreSQL, MySQL, Redis, and MongoDB are all included—just one click to add them. Environment variables and secrets management is built-in, automatic HTTPS works out of the box, and custom domains are easy to set up. The pricing is fair and usage-based, so you only pay for what you use.
I use Railway for web applications (Node.js, Python, Go, Ruby), APIs and backends, full-stack apps, databases, cron jobs, and any service that needs persistence.
I wouldn’t use it for static sites though—Netlify is better for that. And for massive enterprise apps, AWS or GCP have more enterprise-grade features that might be necessary.
Why I like Railway
Most apps just work with zero config. Railway detects your framework automatically and deploys it correctly. I’ve deployed Node.js, Python, and Go apps without writing a single configuration file.
It’s fast. From git push to deployed takes under a minute. The dashboard is beautiful and intuitive—everything is where you expect it to be.
Databases are included, which is huge. PostgreSQL, MySQL, Redis, MongoDB—one click to add, and they’re instantly connected to your app. No need to sign up for separate services or manage connection strings manually.
Preview deployments are automatic. Every PR gets its own URL, which is perfect for testing changes before merging to production.
The pricing is fair. You pay $5/month and get $5 of usage credit. No minimum spend, no waste. You’re not paying for resources you don’t use.
I’ve never had unexpected downtime with Railway. It just works, which is exactly what I want from a deployment platform.
What you can deploy on Railway
Railway supports pretty much anything that runs in a Docker container, but it’s optimized for the most common use cases. Here’s what you can deploy:
Web applications
Any web app or API built with Node.js, Python, Go, Ruby, PHP, Rust, Java, or .NET. Railway auto-detects your framework and configures everything automatically.
Supported frameworks include Next.js, Express, FastAPI, Django, Flask, Rails, Laravel, Fiber, Gin, and many more.
Databases
Railway provides managed databases that you can add to your project with one click:
- PostgreSQL - The most popular relational database
- MySQL - Another solid relational option
- MongoDB - NoSQL document database
- Redis - In-memory data store for caching and queues
These are real databases with persistence, automatic backups, and connection strings that are automatically injected into your app’s environment variables.
Cron jobs and background workers
You can deploy services that don’t expose HTTP endpoints. These are perfect for scheduled tasks, queue workers, or any background processing.
Static sites
While I mentioned Netlify is better for pure static sites, Railway can still serve them. It’s useful if you want everything in one place.
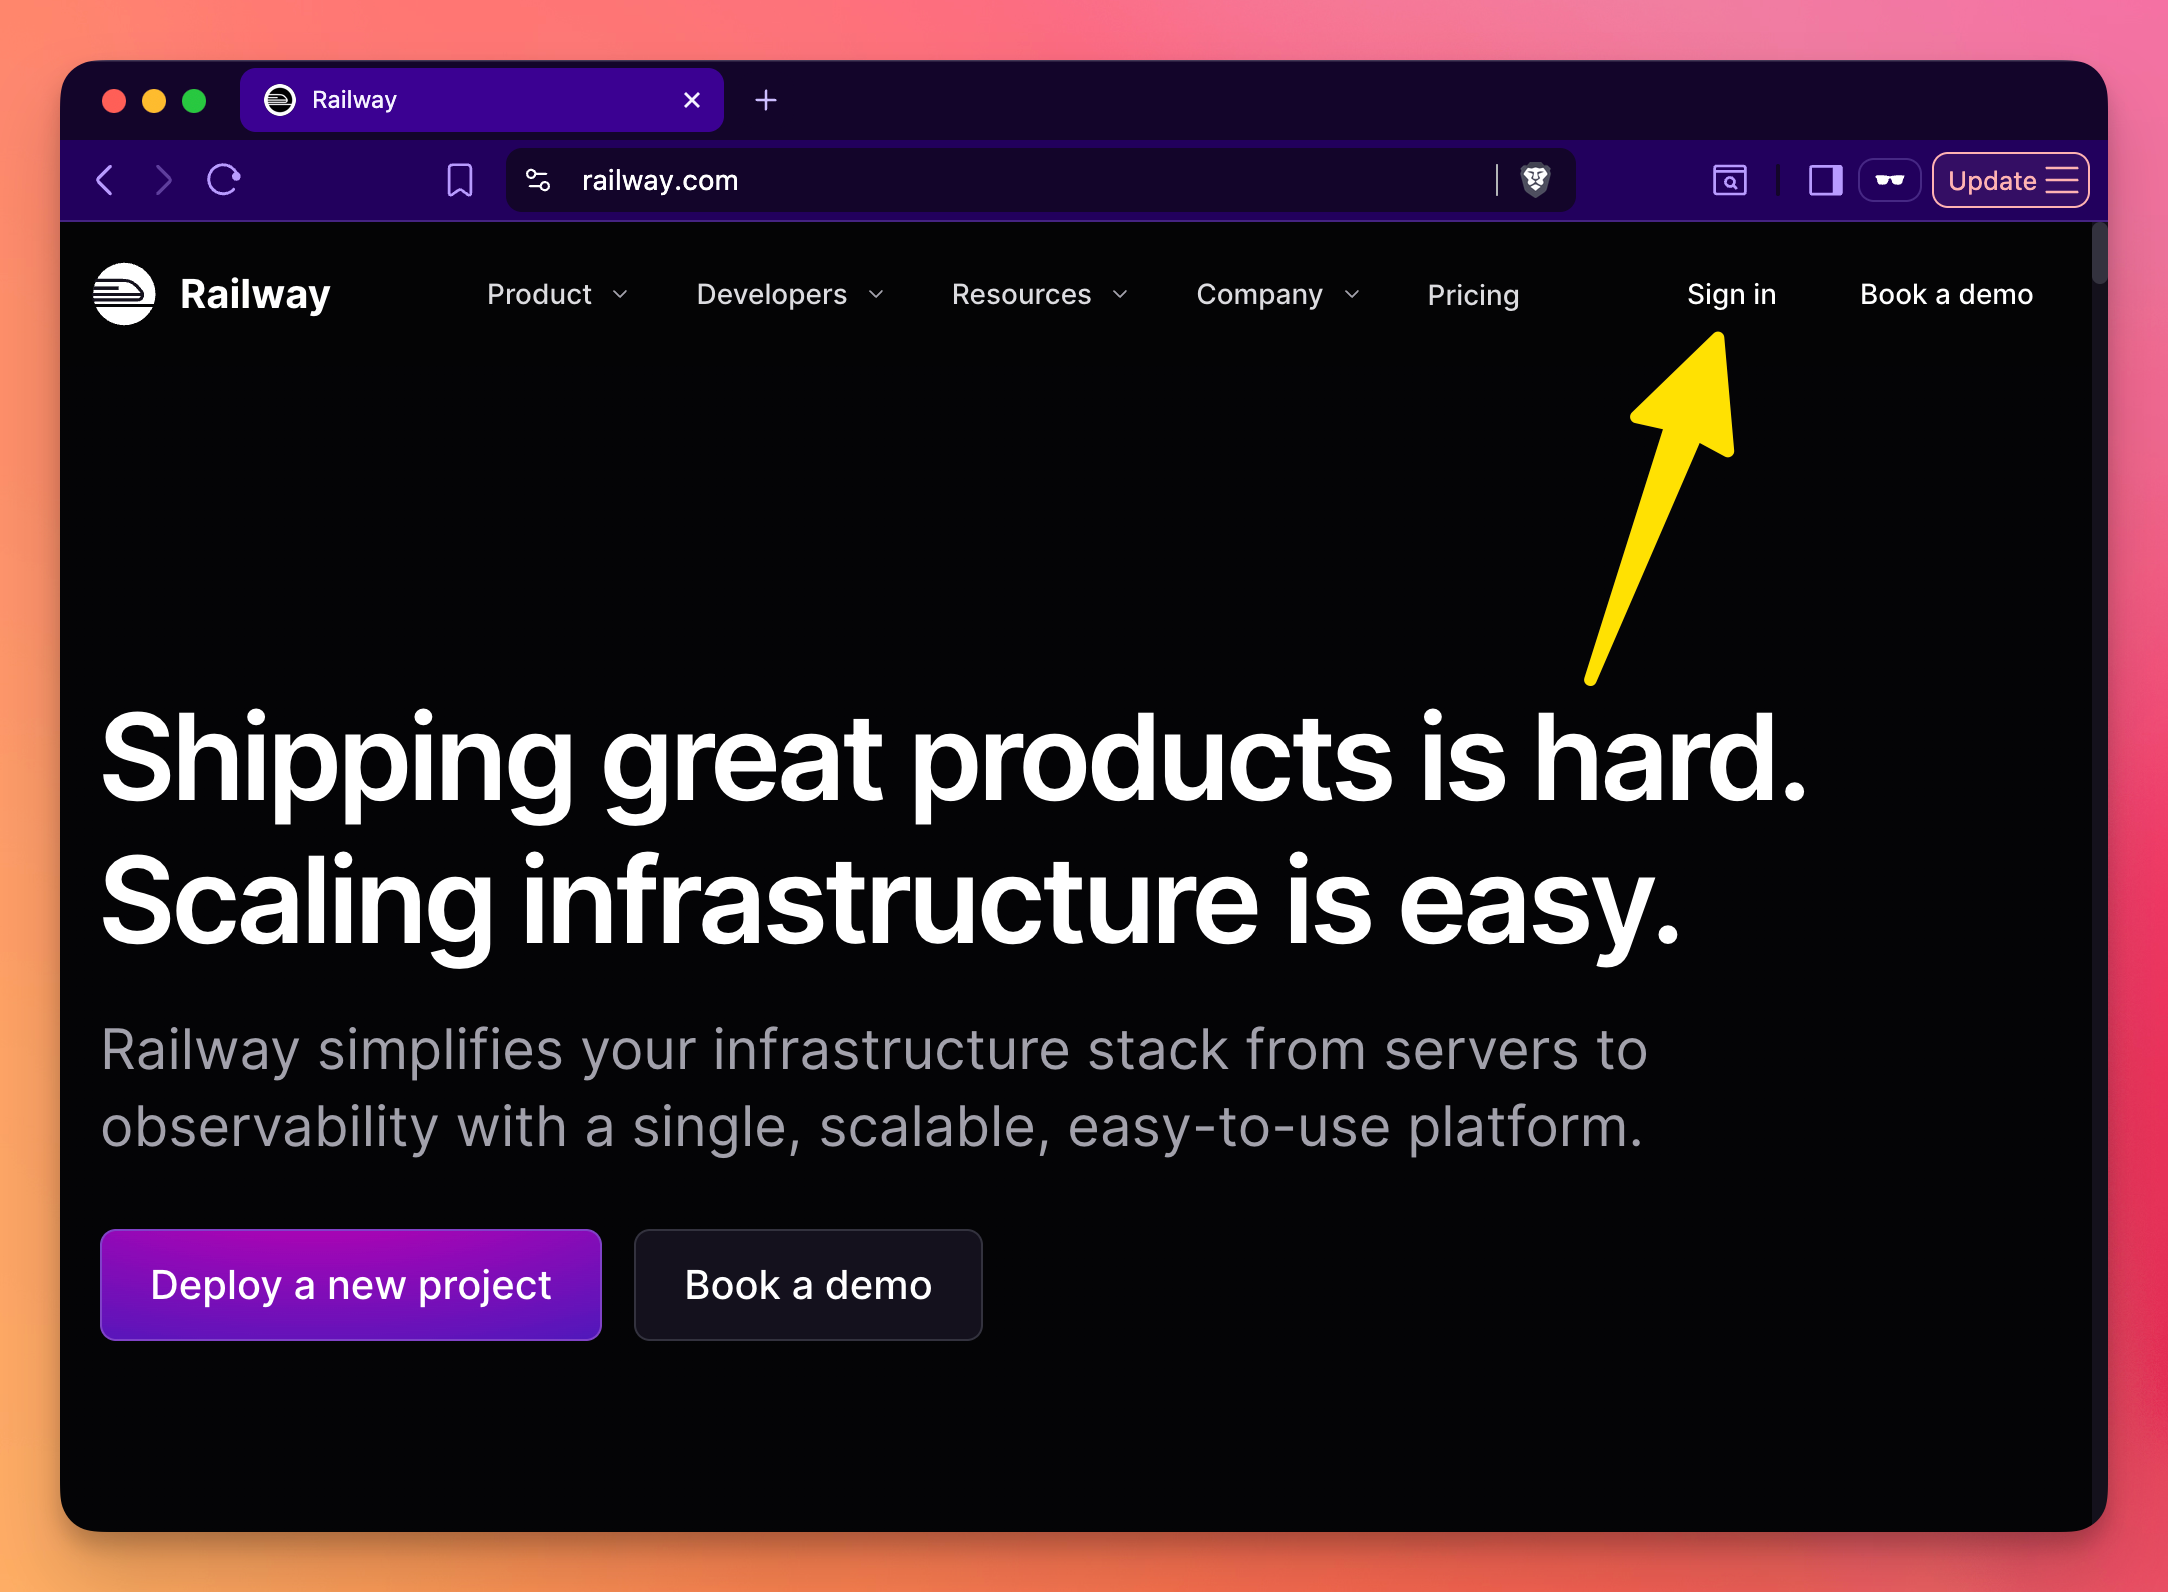
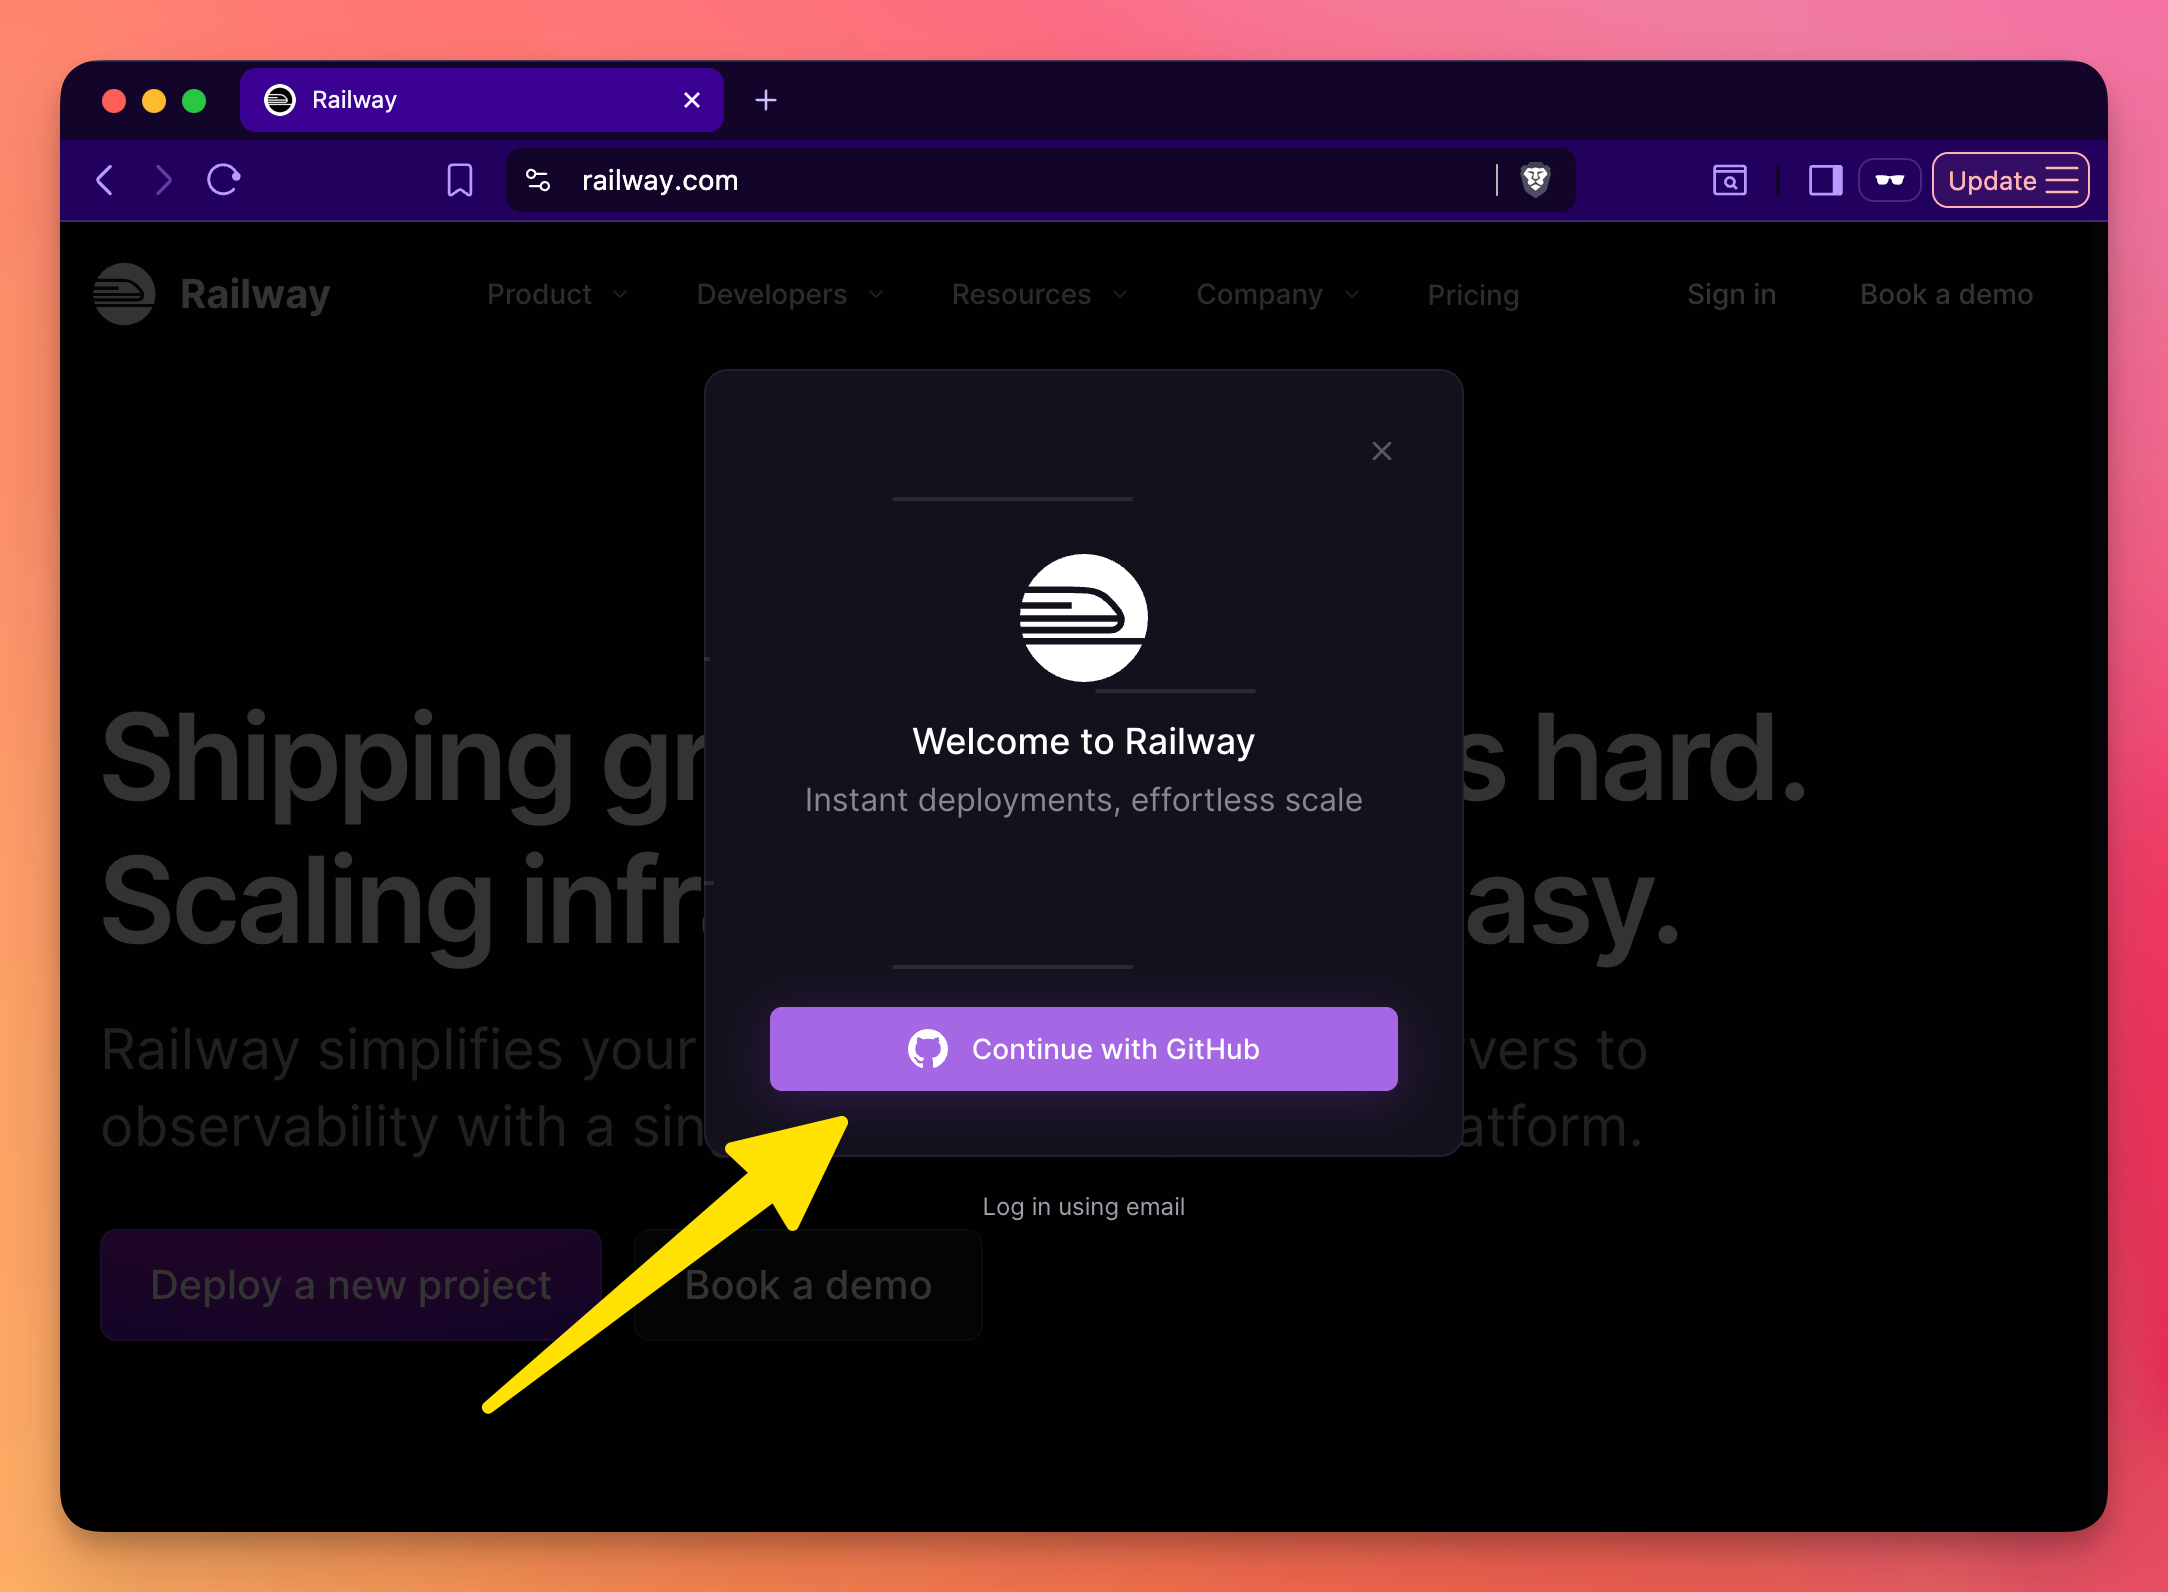
Getting started
Go to railway.com (referral link!) and sign up with GitHub. That’s it. No credit card required to start.
Install CLI (optional)
The CLI is optional but useful to automate stuff or do things from the command line, if you prefer:
# Mac
brew install railway

# all platforms
npm i -g @railway/cli
See other ways to install the CLI on the official docs.
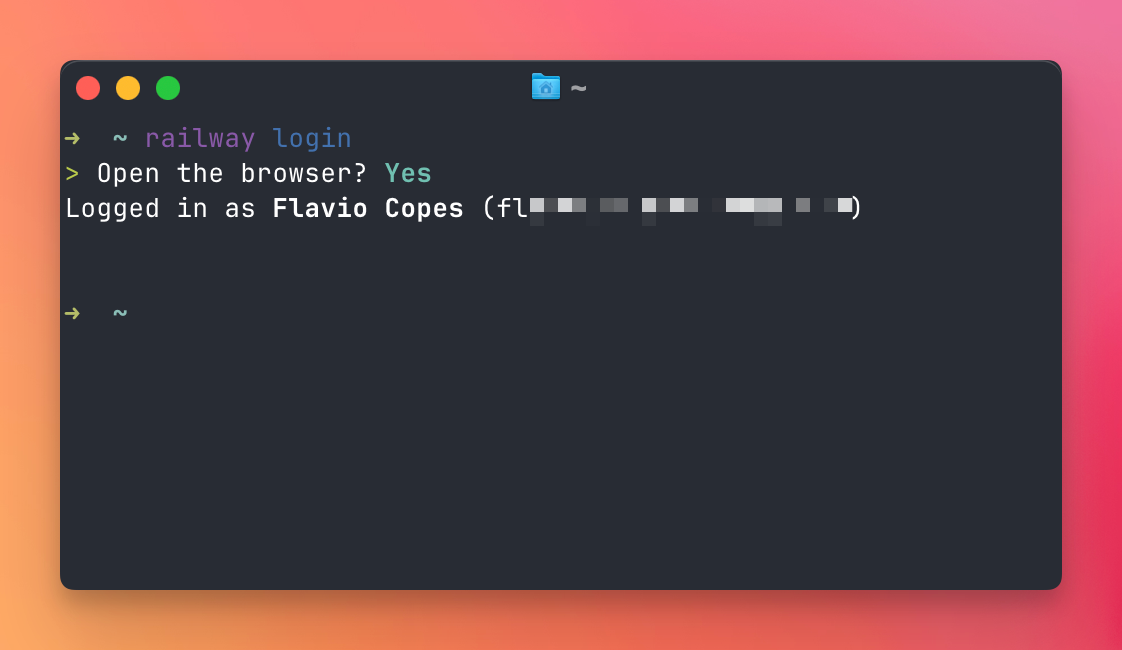
Once the CLI is installed, login:
railway loginto log in.
Create a simple app to deploy
I’m going to use Bun for this.
mkdir my-bun-app
cd my-bun-app
bun init -y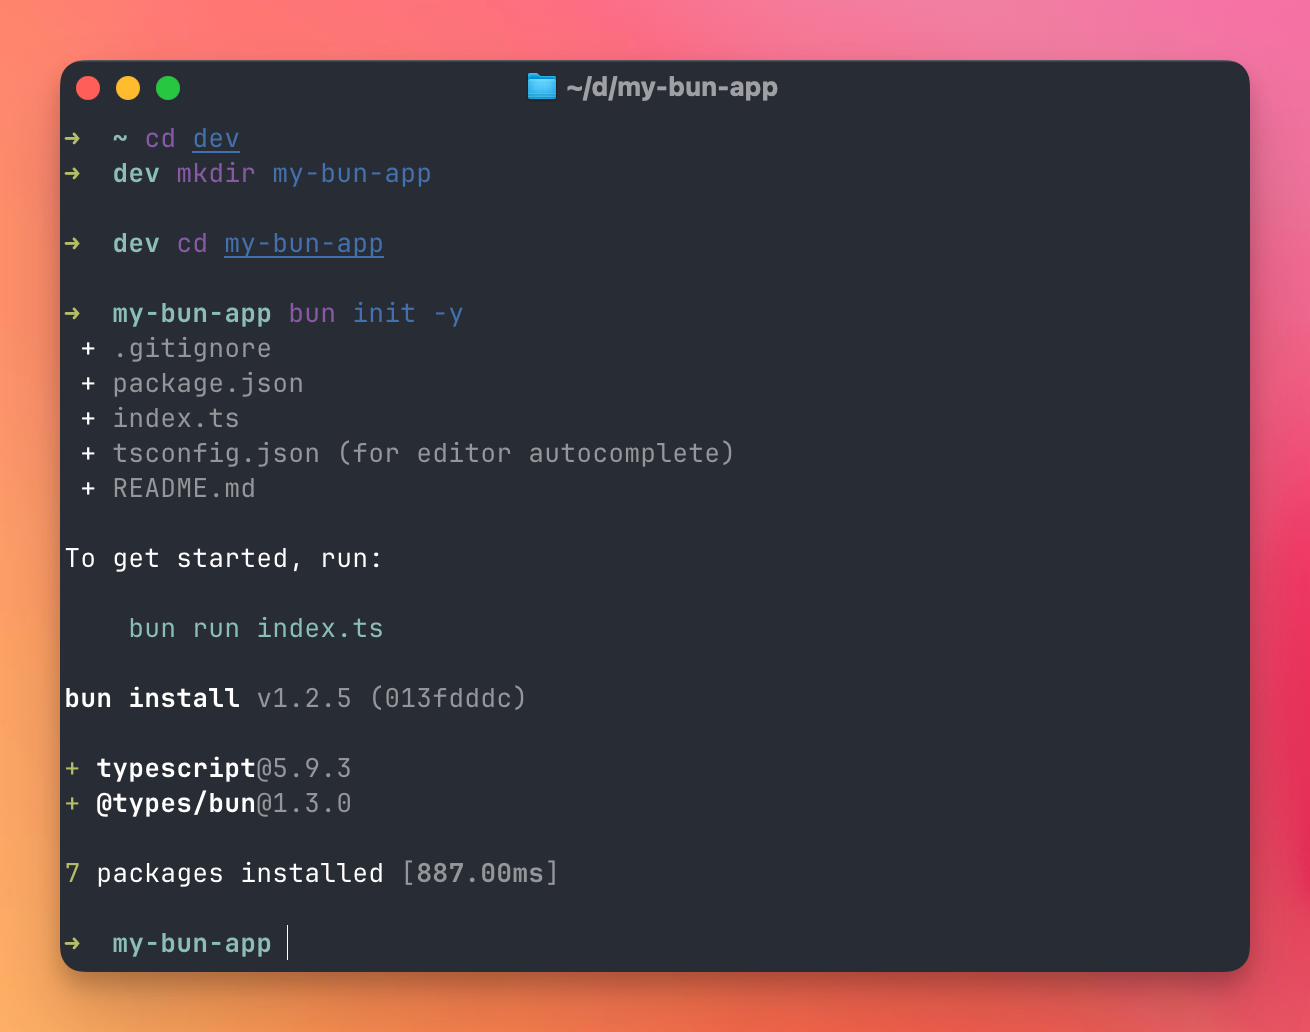
Edit index.ts and add this code:
const server = Bun.serve({
  port: process.env.PORT || 3000,
  hostname: '0.0.0.0',
  fetch(req) {
    const url = new URL(req.url)

    if (url.pathname === '/') {
      return Response.json({
        message: 'Hello from Railway with Bun!',
        environment: process.env.RAILWAY_ENVIRONMENT || 'local',
      })
    }

    if (url.pathname === '/health') {
      return Response.json({
        status: 'ok',
        uptime: process.uptime(),
      })
    }

    return new Response('Not Found', { status: 404 })
  },
})

console.log(`Server running on port ${server.port}`)
This code creates a simple Bun web server that listens on a configurable port, responds with JSON at the root endpoint, includes a health check endpoint, and returns a 404 for all other routes.
Now update package.json to add the scripts section:
{
  "name": "my-bun-app",
  "module": "index.ts",
  "type": "module",
  "private": true,
  "devDependencies": {
    "@types/bun": "latest"
  },
  **"scripts": {
    "start": "bun run index.ts"
  },**
  "peerDependencies": {
    "typescript": "^5"
  }
}
Now push the code to GitHub, and then we’ll connect the GitHub repo to Railway.
To create a GitHub repository from the command line, you need to use the GitHub CLI. First, install it if you haven’t already:
# Mac
brew install gh

# Windows
winget install --id GitHub.cli

# Linux
sudo apt install gh
Then authenticate with GitHub:
gh auth login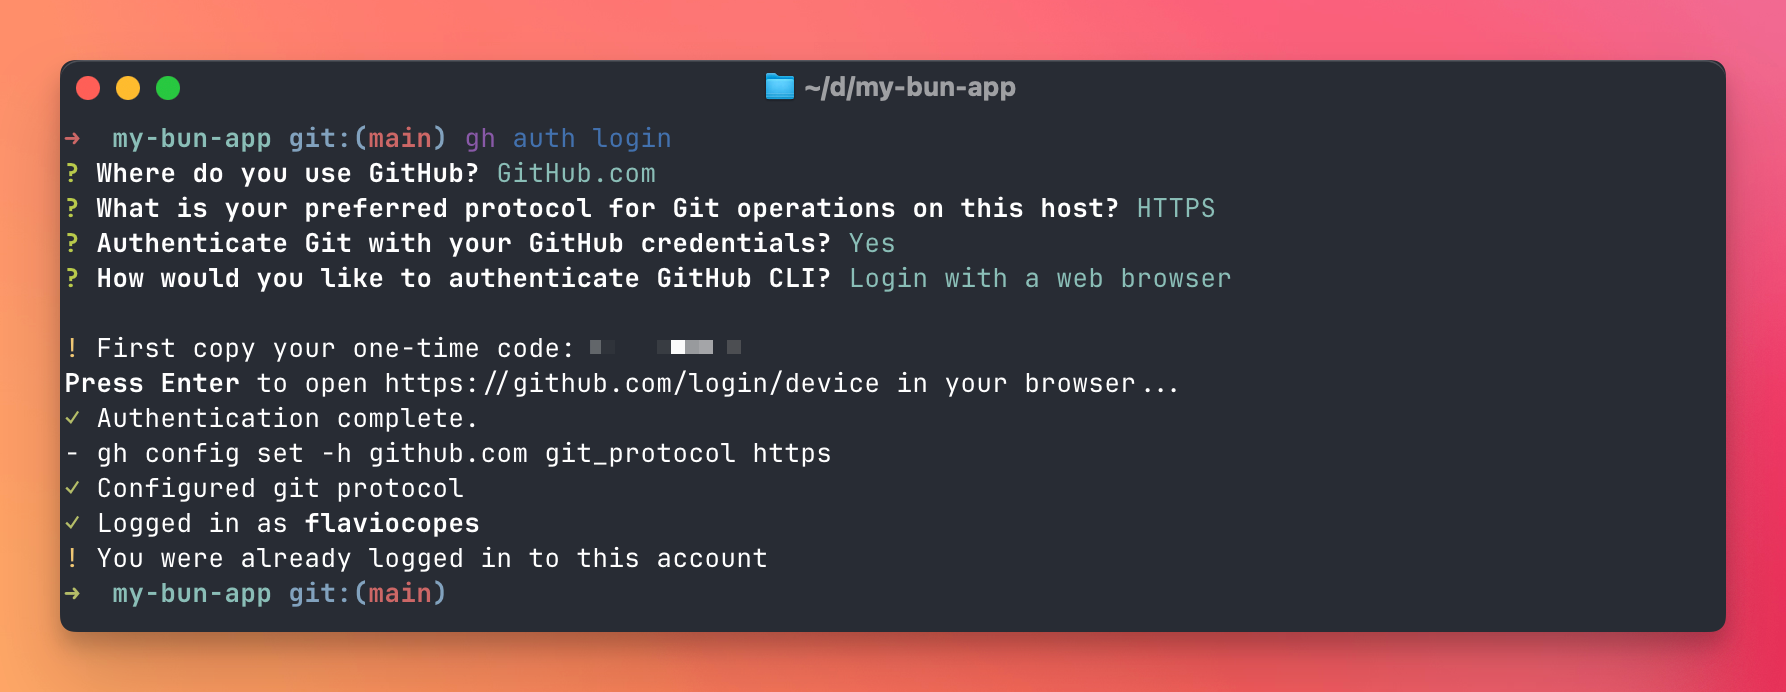
Now you can create the repository and push your code:
git init
git add .
git commit -m "Initial commit"

# Create the repo on GitHub and push
gh repo create my-bun-app --public
git remote add origin https://github.com/flaviocopes/my-bun-app.git
git push --set-upstream origin main
These commands initialize a Git repository, stage all files, create an initial commit, create a new public GitHub repository named “my-bun-app”, add it as a remote origin, and push the code to the main branch.
Deploy on Railway
Now let’s deploy on Railway. We have 2 options, through the dashboard, or using the CLI.
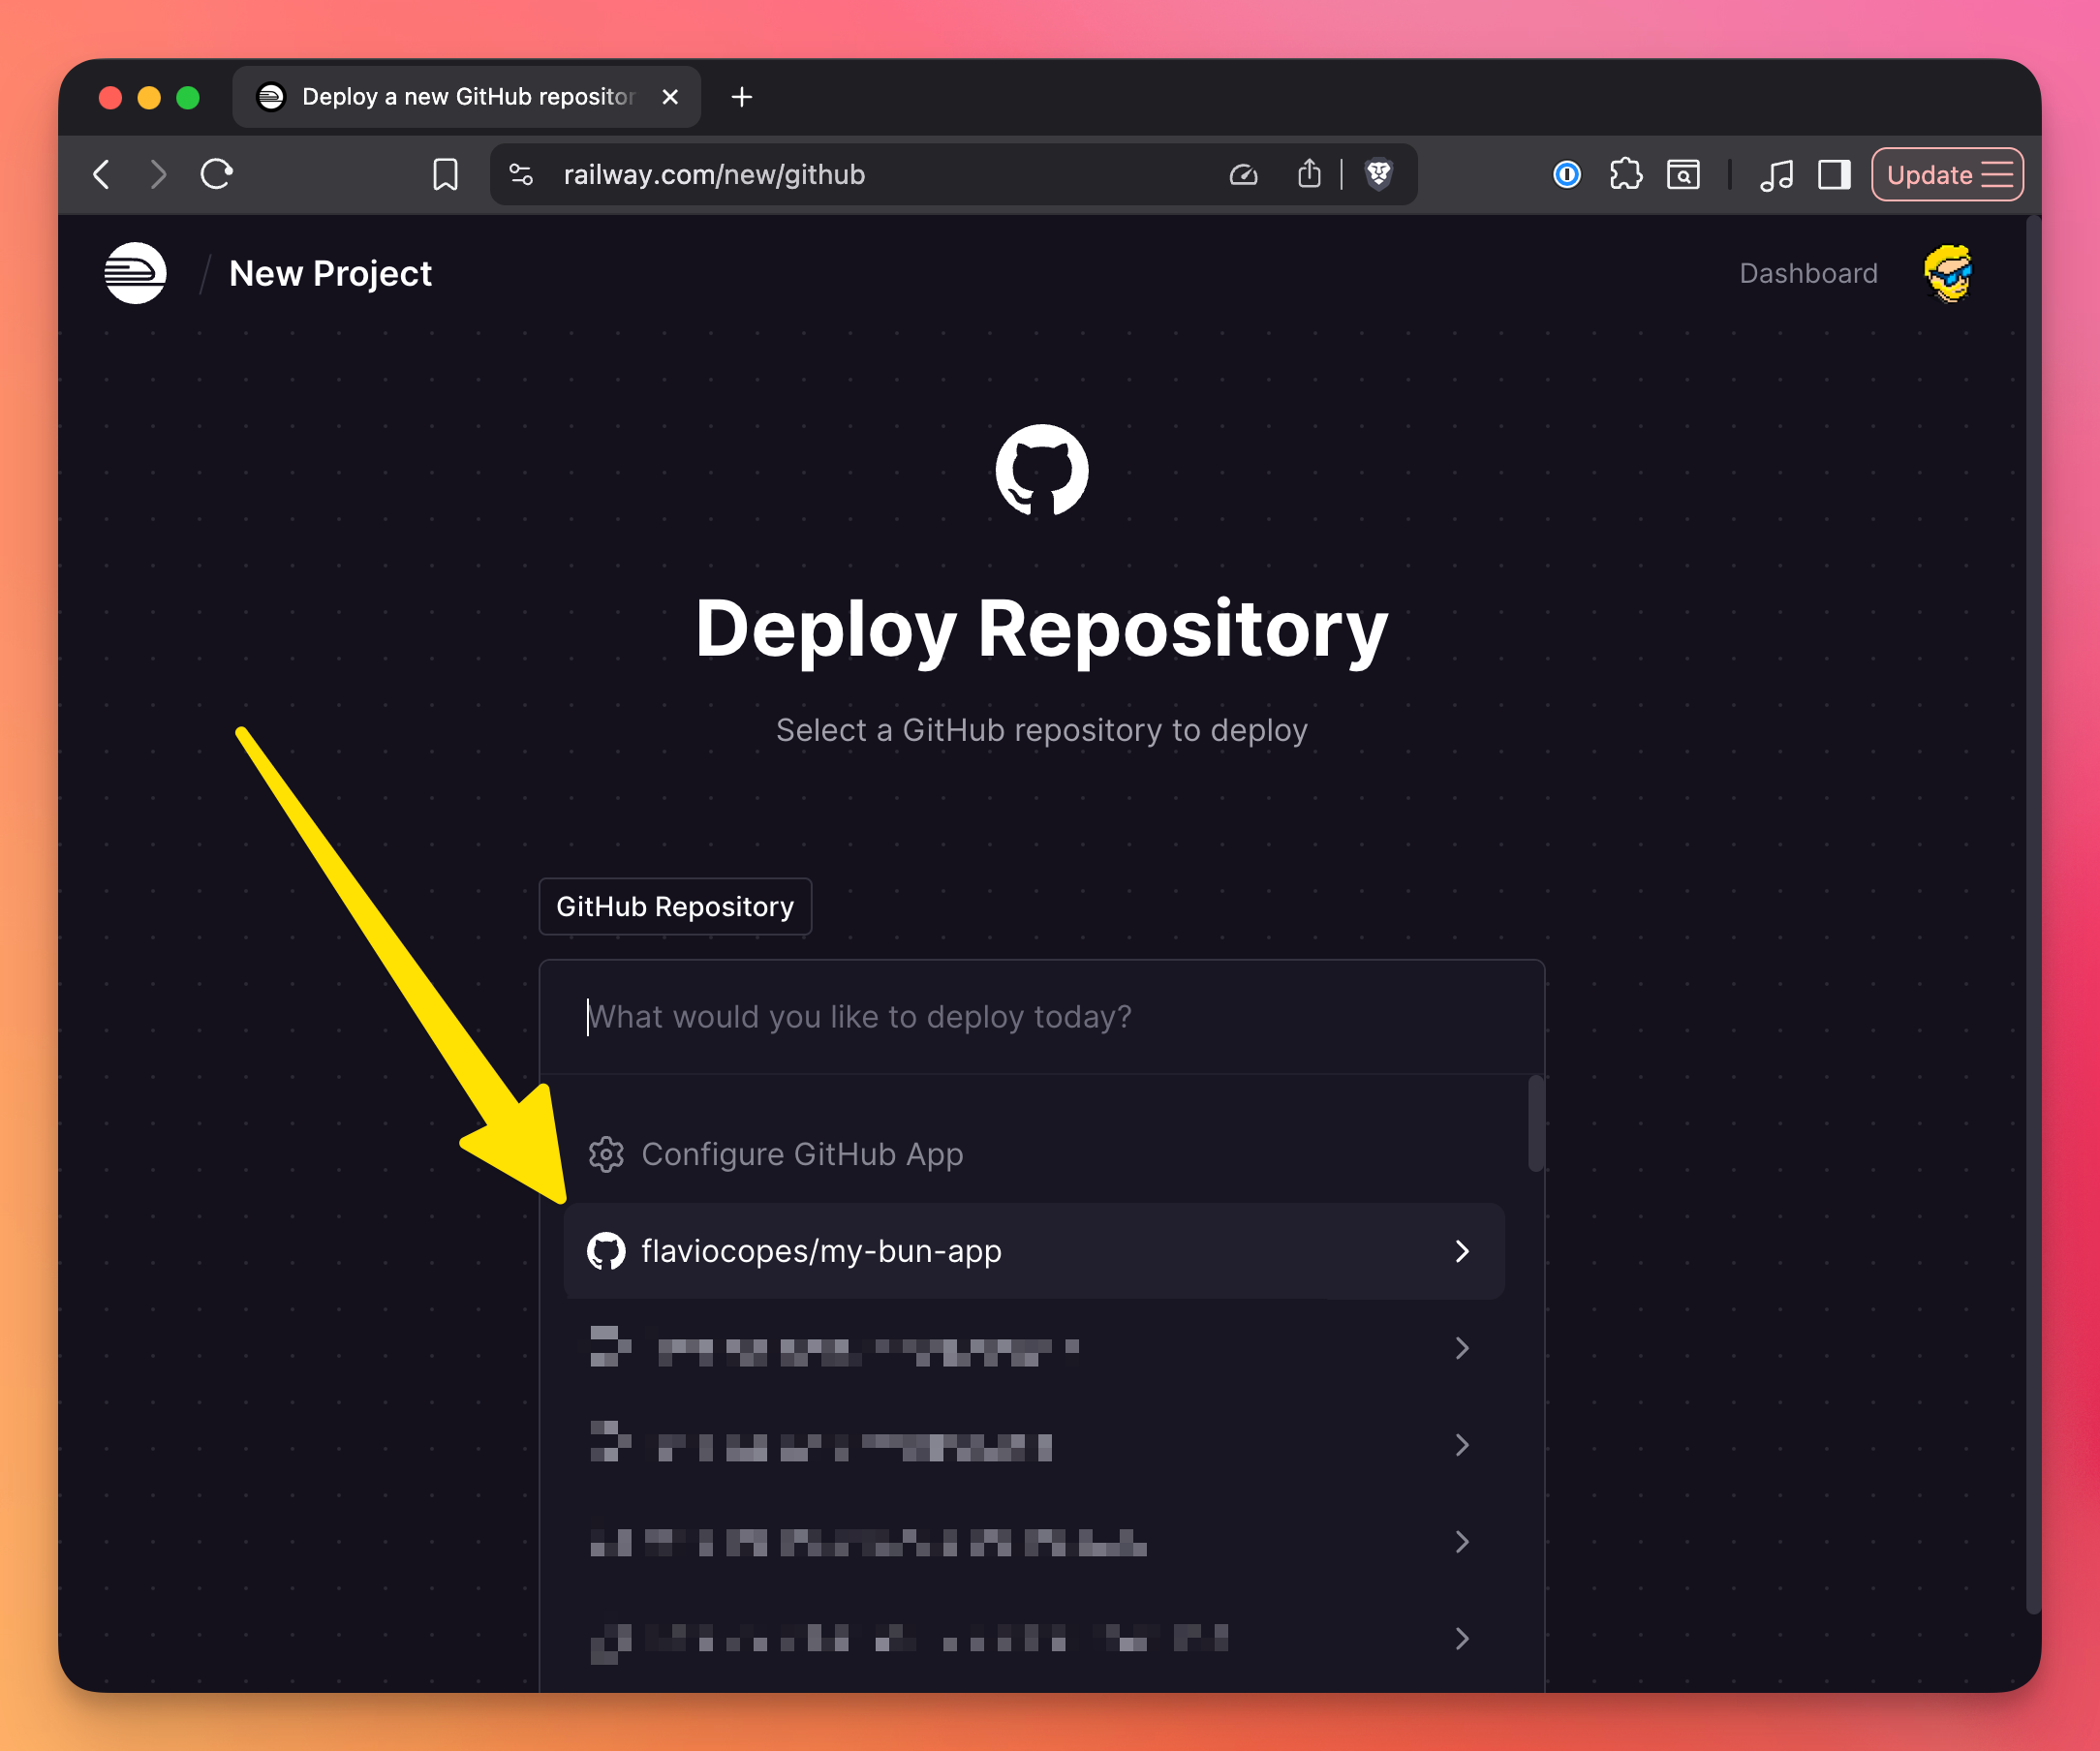
Option 1: Dashboard
- Go to railway.com
- Click “New”
- Choose “GitHub Repository”
- Select your repository
- Click “Deploy”

Option 2: CLI
railway init
railway up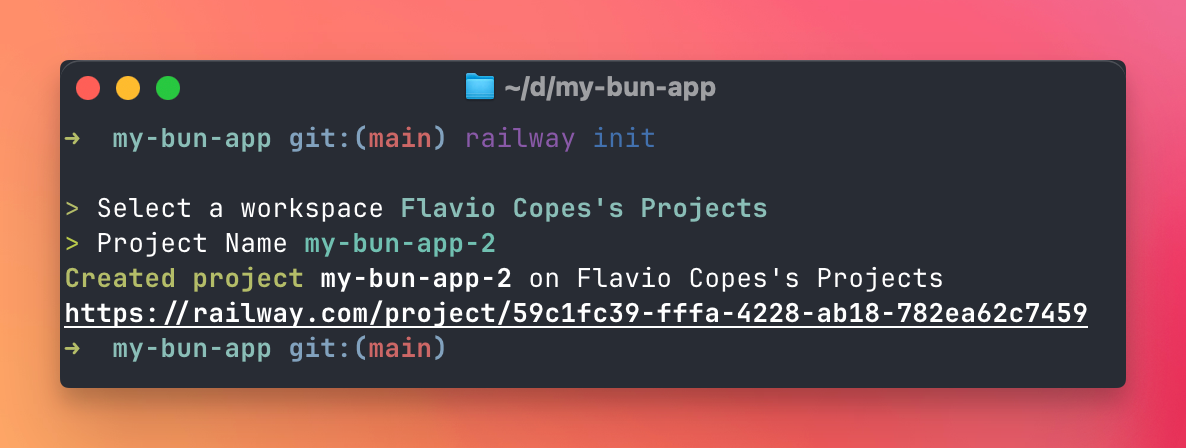
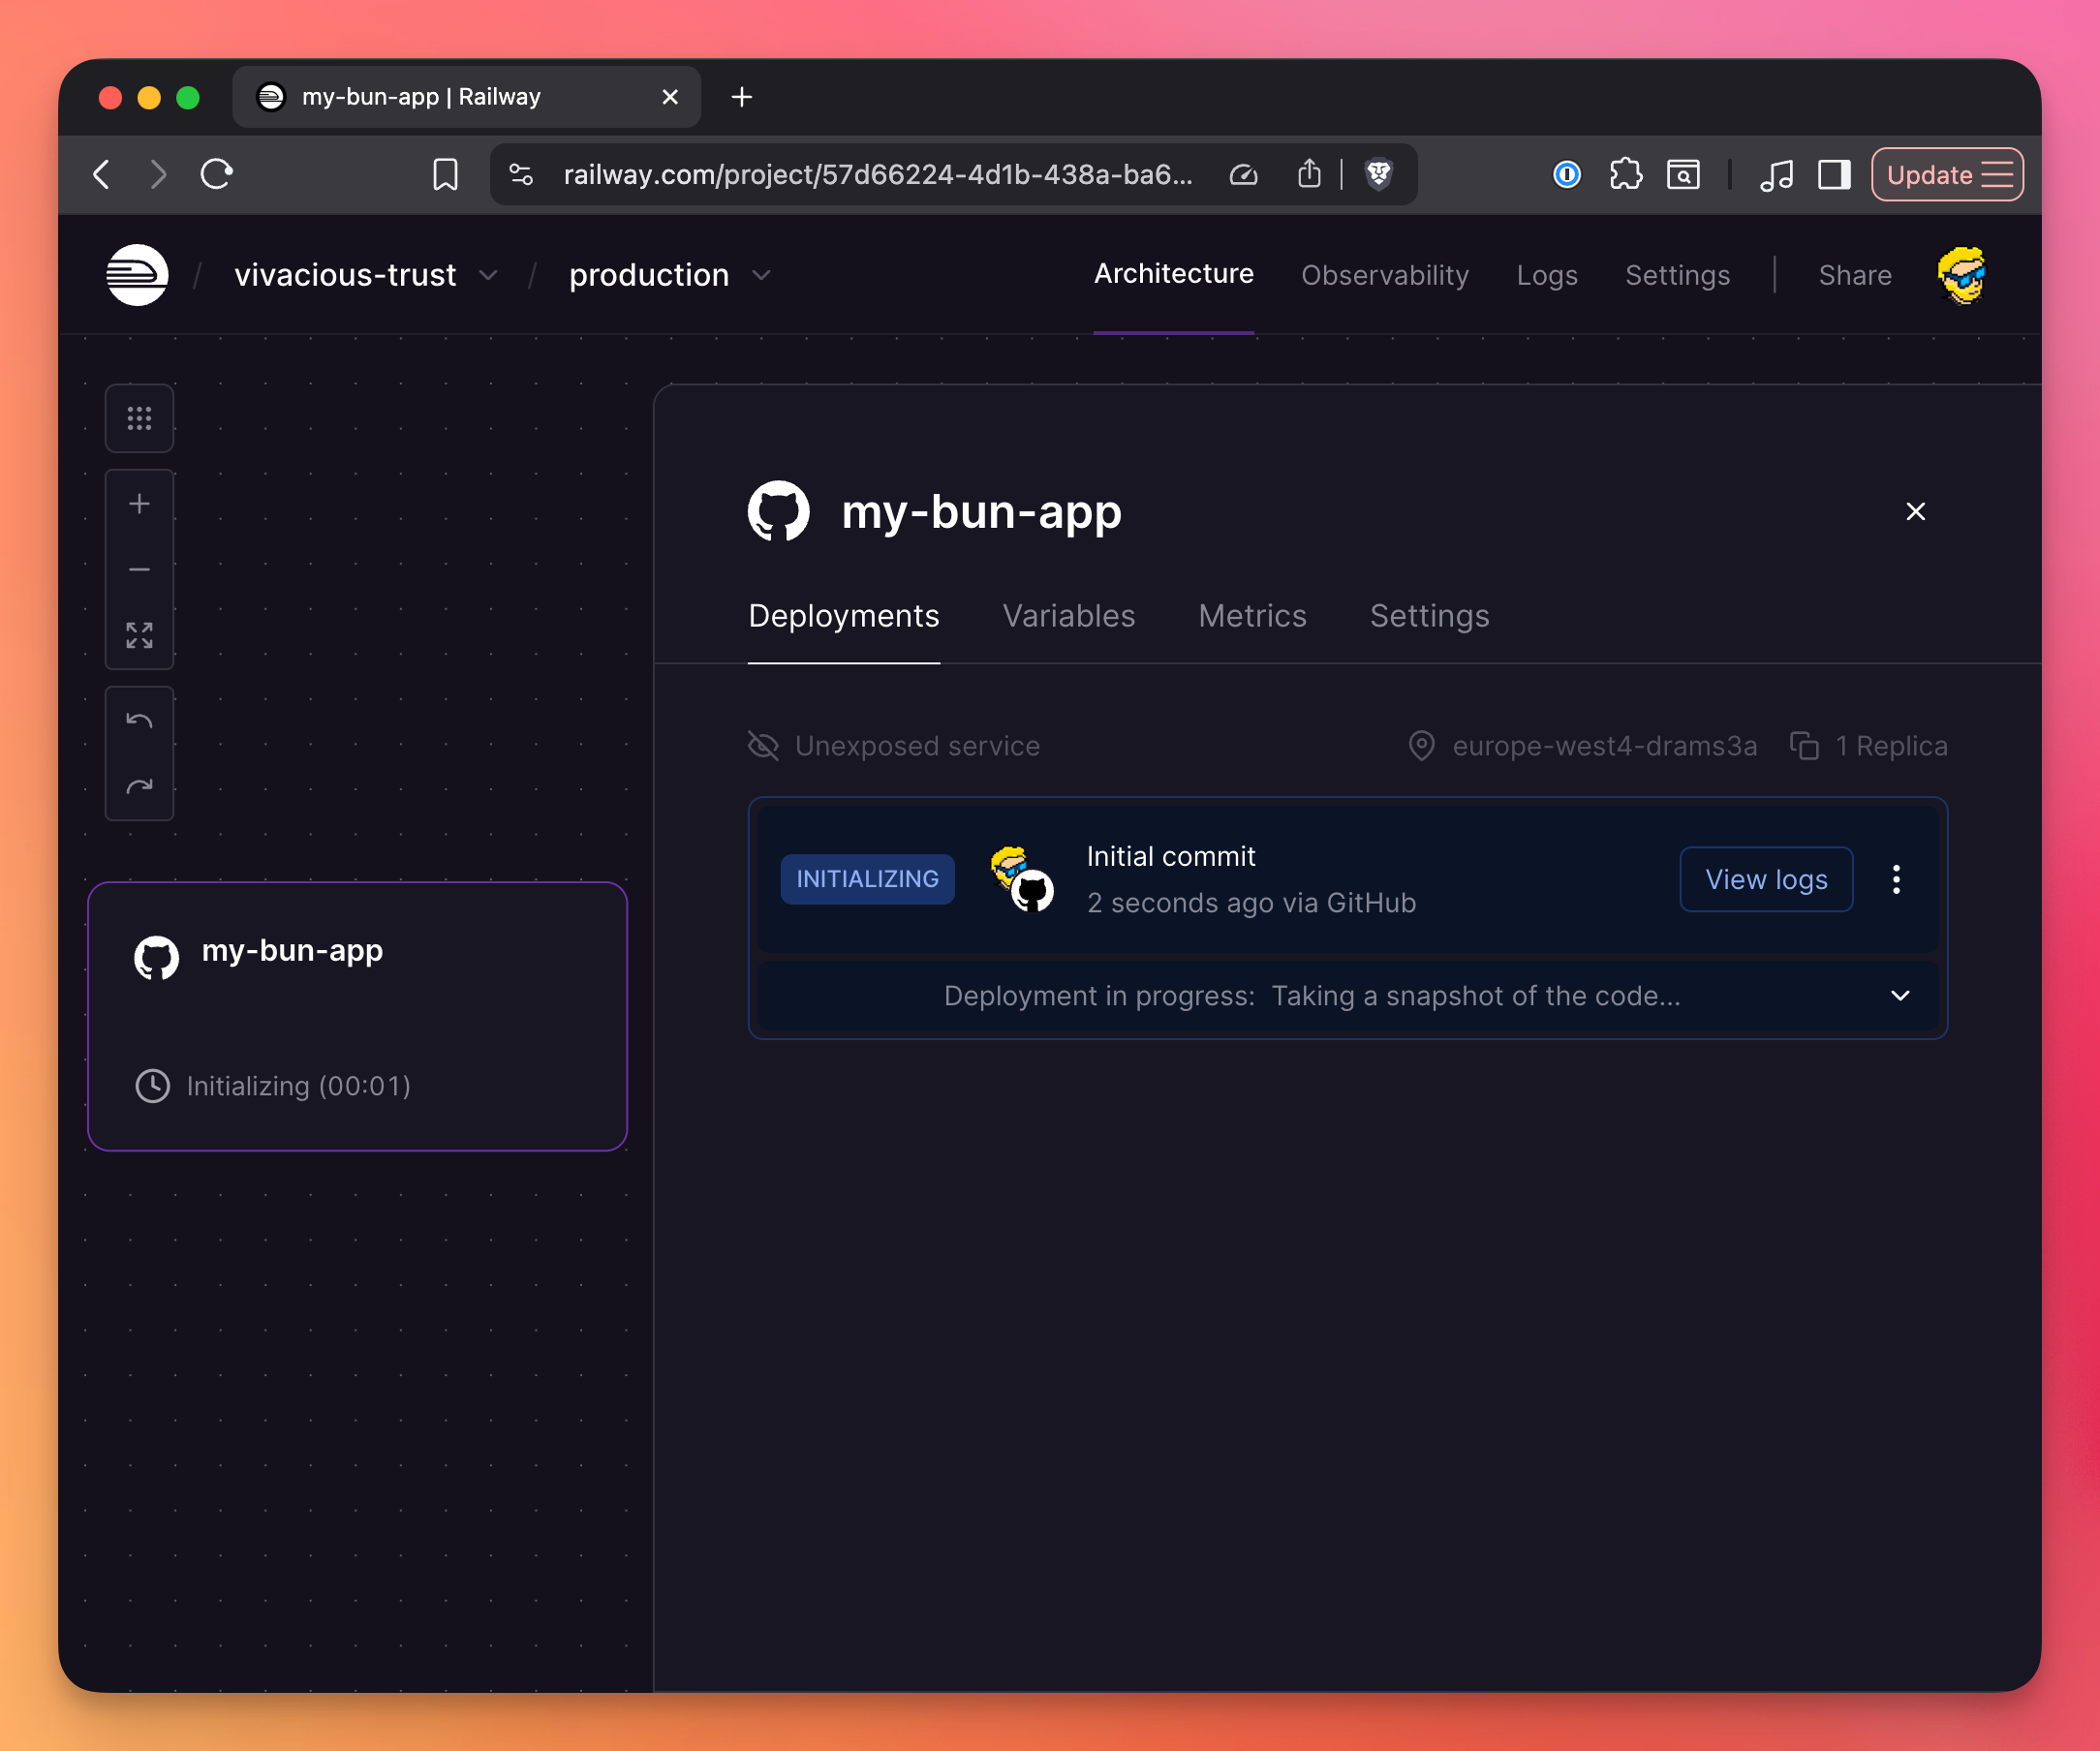
Railway will:
- Detect Bun
- Run
bun install - Run
bun start - Deploy your app
- Give you a URL:
https://my-bun-app-production.up.railway.app
Now you’ll see “Unexposed App” in Railway:
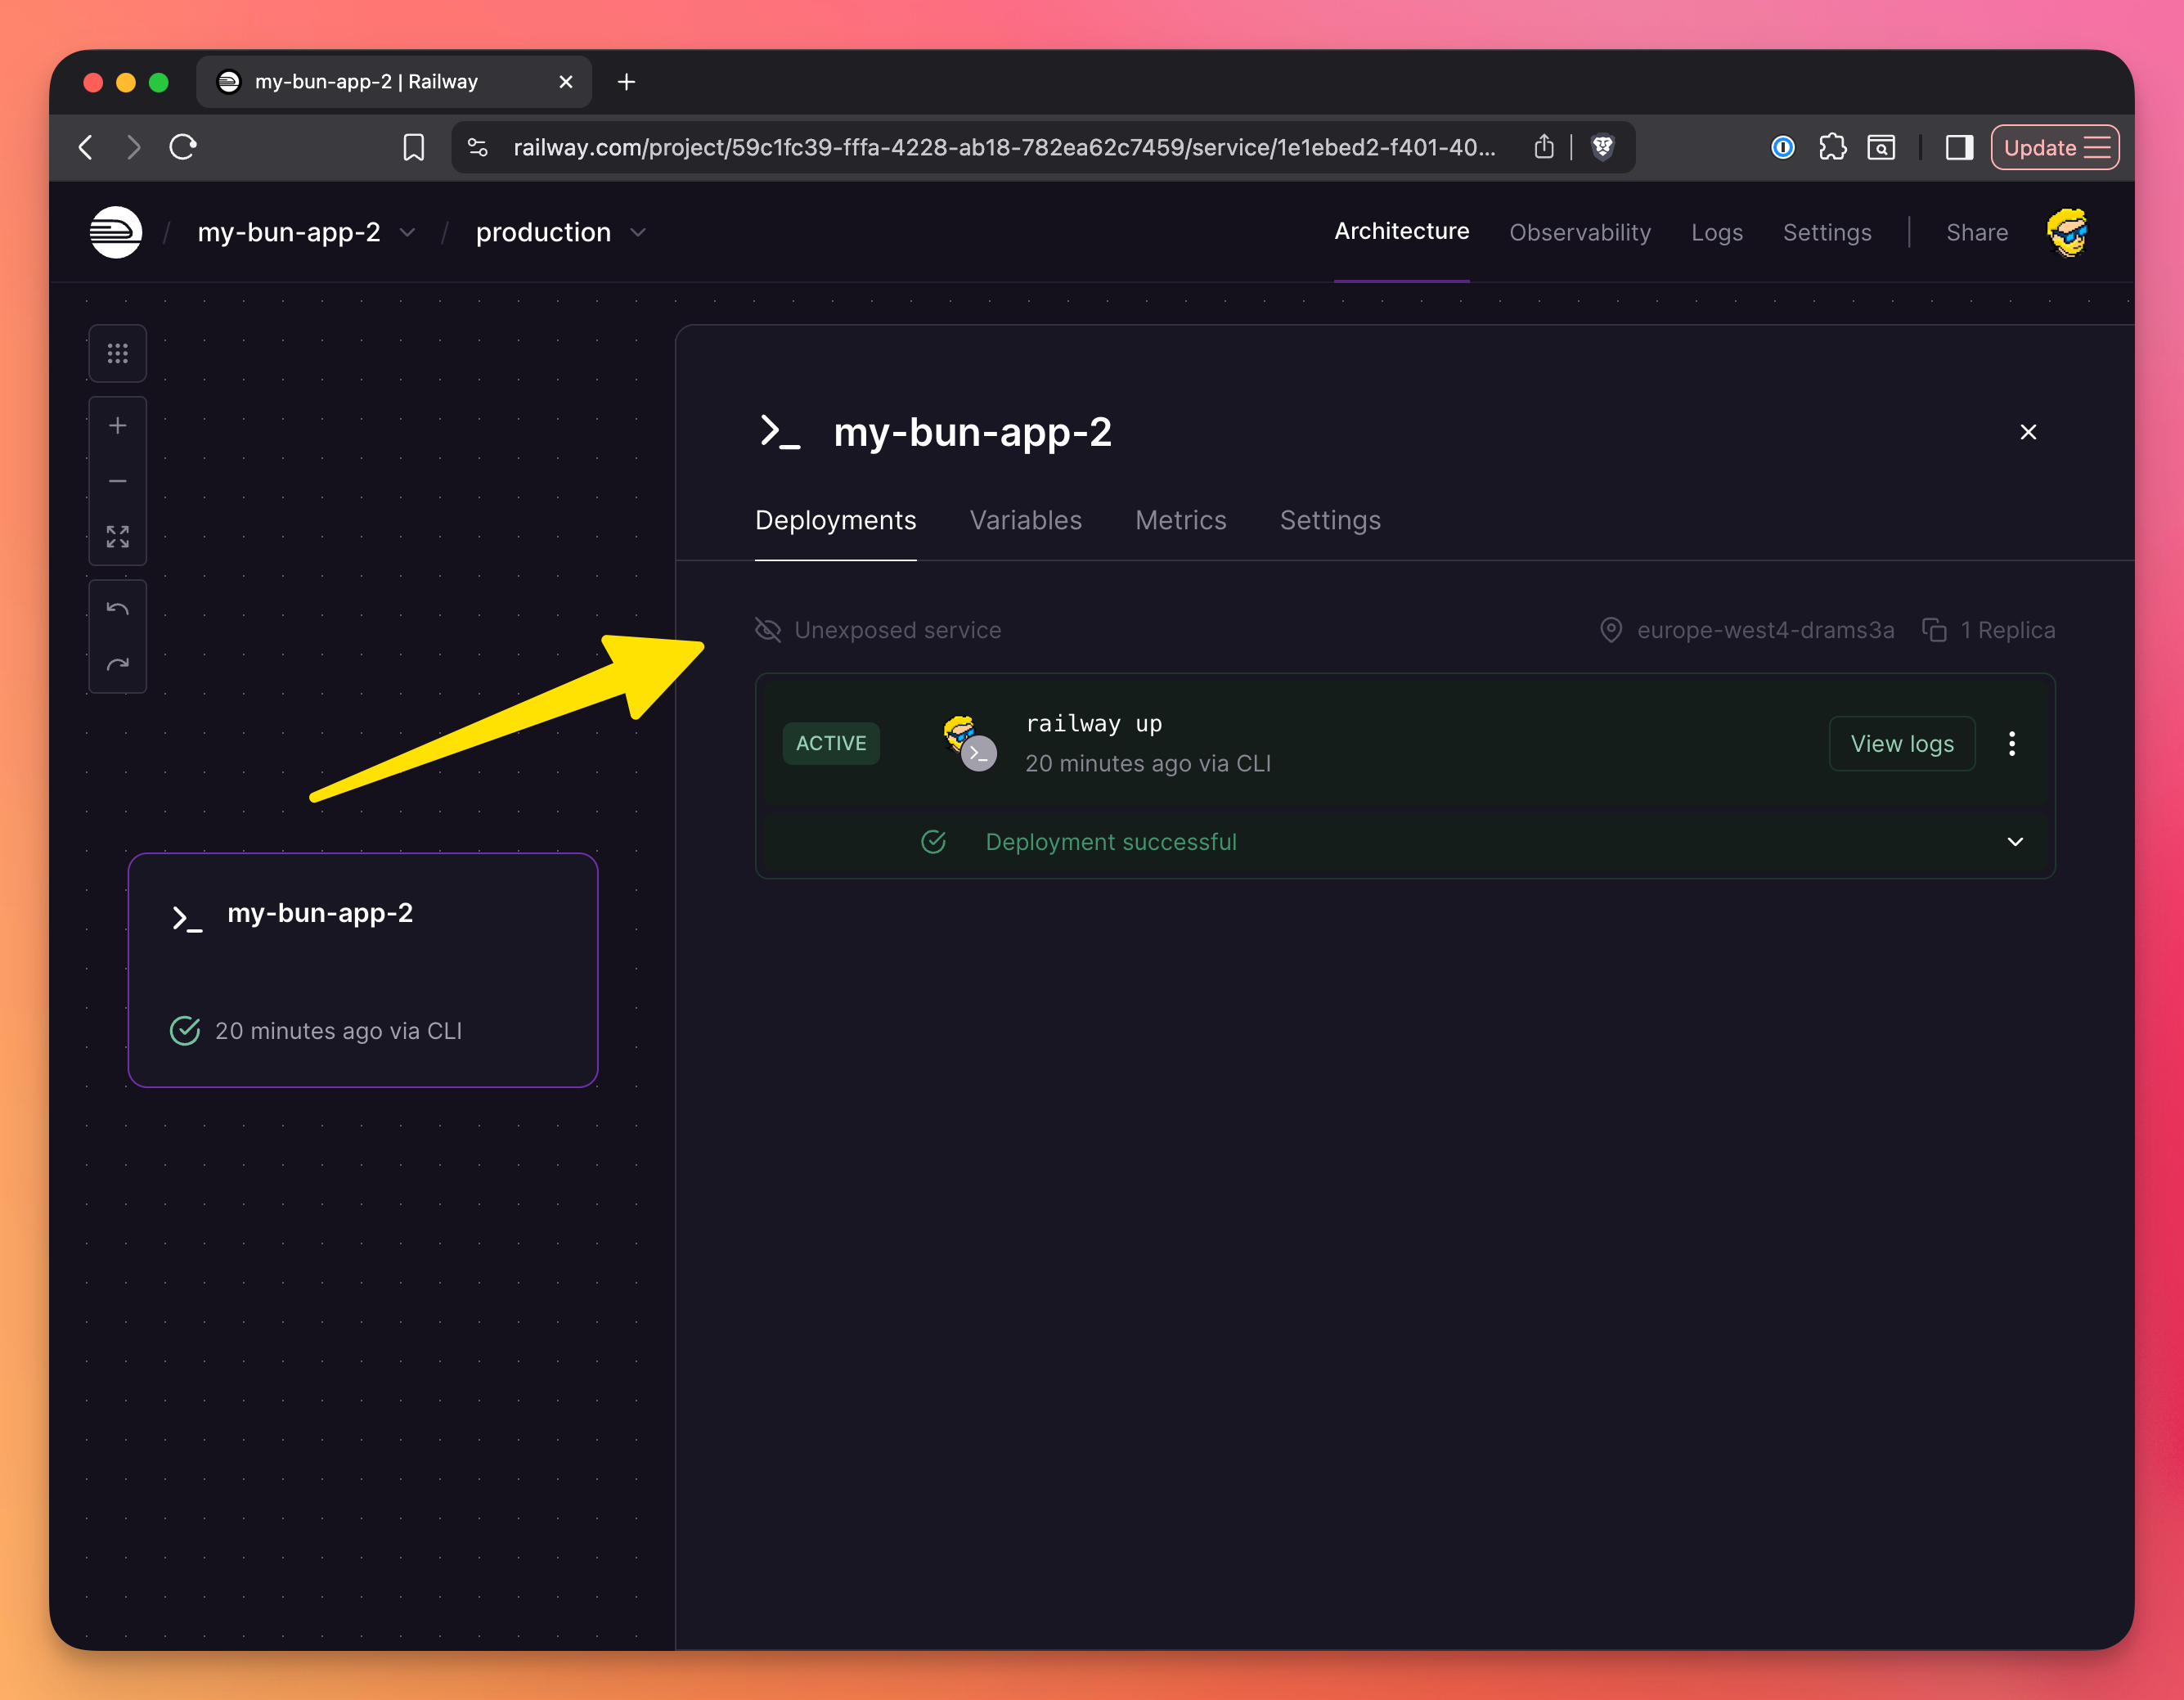
Click it, you’ll be sent to the Networking settings, where you’ll click “Generate domain” and Railway will generate a domain for you:
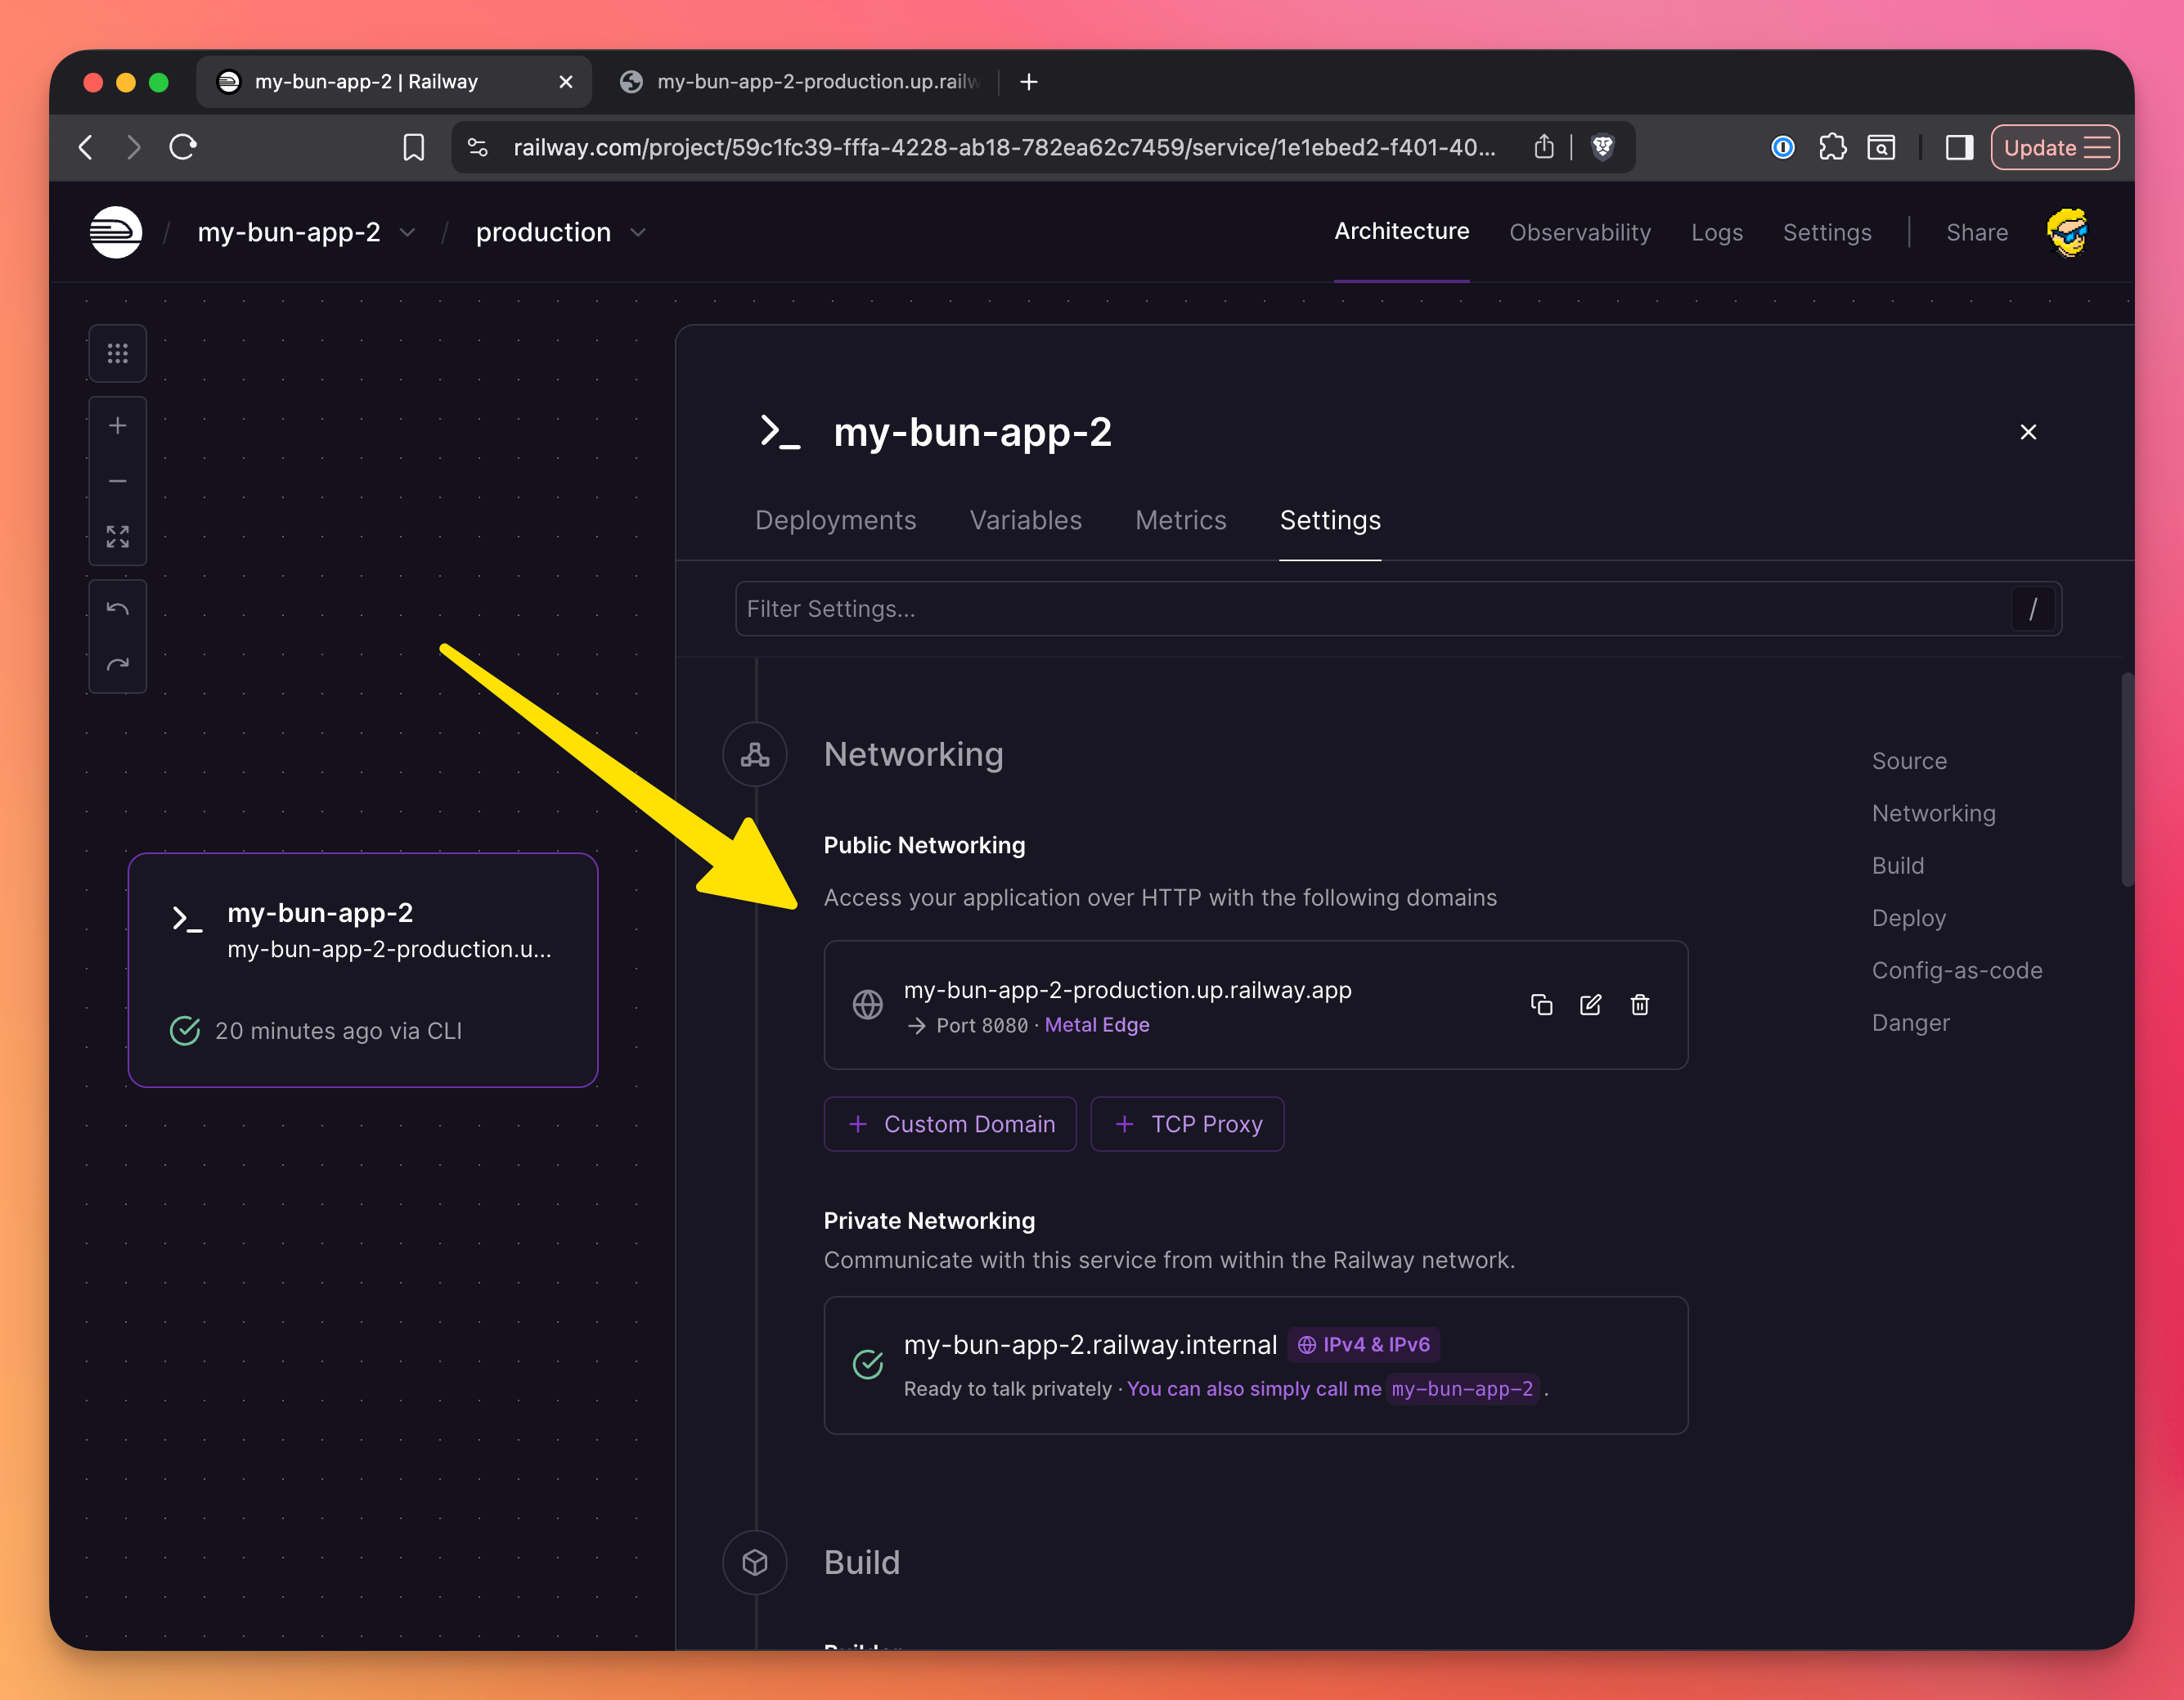
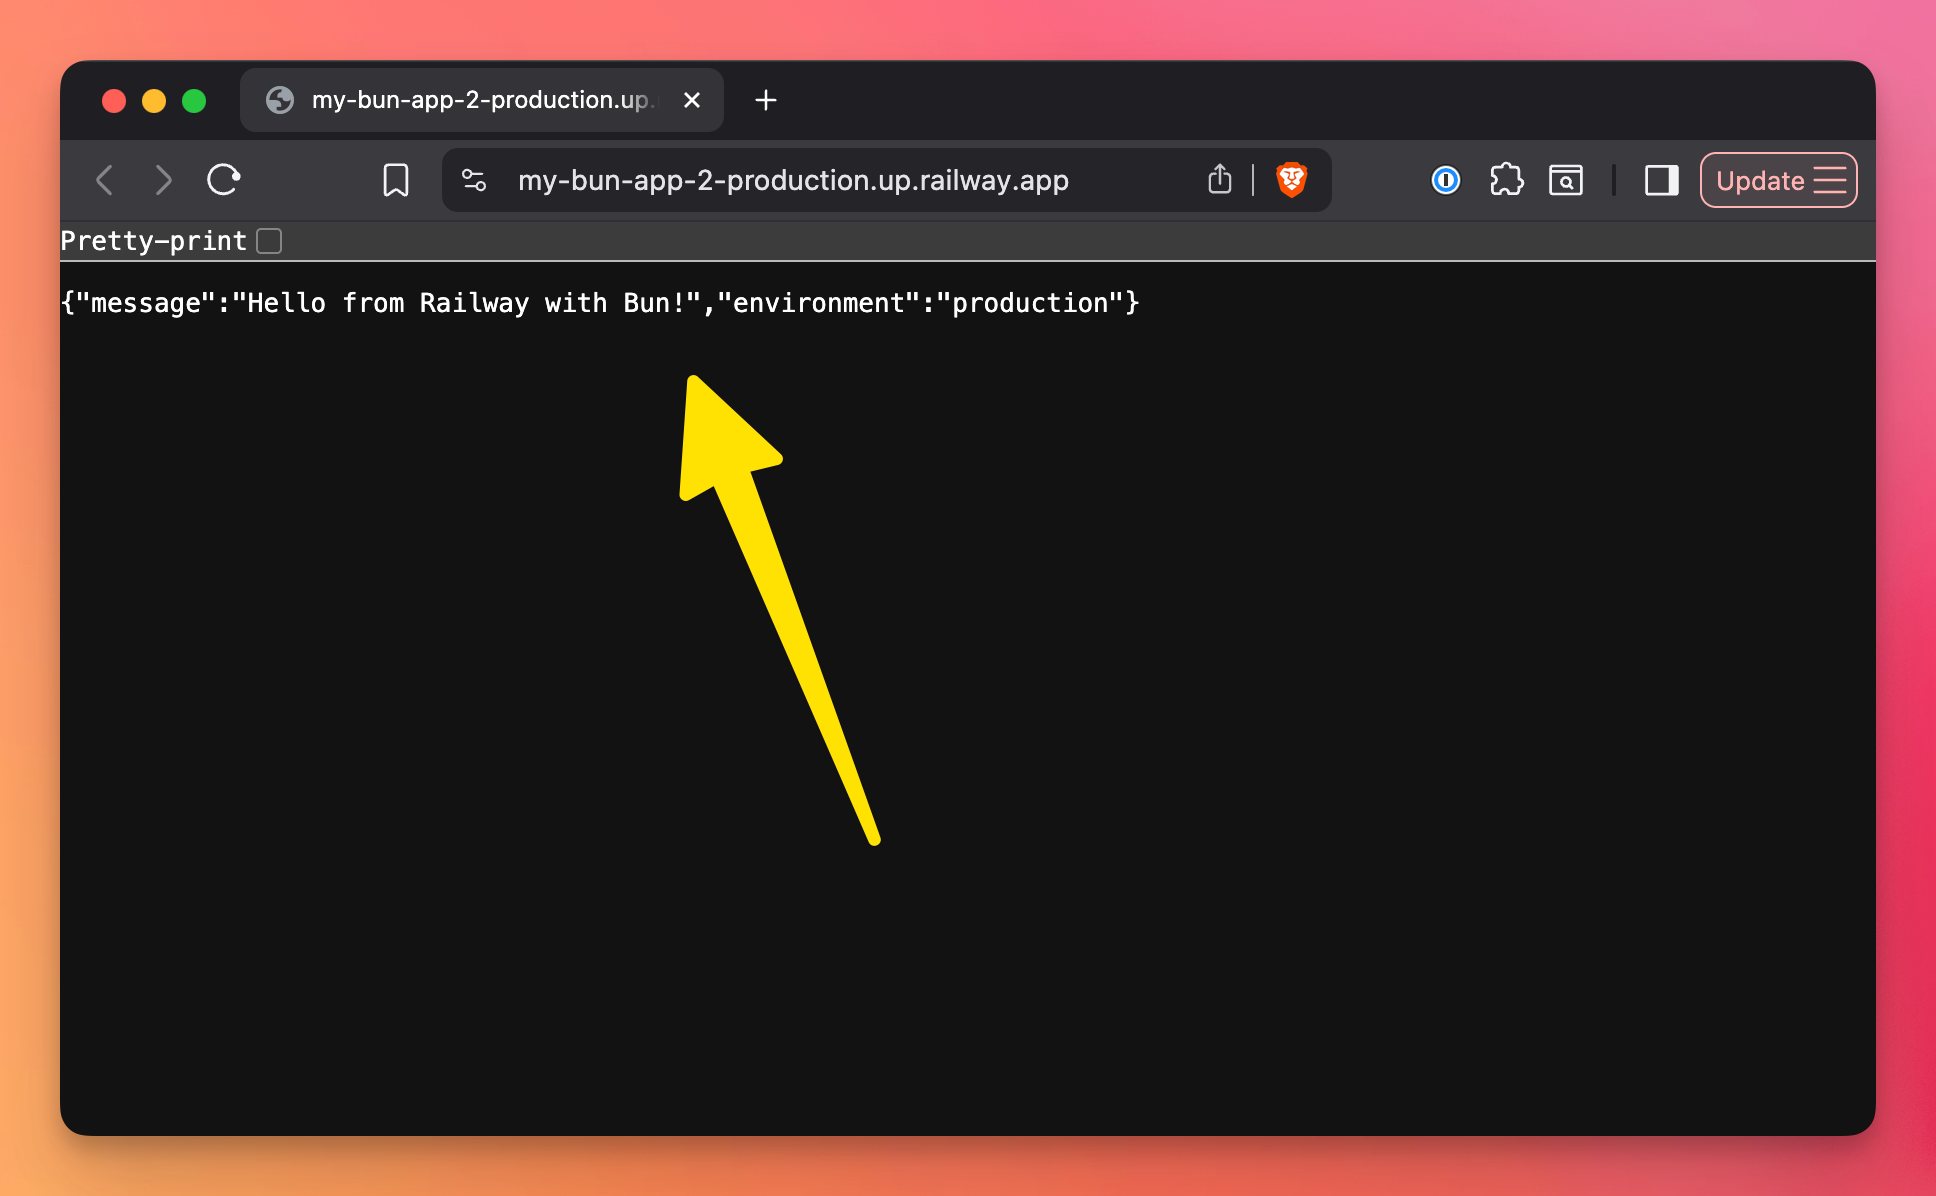
Click the domain, you should see the app up and running:
Adding a database
Let’s add a PostgreSQL database to our app.
PostgreSQL is not the only option. You can also create Redis, MongoDB, and MySQL databases, but let’s do an example with PostgreSQL.
Option 1: Dashboard
- Open your project
- Click “New” → “Database”
- Select “PostgreSQL”
- Click “Add PostgreSQL”
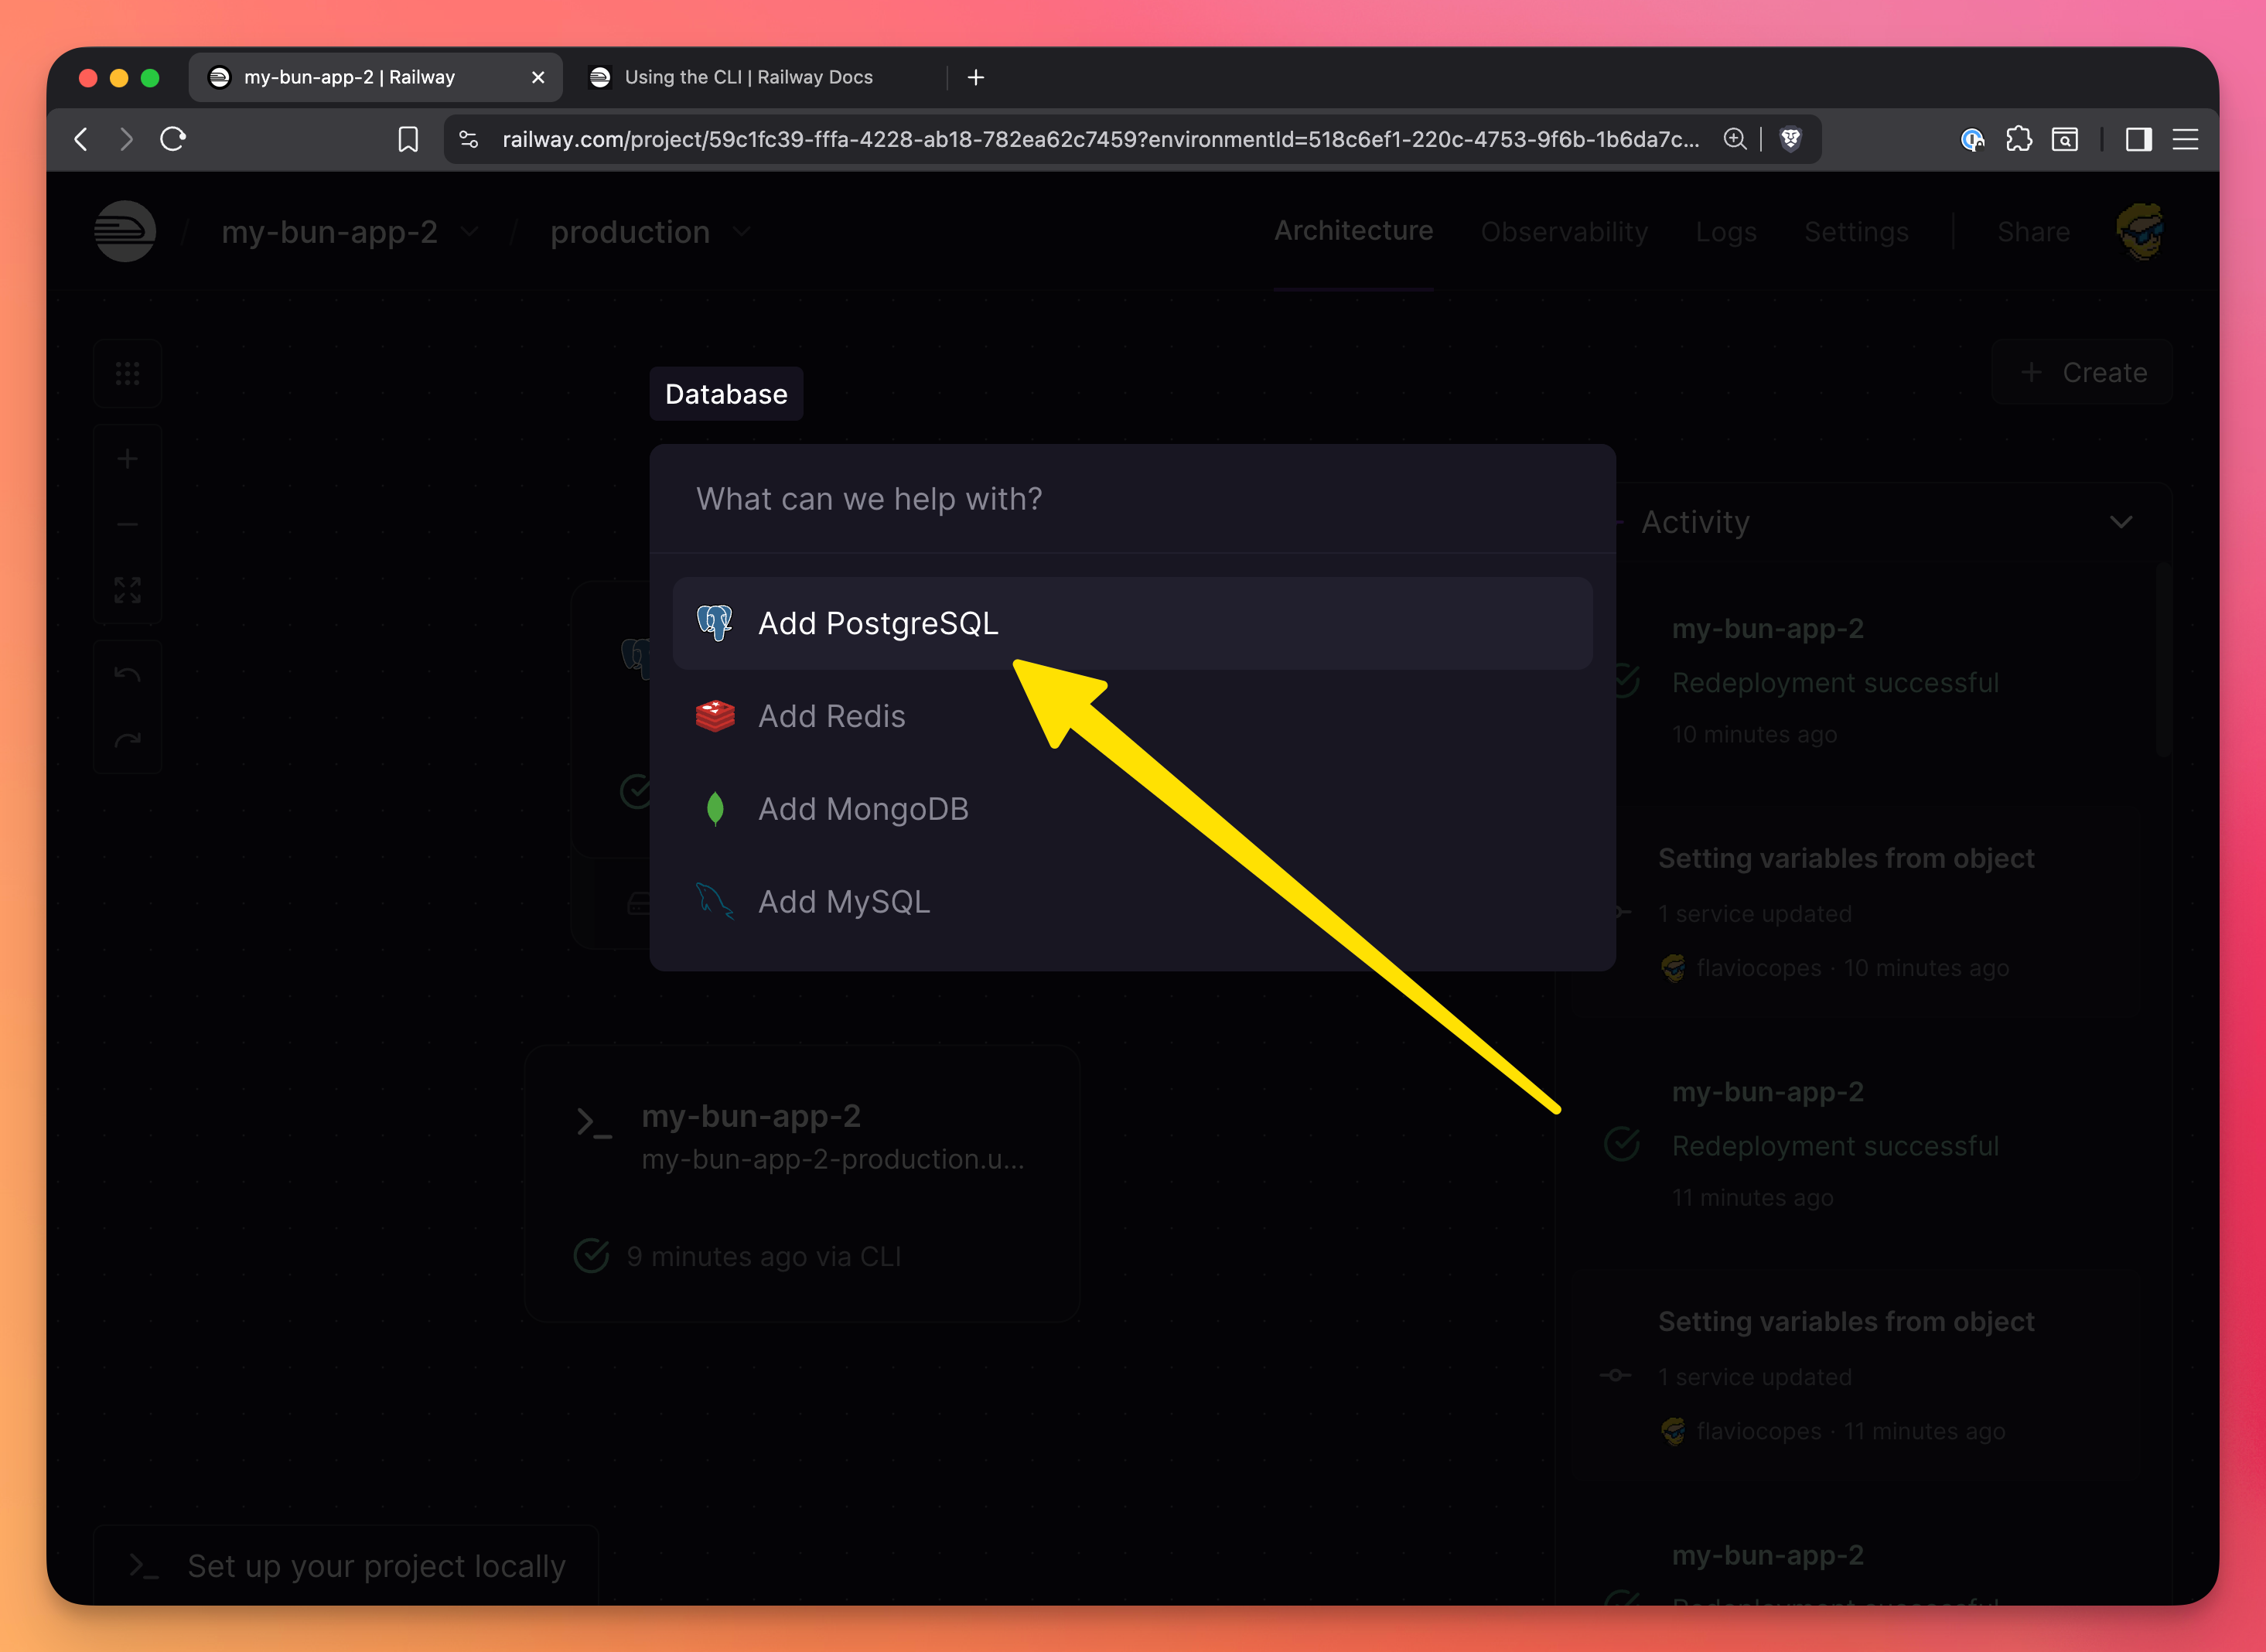
Railway will create the database and automatically add a DATABASE_URL environment variable to your app.
Option 2: CLI
railway add --database postgresThat’s it. Your app now has access to a PostgreSQL database through the DATABASE_URL environment variable.

Now we can make use of this database in our app.
Bun 1.3 includes built-in PostgreSQL support, so you don’t need to install any packages. The SQL client is available directly from the bun module.
Replace the content of index.ts with this code:
import { sql } from 'bun'

// Initialize database table
let dbInitialized = false
async function initializeDB() {
  if (!dbInitialized) {
    console.log('Initializing database...')
    console.log('DATABASE_URL exists:', !!process.env.DATABASE_URL)

    await sql`
      CREATE TABLE IF NOT EXISTS groceries (
        id SERIAL PRIMARY KEY,
        item TEXT NOT NULL,
        created_at TIMESTAMP DEFAULT NOW()
      )
    `
    dbInitialized = true
    console.log('Database initialized successfully')
  }
}

const server = Bun.serve({
  port: process.env.PORT || 3000,
  hostname: '0.0.0.0',
  async fetch(req) {
    try {
      // Ensure database is initialized on first request
      await initializeDB()

      const url = new URL(req.url)

      // Serve the HTML form
      if (url.pathname === '/' && req.method === 'GET') {
        const groceries =
          await sql`SELECT * FROM groceries ORDER BY created_at DESC`

        const groceryList = groceries
          .map(
            (g: any) =>
              `<li>${g.item} <form method="POST" action="/delete/${g.id}" style="display:inline"><button>Delete</button></form></li>`
          )
          .join('')

        return new Response(
          `<!DOCTYPE html>
          <html>
          <head>
            <title>Grocery List</title>
            <style>
              body { font-family: Arial, sans-serif; max-width: 600px; margin: 50px auto; padding: 20px; }
              input, button { padding: 10px; margin: 5px 0; }
              input { width: 300px; }
              ul { list-style: none; padding: 0; }
              li { padding: 10px; margin: 5px 0; background: #f0f0f0; border-radius: 5px; }
            </style>
          </head>
          <body>
            <h1>Grocery List</h1>
            <form method="POST" action="/add">
              <input type="text" name="item" placeholder="Enter grocery item" required />
              <button type="submit">Add Item</button>
            </form>
            <h2>Your Groceries:</h2>
            <ul>${groceryList || '<li>No items yet!</li>'}</ul>
          </body>
          </html>`,
          {
            headers: { 'Content-Type': 'text/html' },
          }
        )
      }

      // Add new grocery item
      if (url.pathname === '/add' && req.method === 'POST') {
        const formData = await req.formData()
        const item = formData.get('item')

        if (item) {
          await sql`INSERT INTO groceries (item) VALUES (${item})`
        }

        return Response.redirect(url.origin, 303)
      }

      // Delete grocery item
      if (url.pathname.startsWith('/delete/') && req.method === 'POST') {
        const id = url.pathname.split('/')[2]
        await sql`DELETE FROM groceries WHERE id = ${id}`
        return Response.redirect(url.origin, 303)
      }

      // Health check
      if (url.pathname === '/health') {
        return Response.json({
          status: 'ok',
          uptime: process.uptime(),
        })
      }

      return new Response('Not Found', { status: 404 })
    } catch (error: any) {
      console.error('Error handling request:', error)
      return new Response(
        `<!DOCTYPE html>
        <html>
        <head><title>Error</title></head>
        <body>
          <h1>Something went wrong!</h1>
          <p>Error: ${error?.message || String(error)}</p>
          <p>Check the Railway logs for more details.</p>
          <a href="/">Go back</a>
        </body>
        </html>`,
        {
          status: 500,
          headers: { 'Content-Type': 'text/html' },
        }
      )
    }
  },
})

console.log(`Server running on port ${server.port}`)
The initializeDB() function creates a groceries table if it doesn’t exist, with columns for an auto-incrementing ID, the item text, and a creation timestamp. It only runs once per server lifecycle using the dbInitialized flag to prevent redundant table creation on every request.
The Bun server listens on the PORT environment variable (provided by Railway) or defaults to 3000. It binds to 0.0.0.0 to accept external connections, which is essential for deployment platforms like Railway.
The fetch() function handles all HTTP requests with different routes:
- GET / - Queries all groceries from the database, generates an HTML page with a form to add items and a list showing existing items with delete buttons
- POST /add - Extracts the item from form data, inserts it into the database, then redirects back to the homepage
- POST /delete/:id - Deletes a specific grocery item by ID and redirects back
- GET /health - Returns a JSON health check response with server uptime
Bun’s built-in sql template literal automatically connects using the DATABASE_URL environment variable. The tagged template syntax (sql...) prevents SQL injection by properly escaping user input, making queries like sqlINSERT INTO groceries (item) VALUES (${item})“ safe from malicious input.
The entire request handler is wrapped in a try-catch block that logs errors and returns a user-friendly HTML error page with details, helping debug issues in production without crashing the server.
Commit and push your changes:
git add .
git commit -m "Add grocery list with PostgreSQL"
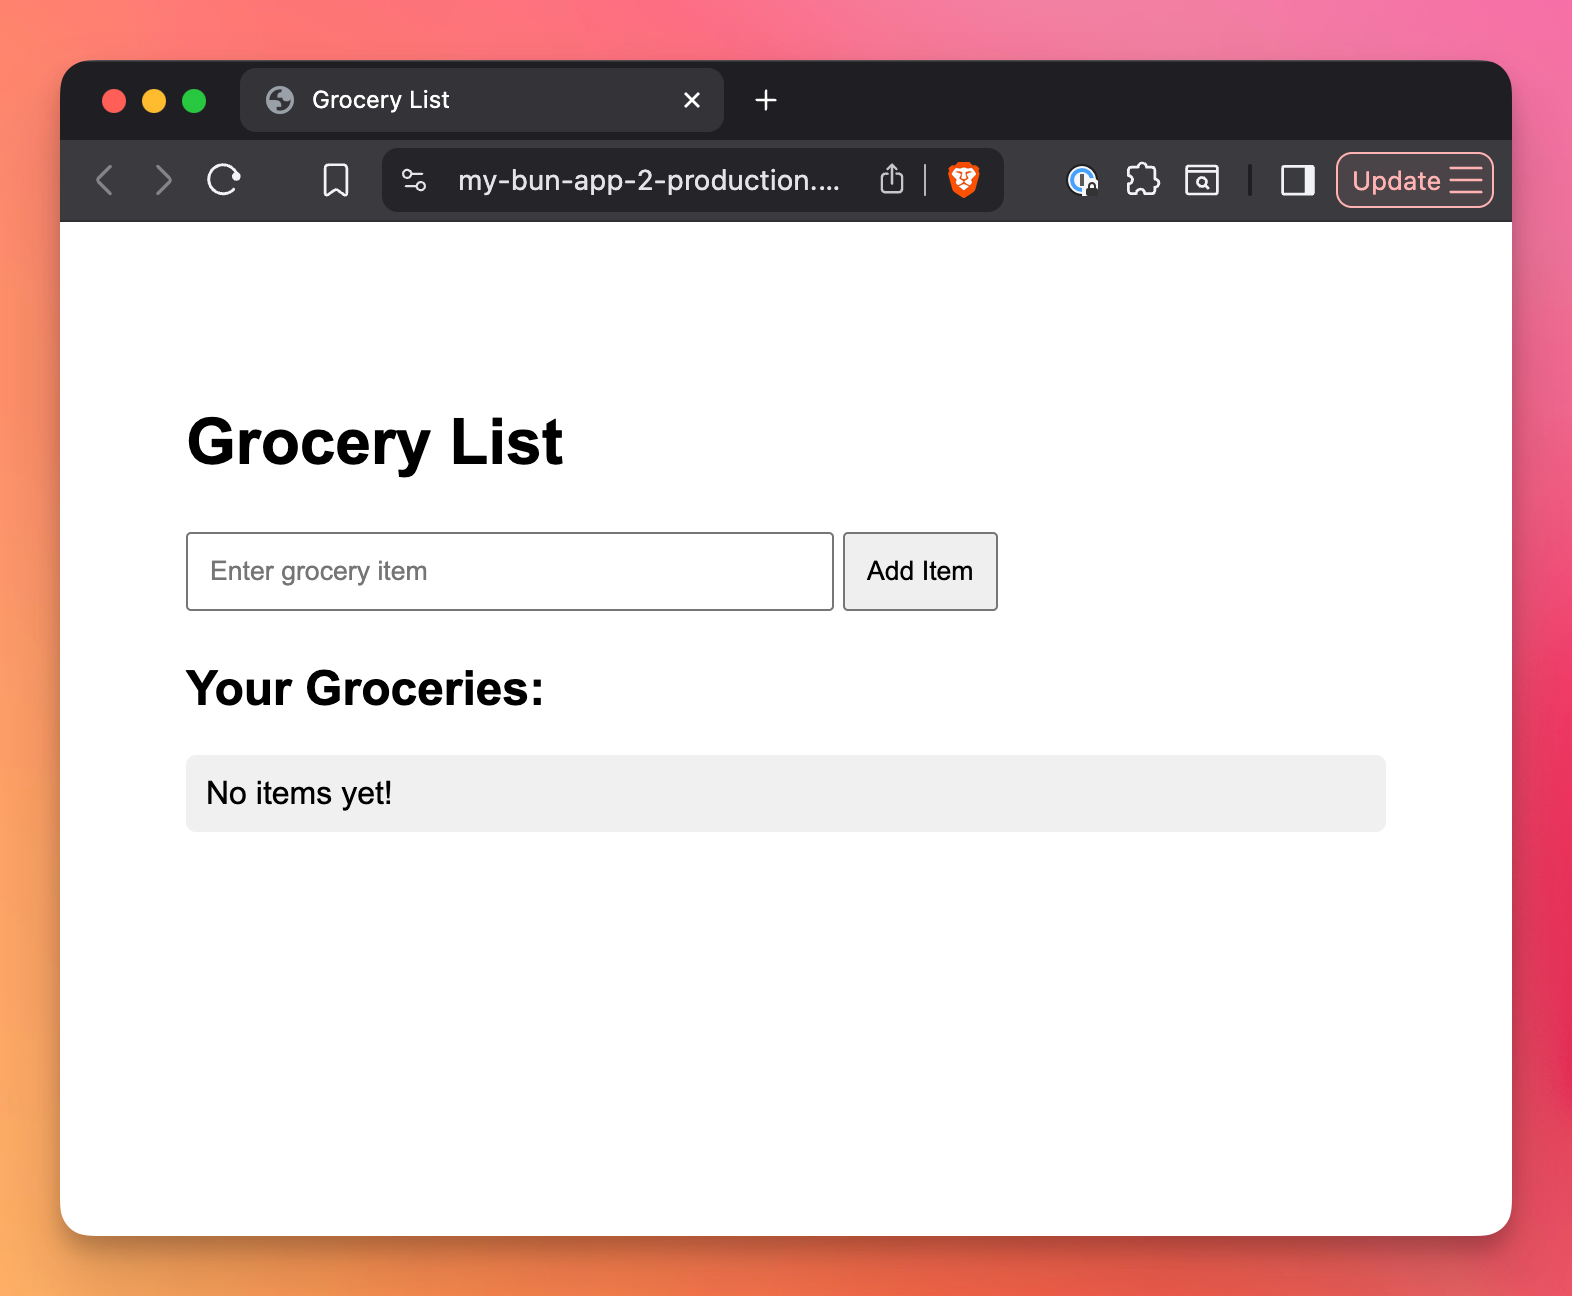
git pushRailway will automatically detect the changes and redeploy your app. Once deployed, visit your app’s URL and you’ll see the grocery list form.
Bun’s database libraries make use of the DATABASE_URL environment variable under the hood.
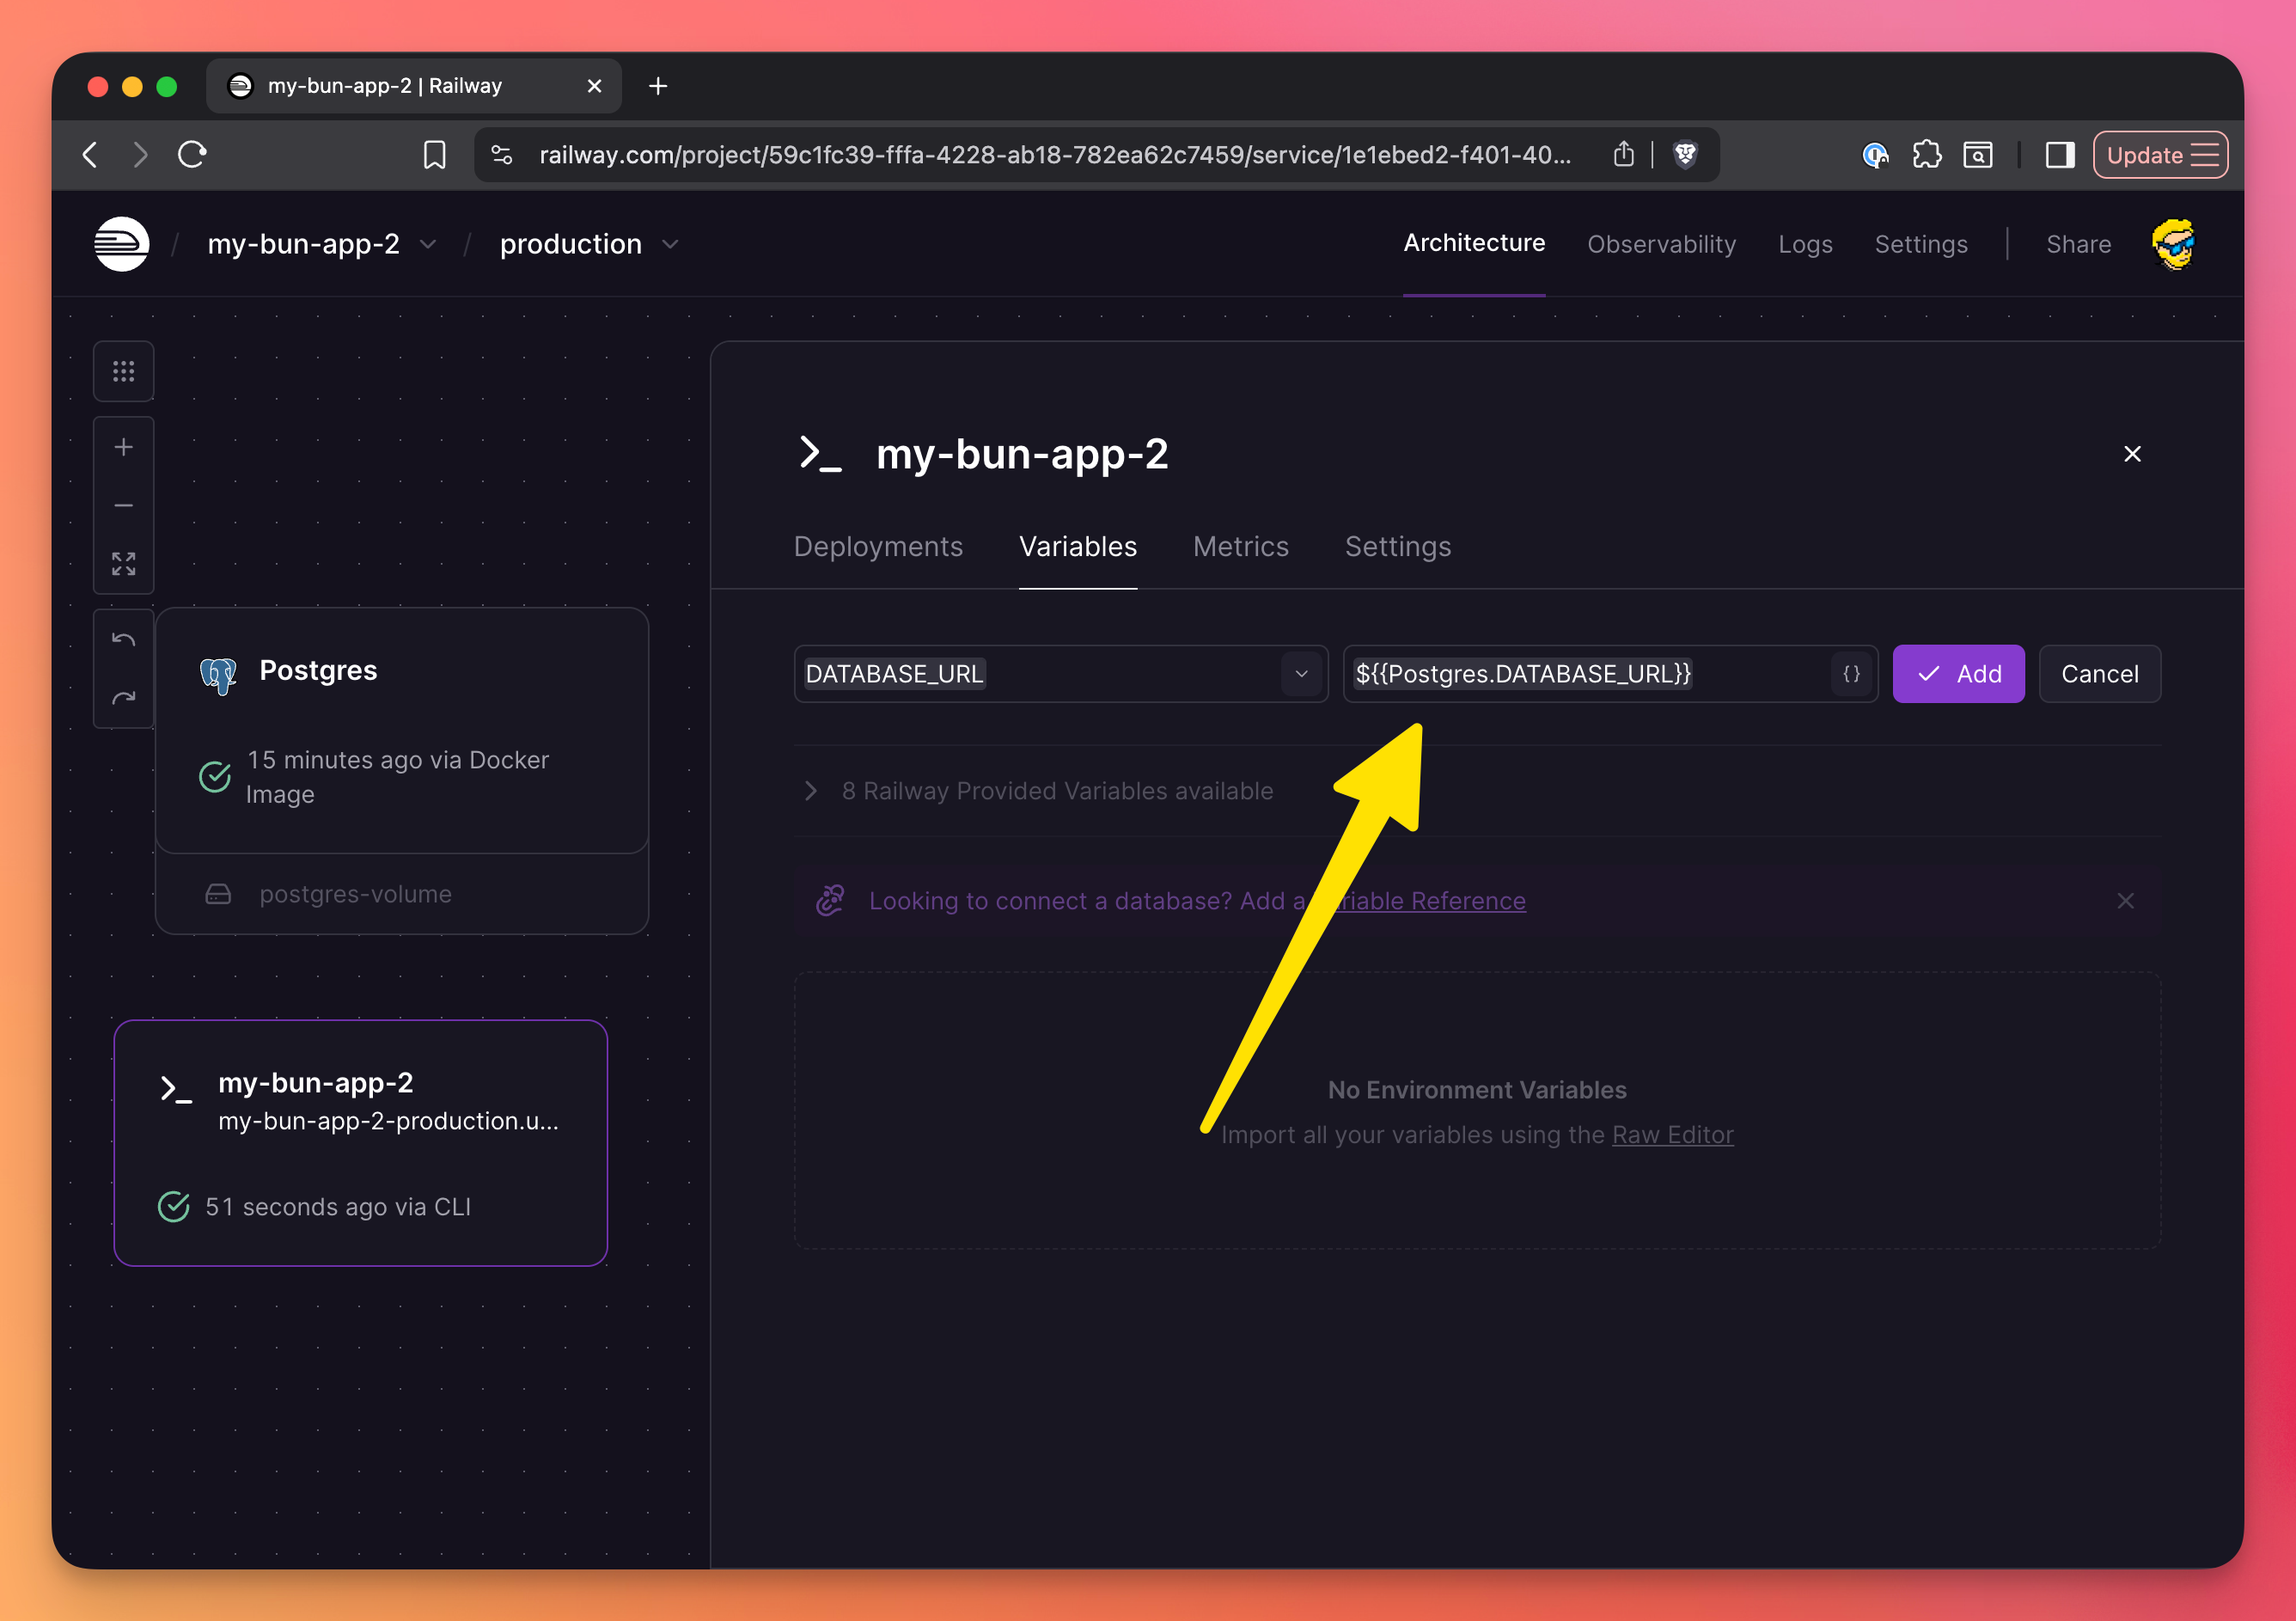
In the settings, make sure you set up the variable reference, so the “app” container references the database URL:

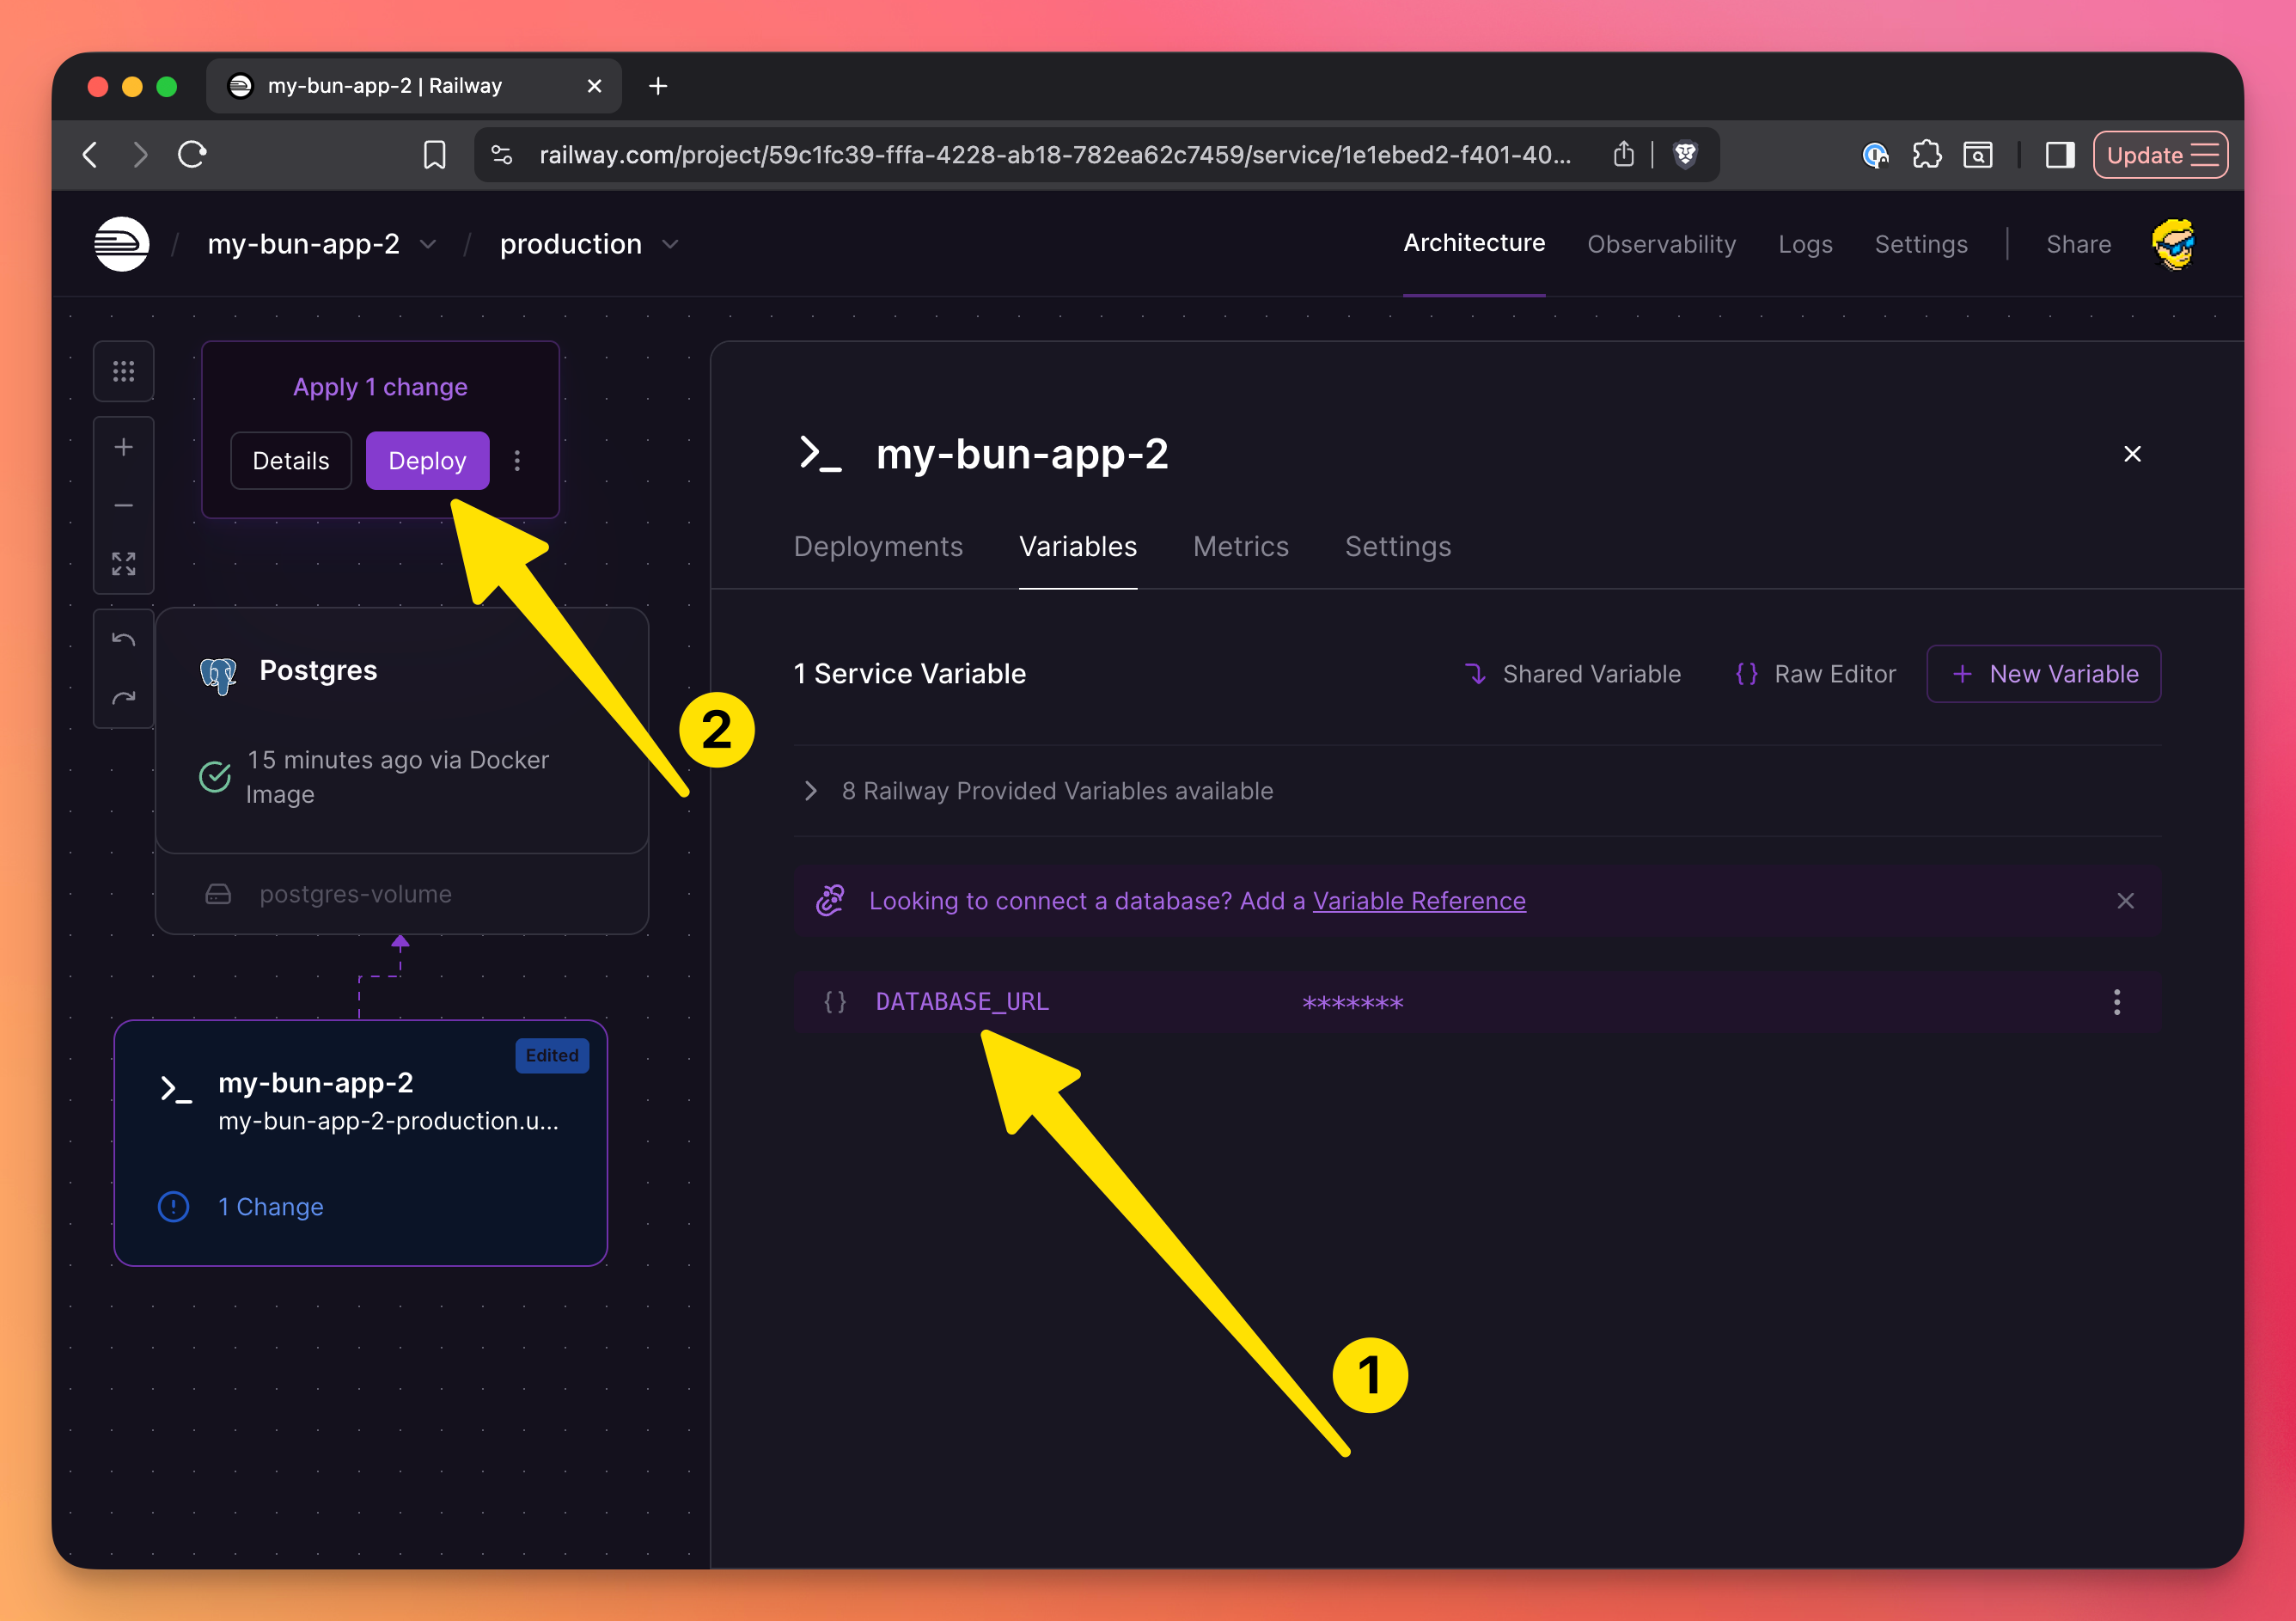
Here it is, click “Deploy” once you’re done:
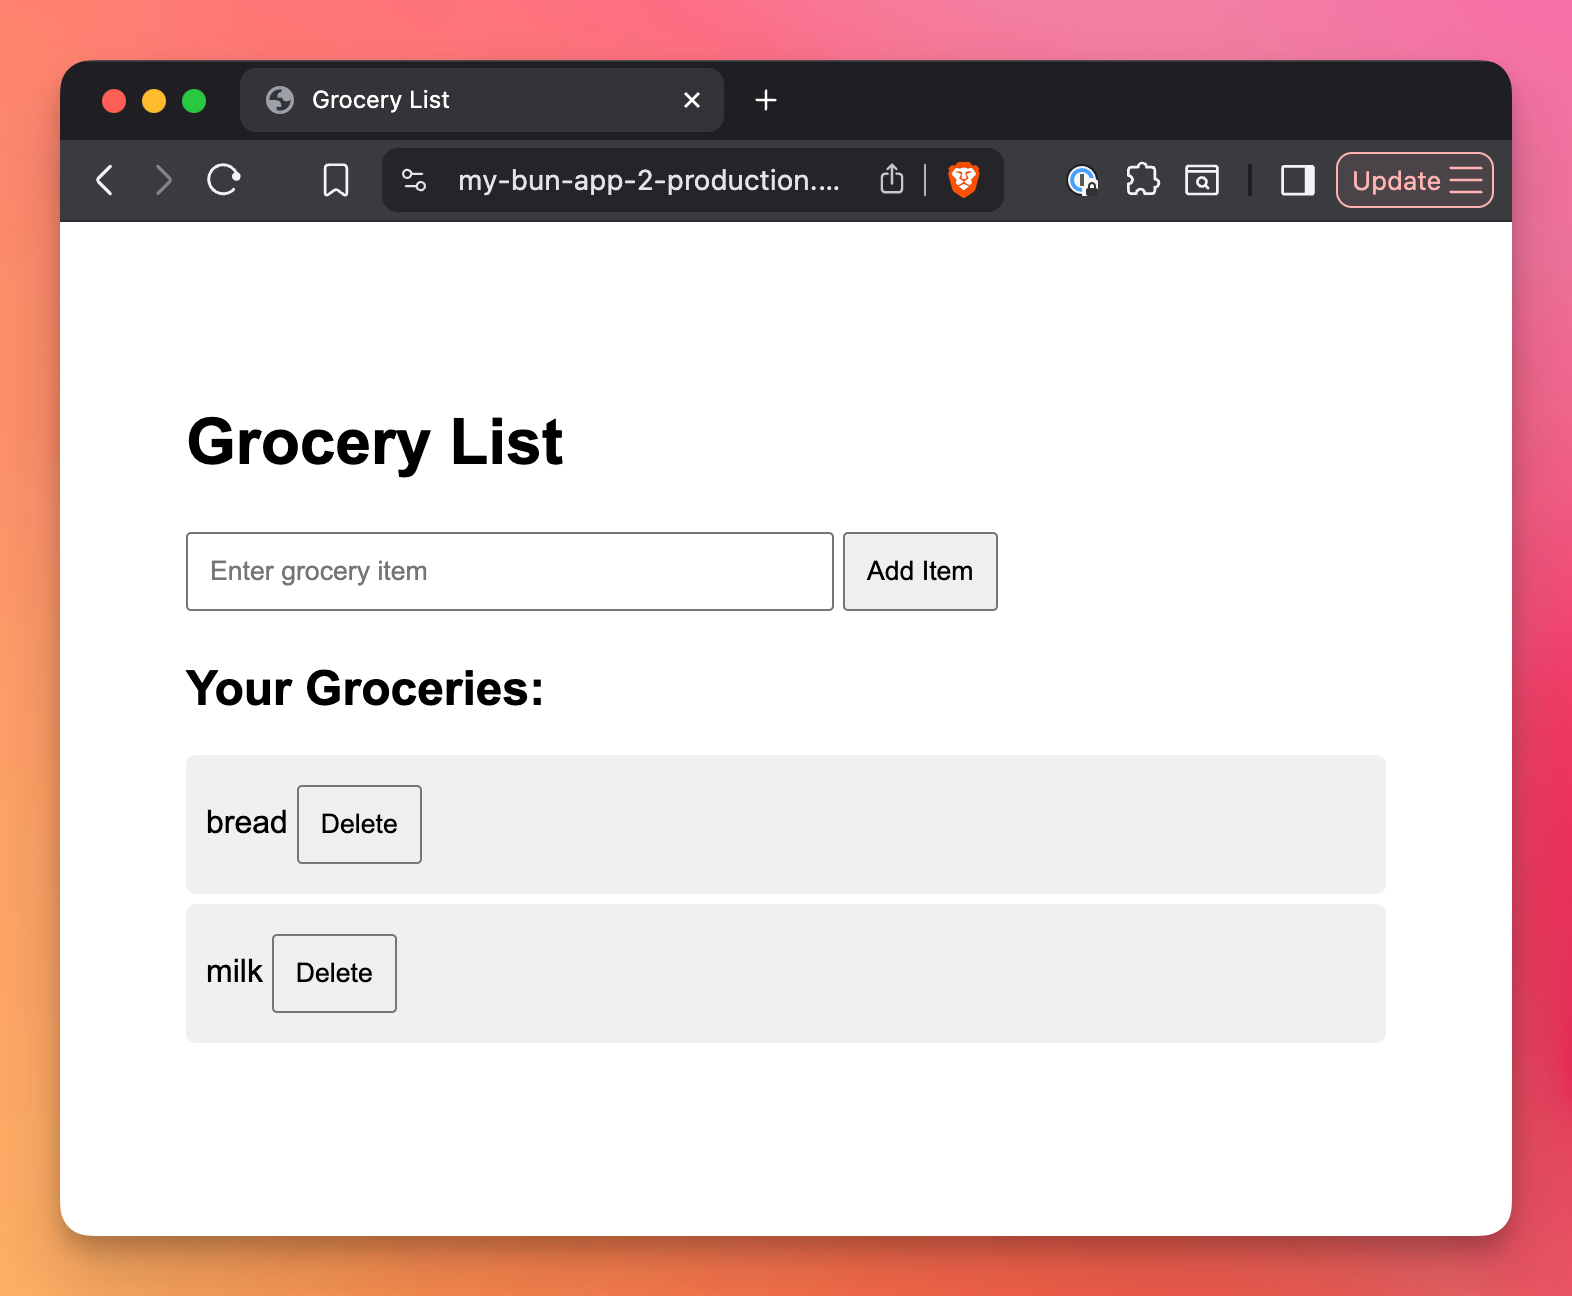
After the deploy is successful, the app should be up and running, with a database!
In the Railway interface, click the database instance and in the “Database → Data” tab you’ll see the tables, and clicking one table will show the data (very handy):
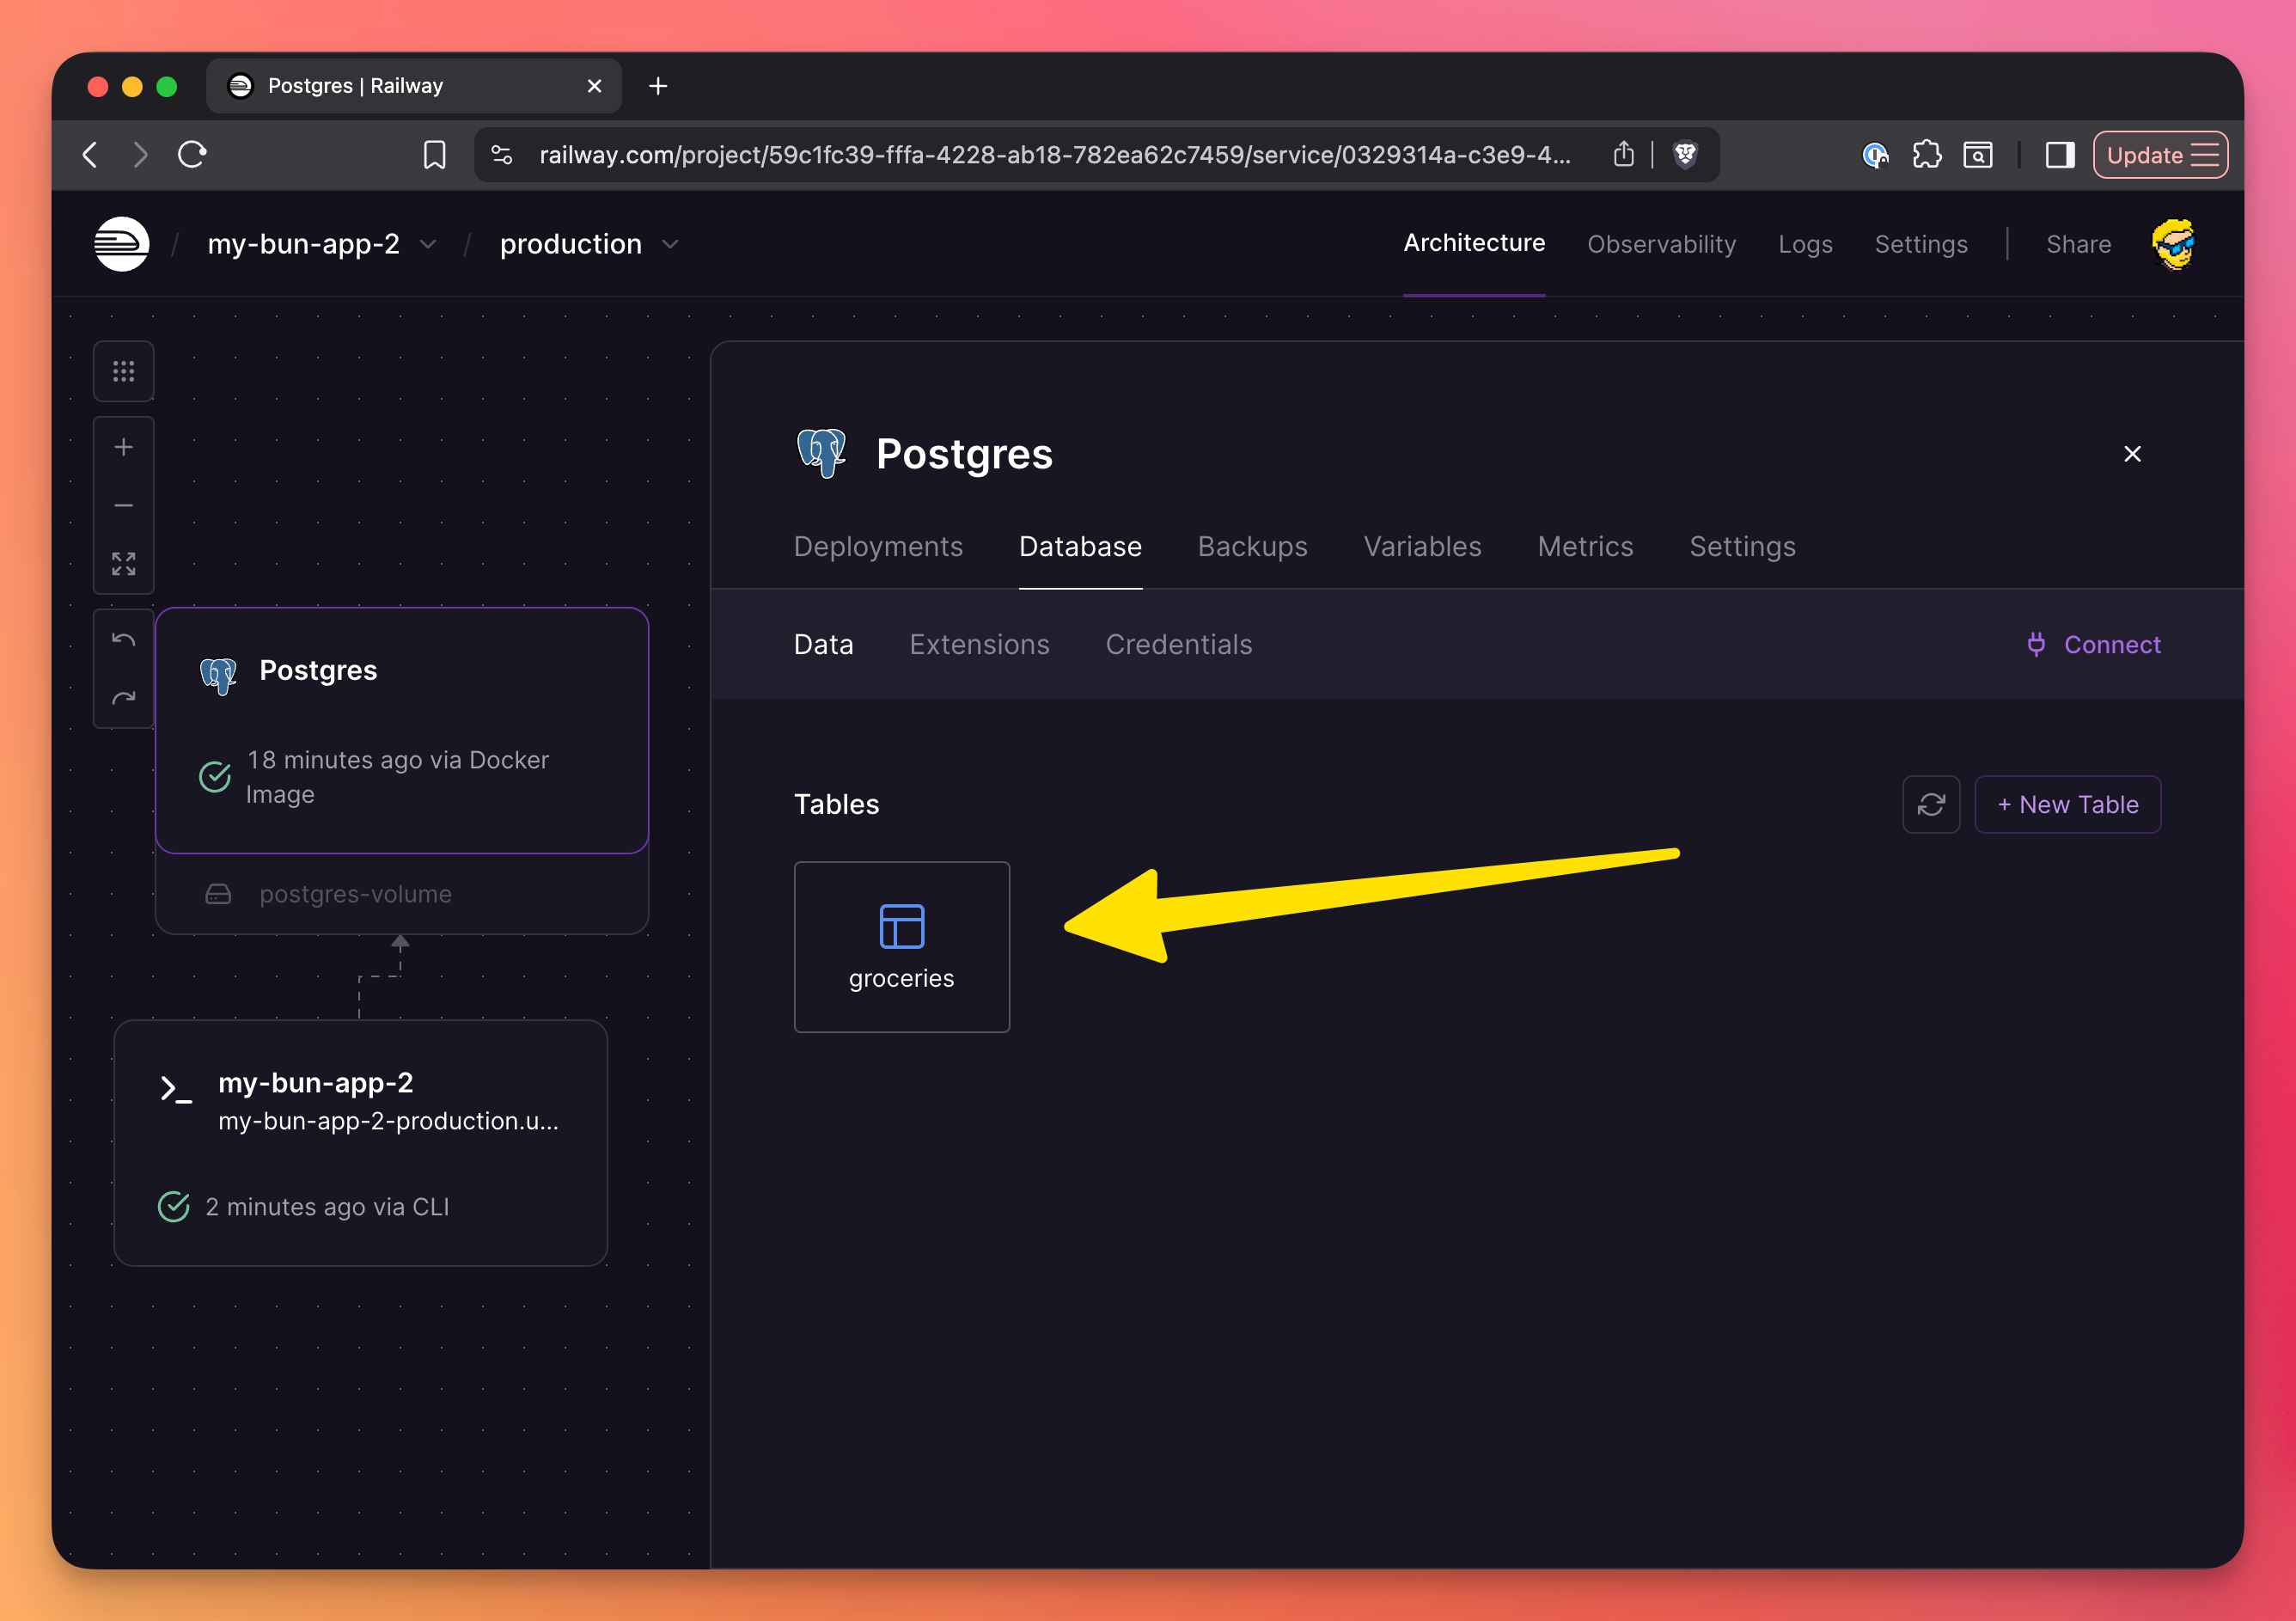

Of course you can connect to this PostgreSQL instance using TablePlus or any other database tool.
Volumes
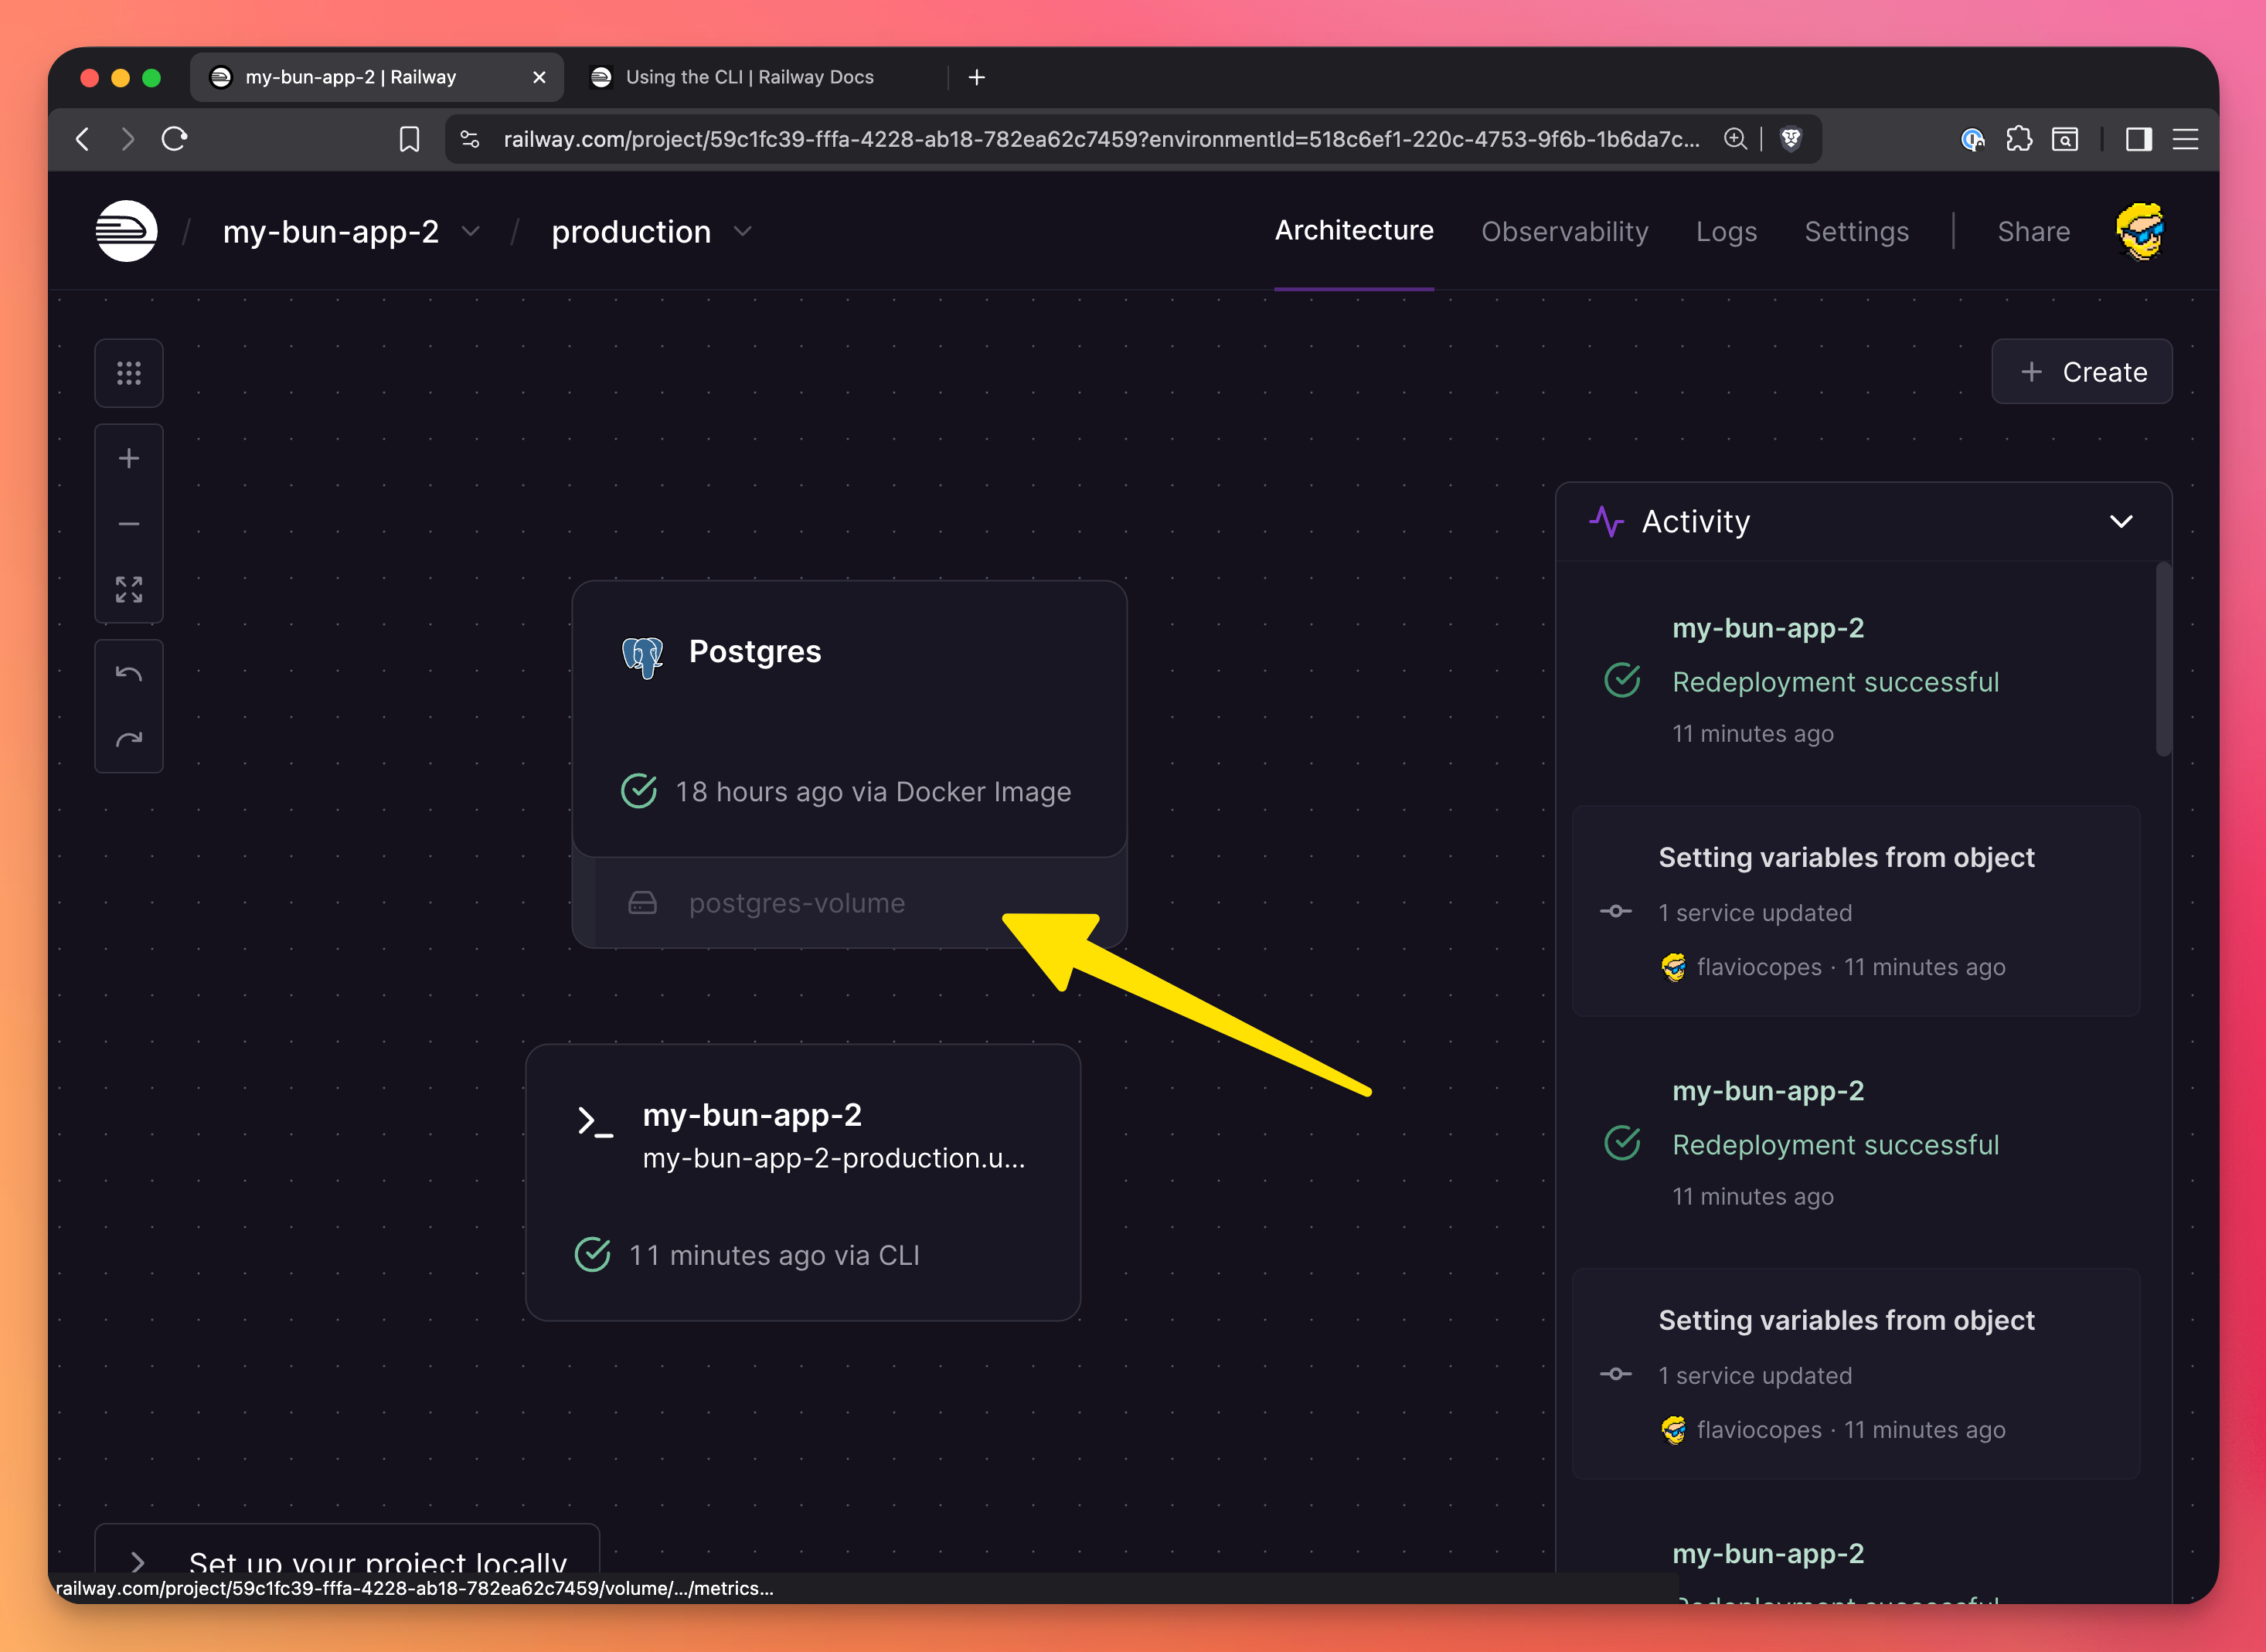
Railway Volumes provide persistent storage for your applications. Unlike the ephemeral filesystem that gets wiped on every deployment, Volumes persist data across deployments and restarts.
Maybe you noticed already, but look at how the database we created previously is automatically tied to a volume:
Use Volumes when you need to store data that should survive deployments:
- File uploads (images, documents, etc.)
- SQLite databases
- Cache files
- Any data that needs to persist between deployments
Creating a Volume
You can create a Volume from the Railway dashboard:
- Go to your service
- Click “Variables”
- Scroll down to “Volumes”
- Click “New Volume”
- Choose a mount path (e.g.,
/data)
Railway will create the Volume and mount it at your specified path. Your application can now read and write to this directory, and the data will persist across deployments.
Volumes start with a size limit of 5GB. You can increase this value if you need.
Using Volumes in your code
Once you’ve created a Volume mounted at /data, you can use it in your application:
import { writeFile, readFile } from 'fs/promises'
import { join } from 'path'

const UPLOAD_DIR = '/data/uploads'

// Save uploaded file
async function saveUpload(filename: string, content: Buffer) {
  const filepath = join(UPLOAD_DIR, filename)
  await writeFile(filepath, content)
  return filepath
}

// Read file
async function getUpload(filename: string) {
  const filepath = join(UPLOAD_DIR, filename)
  return await readFile(filepath)
}
Volume pricing
Volumes are charged based on storage size and usage time. The cost is minimal for most use cases—typically a few dollars per month for several gigabytes of storage.
Important notes
- Volumes are single-region: They’re tied to the region where your service runs
- No automatic backups: Railway doesn’t automatically back up Volume data. Consider implementing your own backup strategy for critical data
- Size can be increased: You can increase Volume size at any time, but you cannot decrease it
- One Volume per service: Each service can have one Volume. If you need multiple storage locations, use subdirectories within your Volume mount path
Environment variables
Railway makes it easy to manage environment variables and secrets.
Adding variables in the dashboard
- Go to your service
- Click “Variables”
- Add your key-value pairs by clicking “New Variable”
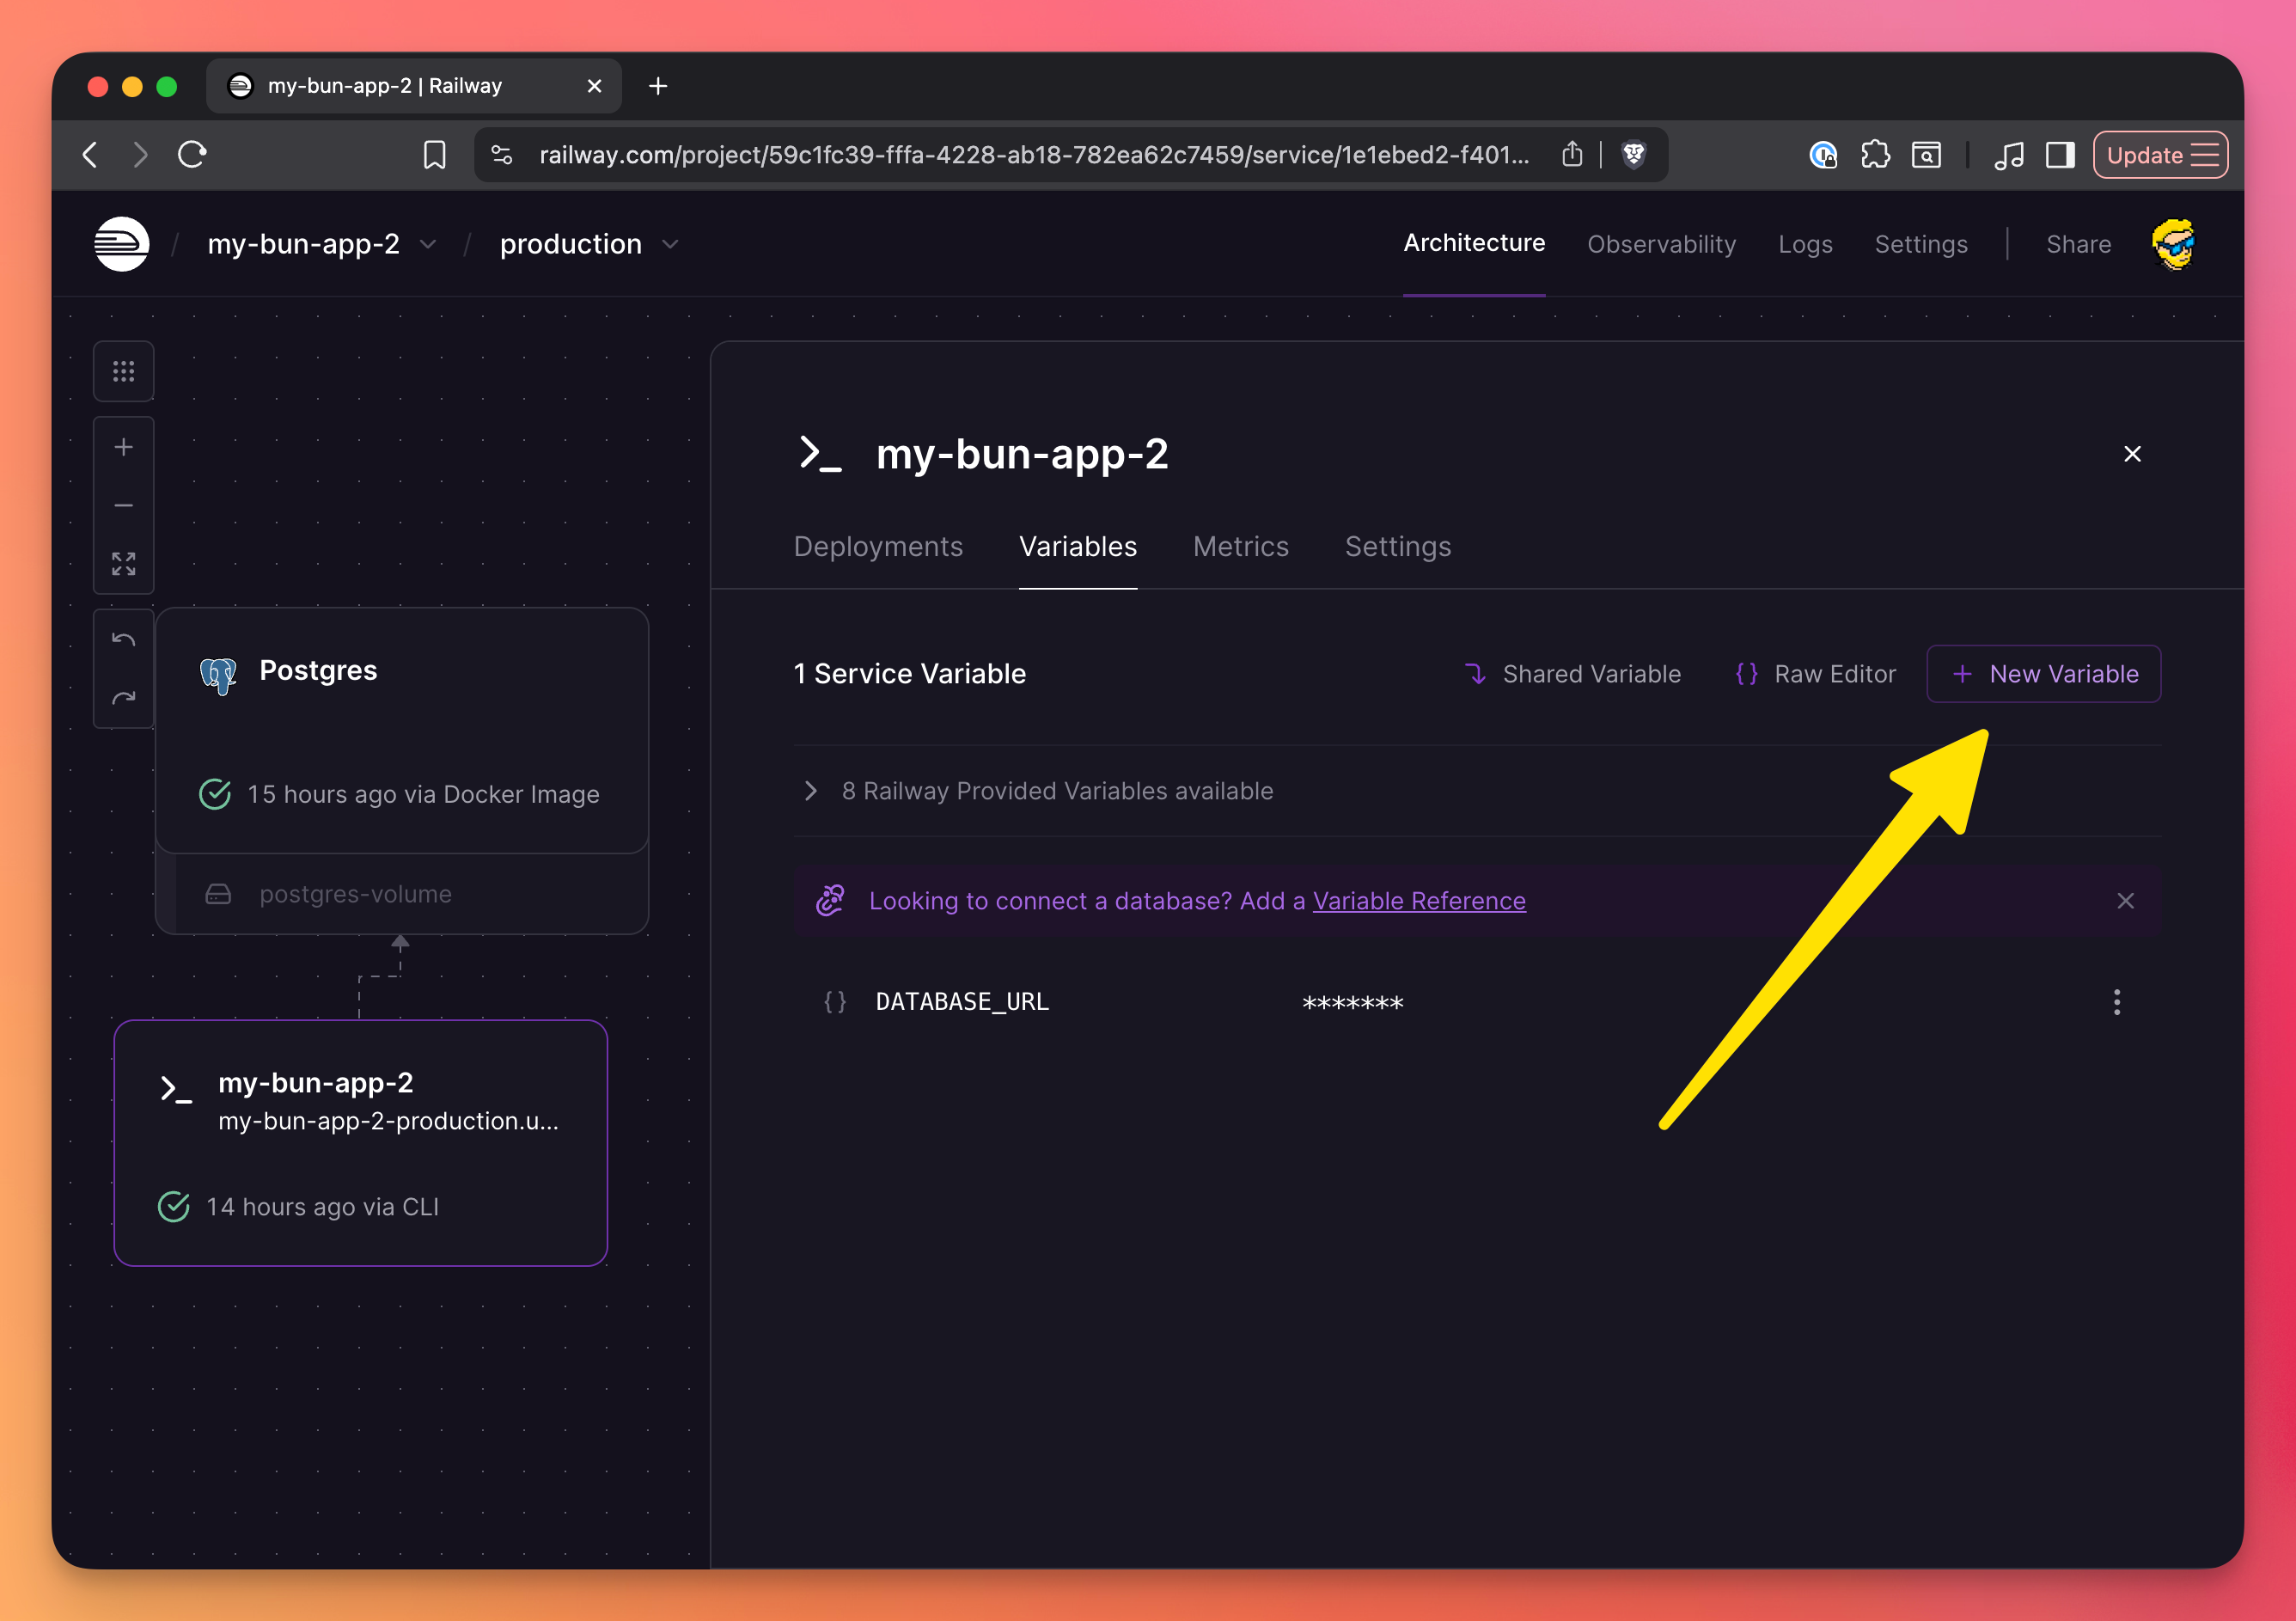
You can add your own variables, or reference variables set by Railway or other services, like we did before with DATABASE_URL.
Variables are encrypted at rest and only available to your service. You can also set different variables for production and other environments.
Adding variables via CLI
railway variables --set API_KEY=your-secret-key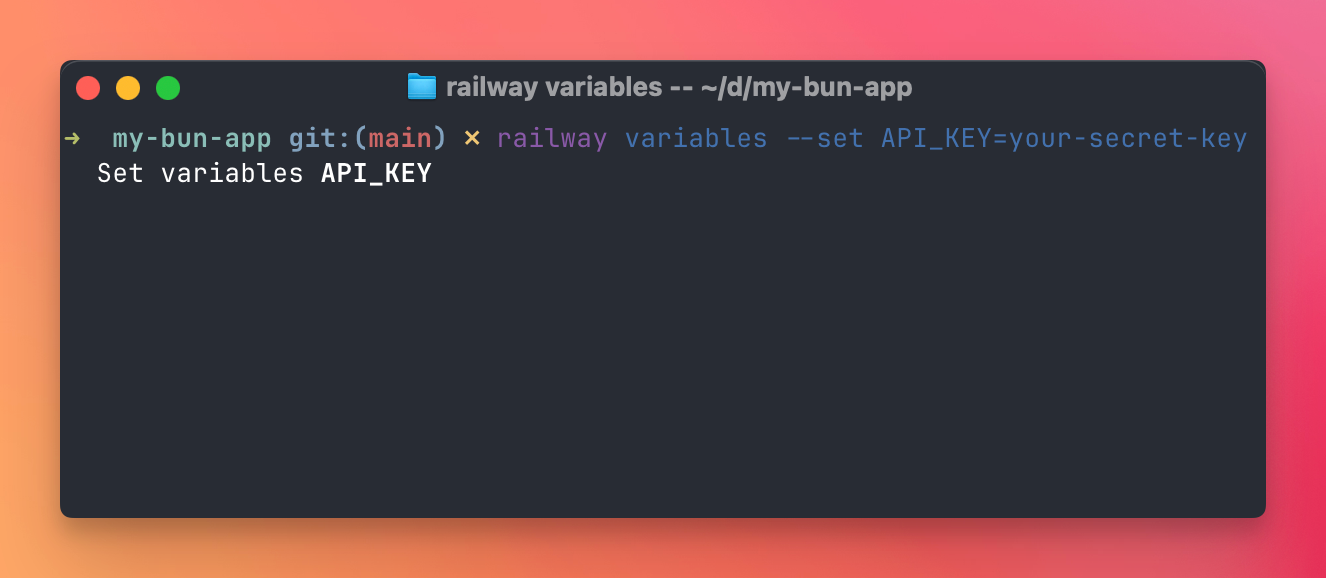
To see all variables:
railway variables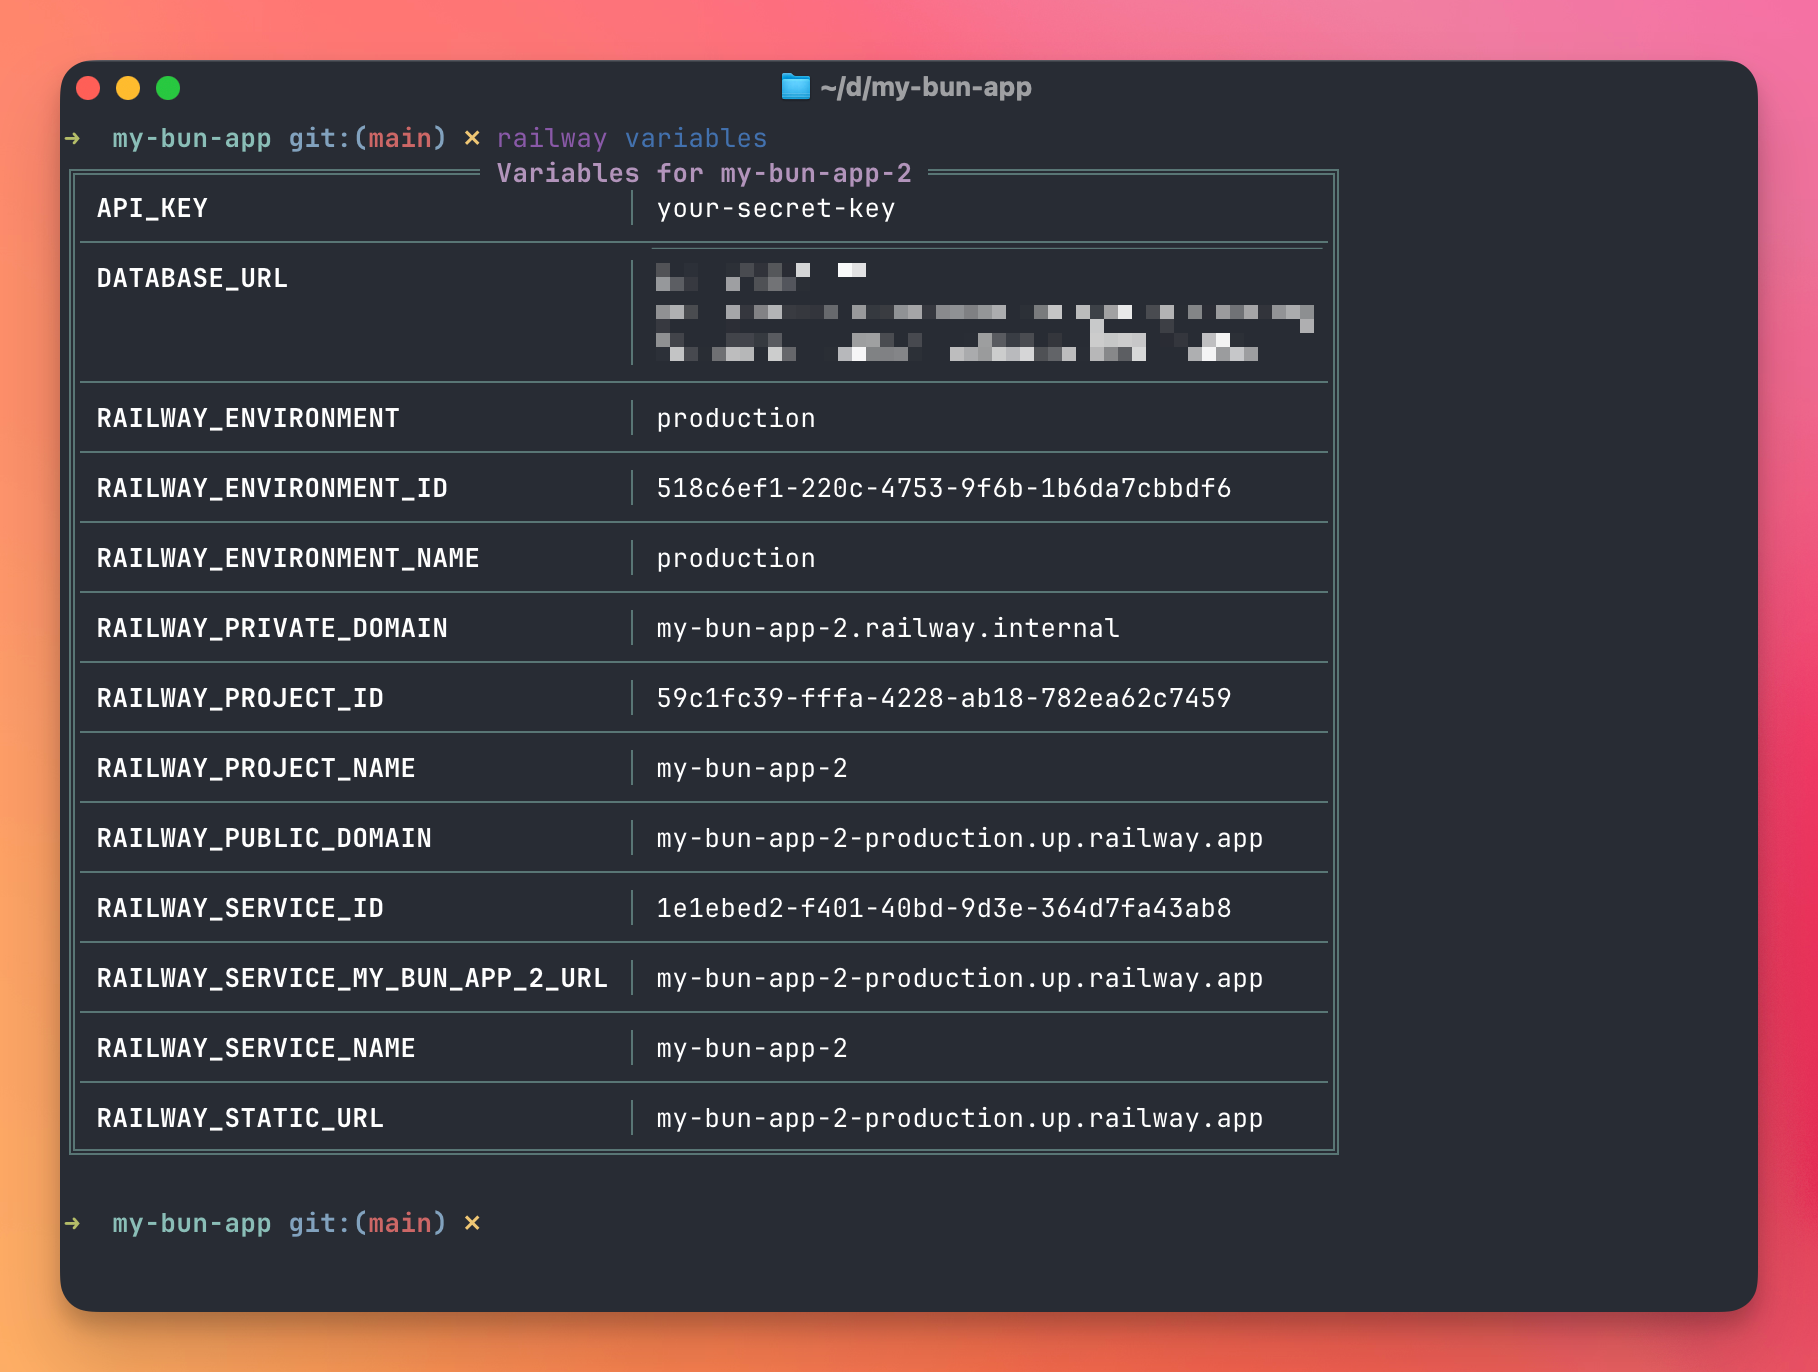
Custom domains
Railway gives you a .up.railway.app domain by default, but you can add your own custom domain.
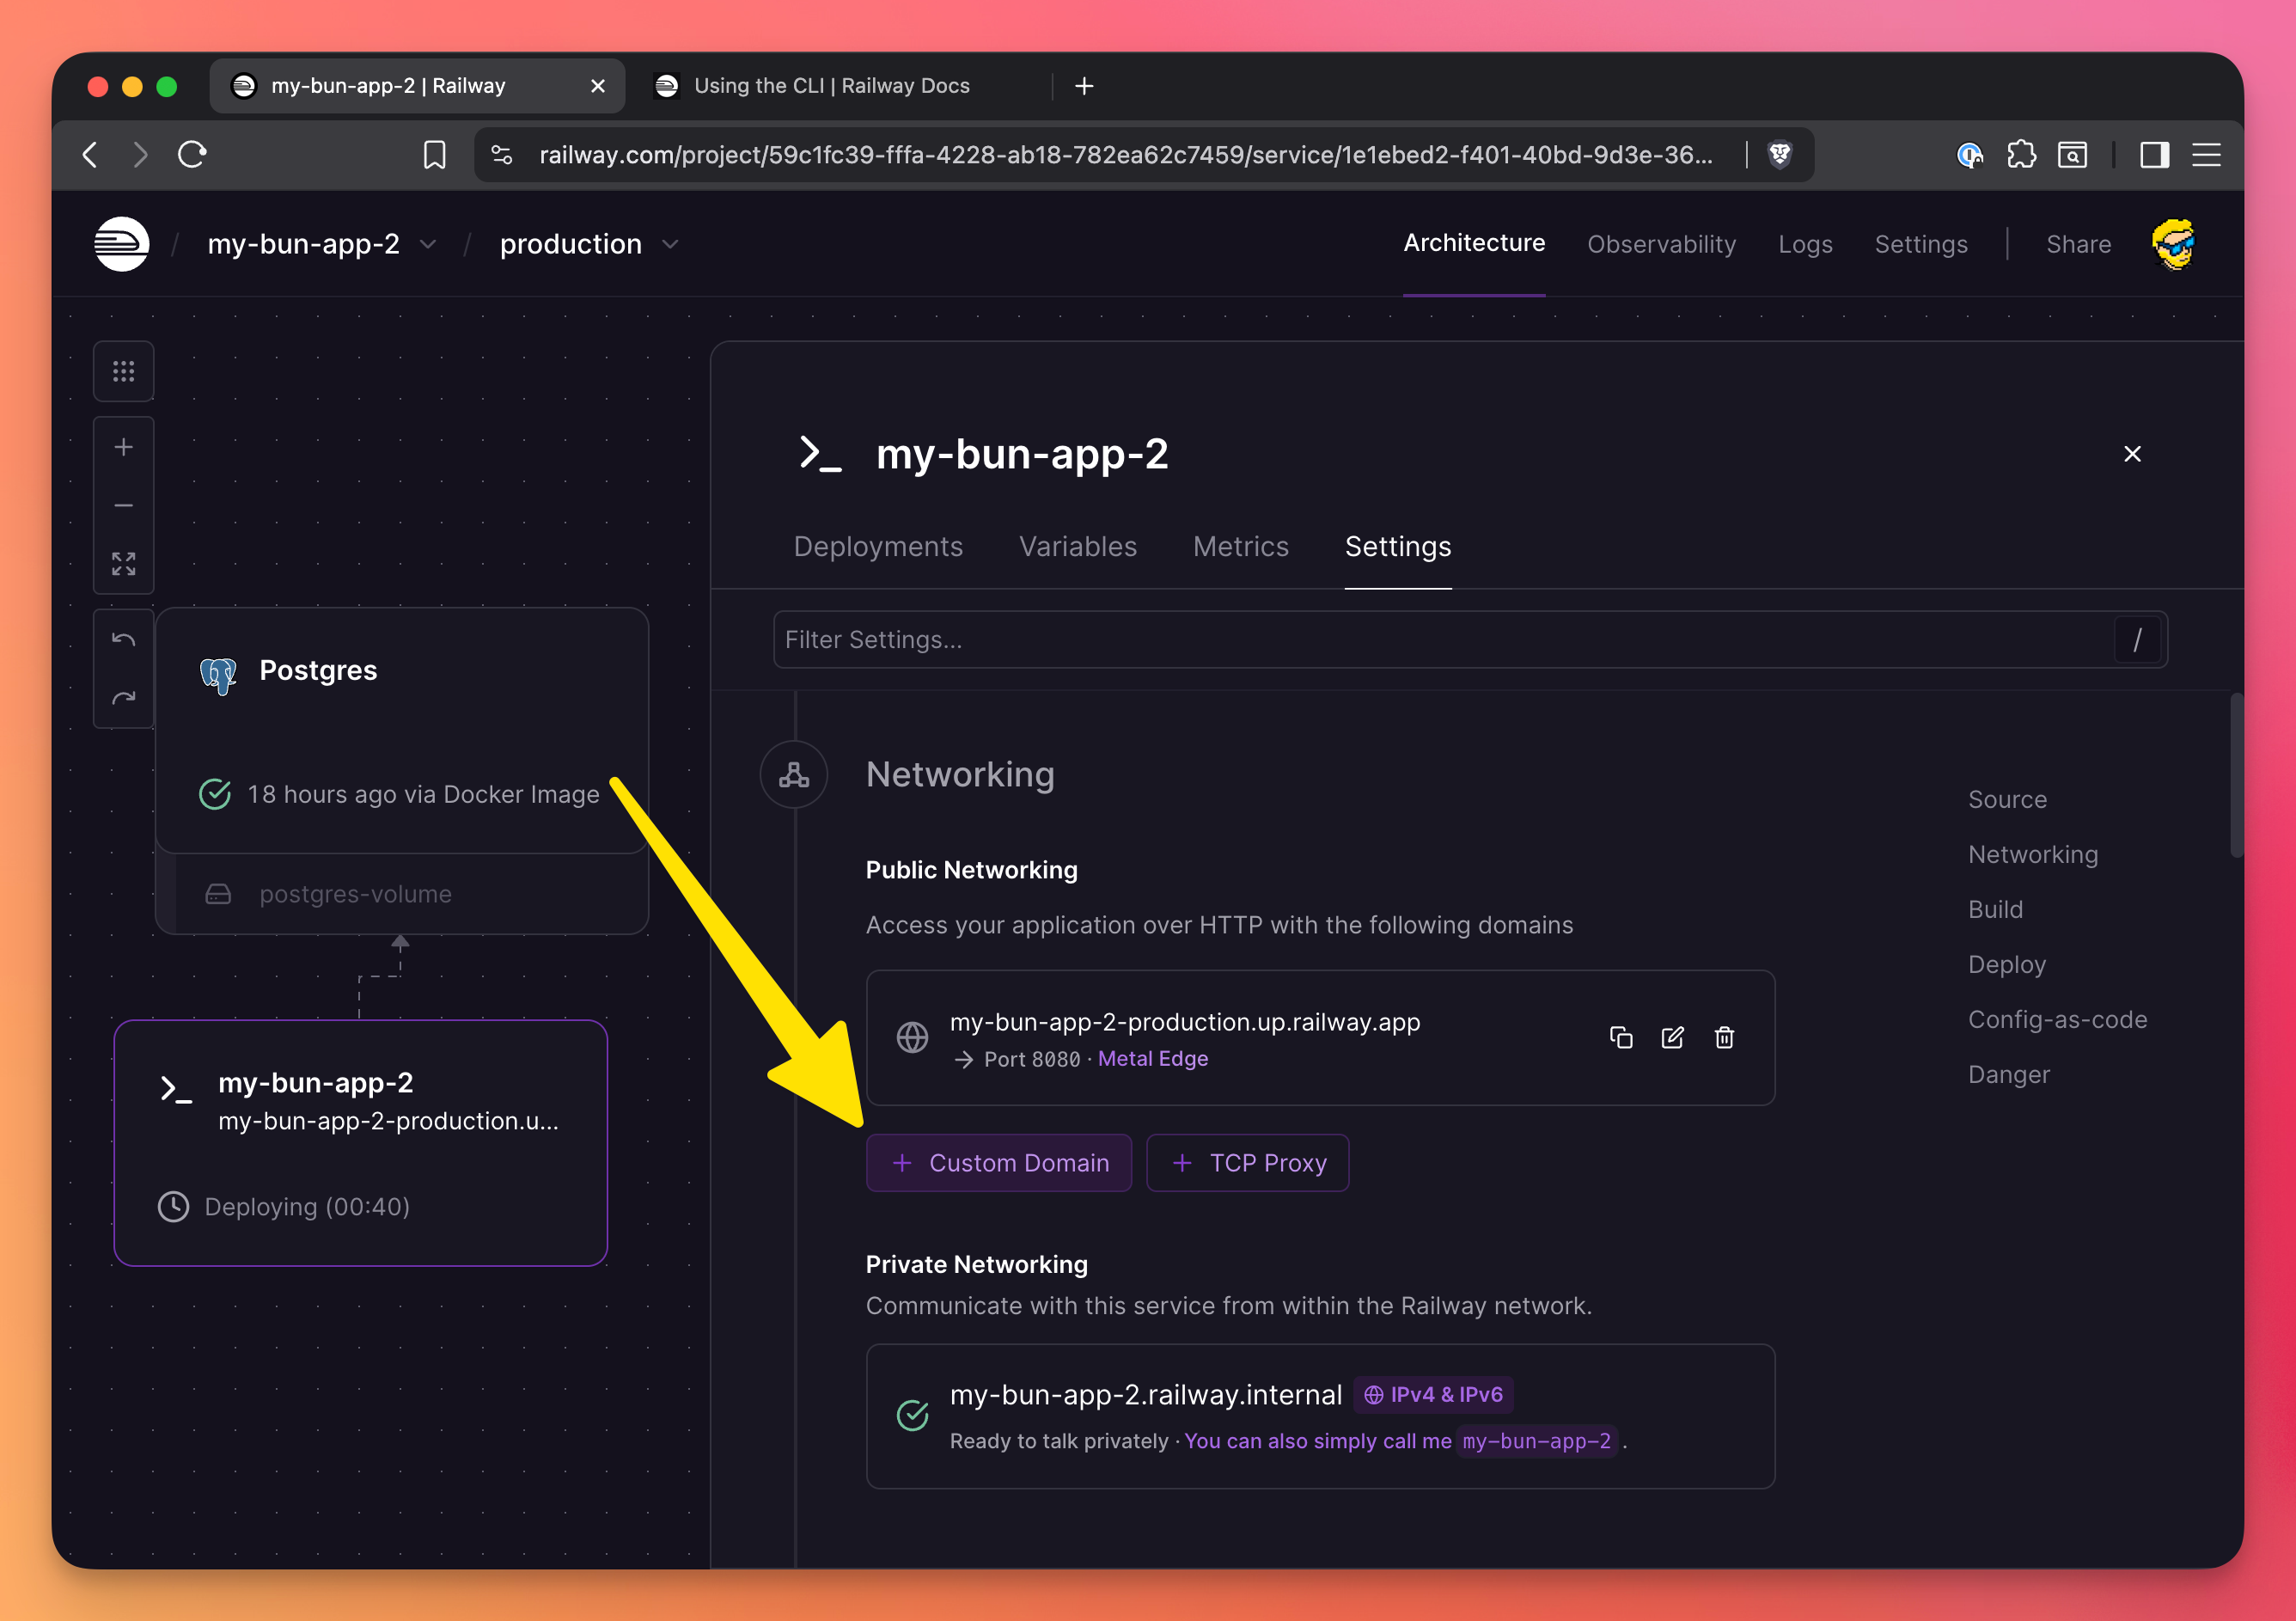
- Go to your service settings
- Click “Networking”
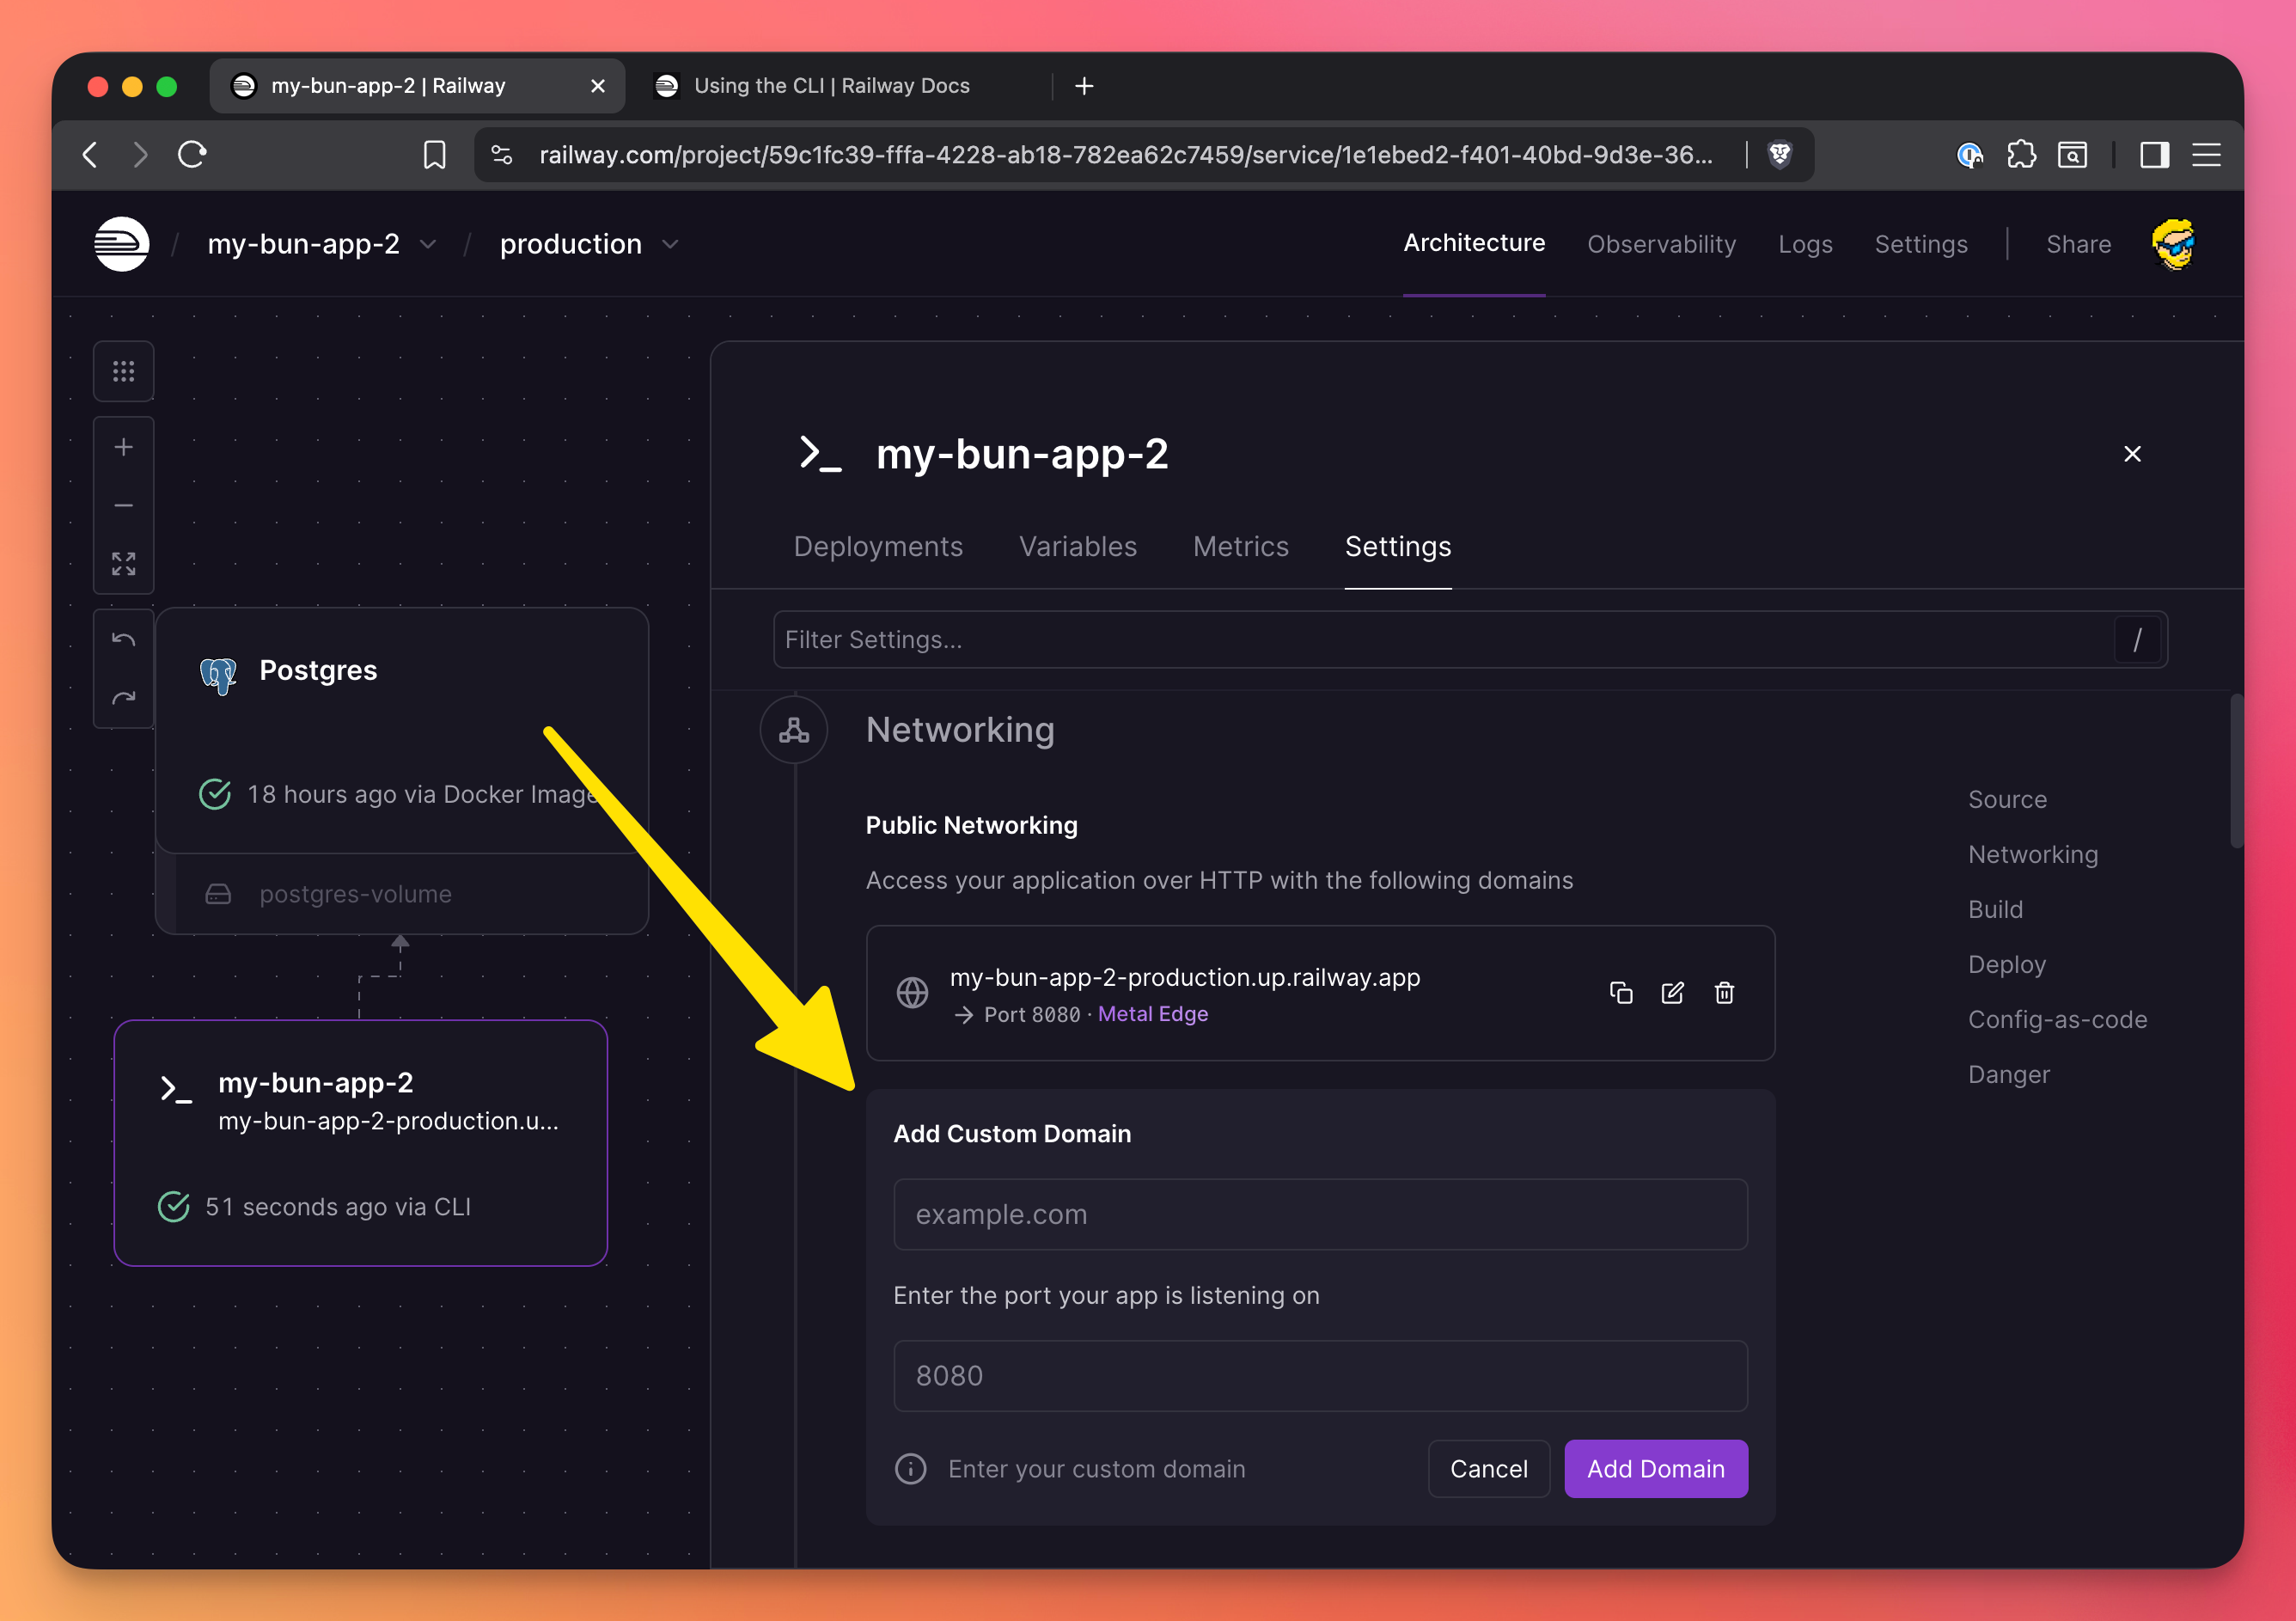
- Click “Add Custom Domain”
- Enter your domain (e.g.,
api.yourdomain.com) - Add the CNAME record to your DNS provider
Railway handles SSL certificates automatically via Let’s Encrypt. No configuration needed.
Logs and monitoring
Railway provides real-time logs for every deployment. Click on any deployment to see its logs.
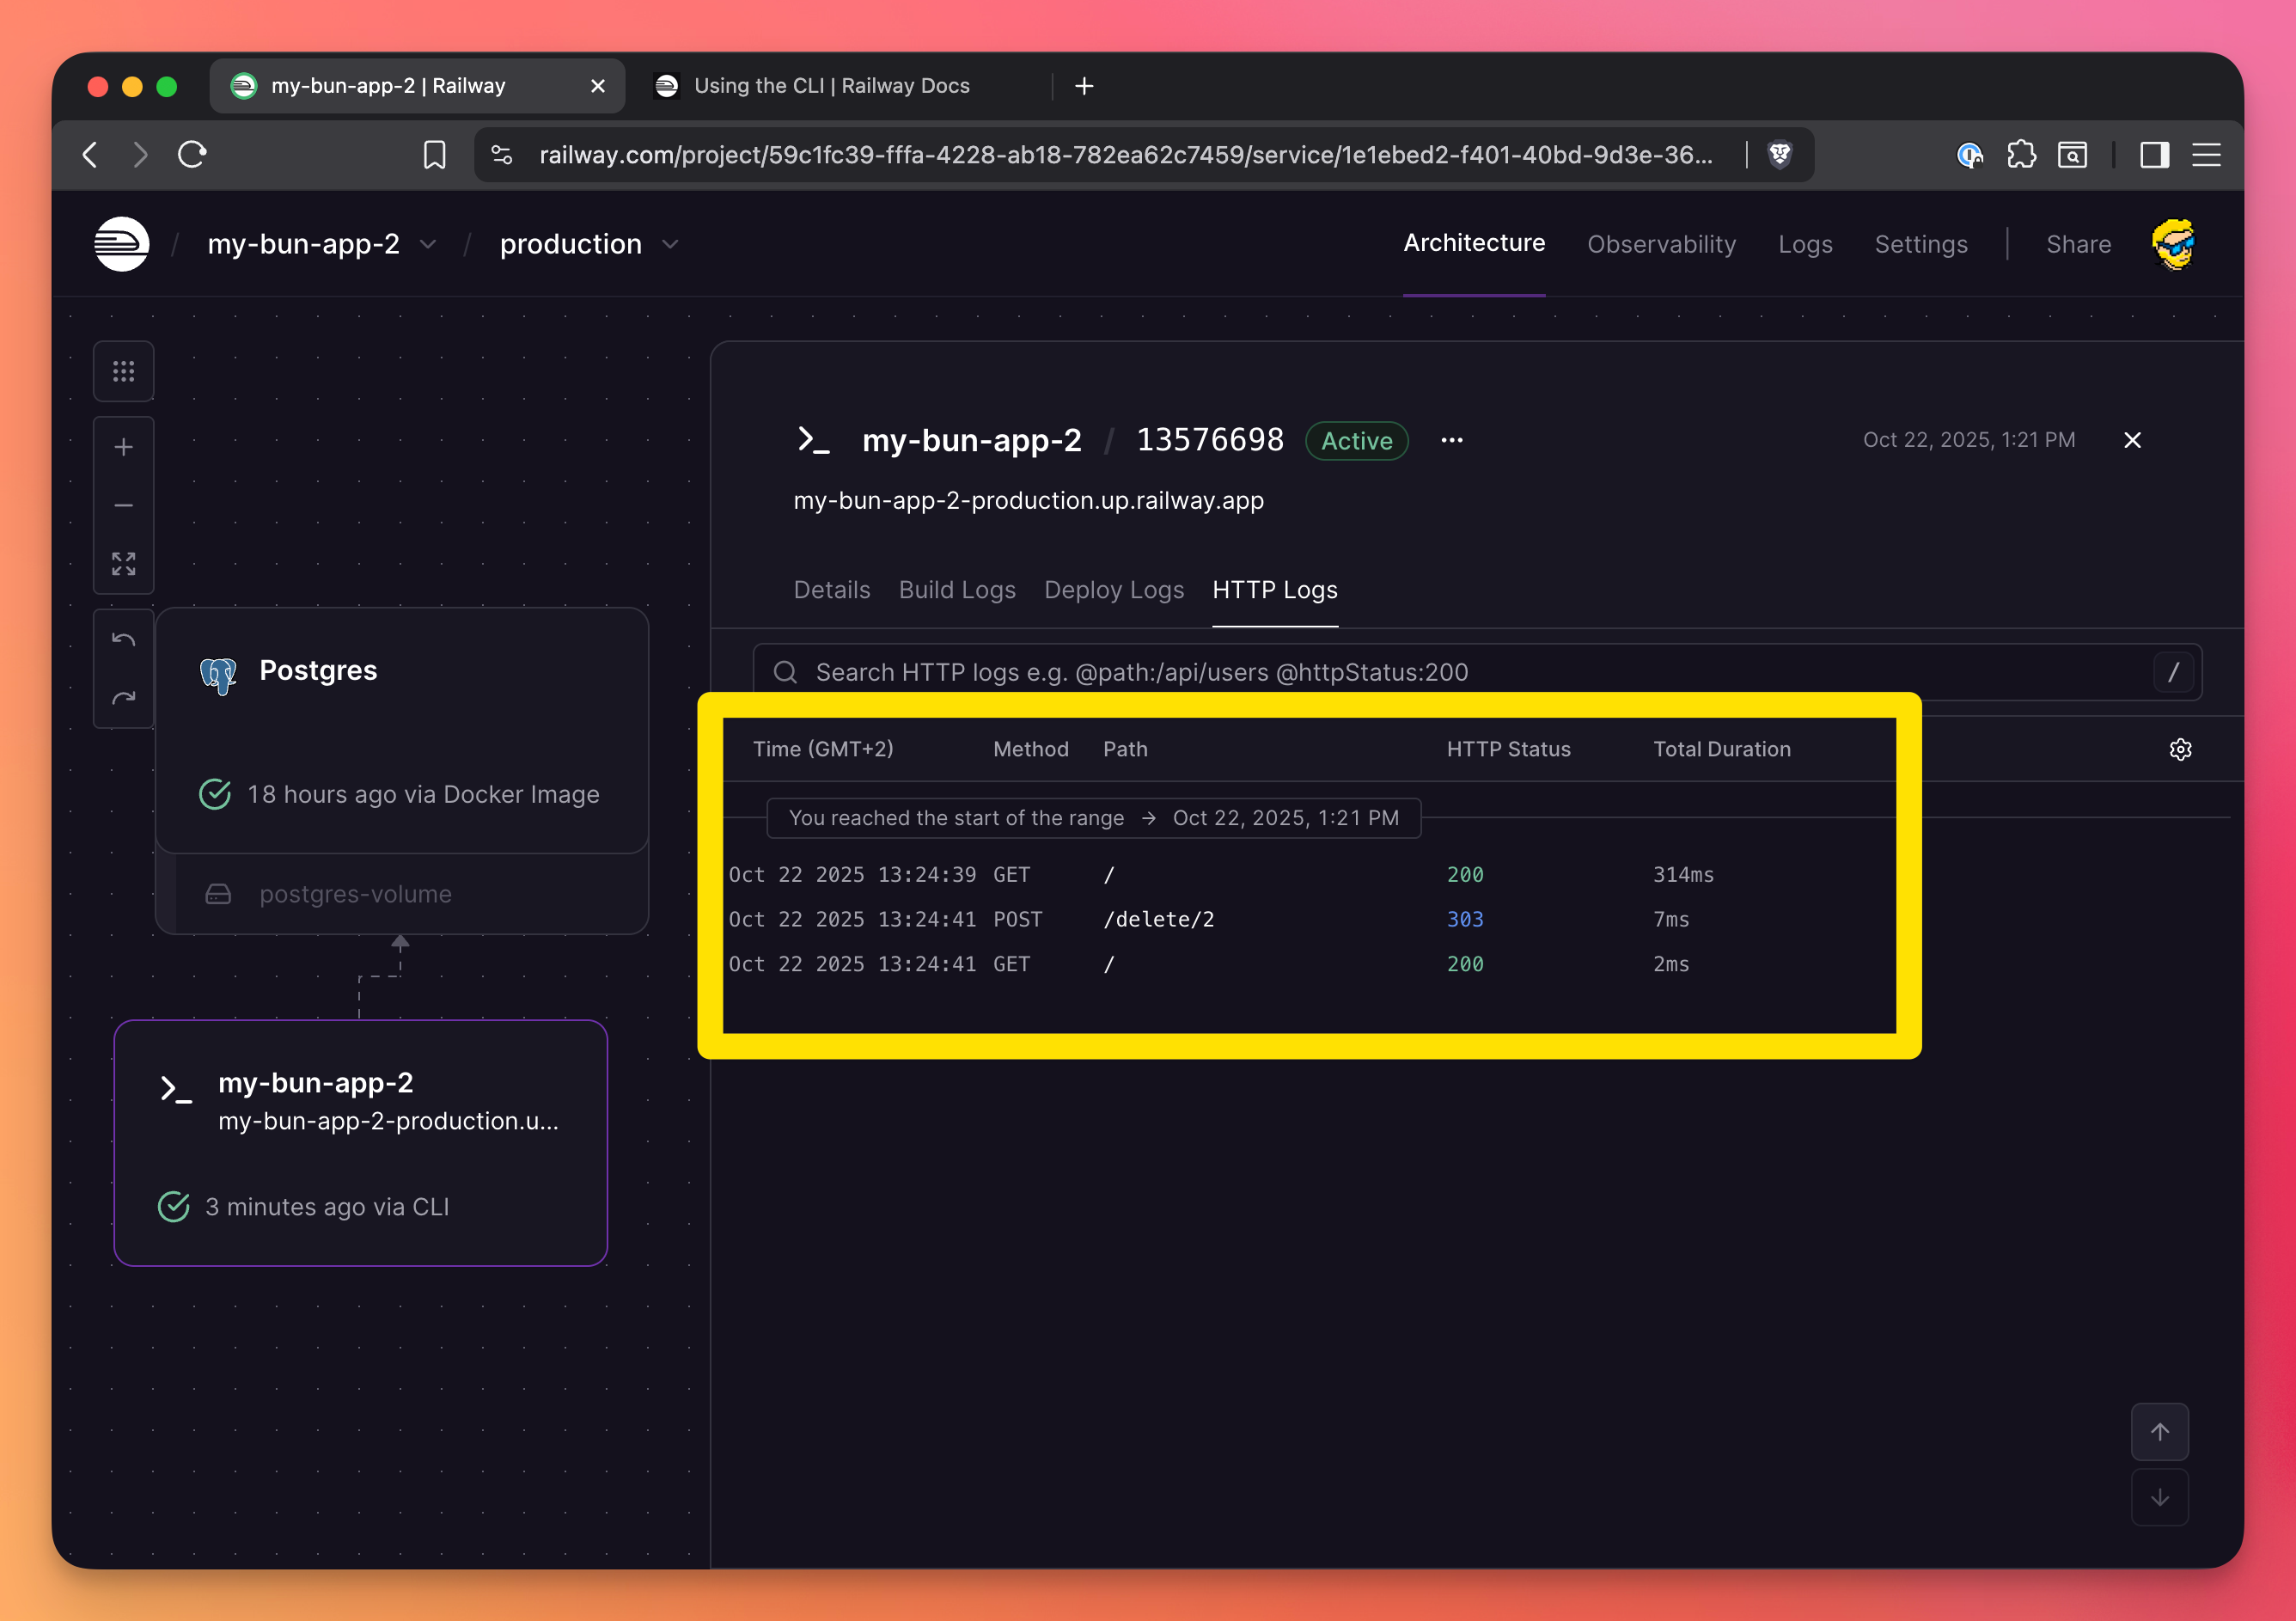
You have build logs, deploy logs, and HTTP logs: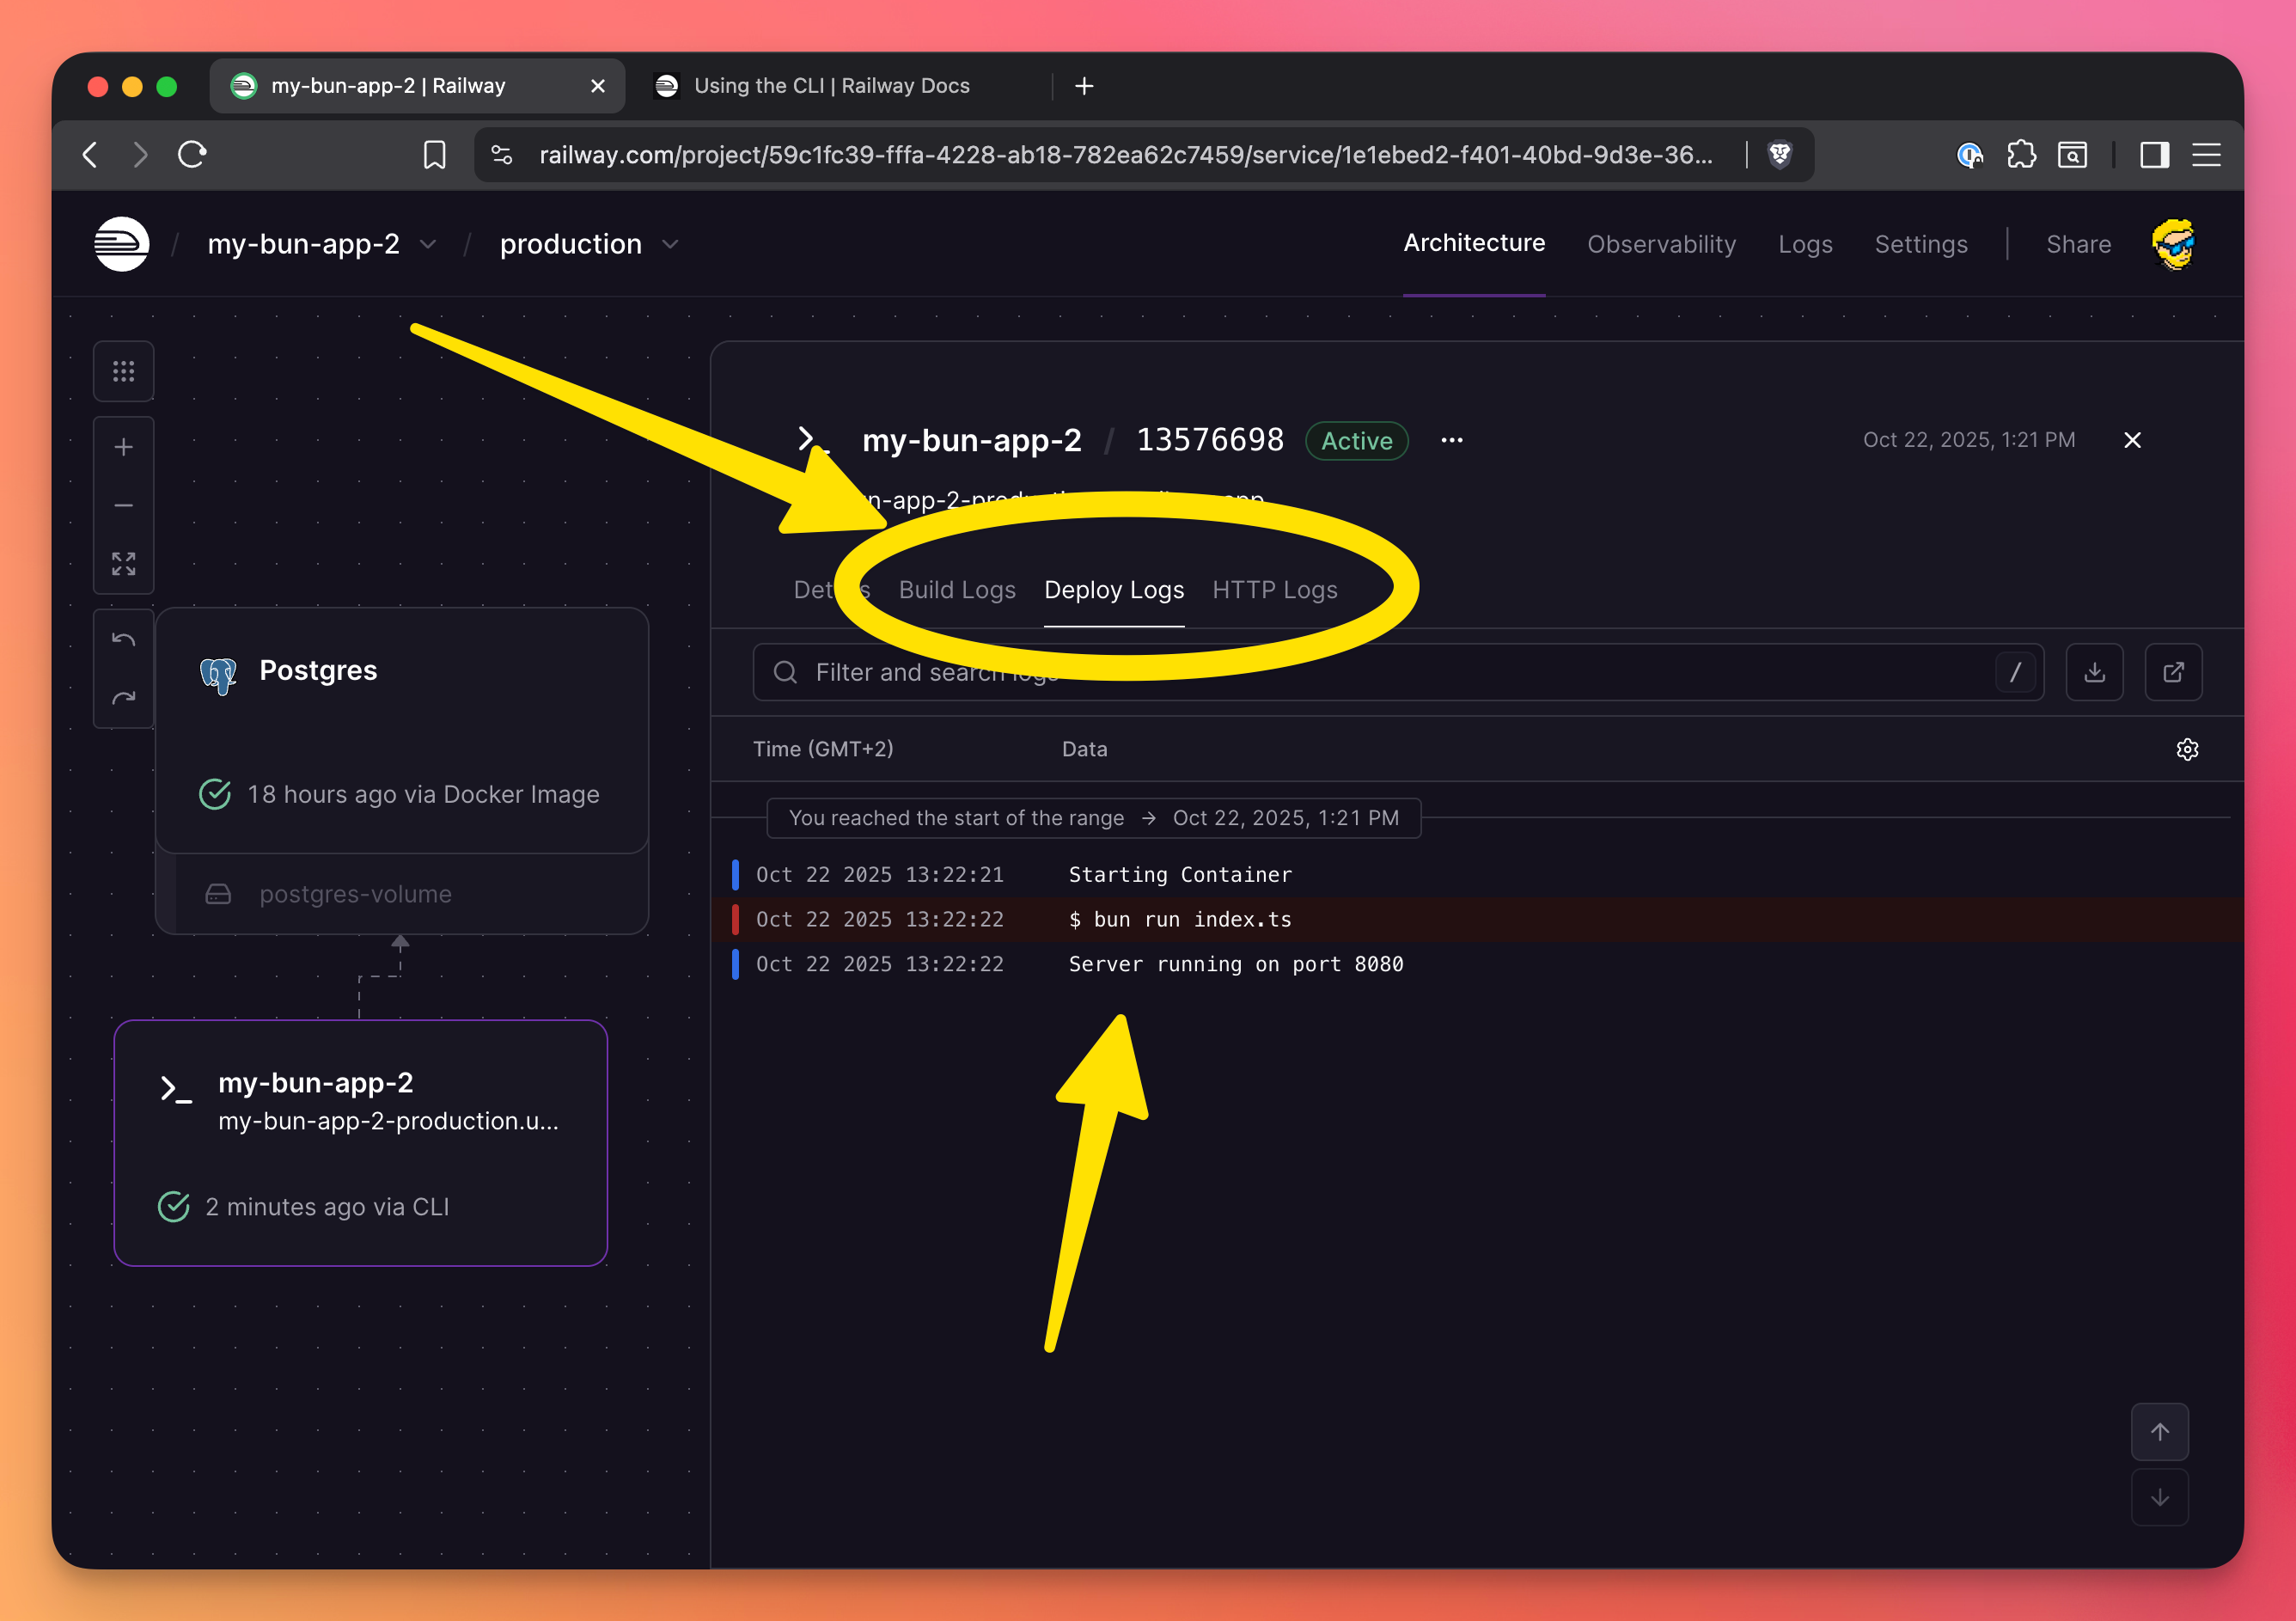
HTTP logs log all the HTTP requests made to the server:
You can also stream logs from the CLI:
railway logs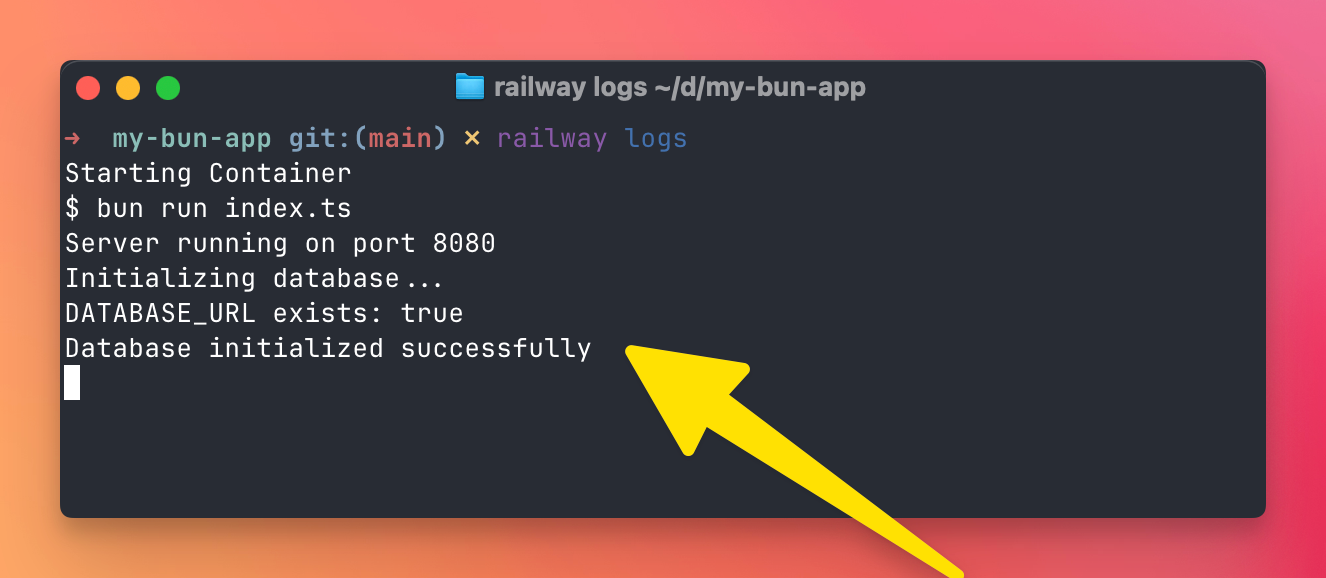
Pricing
Railway uses a usage-based pricing model. You pay for what you use, not for what you provision.
The free tier includes $5 worth of usage per month.
Most small to medium apps cost between $5-20 per month.
There’s no minimum spend—if you use $3 worth of resources, you pay $3.
Tips and best practices
Here are some things I’ve learned from using Railway in production:
Use environment-specific variables
Railway supports multiple environments (production, staging, etc.). Use them to keep your production and development configurations separate.
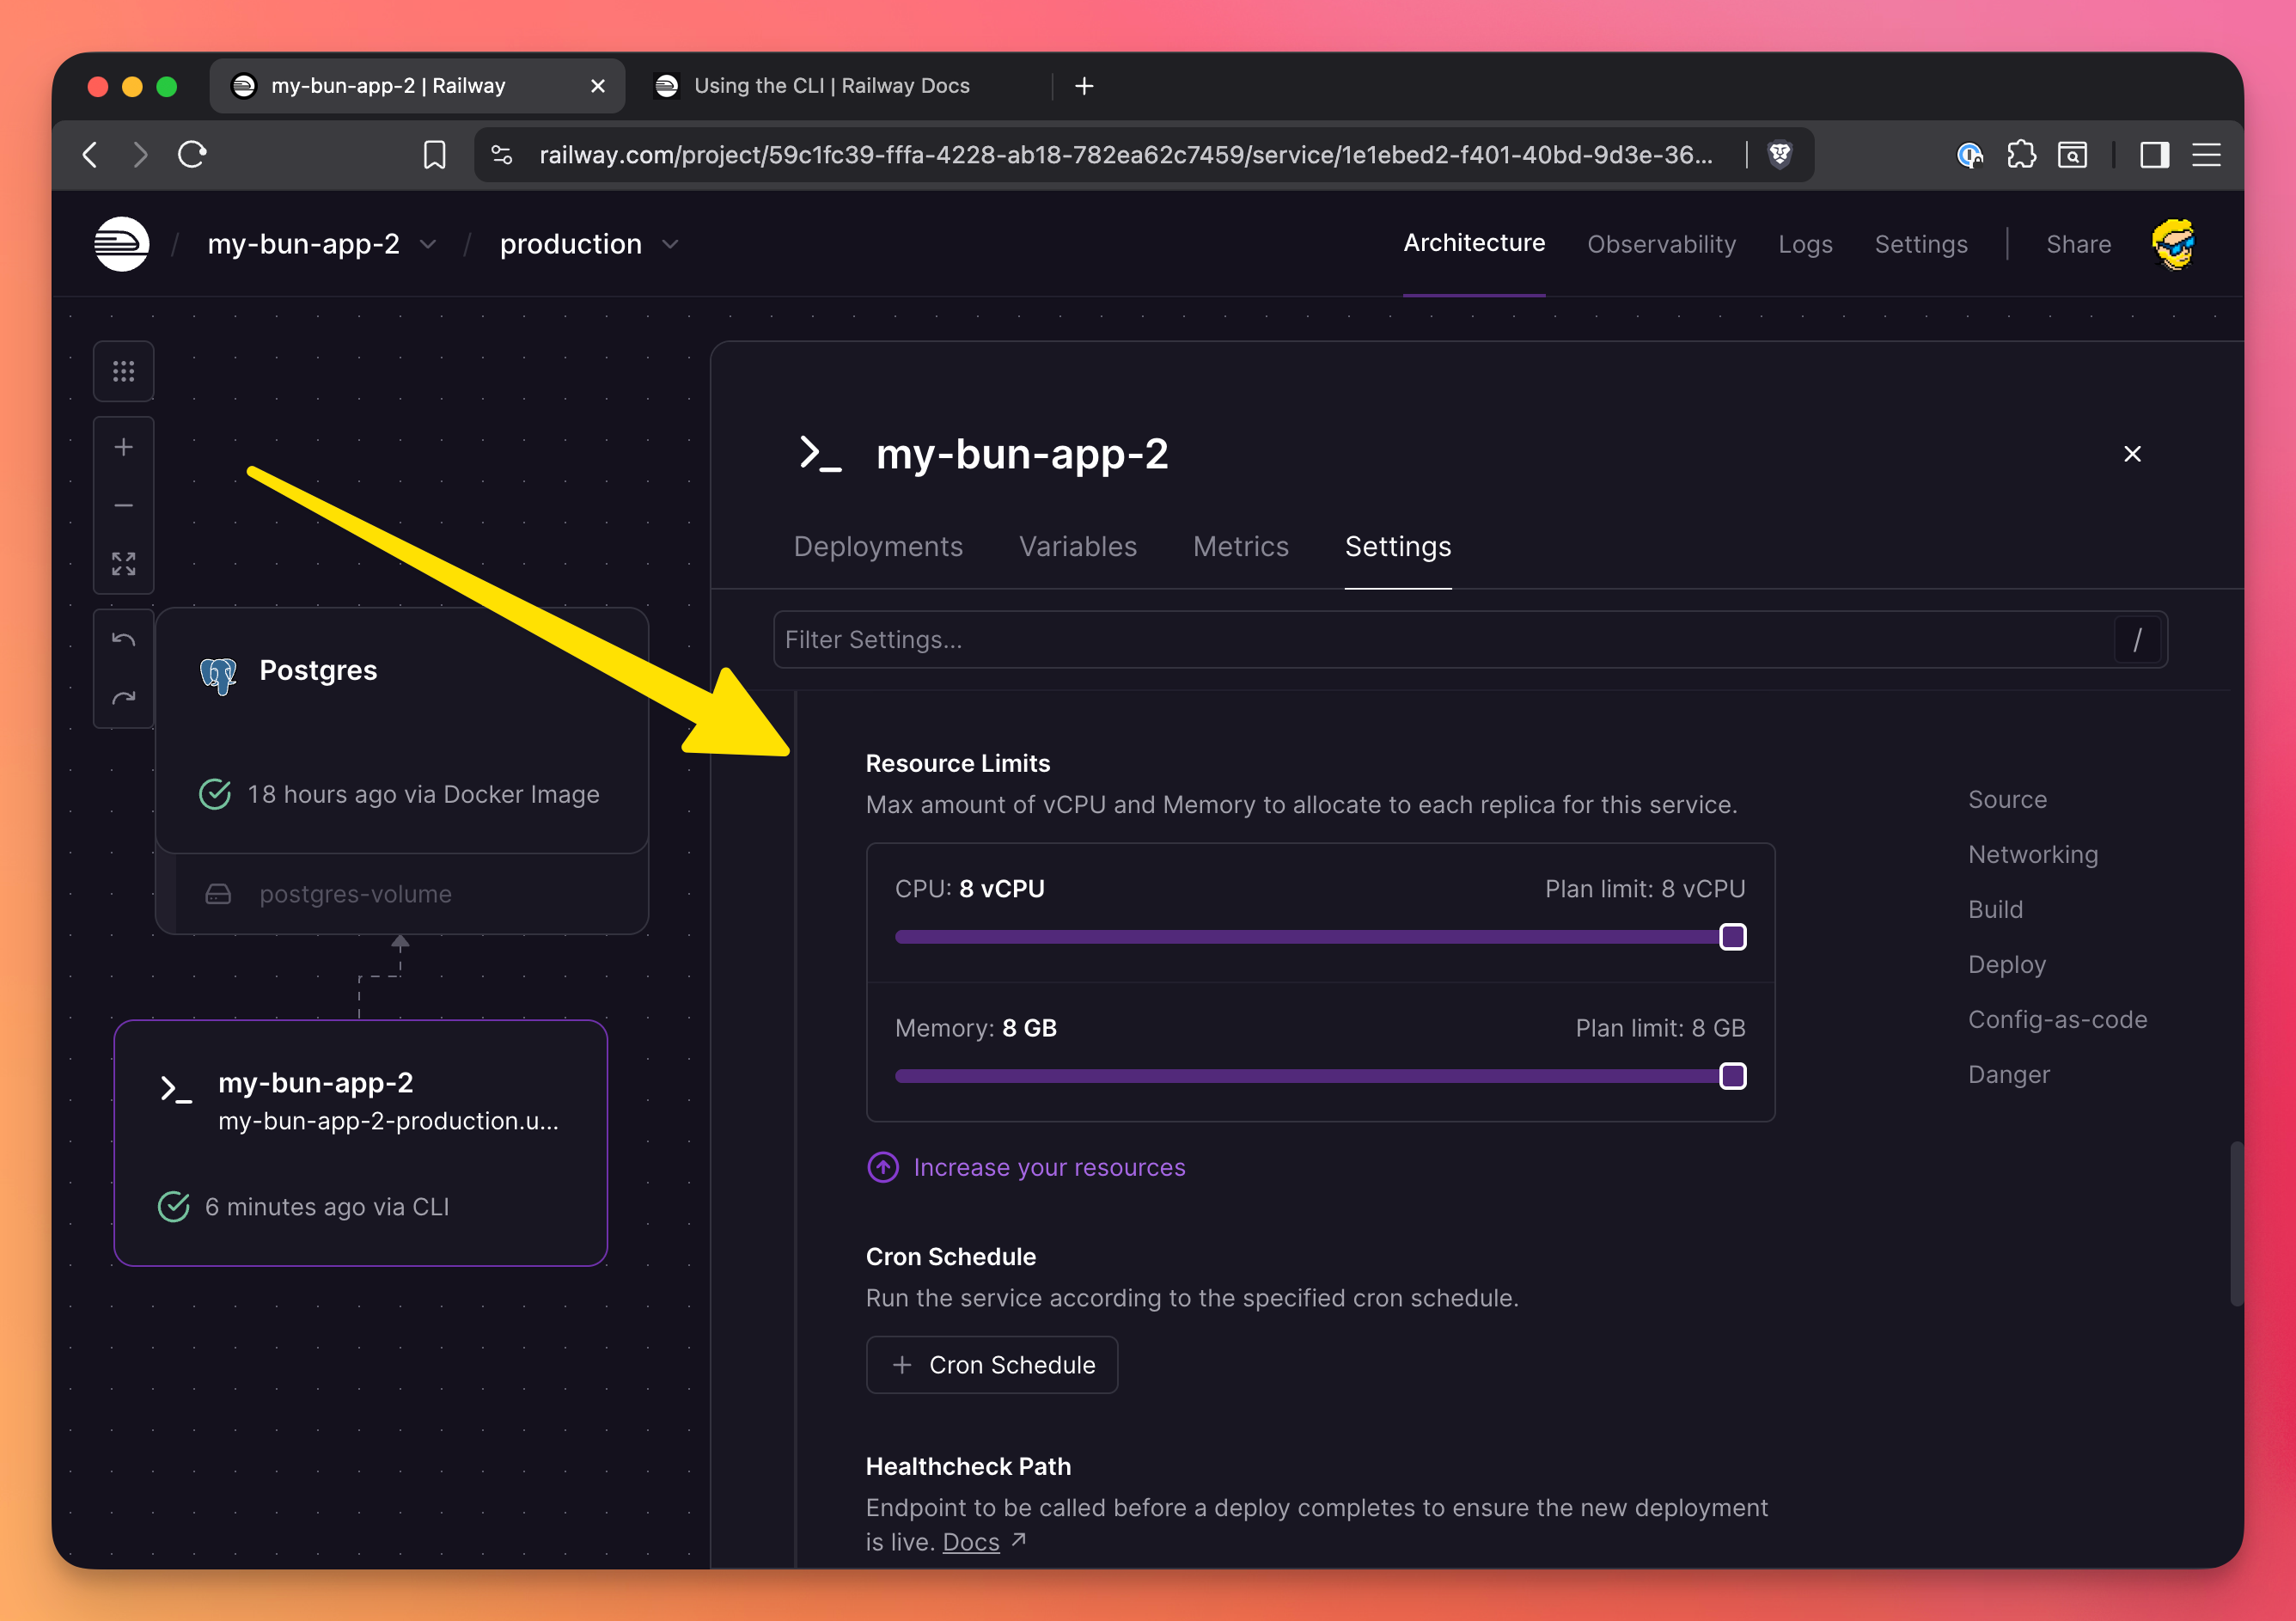
Set resource limits
By default, Railway gives your service reasonable resources. But you can adjust CPU and memory limits in the service settings if needed.
You do so in the “Resource Limits” settings:
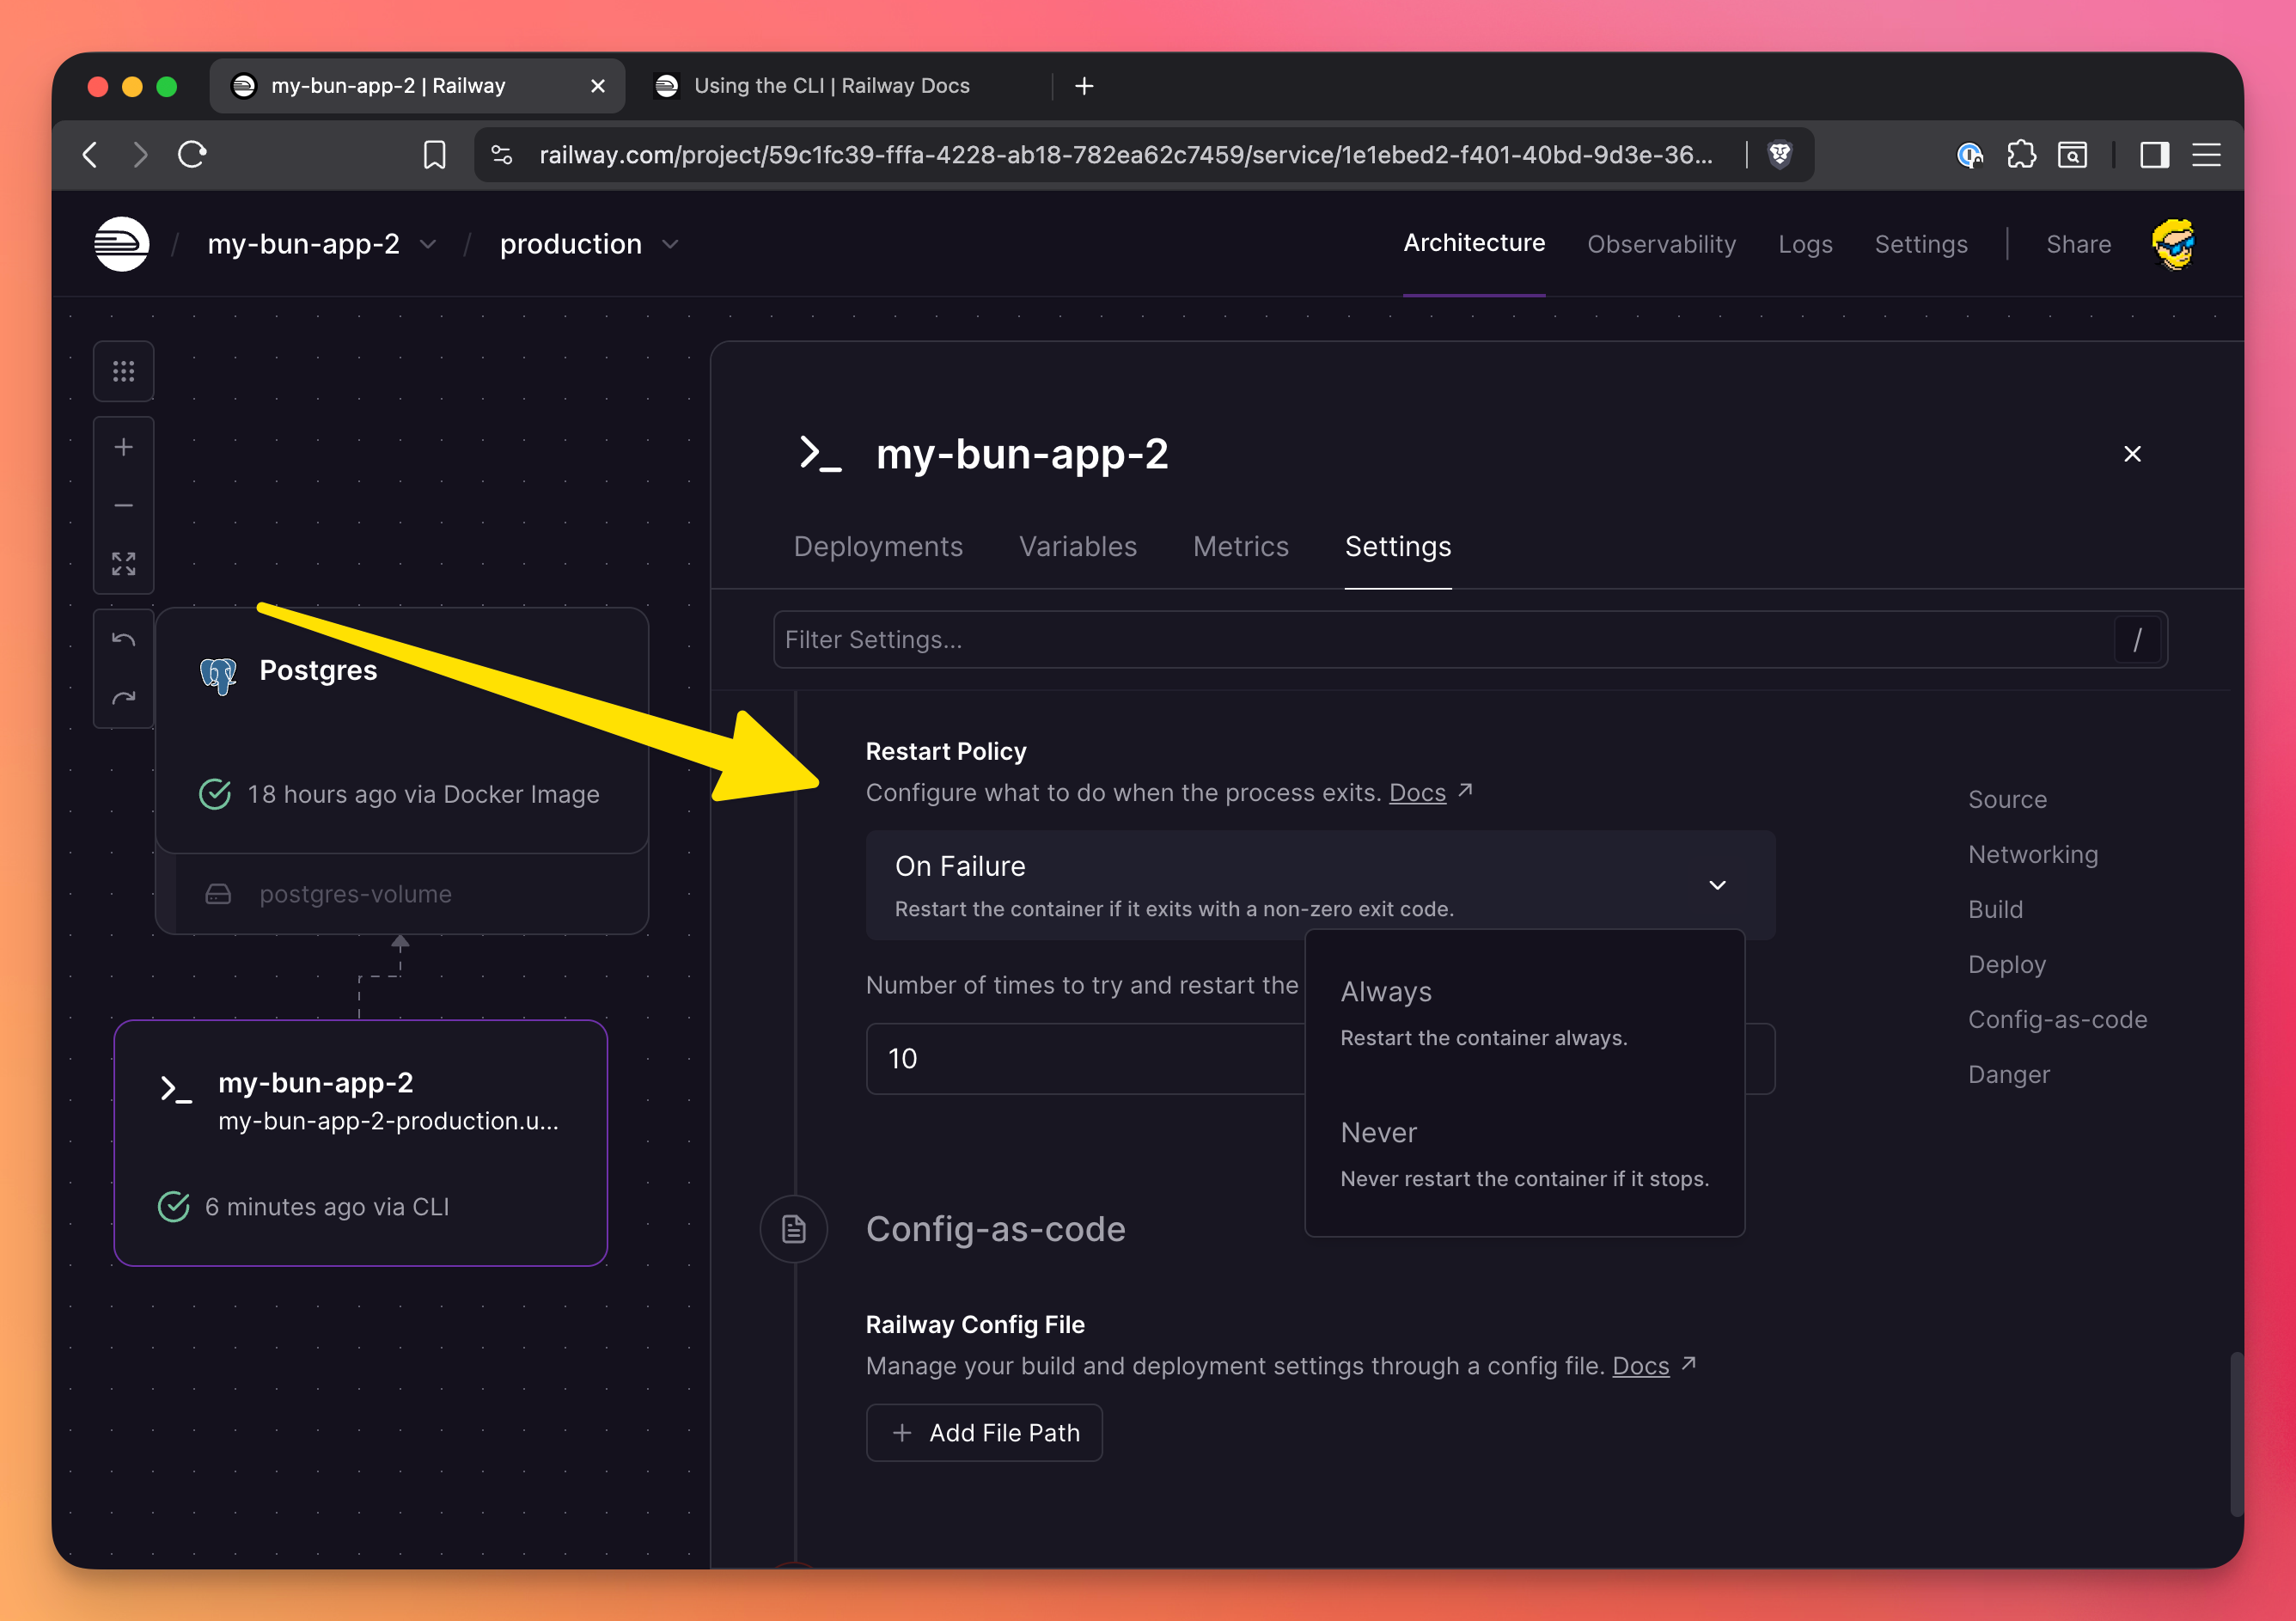
Enable auto-restart
In service settings, enable “Restart Policy” to automatically restart your service if it crashes. You can set the number of times it retries before giving up:
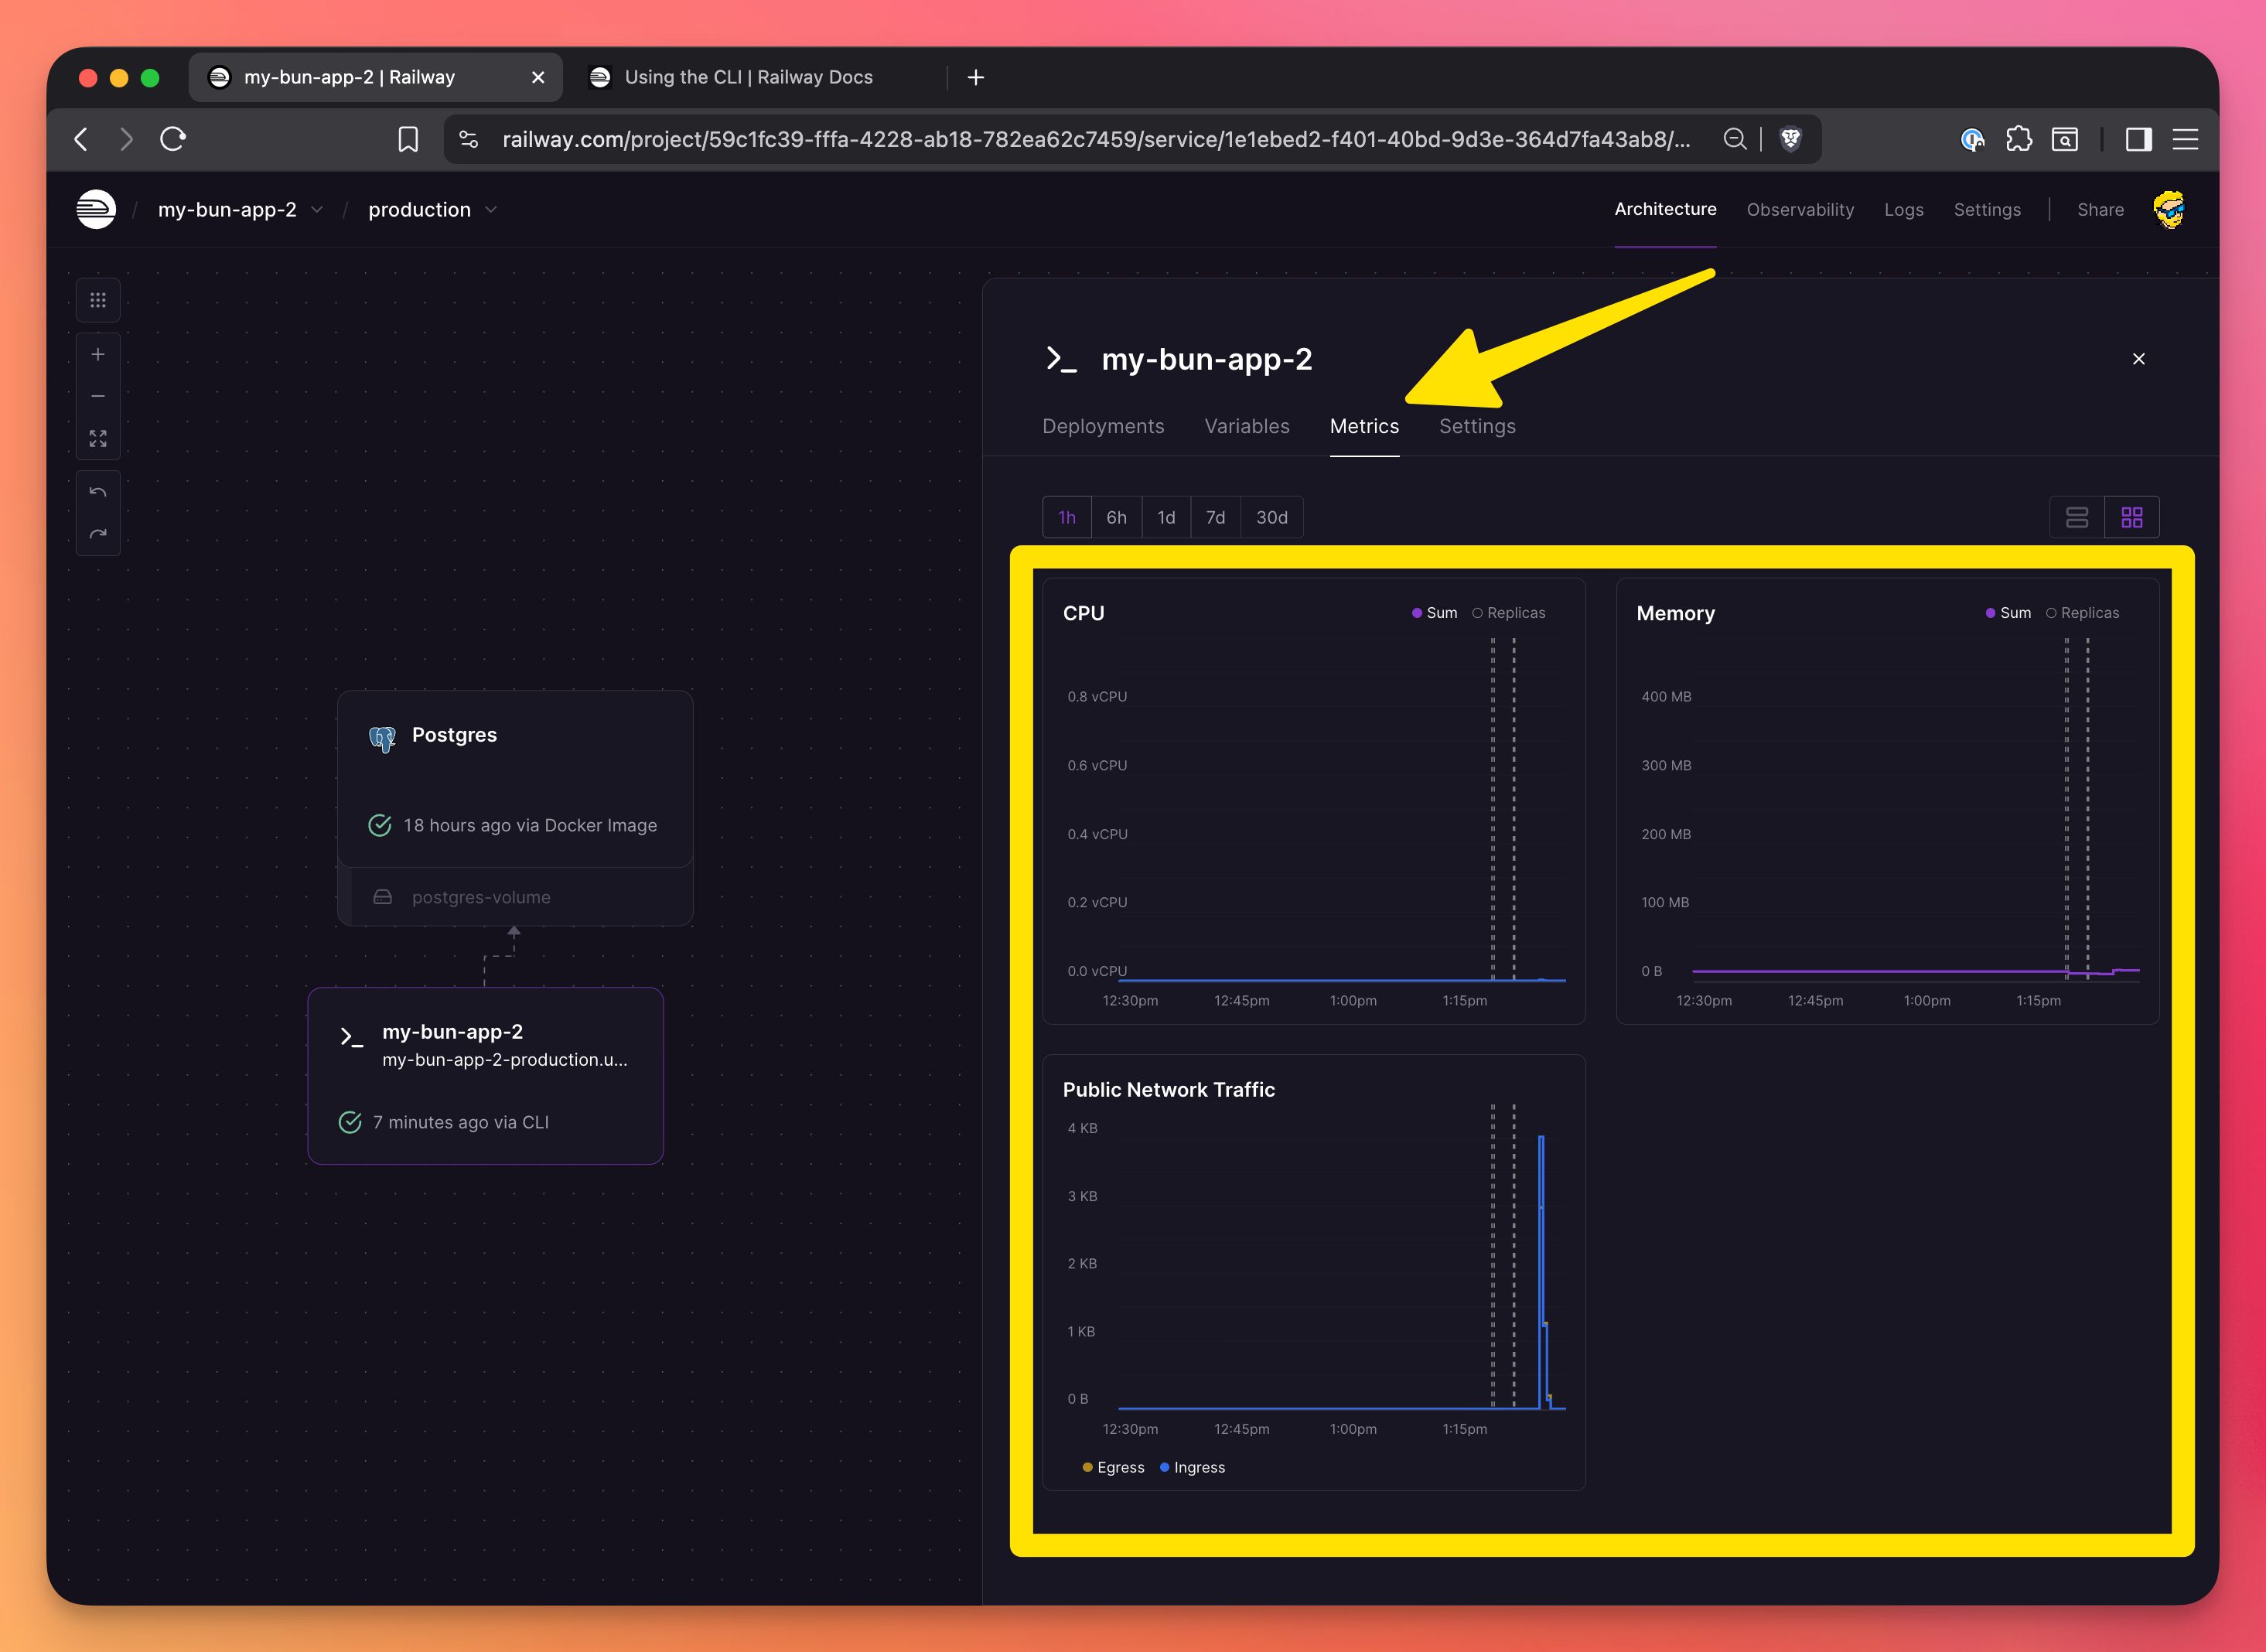
Monitor your usage
Keep an eye on your usage metrics dashboard to avoid surprises. Railway sends you alerts when you’re approaching your limits. You can see CPU/Memory/Network metrics per-app:
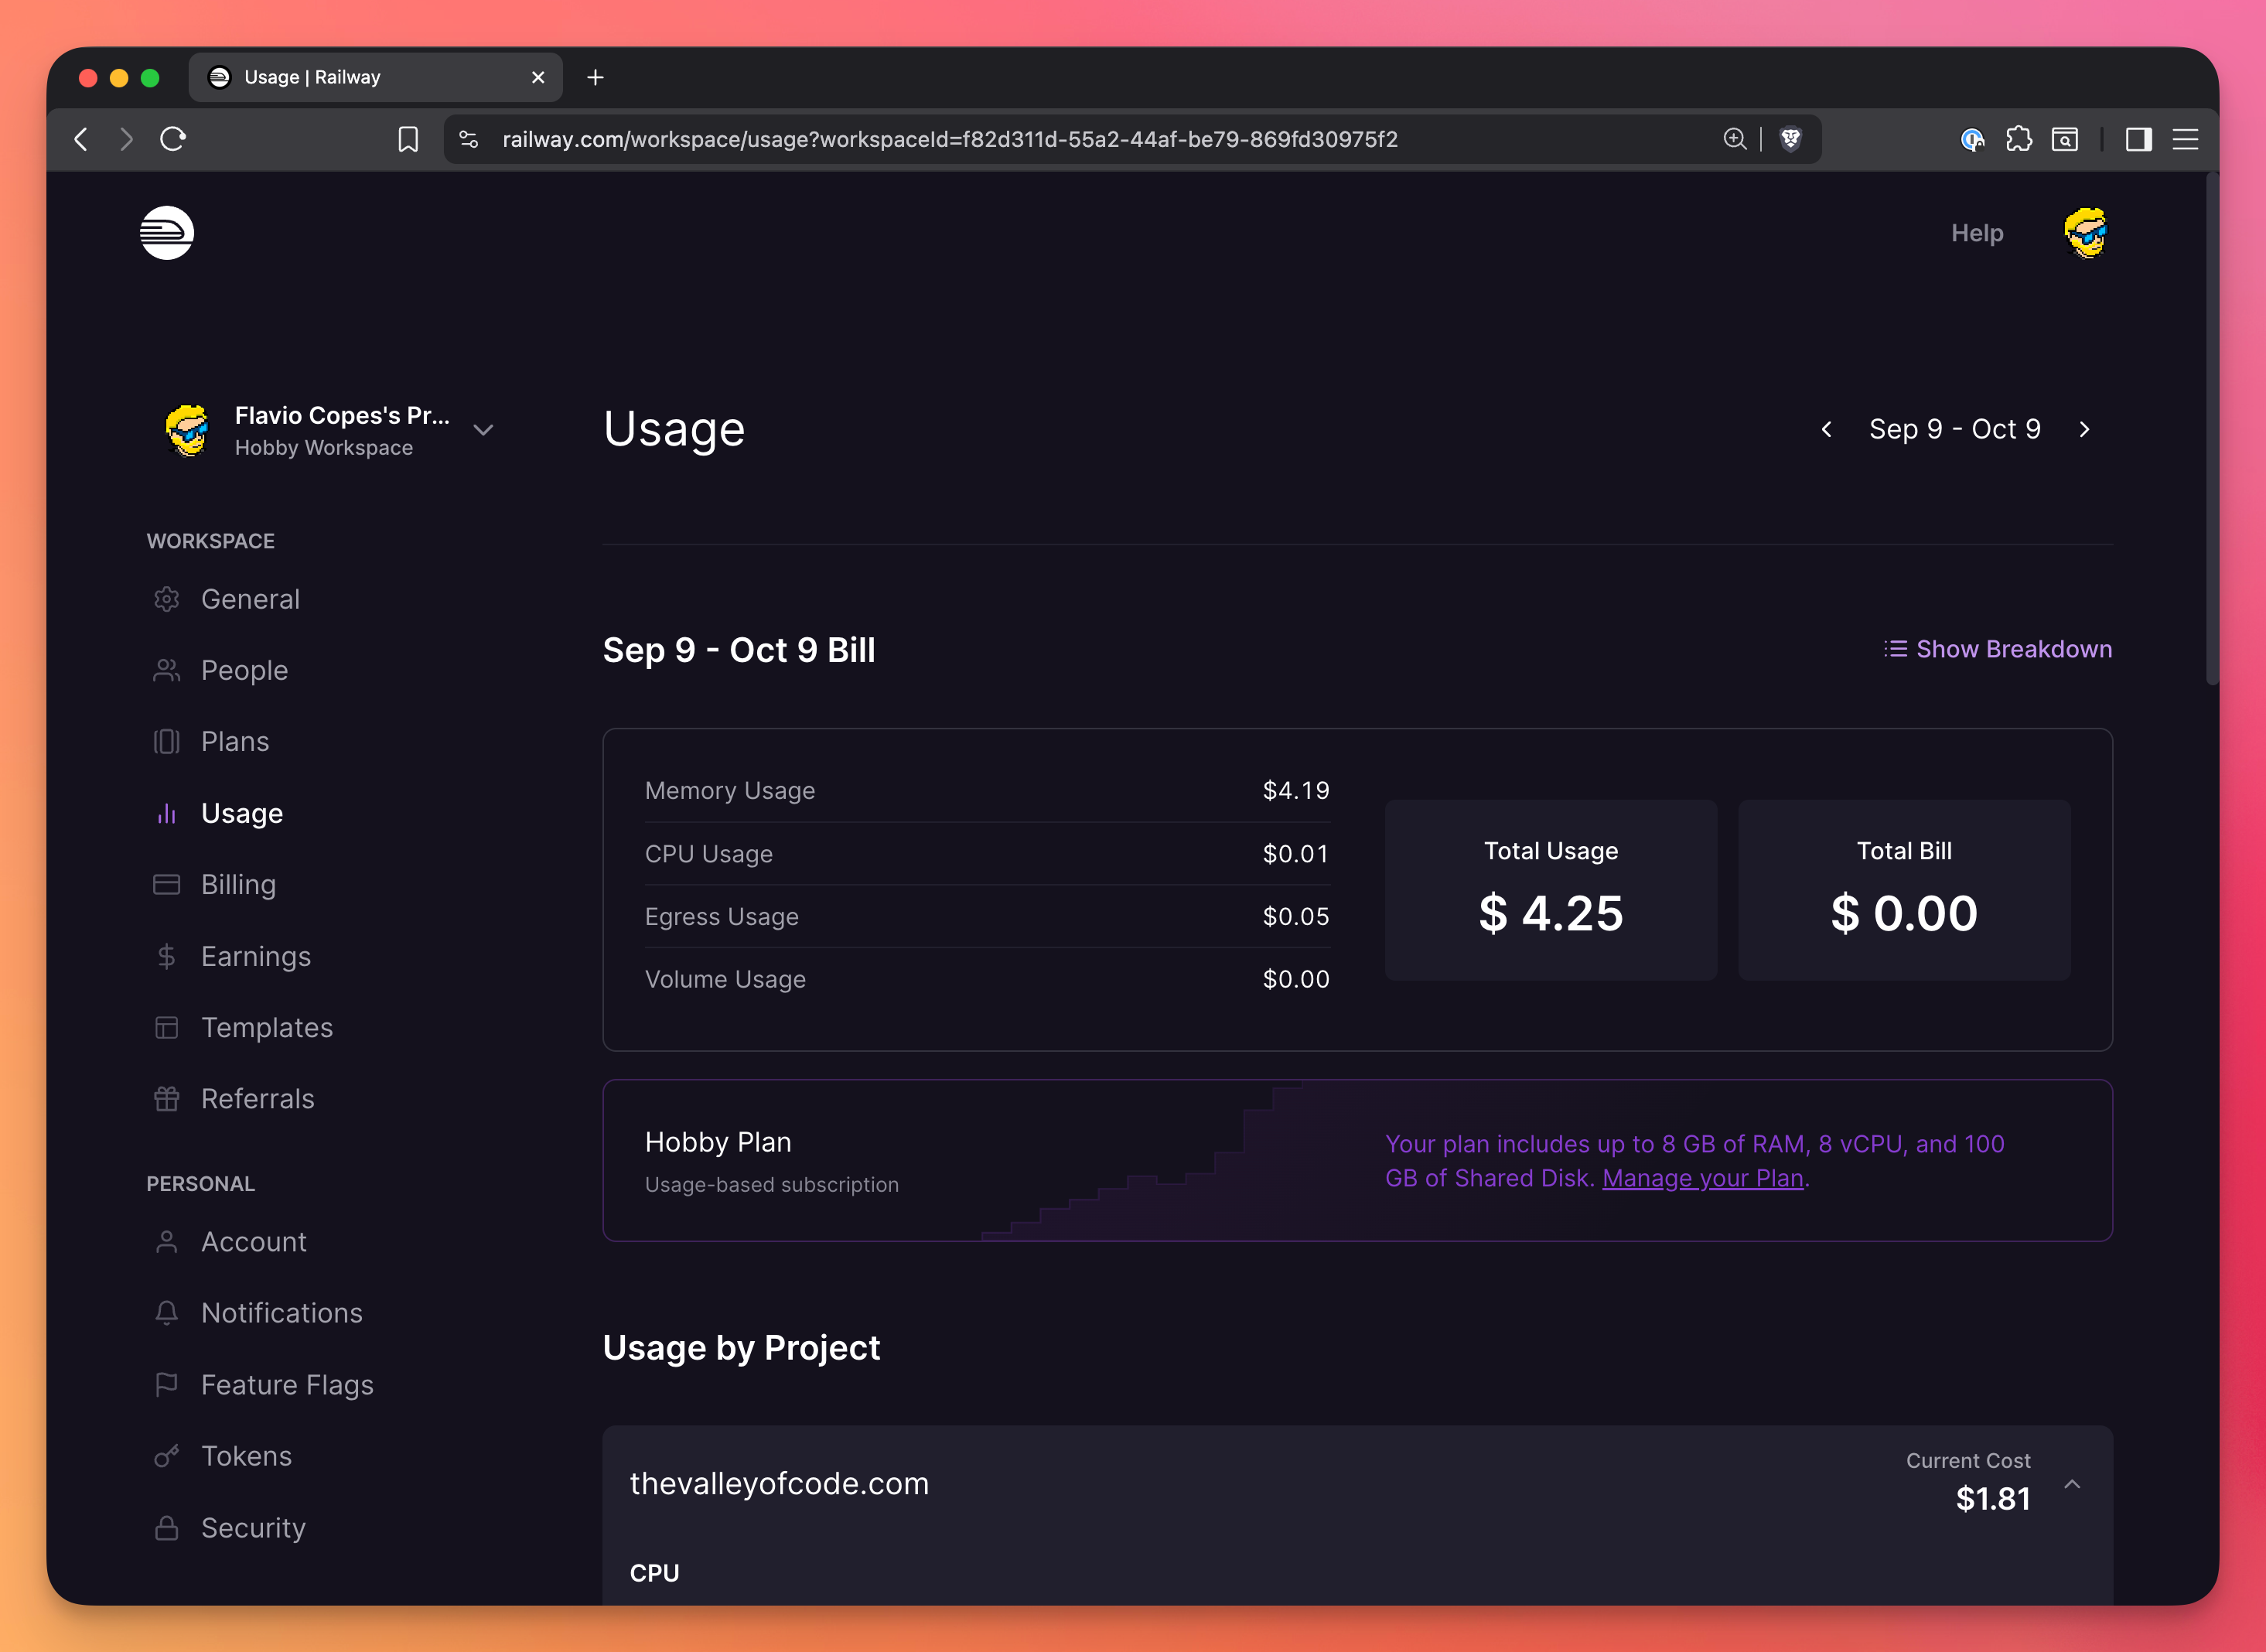
and also you can see very detailed cost breakdown in your workspace usage settings, both global:
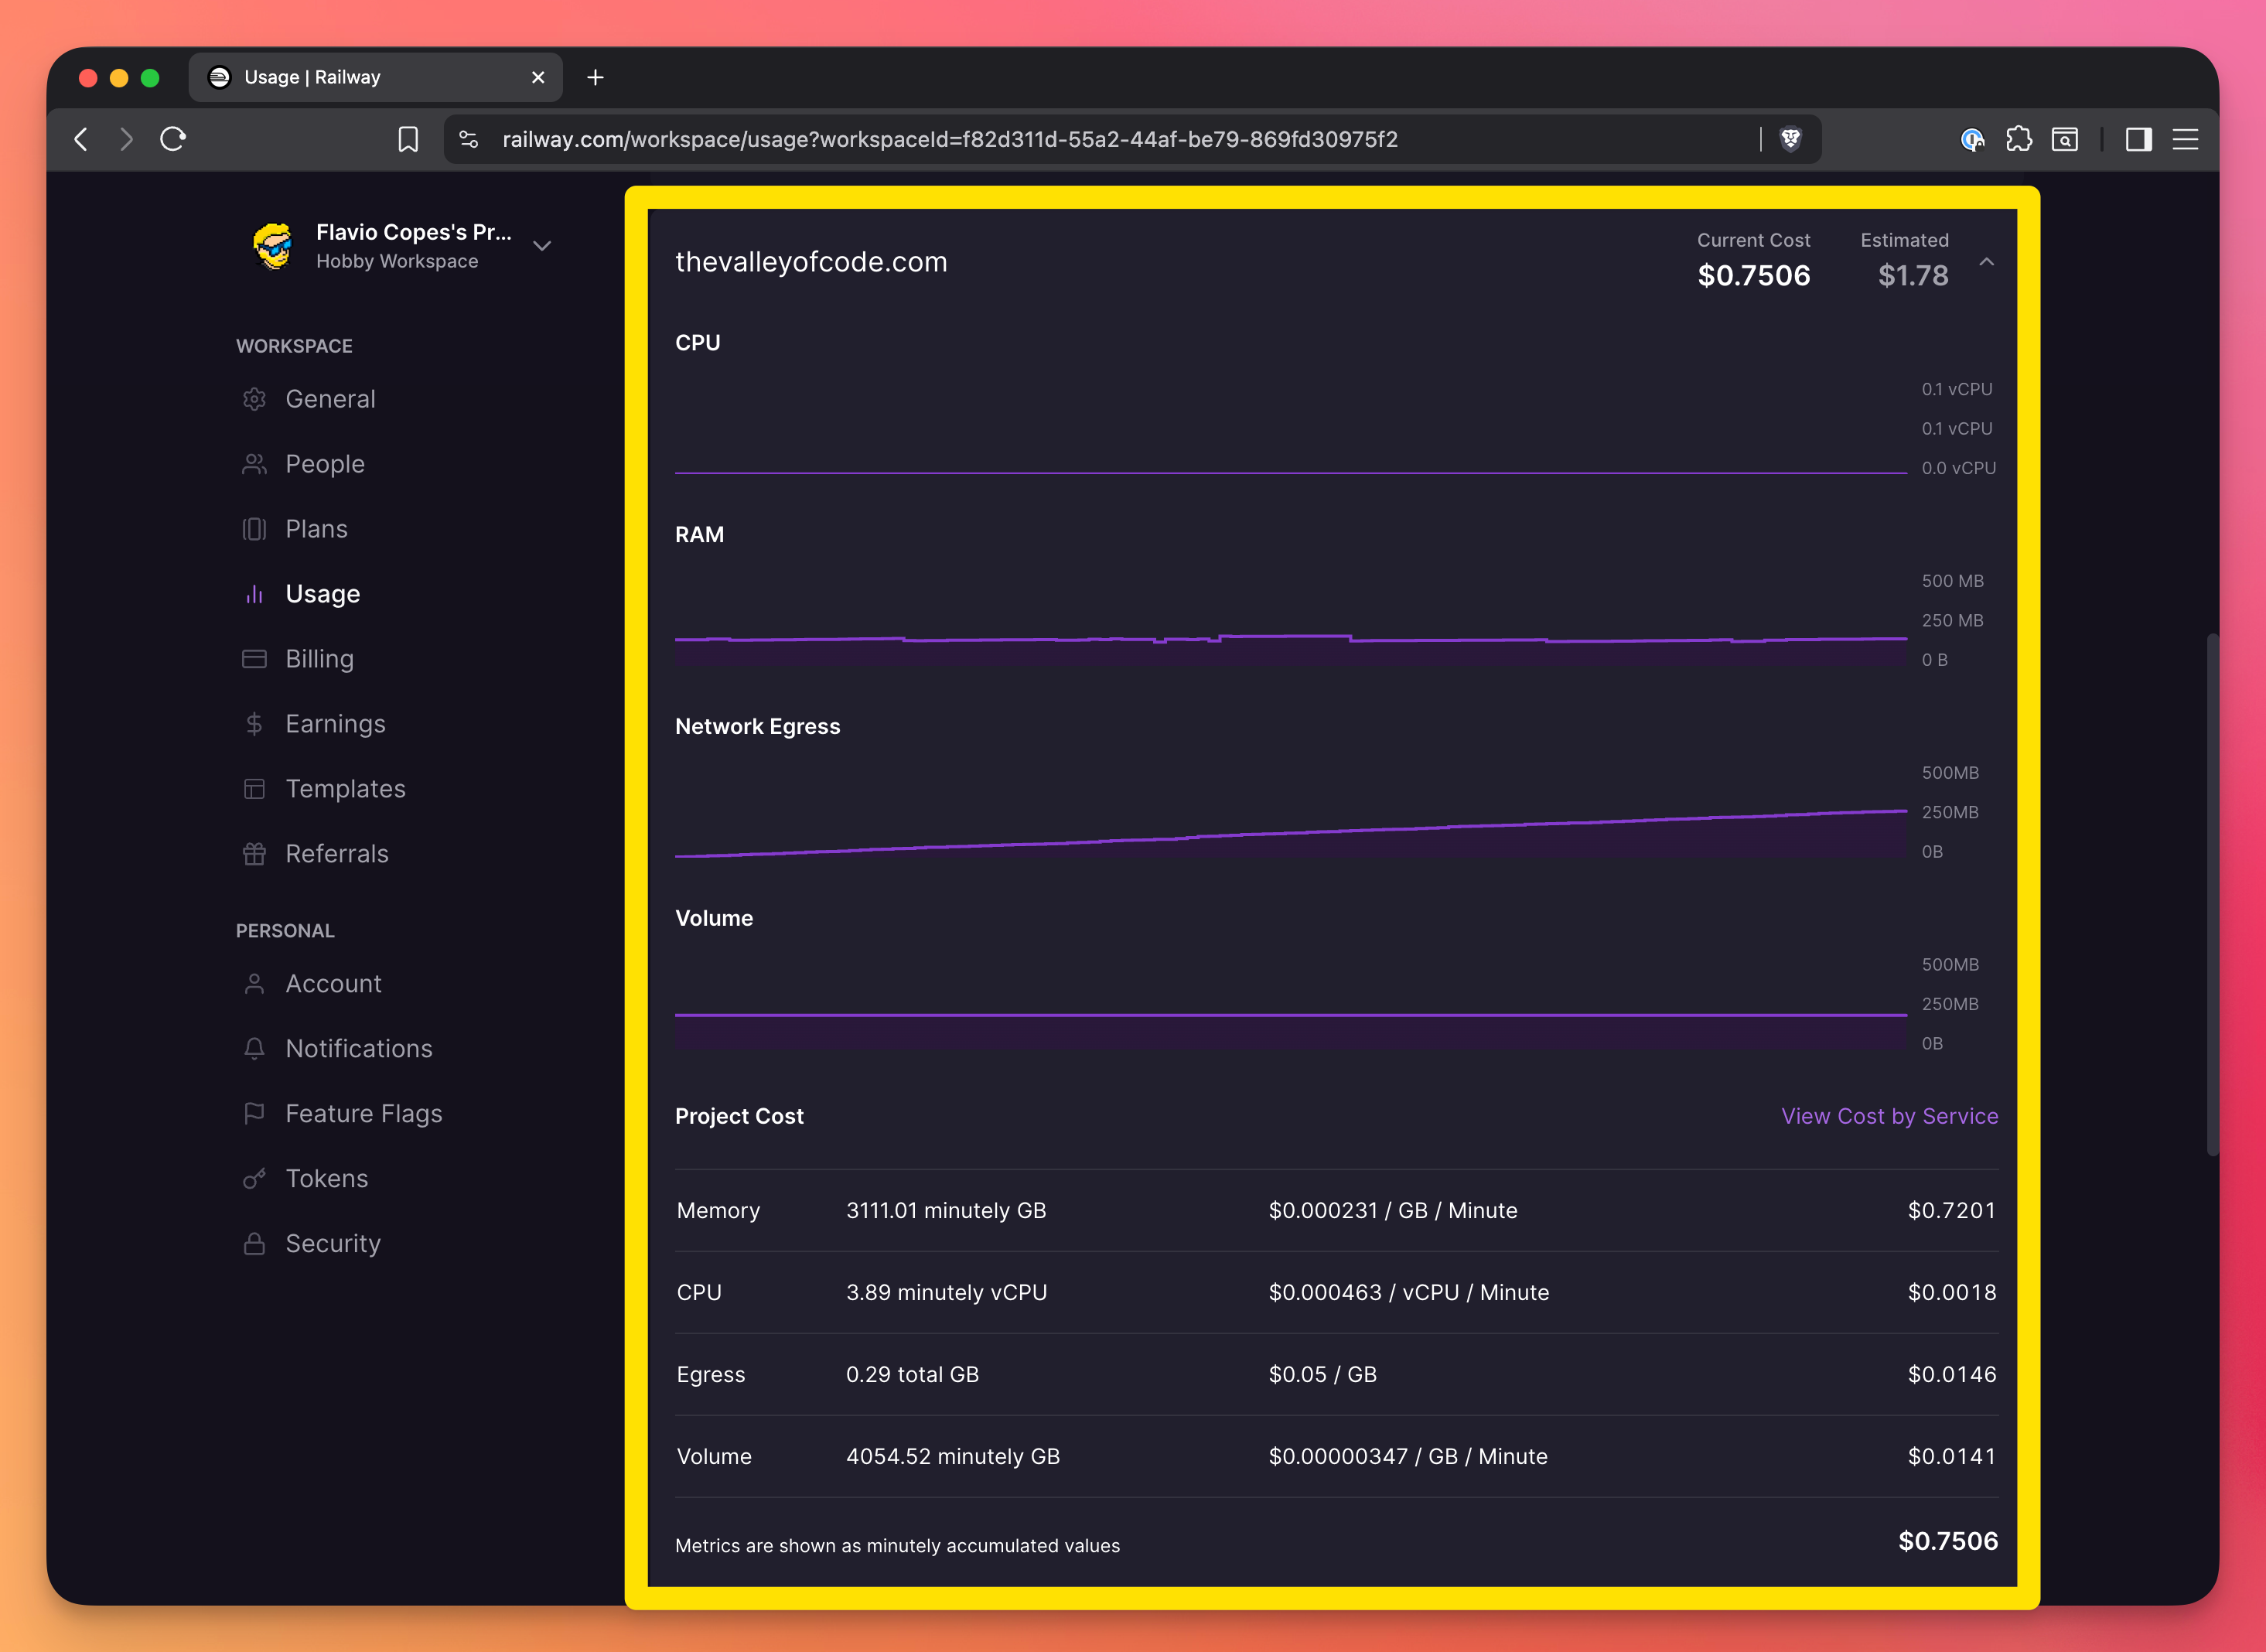
and per-project:
Database connection issues
Make sure you’re using the DATABASE_URL environment variable that Railway provides. Don’t hardcode connection strings.
There’s a lot more
There’s a lot more in Railway that I’ve discussed here, but I hope this was a good introduction.
Conclusion
Railway is a really fast and easy way to deploy web applications that need to run services and deploy resources like databases.
It’s also quite cheap.
It removes all the friction between writing code and having it running in production.
If you’re building a side project, a startup MVP, or anything that needs to be deployed quickly, Railway is worth trying.
I wrote 20 books to help you become a better developer:
- JavaScript Handbook
- TypeScript Handbook
- CSS Handbook
- Node.js Handbook
- Astro Handbook
- HTML Handbook
- Next.js Pages Router Handbook
- Alpine.js Handbook
- HTMX Handbook
- React Handbook
- SQL Handbook
- Git Cheat Sheet
- Laravel Handbook
- Express Handbook
- Swift Handbook
- Go Handbook
- PHP Handbook
- Python Handbook
- Linux/Mac CLI Commands Handbook
- C Handbook