The complete guide to Codex
By Flavio Copes
How to use Codex, OpenAI's coding agent: the desktop app from first prompt to review, then the CLI, skills, plugins, worktrees, and scheduled tasks.
Codex is OpenAI’s coding agent. You point it at a project and tell it what you want to do.
It can read the code, edit files, run commands, start a development server, and check its own work. It also has access to your Git history, project instructions, and any other tools you connect.
We’ll start with the desktop app. This is where I use Codex most, and it puts the chat, files, terminal, browser, and Git diff in the same window. We’ll get to the CLI later.
The screenshots were taken in September 2026, and I checked every workflow against the official Codex documentation at the same time. Codex changes quickly, so some buttons might have moved by the time you read this.
What makes Codex different from ChatGPT
In a regular ChatGPT conversation, you ask a question and get an answer. Codex goes into your project and does the work.
It can inspect the repository, change several files, run the tests, open the result in a browser, and fix what it finds.
The basic loop is:
you describe the result
        ↓
Codex reads the project
        ↓
Codex edits and runs commands
        ↓
Codex verifies the result
        ↓
you review the changes
I treat it like a developer who just joined the project. I explain what I want, point it at the useful context, and say how I will decide the work is done.
If this workflow is new to you, my free AI Fundamentals course explains agents, tools, context, permissions, and verification from the beginning.
What you need
Codex is included in every ChatGPT plan, the Free one too. Checked in October 2026, the individual plans are Free at $0, Go at $8 a month, Plus at $20, and Pro at $100, $200 or $500 a month. Business and Enterprise plans include it as well.
Free and Go give you Codex in the desktop app with GPT-6 Luna, and that access is still rolling out. Plus adds Codex in the CLI, the IDE extension, on the web and on iOS, the cloud features like code review, and the GPT-6.1 Sol model. Among the individual plans, only Pro at $500 includes GPT-6 Astra Ultrafast, a mode that generates tokens up to 8x faster than Astra at standard speed.
The plan gives you a usage allowance that Codex shares with ChatGPT Work, so a long agent session and your regular chats draw from the same pool. How far it goes depends on the model, the size of the task, and whether it runs locally or in the cloud. The usage page in the app shows where you stand and when the limits reset. Check it every week or two until you know your pace.
You can also run Codex with an OpenAI API key. Usage is then billed at API rates instead of counting against a plan, but the cloud features that need a ChatGPT account, such as automatic GitHub code review, don’t work with a key.
Start with the desktop app
Codex lives inside the ChatGPT desktop app, as its own mode next to Chat and Work. The download is called ChatGPT, and Codex is one of the three modes you can switch to. The app is available on macOS, Windows, and Linux, and it’s the most complete way to use Codex visually.
In this guide I call it the Codex desktop app, because that’s the mode we’re in the whole time.
You can add local projects and run several chats. You can also inspect diffs, open files, use a terminal, preview web apps, install plugins, and create scheduled tasks without leaving the app.
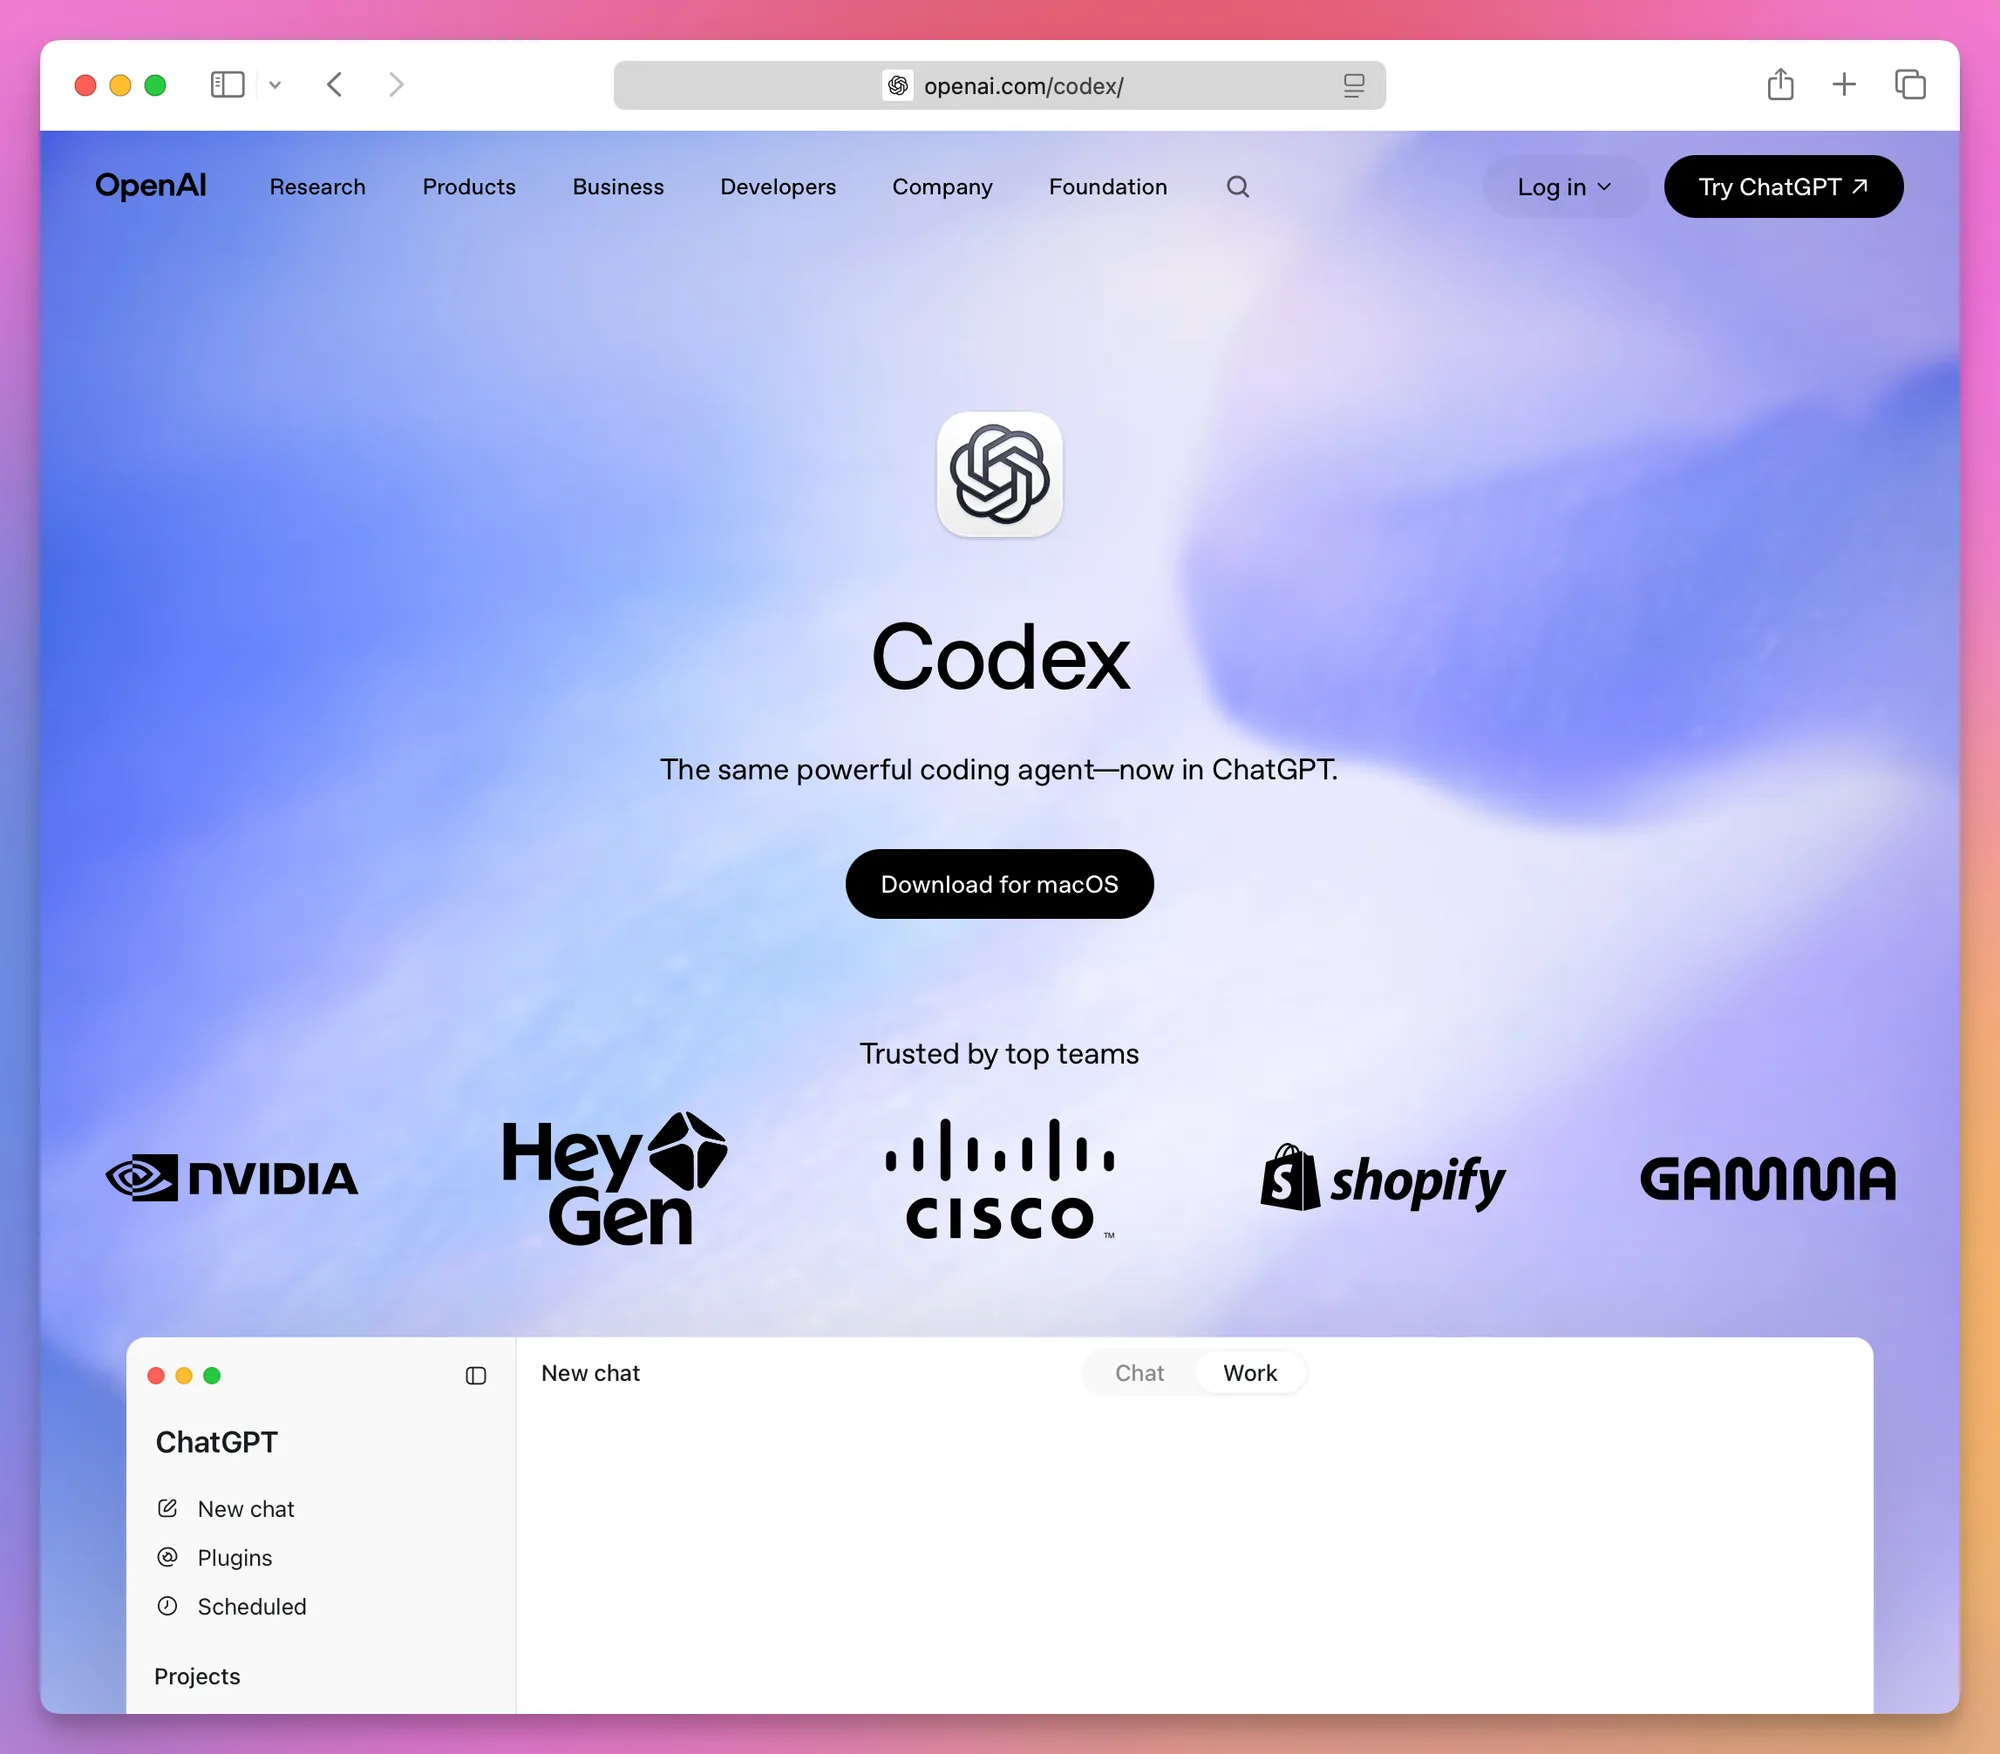
Download it from openai.com/codex, sign in, and switch to Codex.
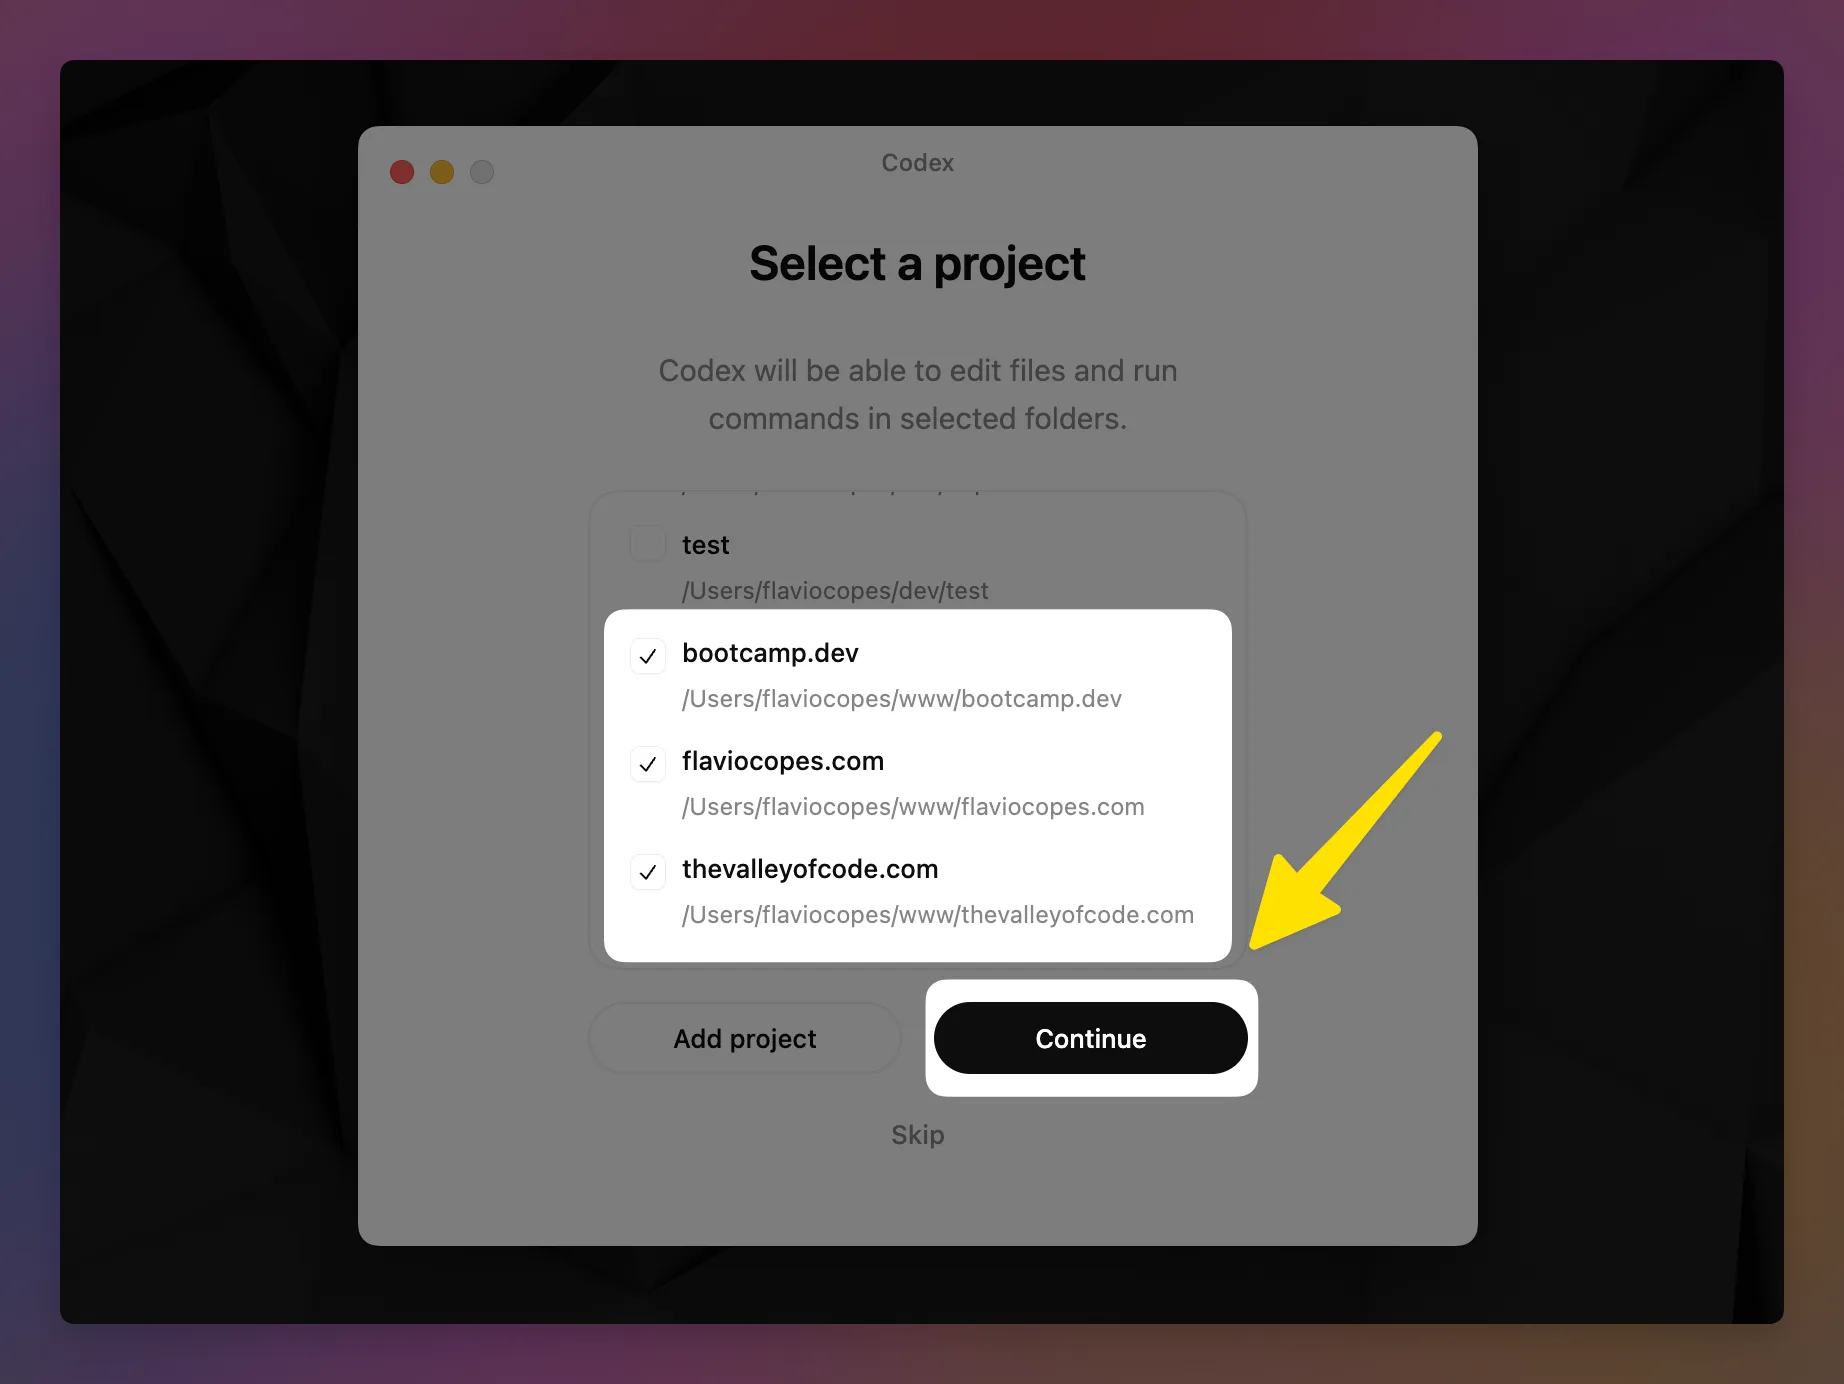
Then add the folder you want to work on. Codex lists the Git repositories you used recently, but you can pick any folder from disk.
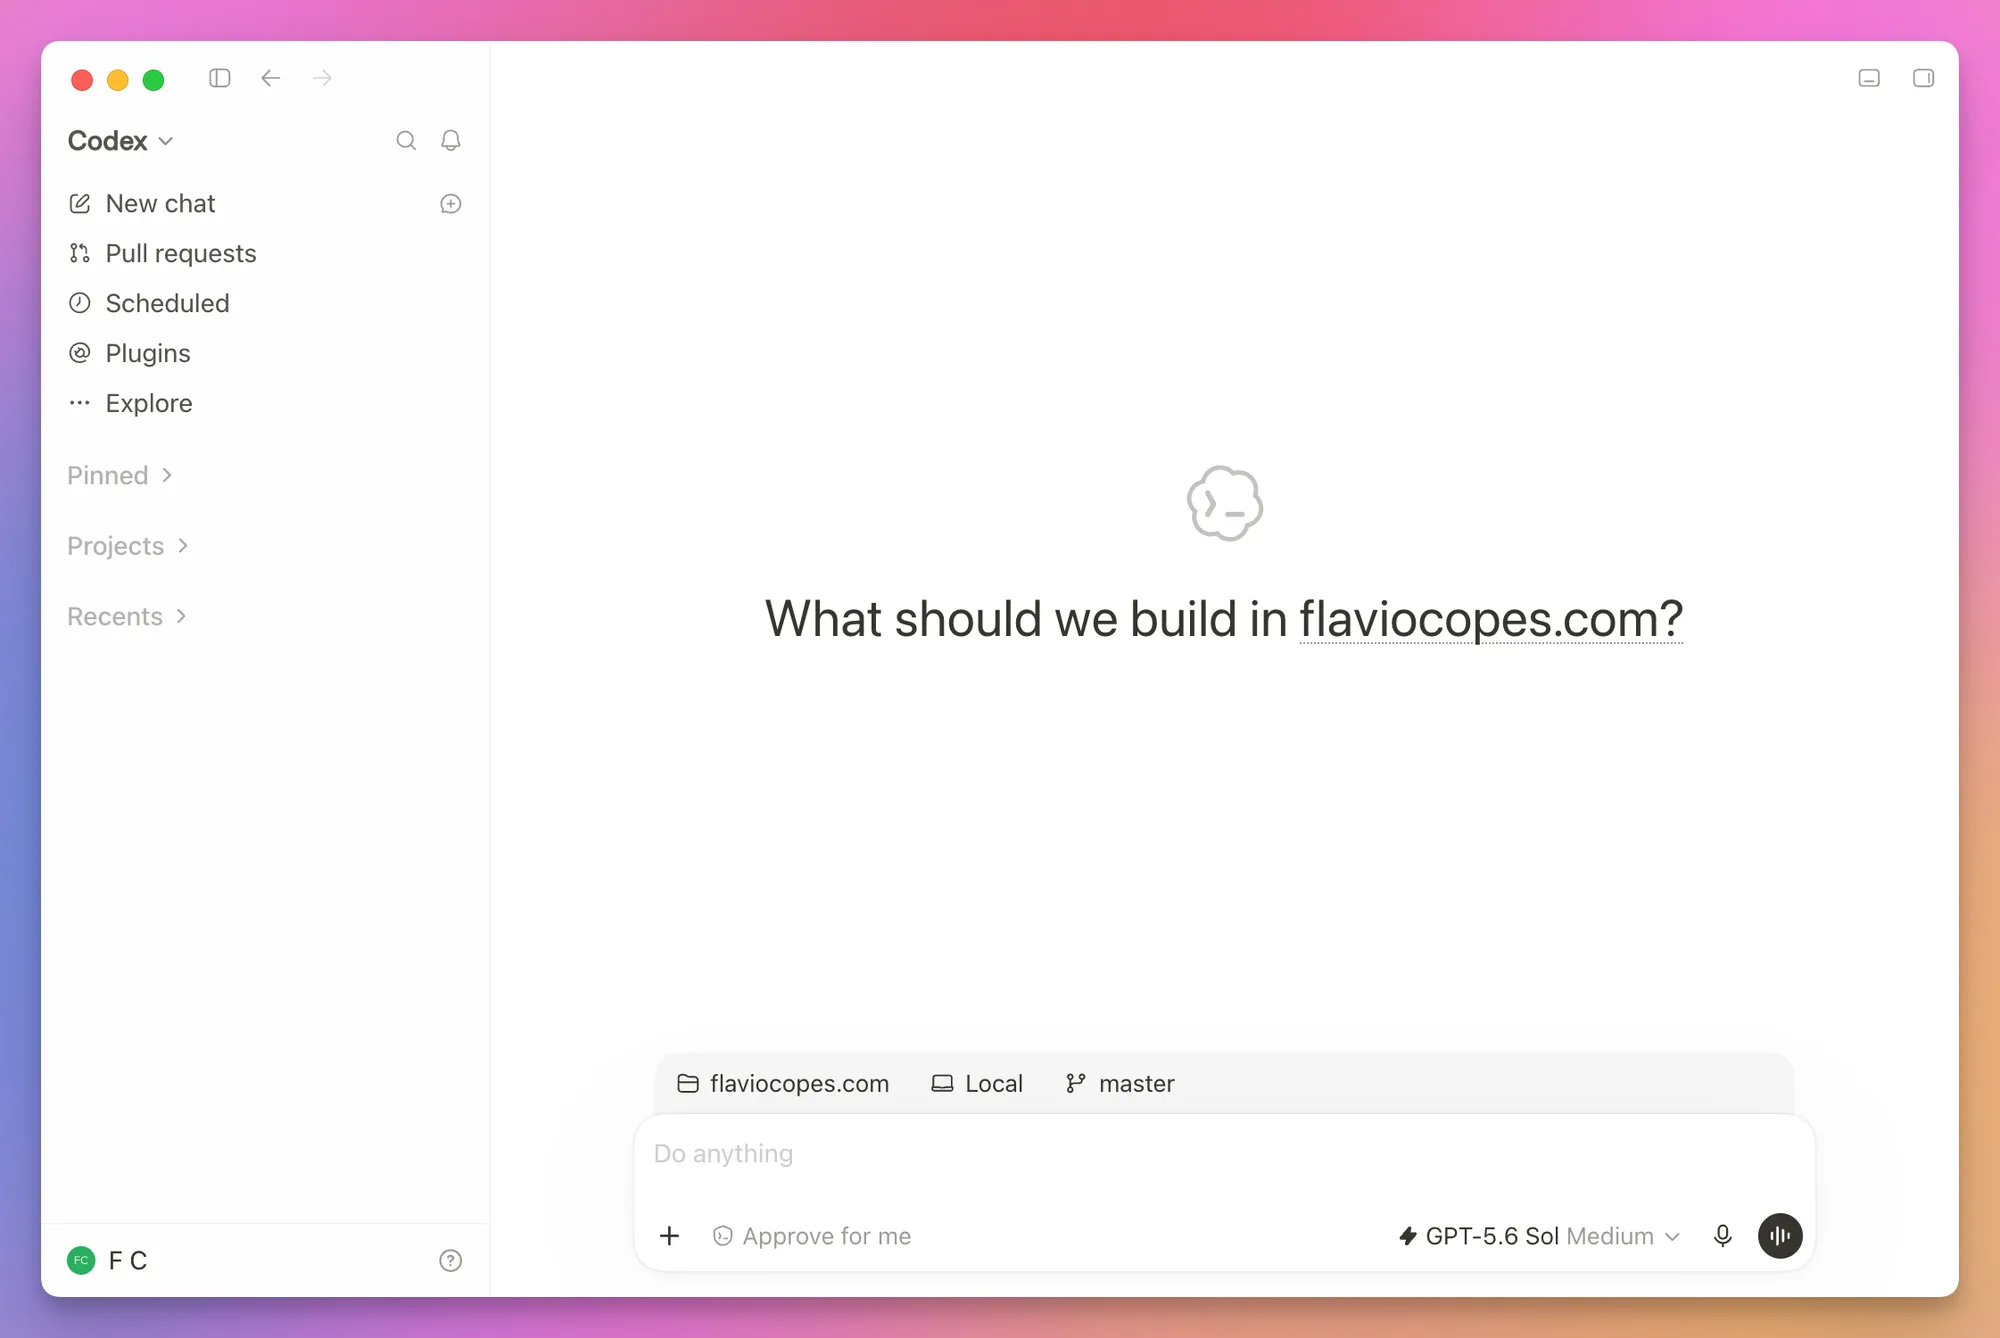
Once the app opens, you can start a chat or select one of your projects from the sidebar.
Before asking Codex to change anything, try a read-only question:
Explain what this project does, ELI5.This lets you see what Codex understands before it touches anything. It also finds the files that matter for the next prompt.
I like the app because I can stay in one place from the first prompt to the final review. I can also leave a long task running, move to another chat, and return when Codex needs me.
Understand the app interface
Your projects and chats are in the sidebar. You’ll also find plugins, scheduled tasks, and settings there.
Move the pointer over a project and click the new chat button.
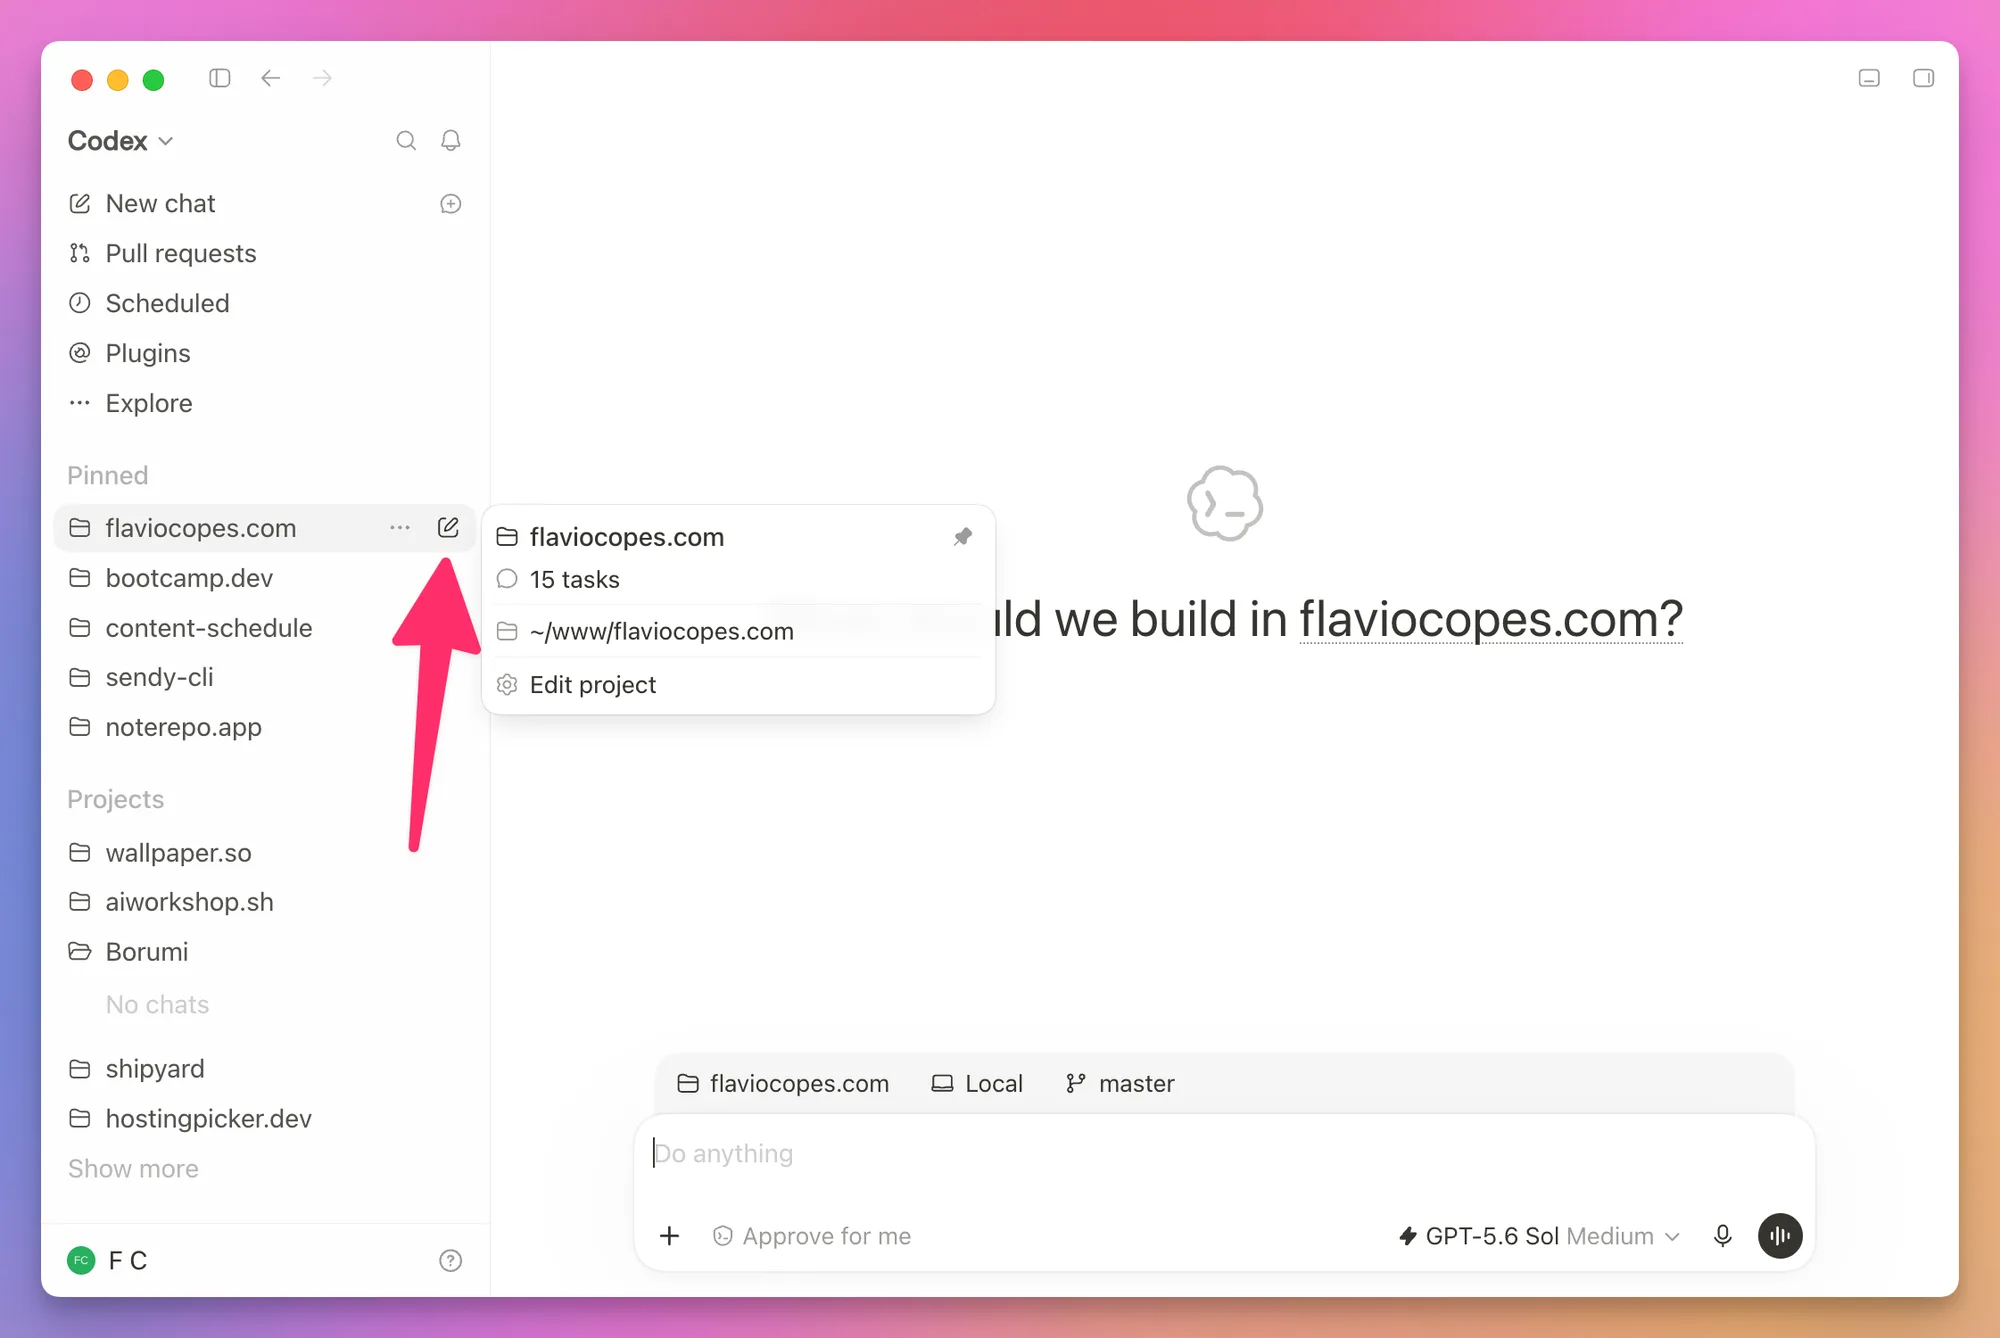
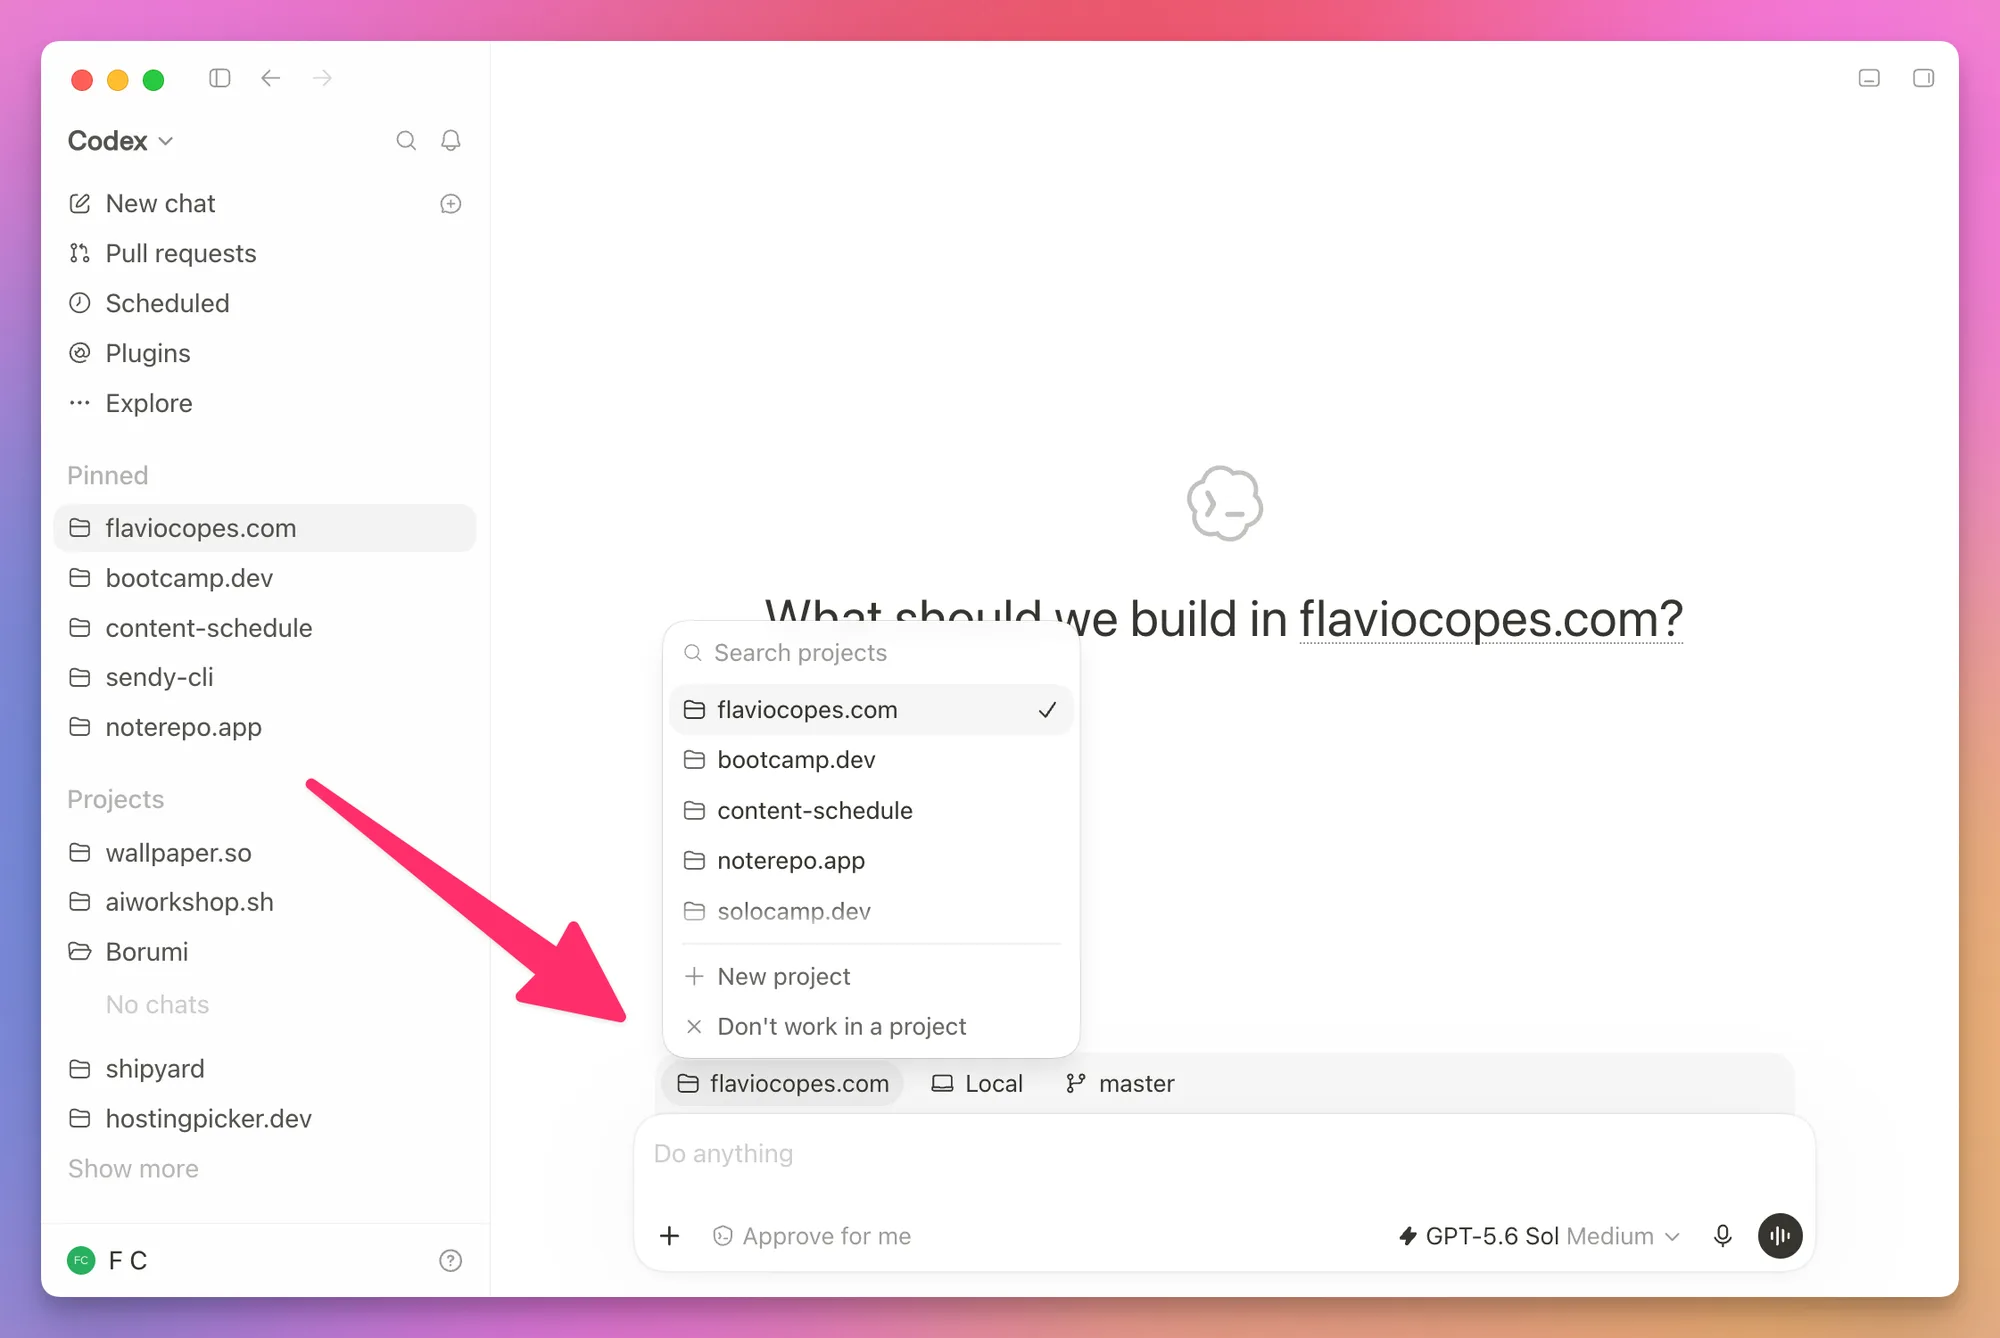
Click the project name above the prompt to switch projects, add another one, or start a chat without a project.
The conversation is in the center. Codex uses it to explain what it’s doing, ask questions, show command output, and report back when it’s done.
On the right you can open the project files, a terminal, the built-in browser, or the Git diff. I open and close these panels depending on what I’m doing.
At the bottom is the prompt panel. Besides writing your request, you can use it to:
- attach a file or image
- choose a model and reasoning level
- choose the project, environment, and branch
- change what Codex can do without asking
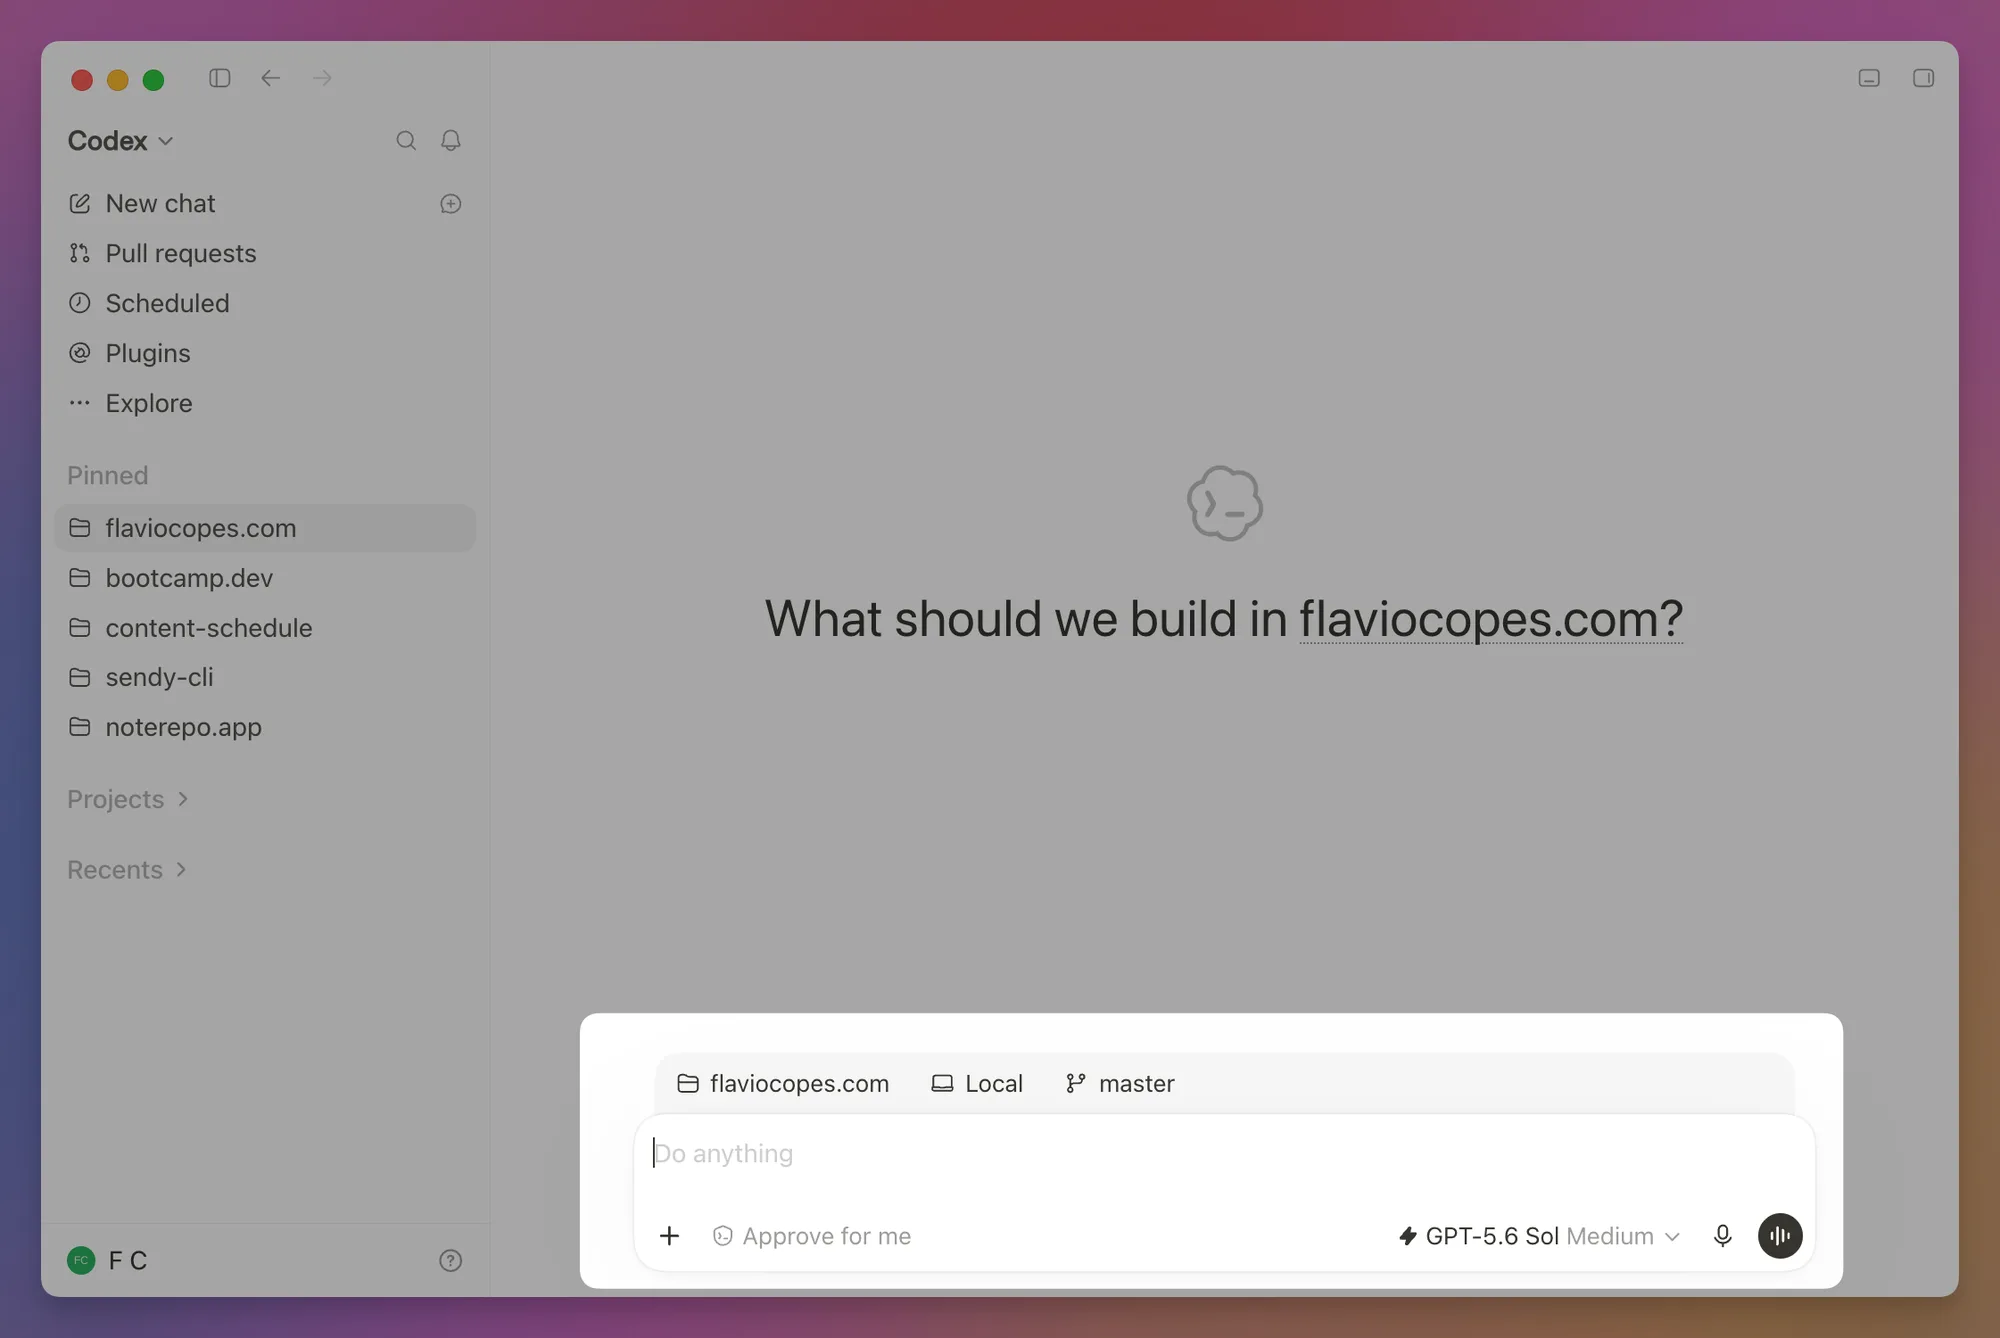
For a Git repository you also choose whether the chat works in your local checkout or in a separate worktree. We’ll look at that choice later.
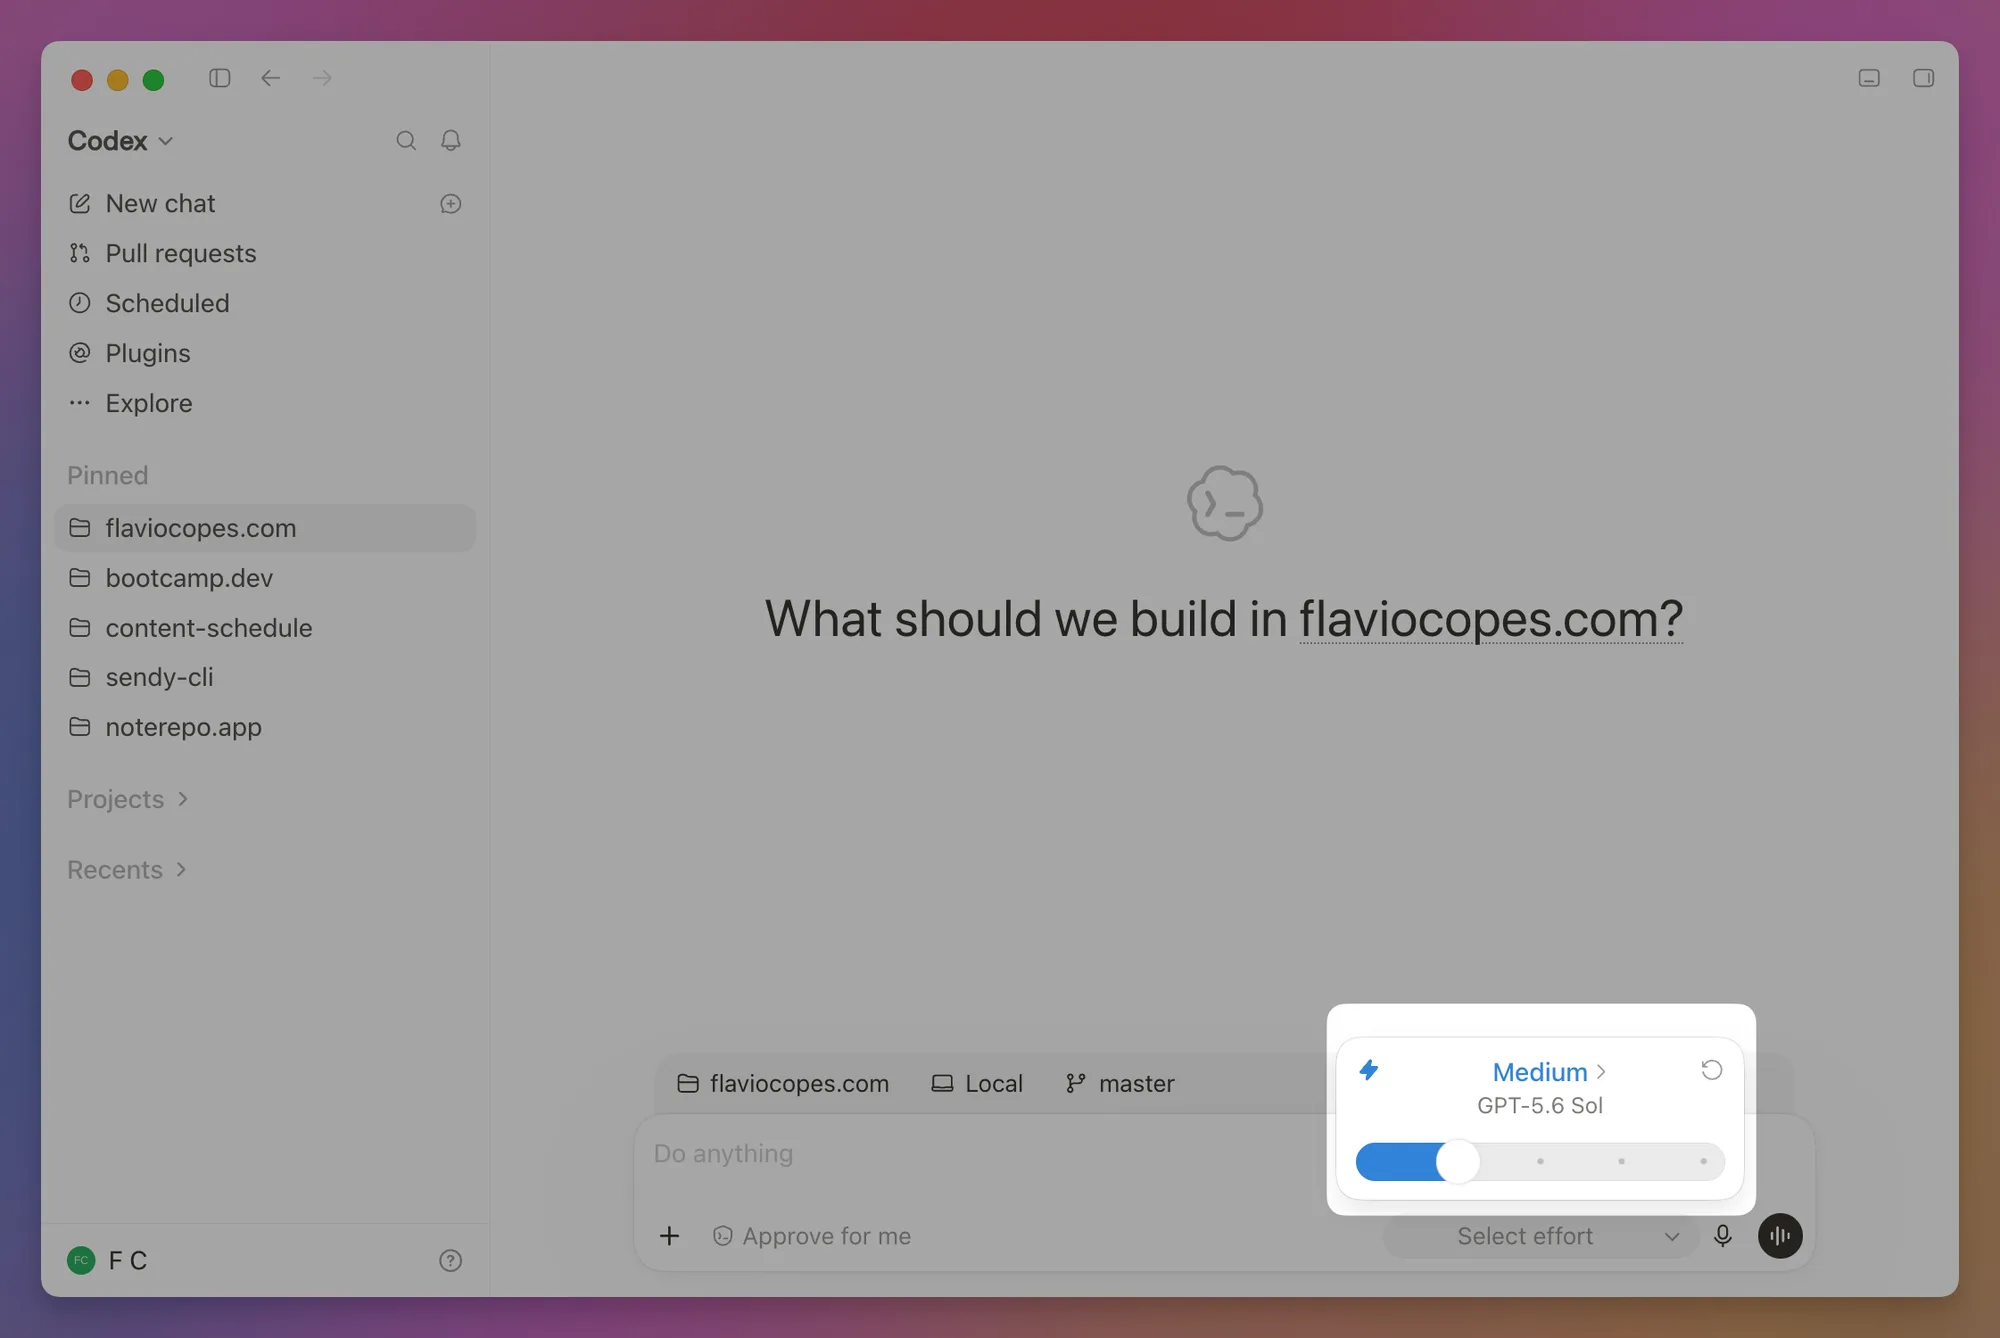
Click the reasoning level to decide how much time Codex should spend thinking about the task.
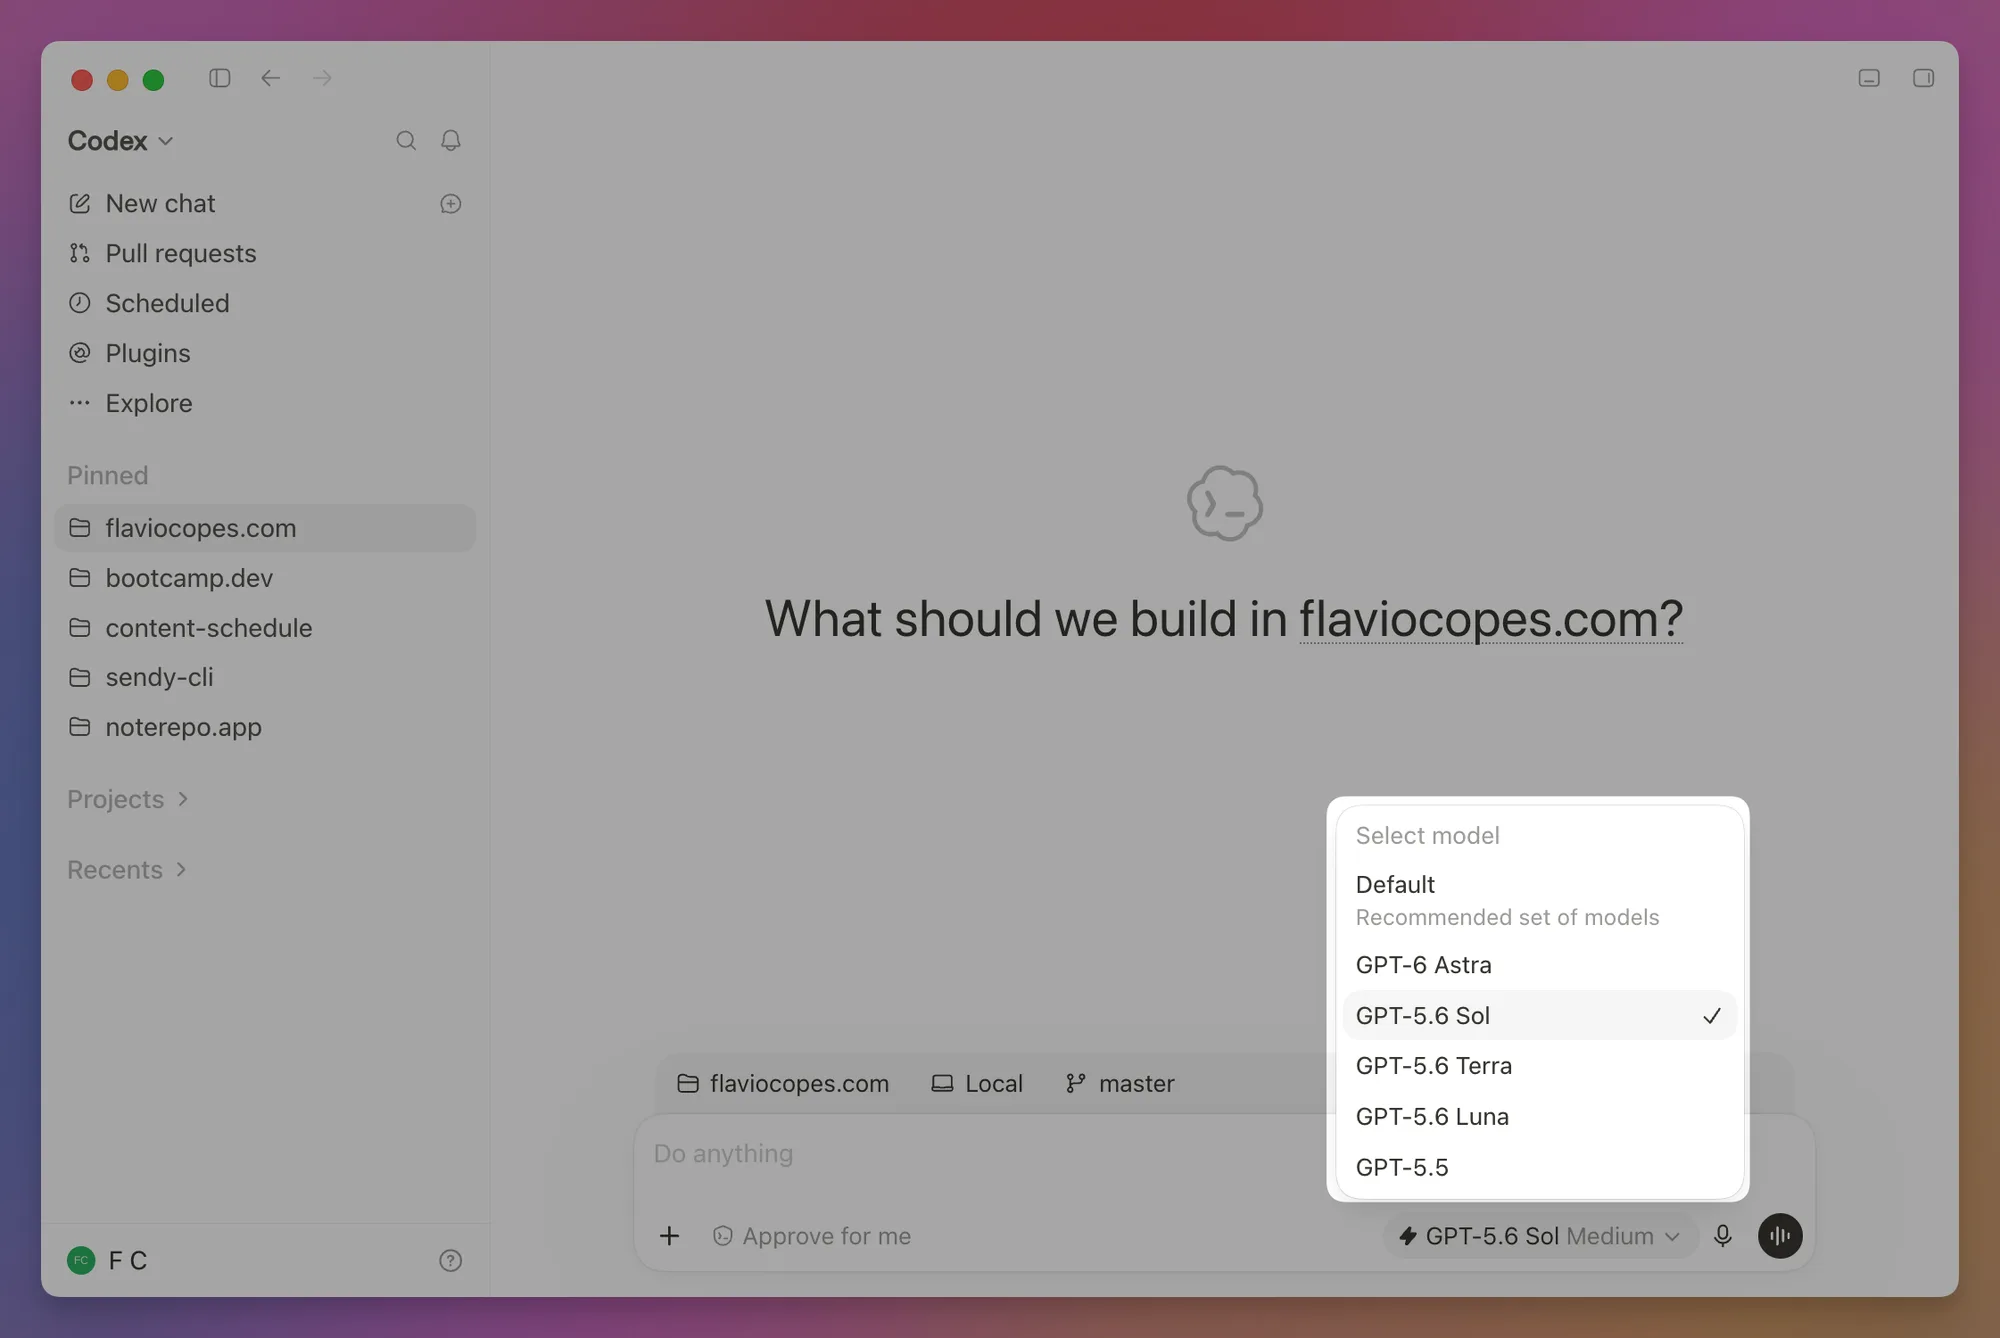
Click the model name when you want to use a different model.
Type / to open the commands available in the current chat.
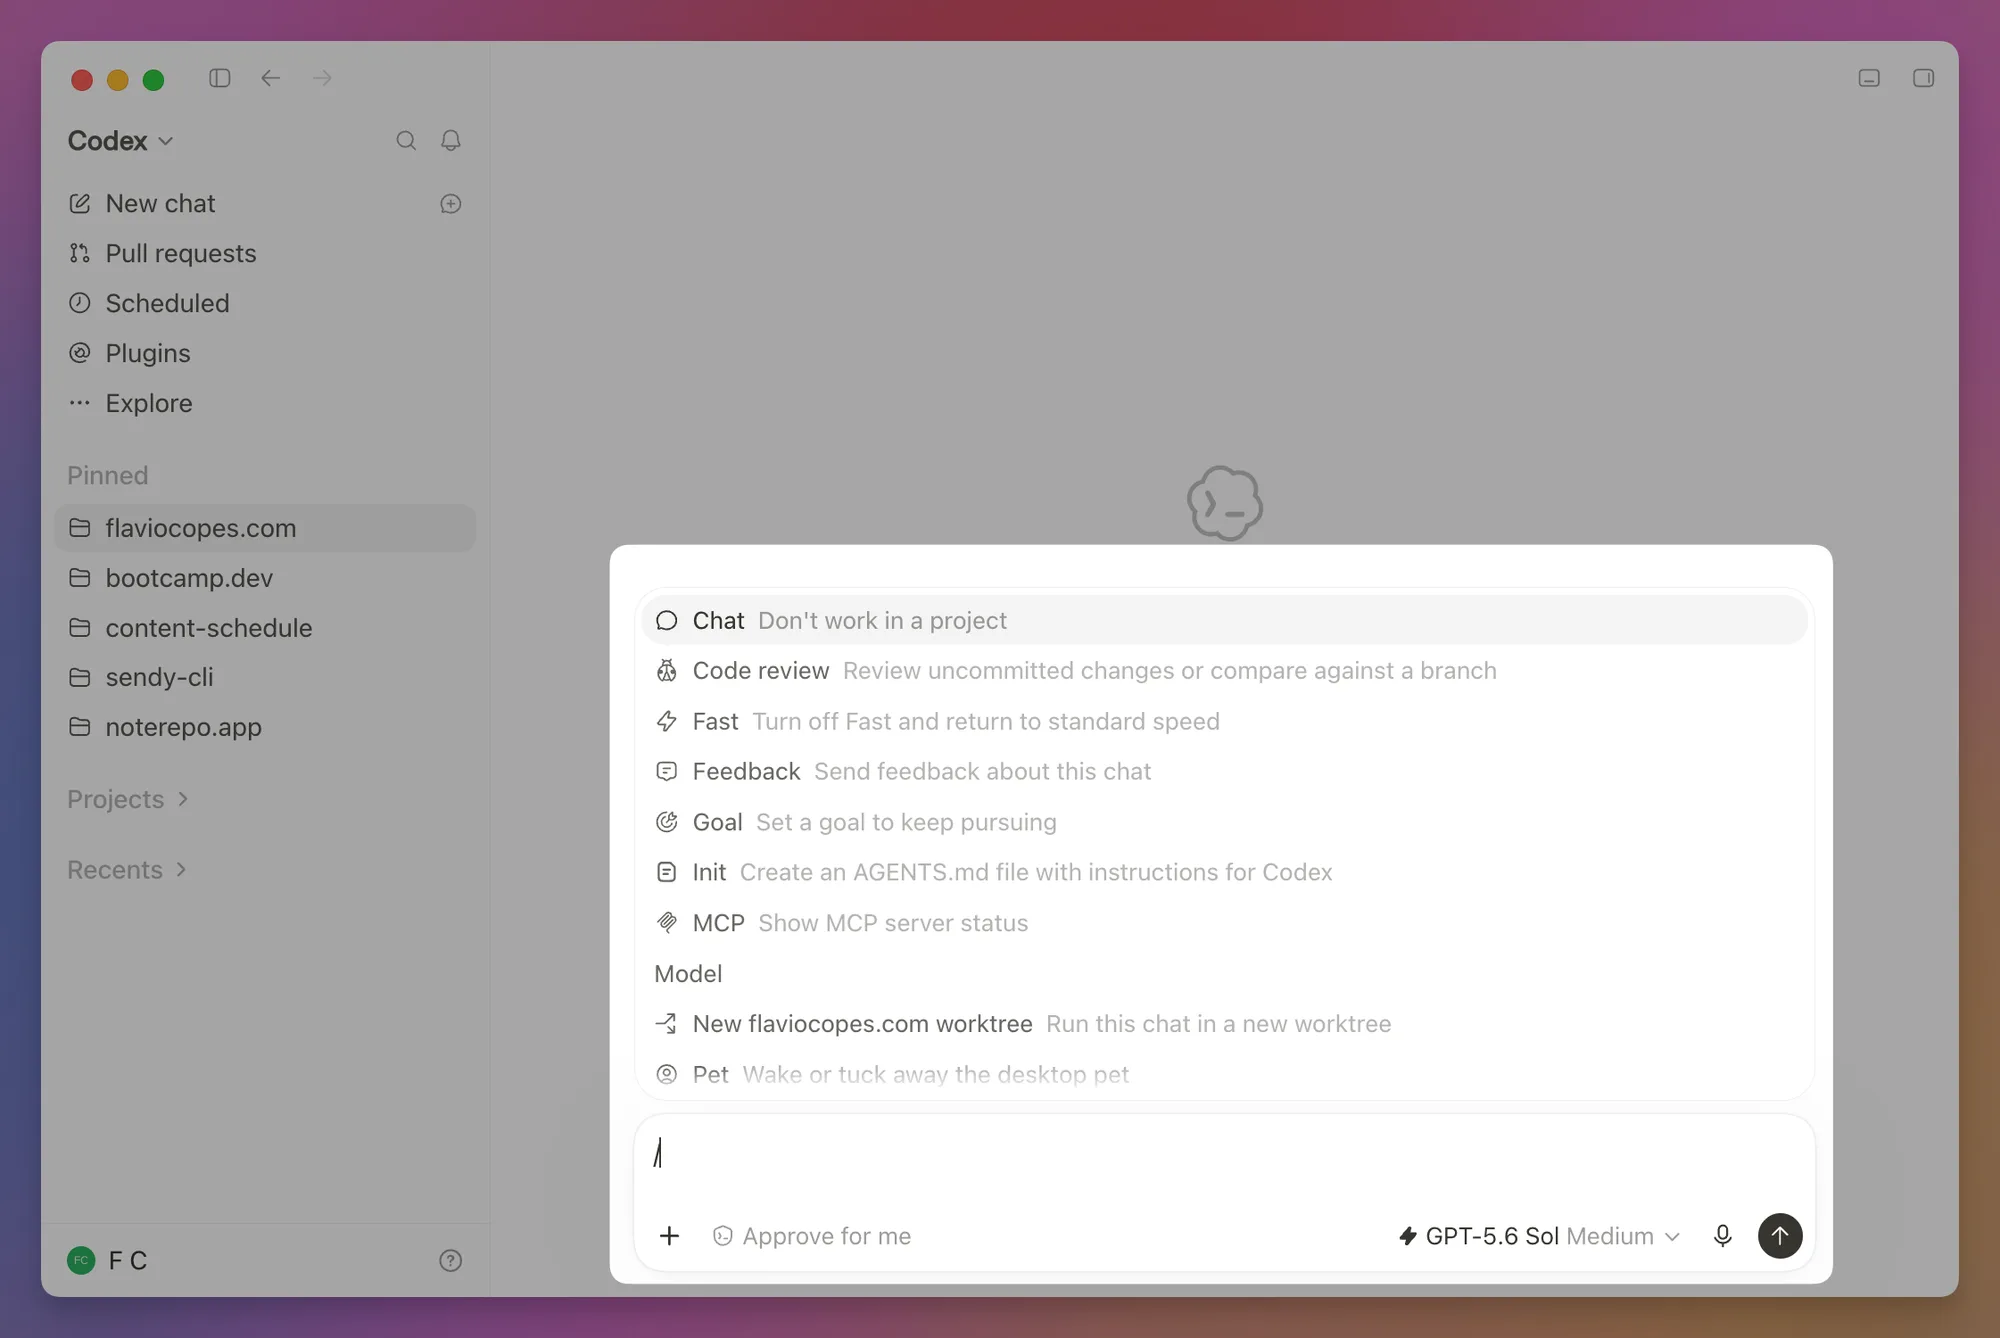
The controls can change depending on the project and the version of the app. Don’t worry if your screen looks a little different from these screenshots.
Organize projects and chats
A project connects Codex to a folder. Each chat holds one conversation and its work.
I keep one chat for one coherent outcome. If I am fixing authentication, I continue in the same chat while I test and refine that fix. I start another chat for an unrelated dependency update.
Rename chats you want to find later. I pin the important ones and archive the ones I’m done with. Archiving removes a chat from the active list without deleting its transcript.
Give Codex useful project instructions
Codex automatically reads files named AGENTS.md before it starts working.
Think of AGENTS.md as a README for the agent. Your README explains the project to people. AGENTS.md explains how Codex should work on it.
You can ask Codex to create a starting file after it inspects the project. Then edit it, because the generated file is only a first draft.
A useful AGENTS.md might look like this:
# Project instructions

## Commands

- Run `npm run dev` to start the site.
- Run `npm test` after changing JavaScript files.
- Run `npm run build` before finishing.

## Code style

- Use plain JavaScript, not TypeScript.
- Use 2-space indentation.
- Do not add a dependency without asking first.

## Definition of done

- The requested behavior works.
- Existing tests still pass.
- New behavior has a test when practical.
Keep the file short and specific. Instead of asking for “good code”, list the commands, directories, constraints, and recurring mistakes Codex needs to know about.
You can put one AGENTS.md in the repository root and more specific files inside subdirectories. Instructions closer to the file being changed take precedence.
I wrote a separate guide about how AGENTS.md works, including global instructions, nested rules, overrides, and maintenance.
Write a good prompt
A prompt for Codex is like a message to a coworker who already has your project open. Say what you want to end up with, not just what you want Codex to work on.
Include the details Codex cannot guess:
- the result you want
- the behavior that must not change
- a useful file, error, screenshot, or Git commit when you have one
- a check it can run when the work is done
This prompt is too vague:
Improve the settings page.Give Codex the missing details:
On the settings page, the Save button stays enabled after a successful save.
Disable it until the form changes again.

The form is in src/components/SettingsForm.tsx.
Keep the existing API and visual design.
Add a test for the saved state, then run the settings form tests.
Now Codex knows what to fix, where the code lives, what must stay the same, and how to check the result.
Examples are more useful than adjectives. Instead of asking for a “robust” URL function, include a few inputs and the exact outputs you expect.
Point at real evidence when you have it. Paste the complete error instead of summarizing it. Attach a screenshot for a visual problem. Name a file if you know where the relevant code lives.
Don’t prescribe every function Codex should write. Your solution might be wrong. Describe the result and the constraints, then let Codex inspect the project.
If you do not know which files matter, do not guess. Ask Codex to find them.
Find the code responsible for saving the settings form. Explain the current flow,
then propose the smallest change that keeps Save disabled after a successful save.
Do not implement it yet.
Pick a model and reasoning level
The composer lets you choose a model and its reasoning level.
Model names change, so there isn’t one model I can always recommend. Start with the default and switch when you have a reason.
Use lower reasoning for a clear, small change. Use higher reasoning for debugging, migrations, architectural work, or a task where several constraints interact.
A typo does not need the same reasoning as a database migration. Higher reasoning takes longer and uses more tokens.
Settings worth checking
Open Settings from the sidebar or the application menu.
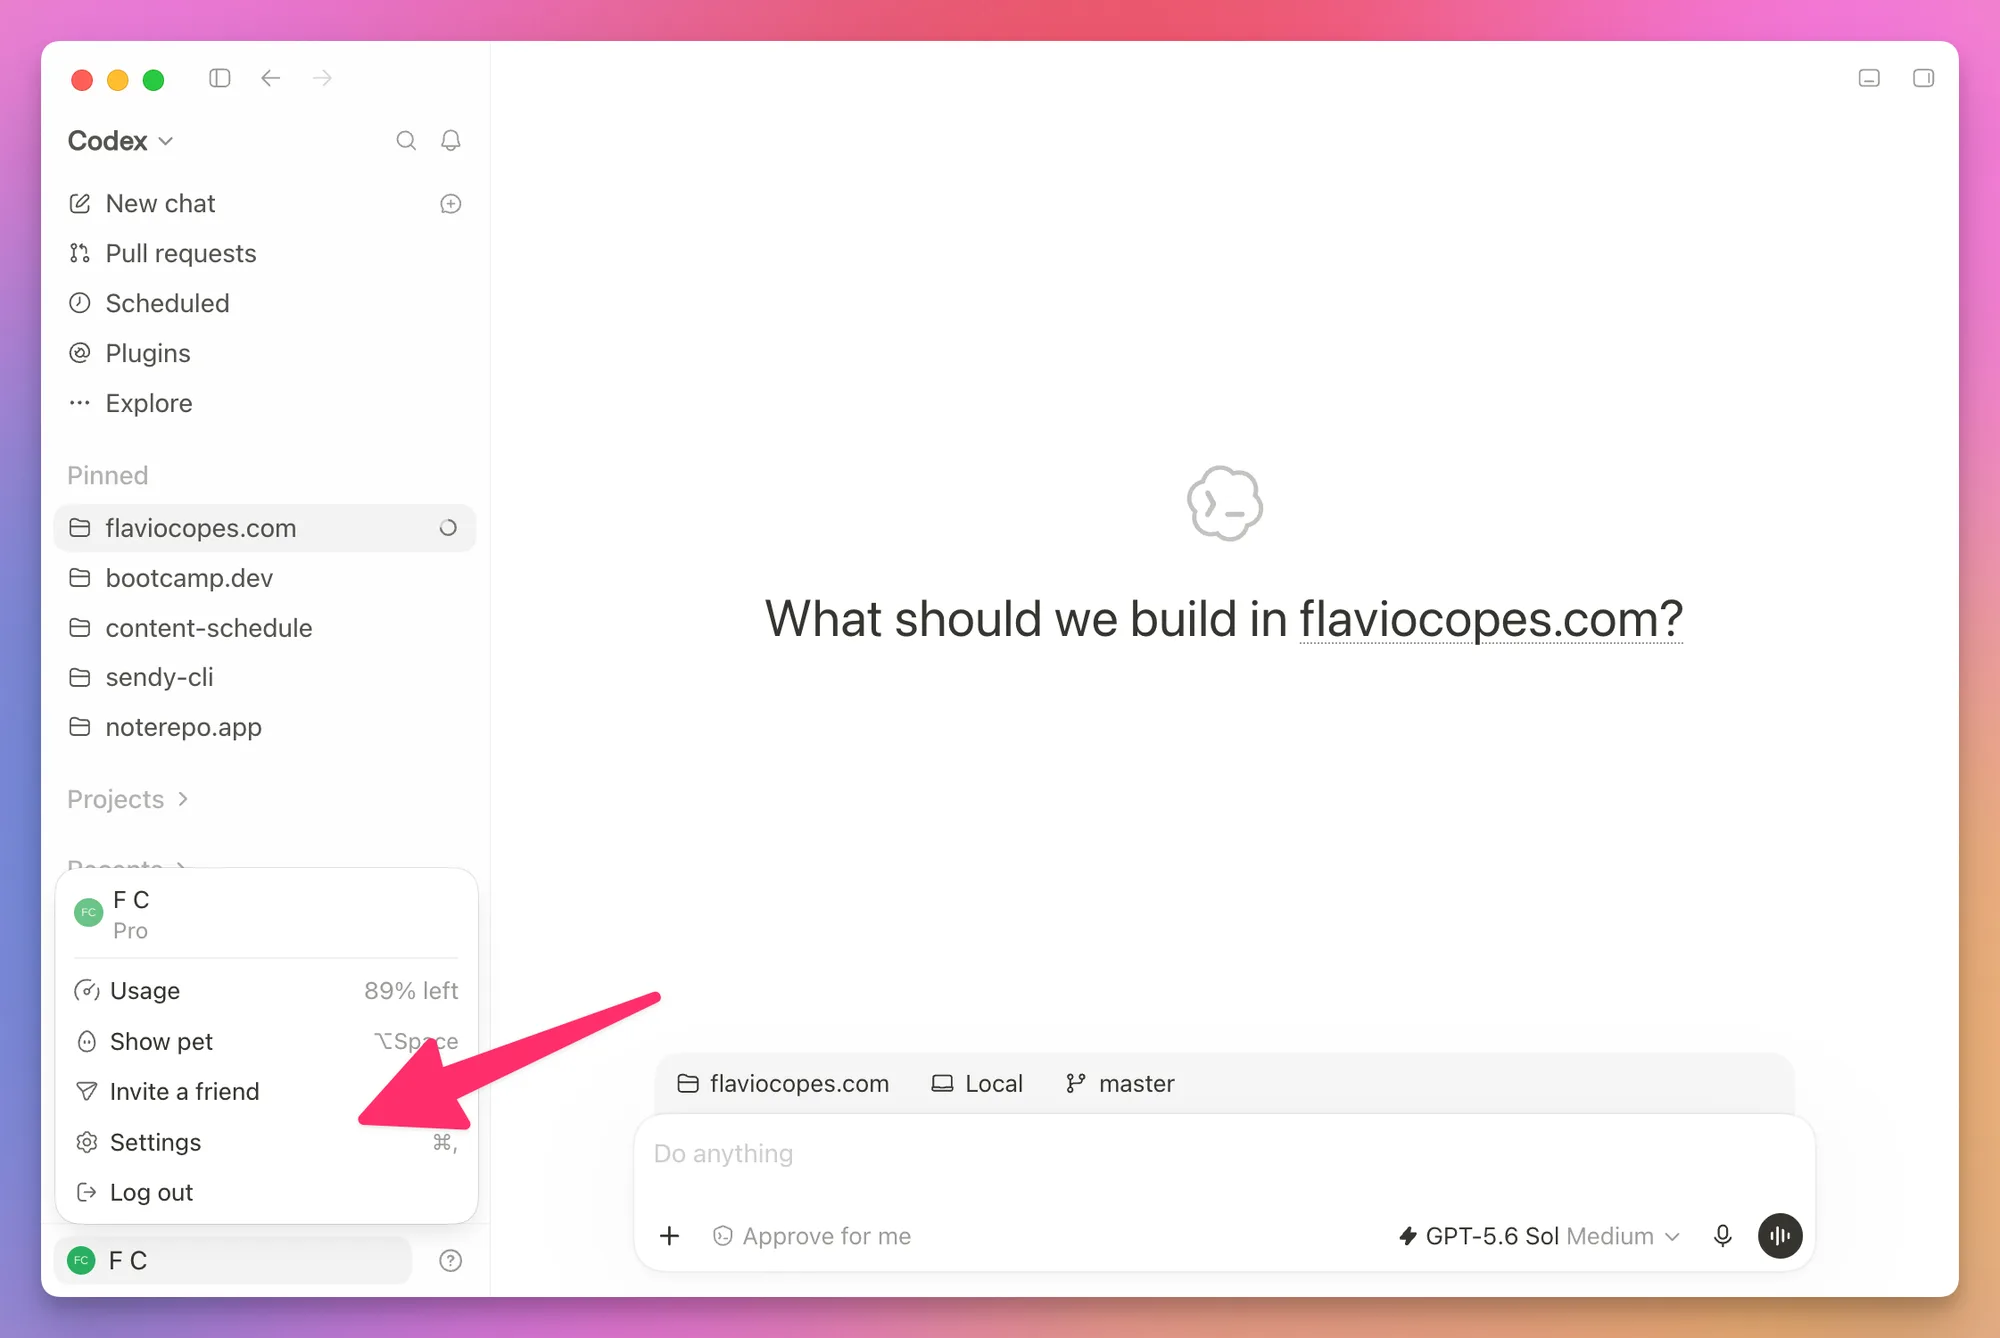
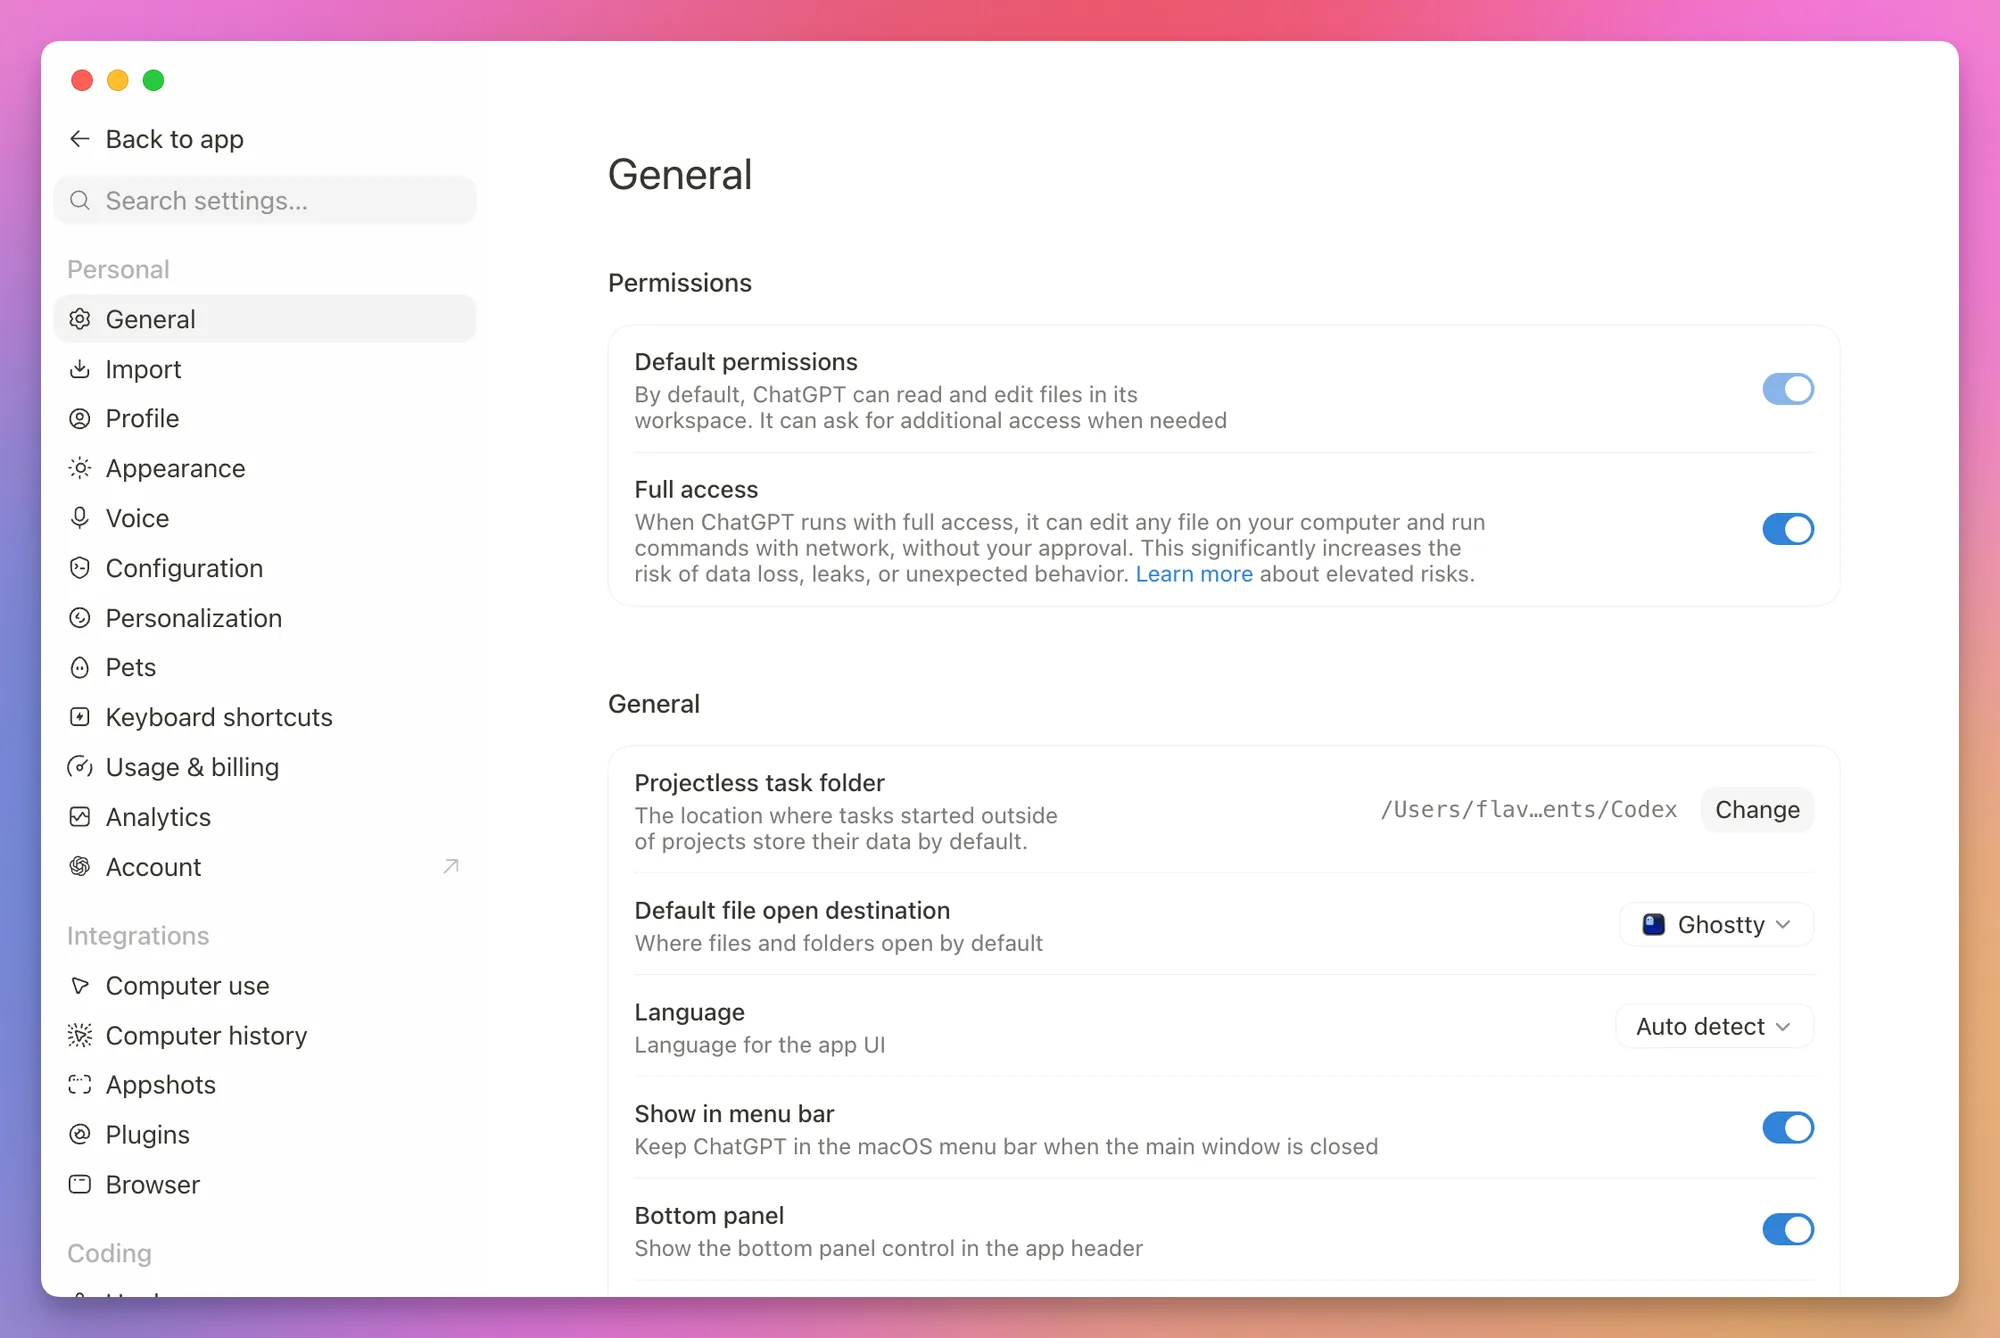
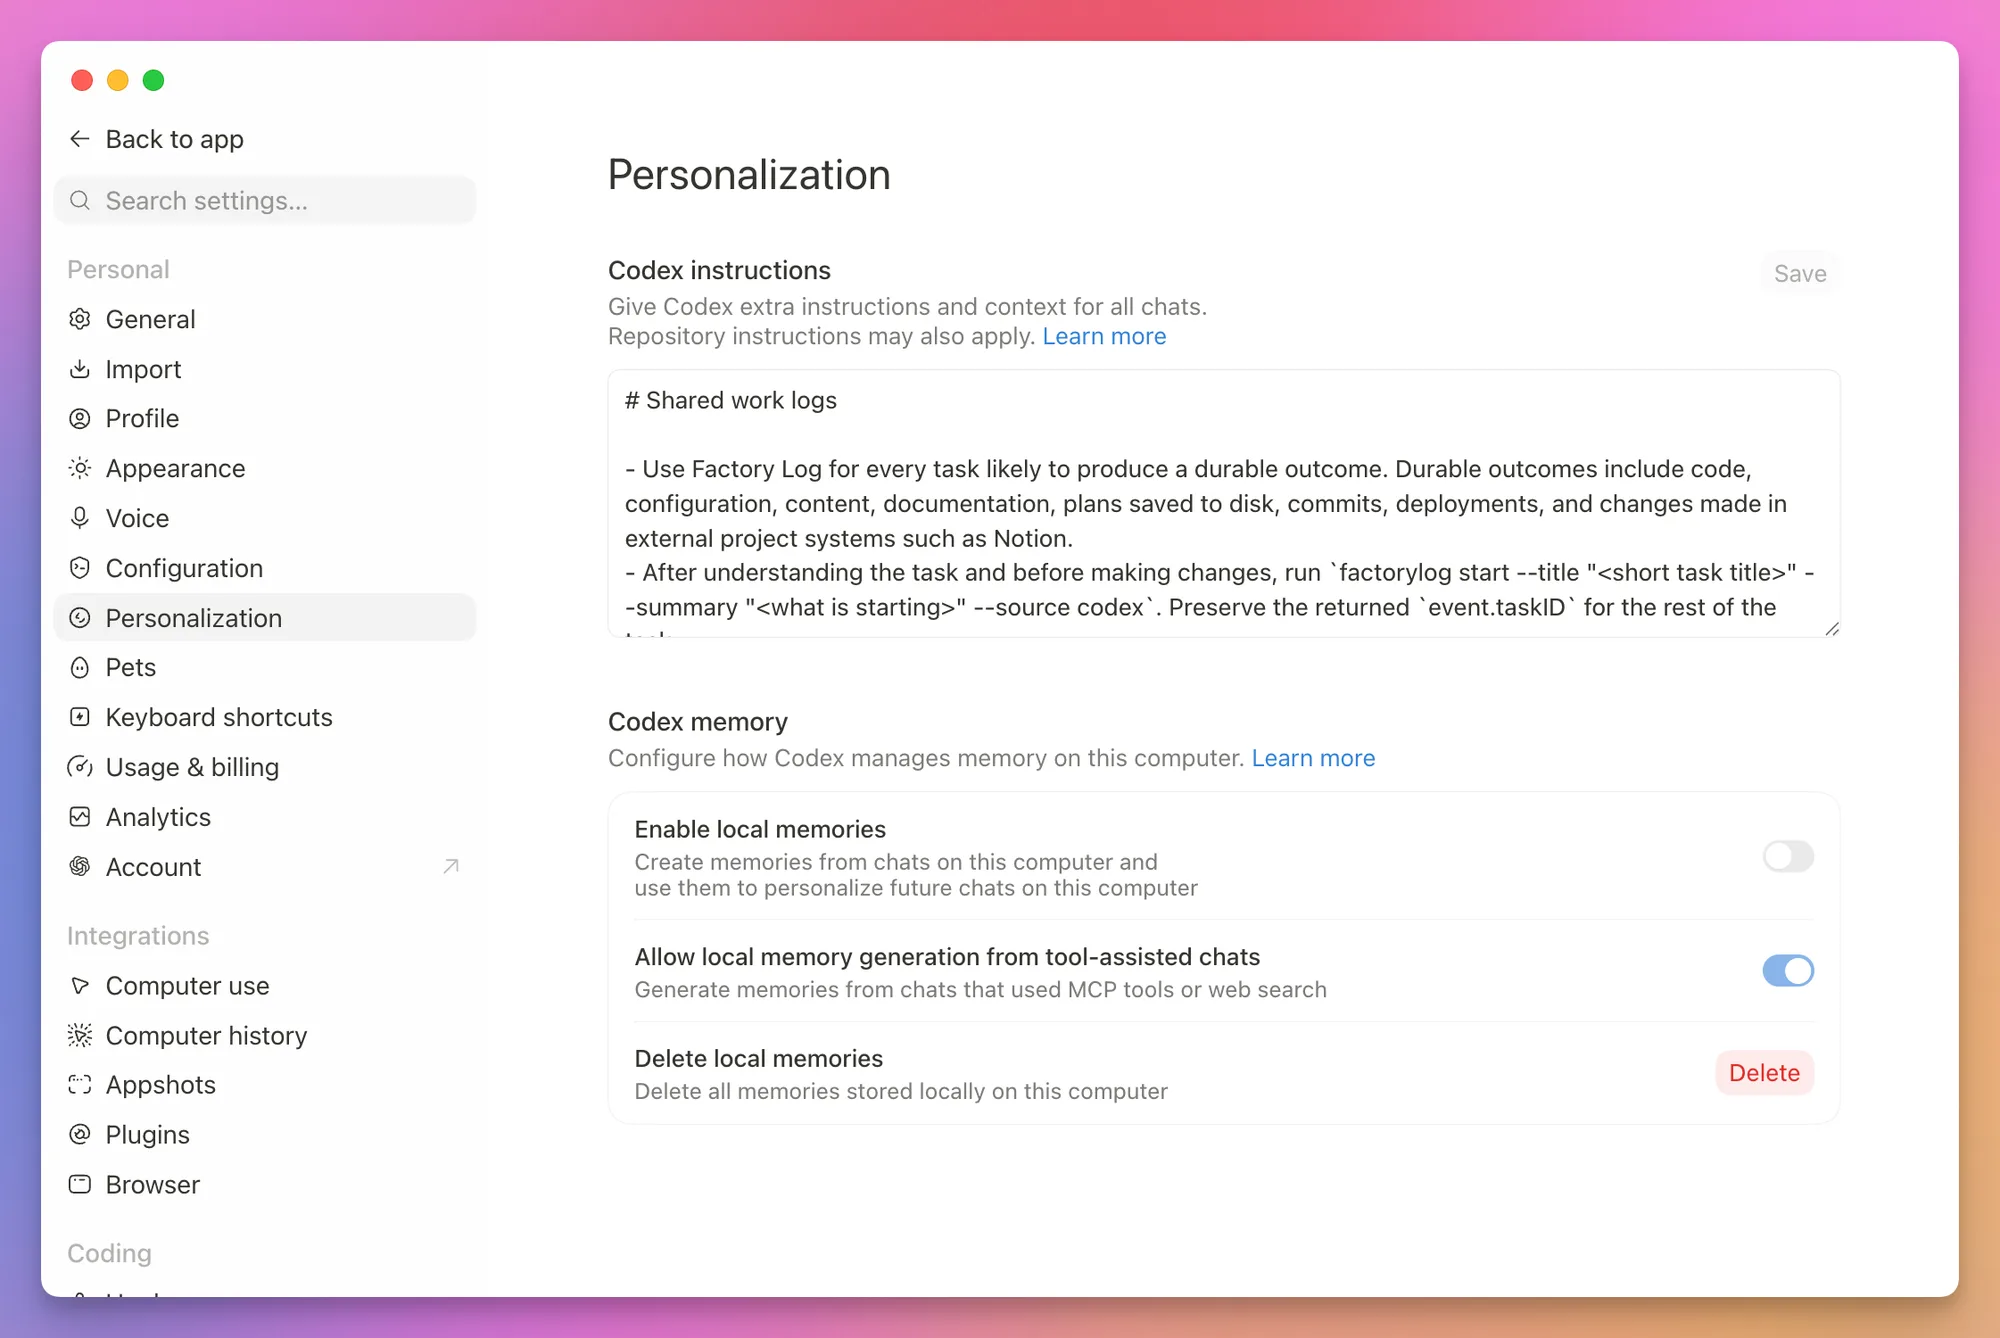
Most pages are what you expect. Four of them change how Codex works on your code, so check those before the first real task.
General holds the default permissions. Out of the box Codex can read and edit files inside the workspace and asks when it needs more. Leave it there, and turn on full access only for a task that needs it.
Personalization holds your global instructions, which tell Codex how to communicate and work with you in every project.
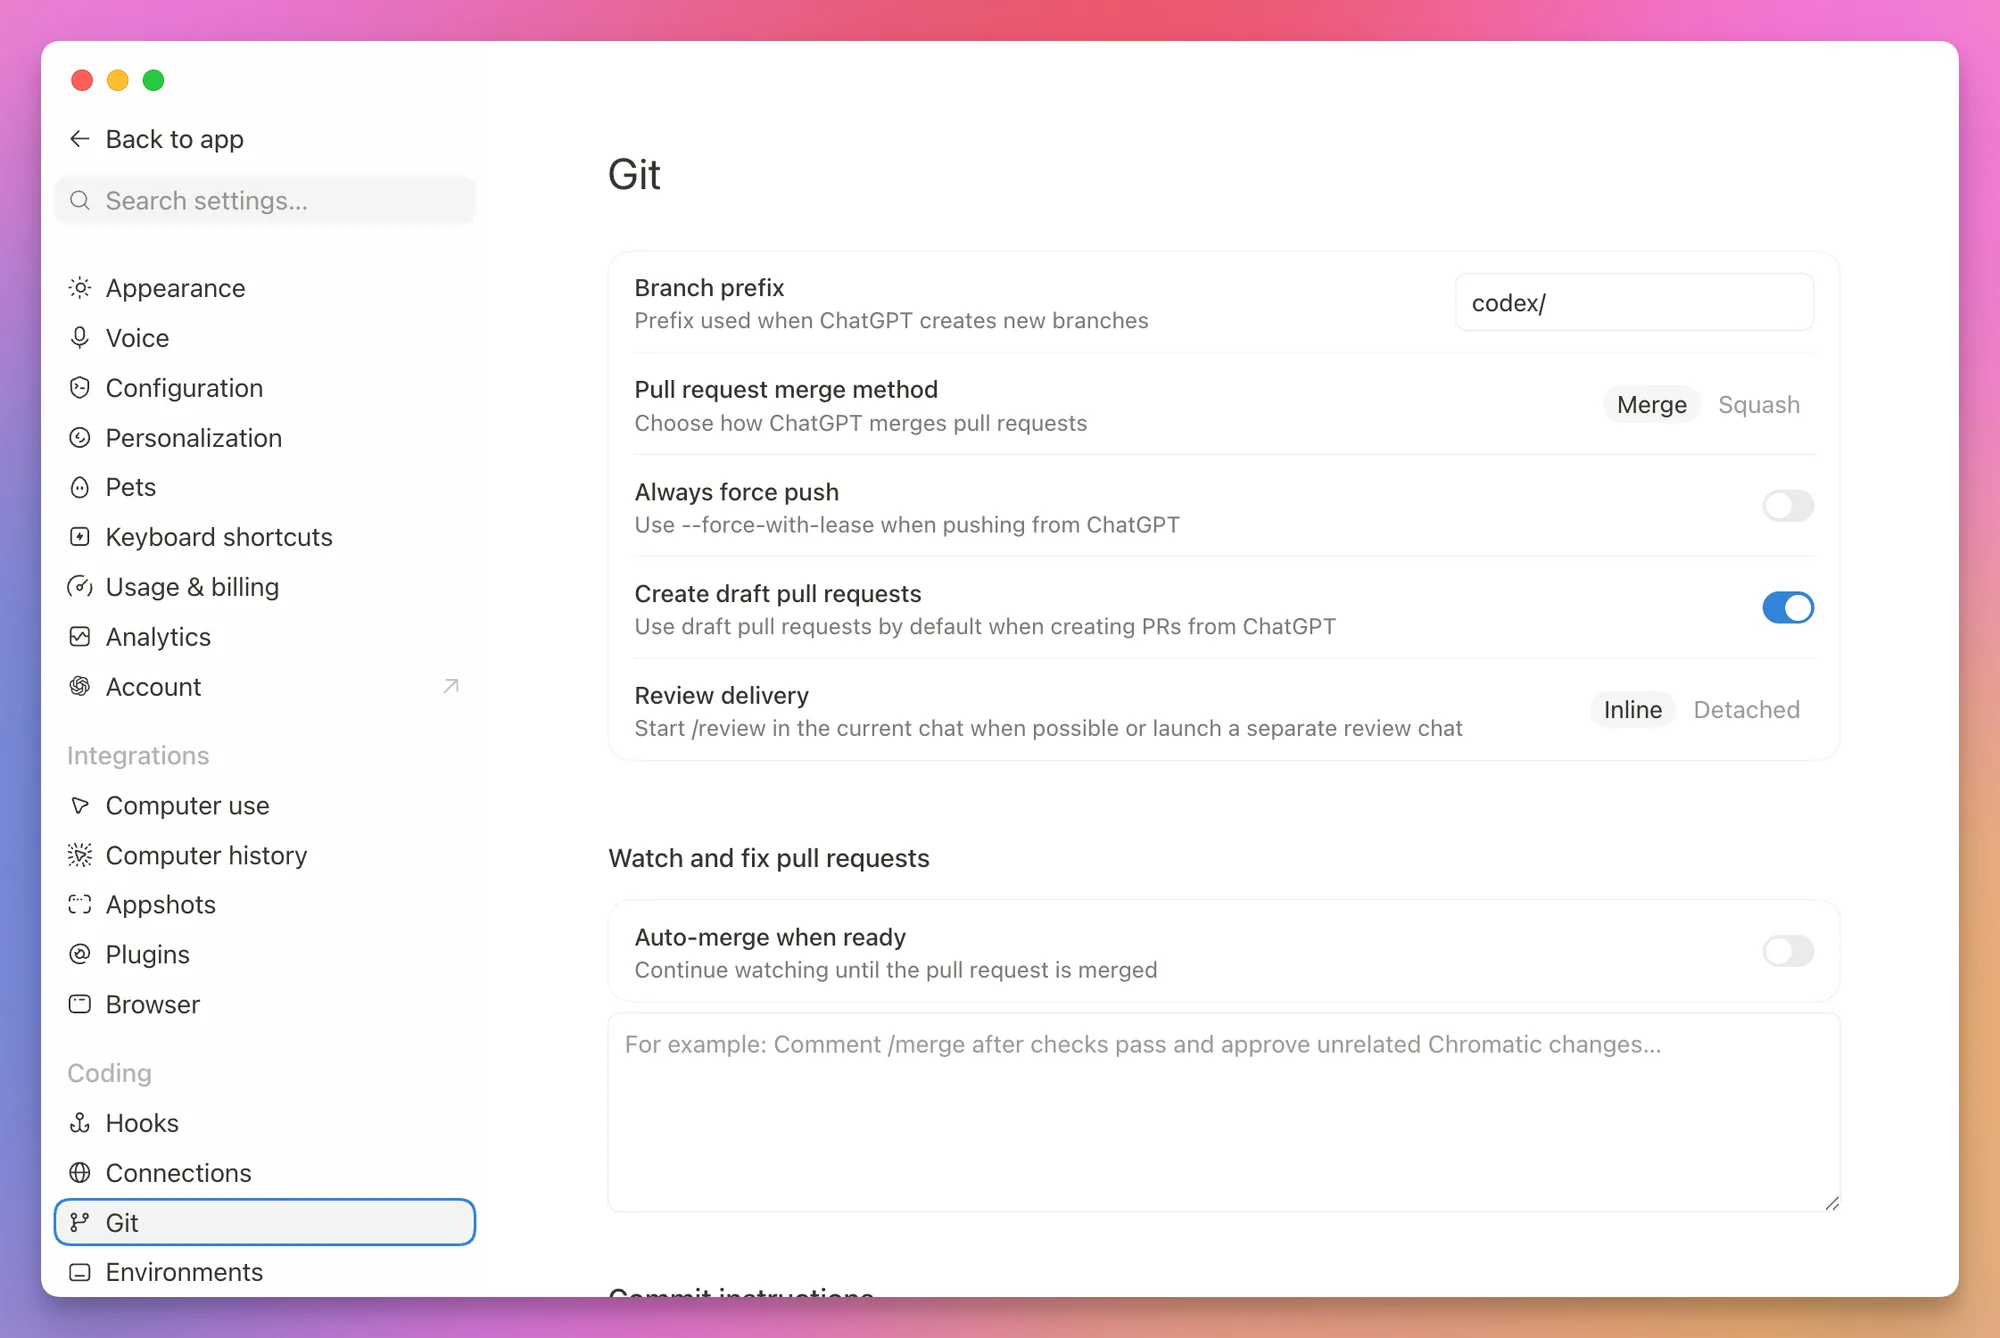
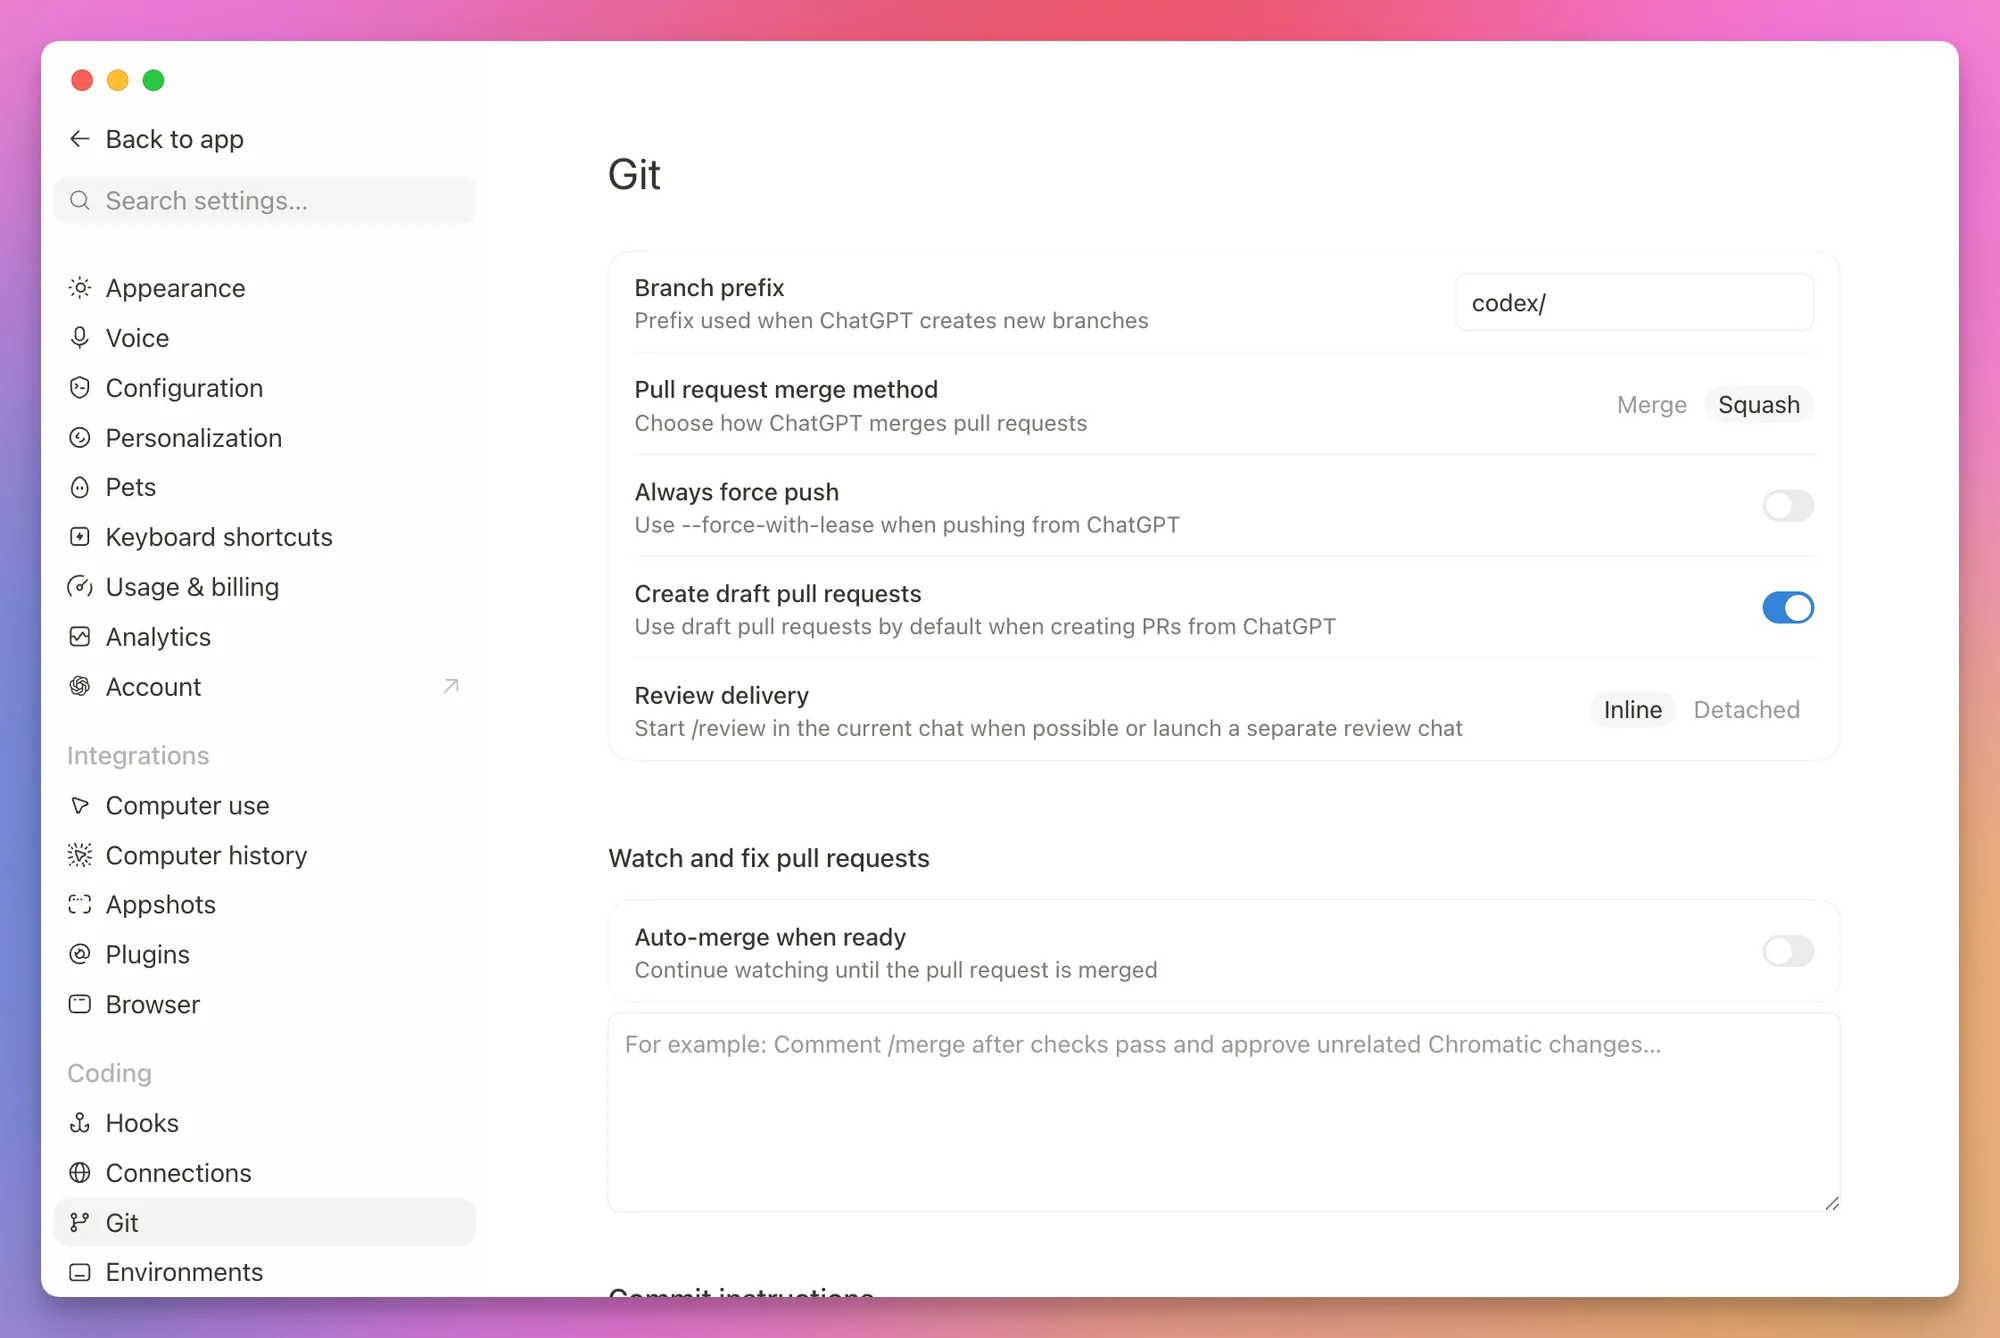
Git covers branch names, commits, and how work comes back into your checkout. The choice that matters most is whether pull requests use merge commits or squash commits. Pick what your team already does.
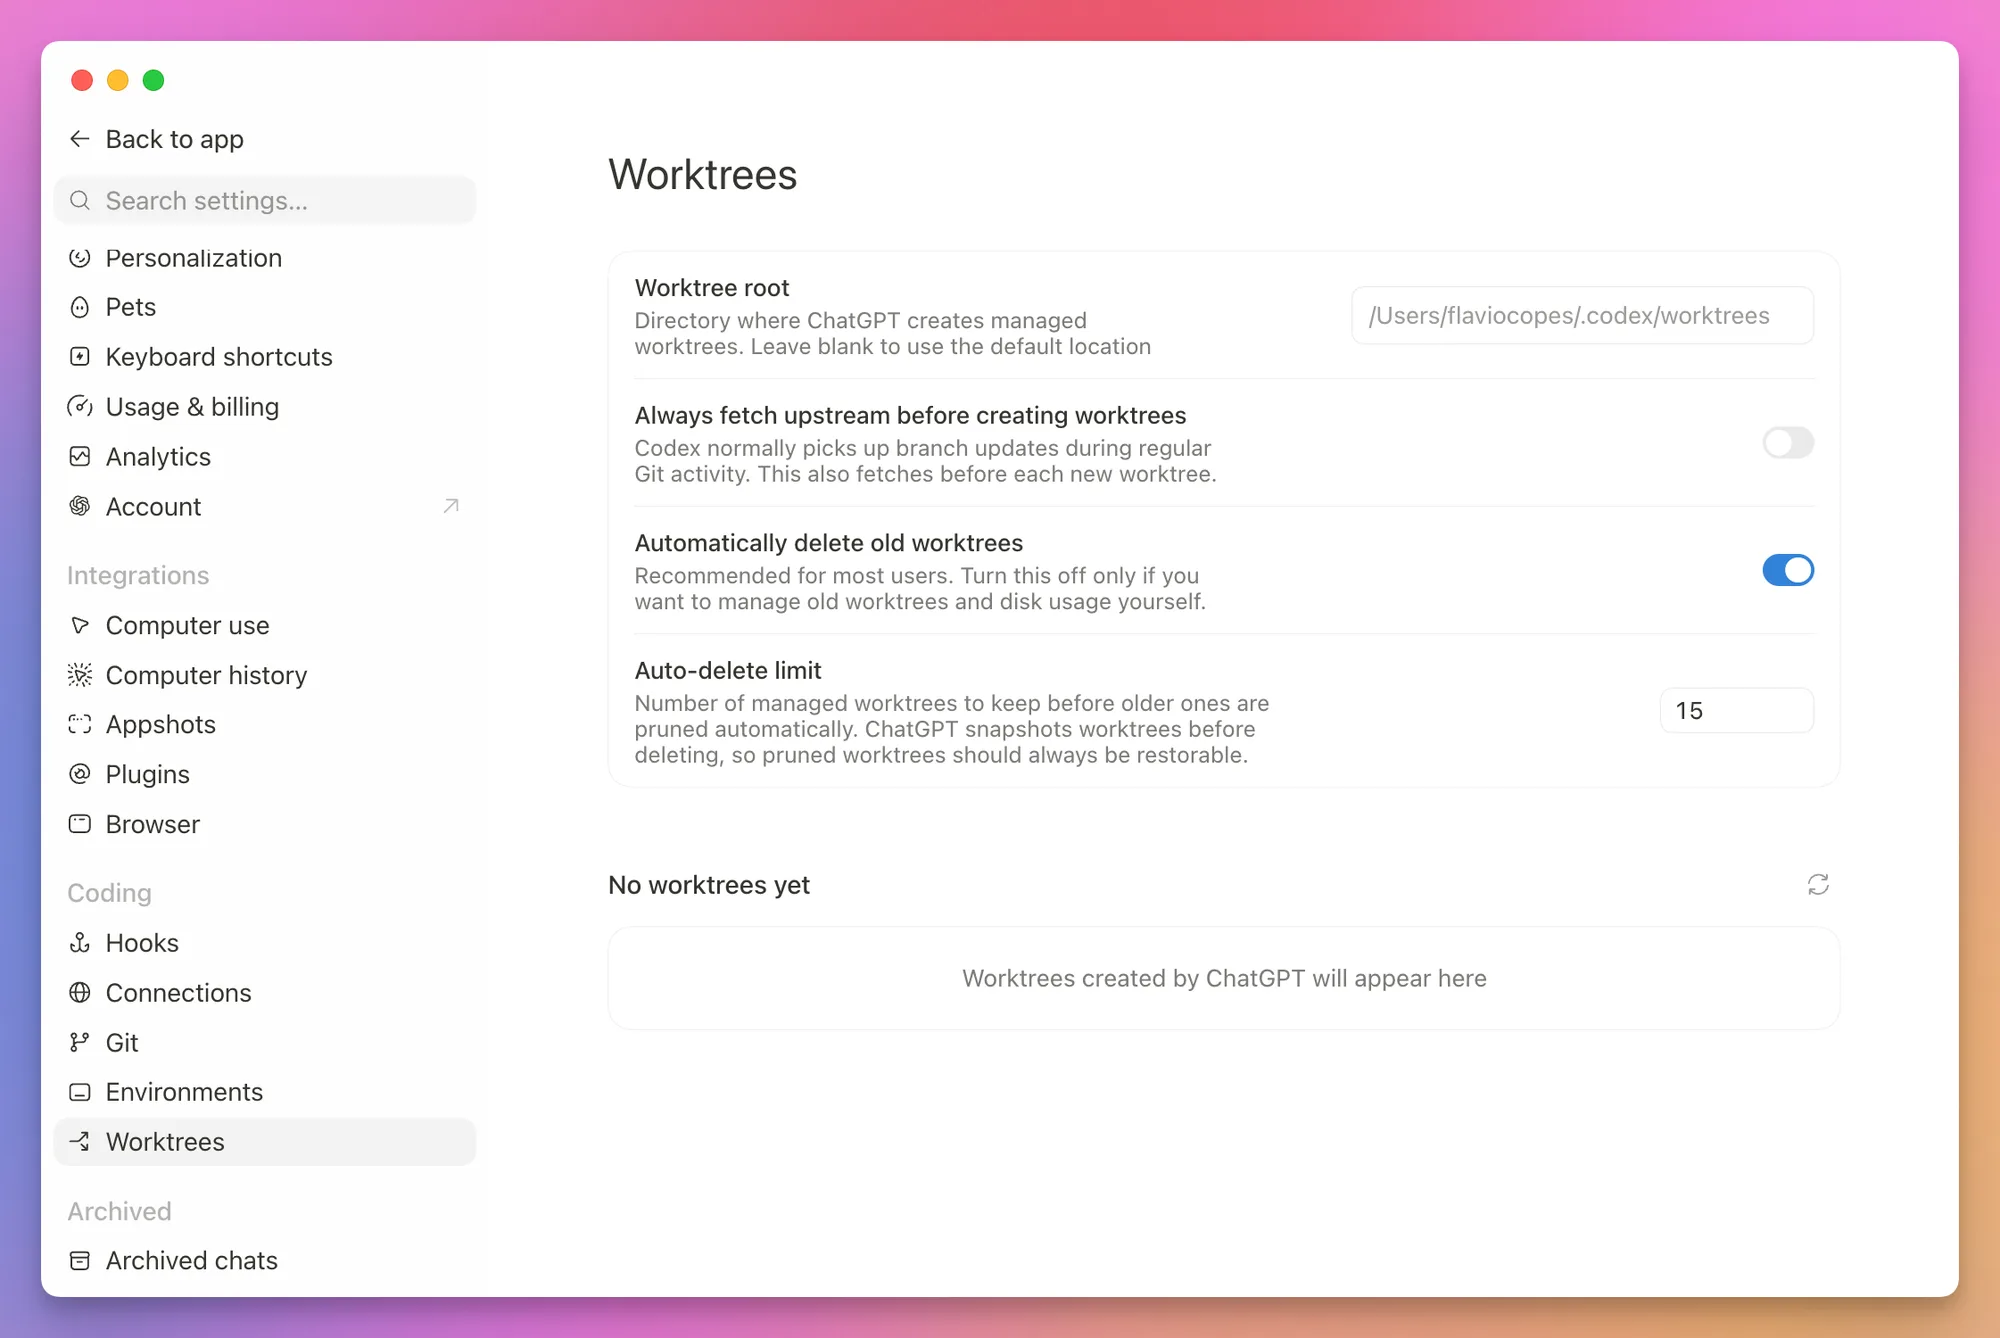
Worktrees sets where Codex creates its managed worktrees, $CODEX_HOME/worktrees by default, and how many it keeps around. Codex keeps the 15 most recent and deletes older ones after saving a snapshot, unless their chat is pinned or still running, or the worktree is permanent. Raise the limit or turn the cleanup off if you’d rather manage disk space yourself.
The other pages, in one line each:
- Appearance: theme, colors, and fonts.
- Keyboard shortcuts: change the keys used around the app.
- Environments: setup scripts and quick actions for a project. A worktree can run them to install its dependencies.
- Plugins: plugins, apps, MCP servers, and skills. We’ll come back to it.
- Browser: the built-in browser and its browsing data.
- Computer use: the desktop apps Codex may use.
- Archived chats: restore a chat you archived.
- Usage and billing: your plan, credits, and current limits.
The Codex interfaces share the same configuration layers. Personal defaults live in ~/.codex/config.toml. A project can keep shared settings in .codex/config.toml.
Understand permissions and the sandbox
Codex has two safety controls. The sandbox decides which files, commands, network resources, and apps it can access. The approval policy decides when Codex has to stop and ask you.
Start with the default permissions. Workspace write is a good setting for most repositories because Codex can change the project without receiving access to the rest of your computer.
Some tasks need more access. Installing a package may require the network, while Computer Use needs access to another app. A deployment command can change production.
Read the command before approving it. Be especially careful with commands that delete files, rewrite Git history, rotate secrets, change a production database, or spend money.
Goals and scheduled tasks keep the same permissions. Running for longer does not give Codex more access.
Use Plan mode before a difficult change
Plan mode lets Codex inspect the project without editing files. It then proposes how to do the work.
You can select Plan in the composer or type:
/planHere I selected Plan before asking Codex to check whether a project needed dependency updates:
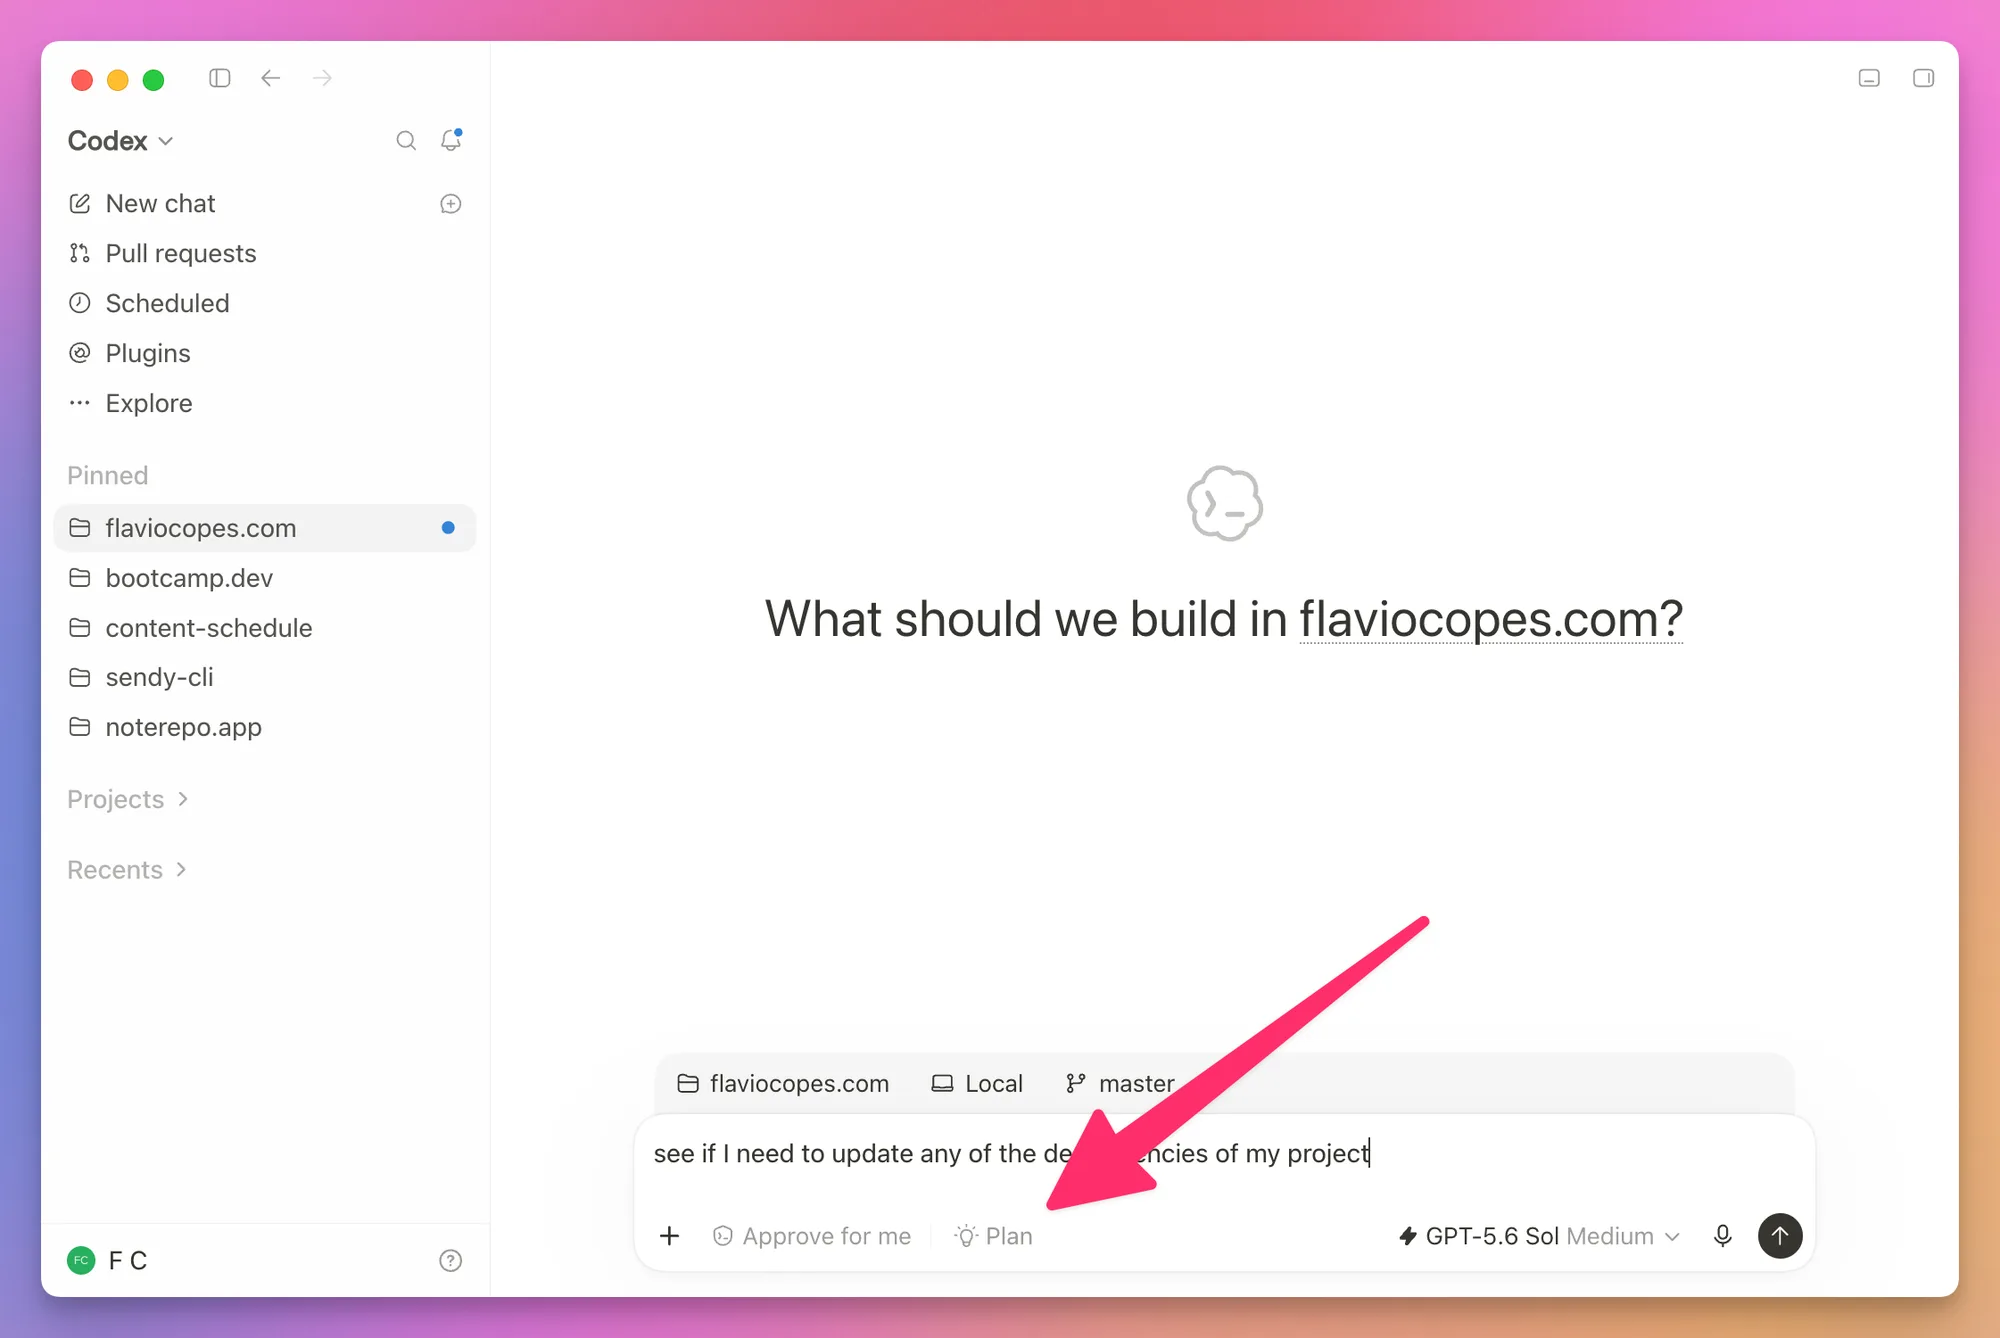
Codex inspects the project and returns a plan without changing files. When the plan is ready, it asks whether it should implement it.
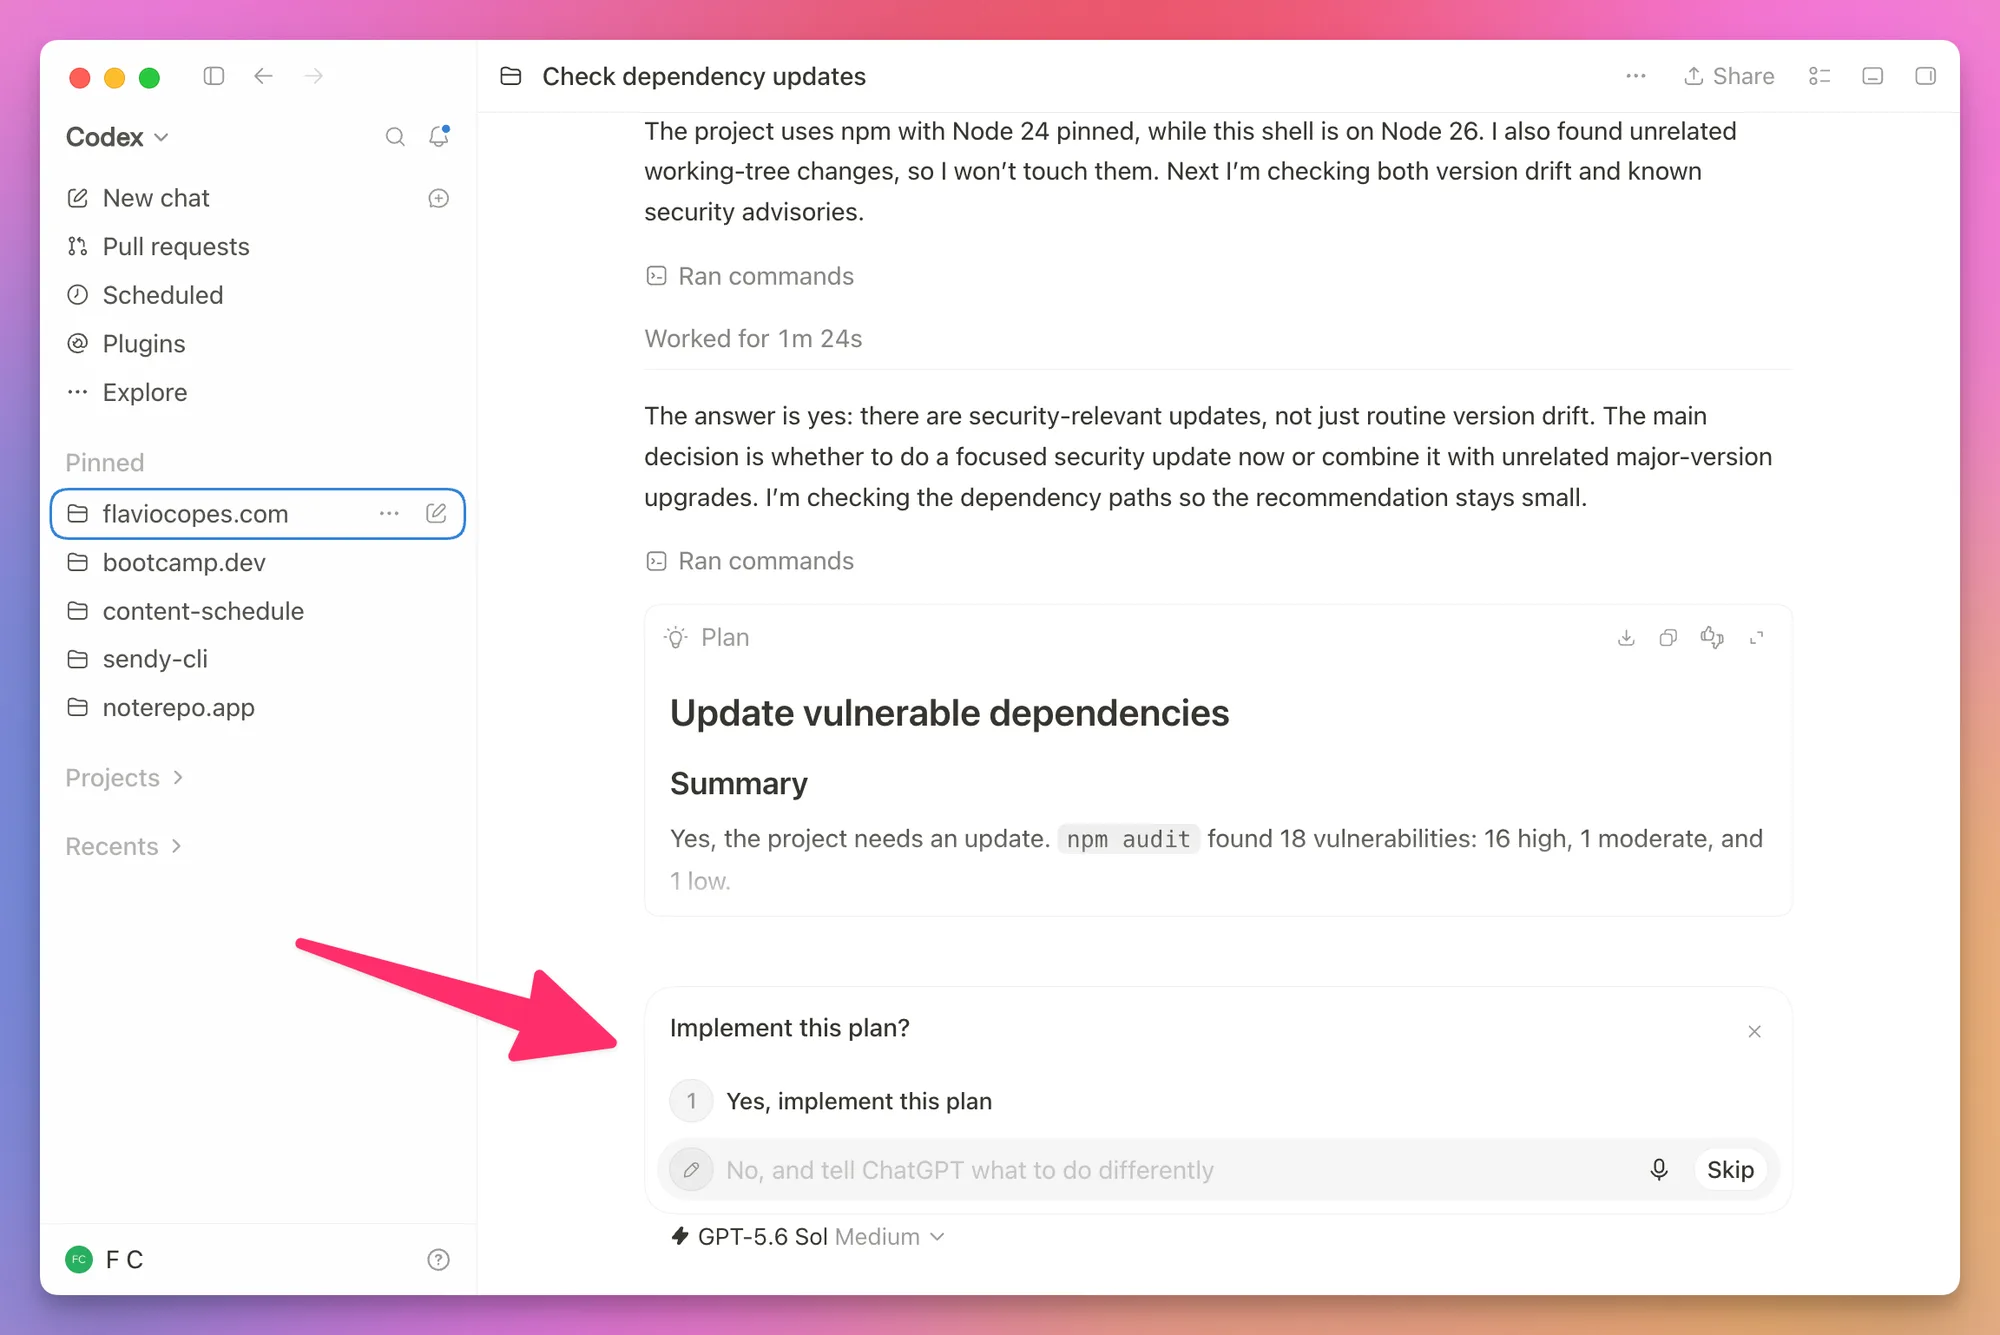
Read the plan before you continue. You can approve it, or tell Codex what to change first.
Ask for a plan when:
- you are not sure about the implementation
- the change crosses several parts of the project
- the order matters
- a wrong assumption would be expensive
I skip Plan mode for tiny and obvious edits. When I do ask for a plan, I review it as carefully as I review the code because this is where I can catch a wrong decision before any files change.
Make the change
Once the plan looks right, tell Codex to implement it.
For example:
Implement the plan. Run the relevant tests and the production build.
Do not change files outside the areas listed in the plan.
Codex now reads the files, applies its patches, and runs the commands from the plan. You can move to another chat or continue your own work. The app sends a notification when Codex needs a decision or finishes.
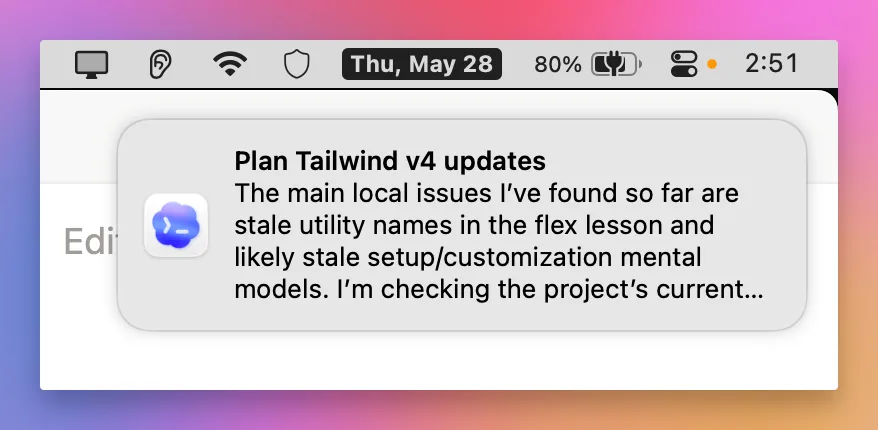
You can also steer a running task. Send another message when you notice a missing constraint:
Keep the existing URL structure. Other sites link to these routes.I do this often. I would rather add the constraint immediately than wait for the wrong change to finish.
Use Goal mode for long work
Plan mode works out how to approach one task. Goal mode keeps Codex working toward a result that may take much longer.
Click Goal in the composer to switch modes:
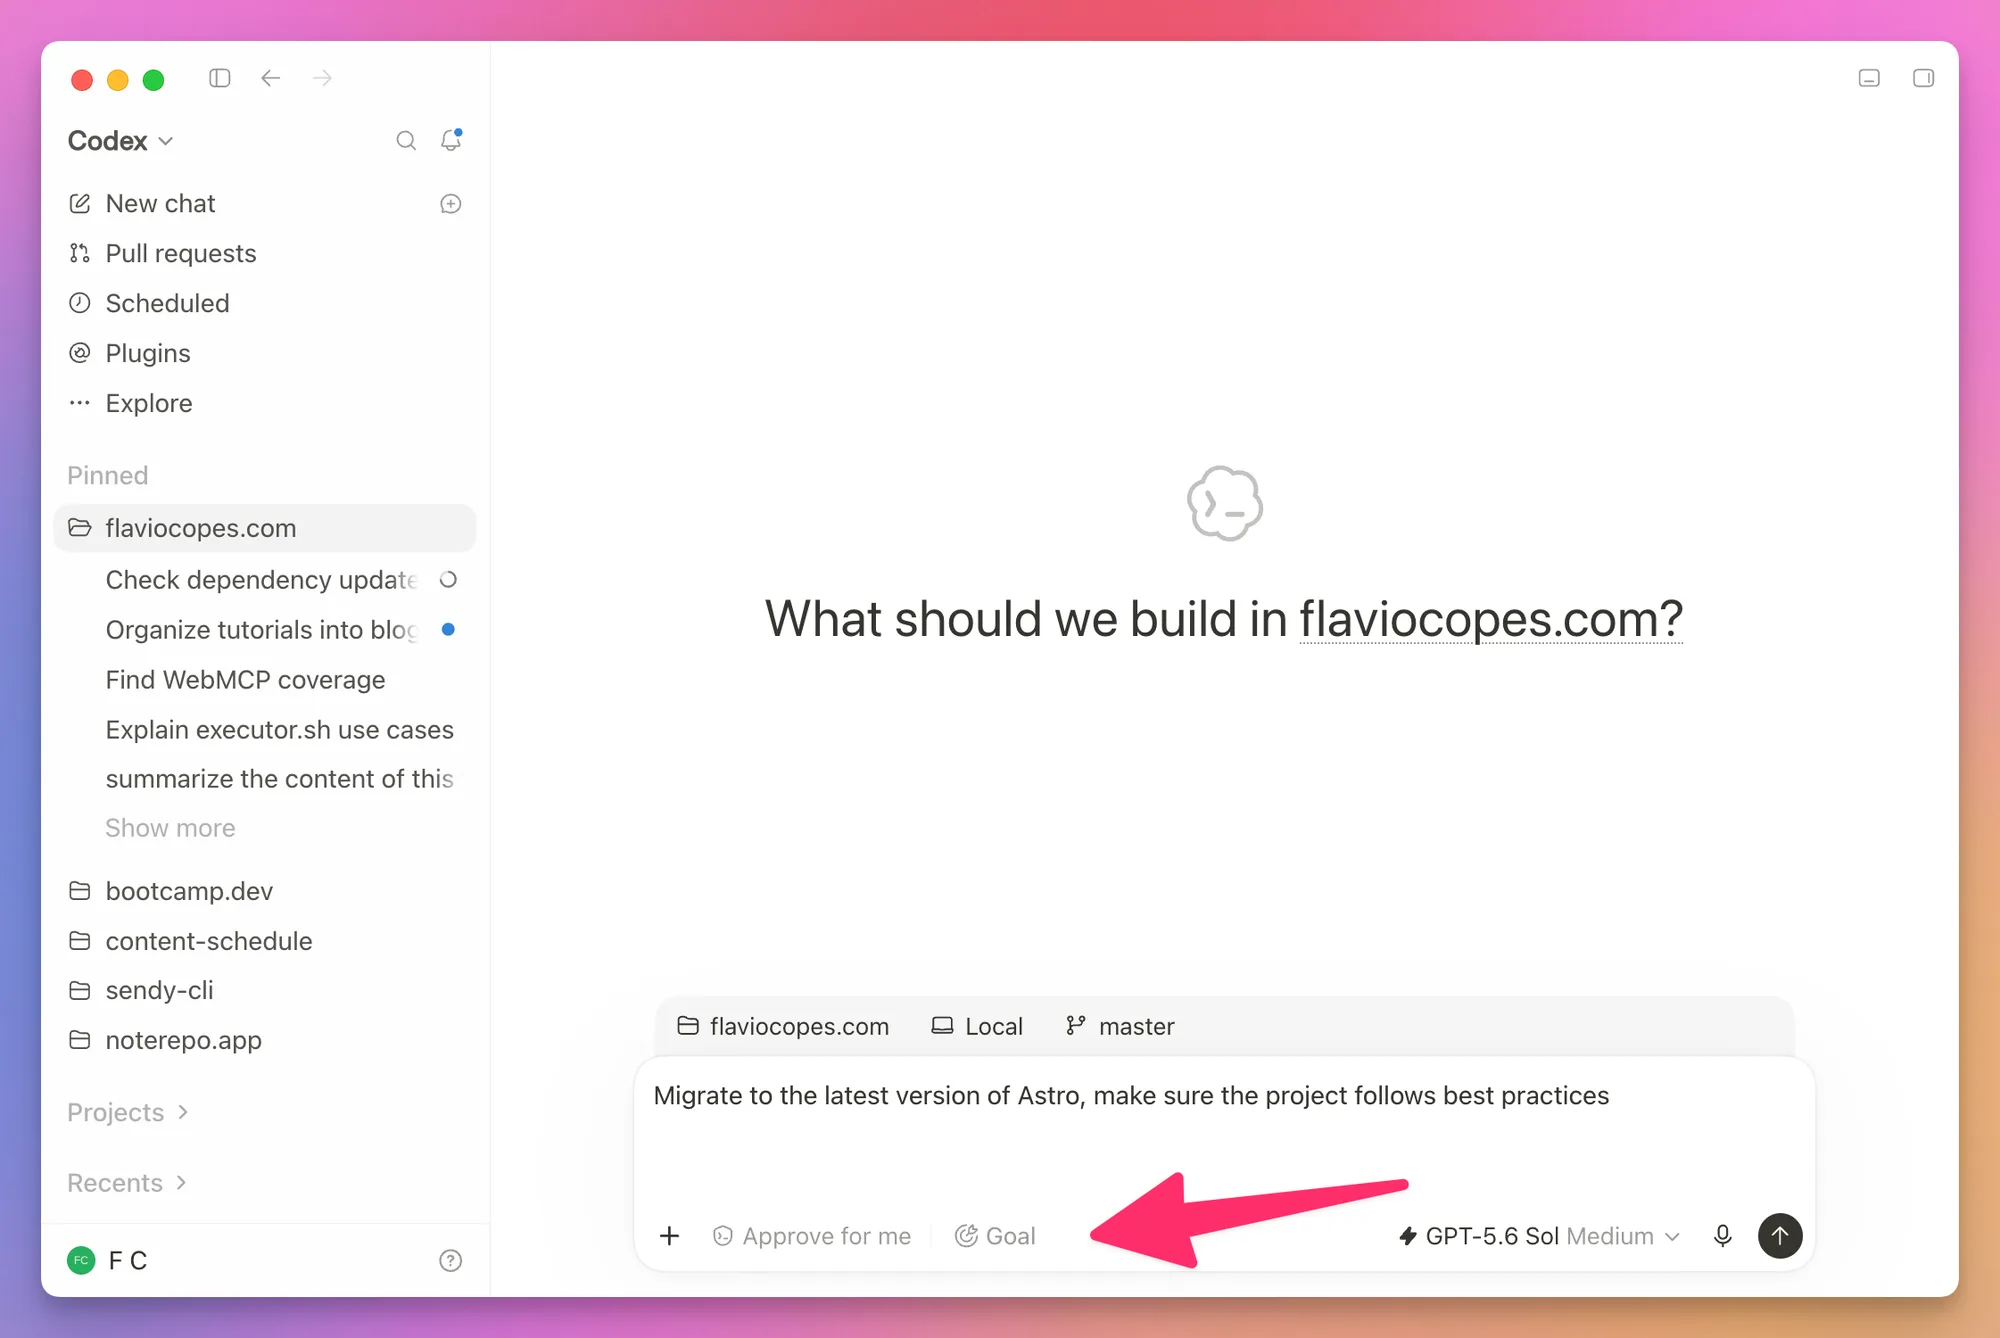
Then describe the result you want Codex to keep pursuing:
Migrate to the latest version of Astro and make sure the project follows best practices.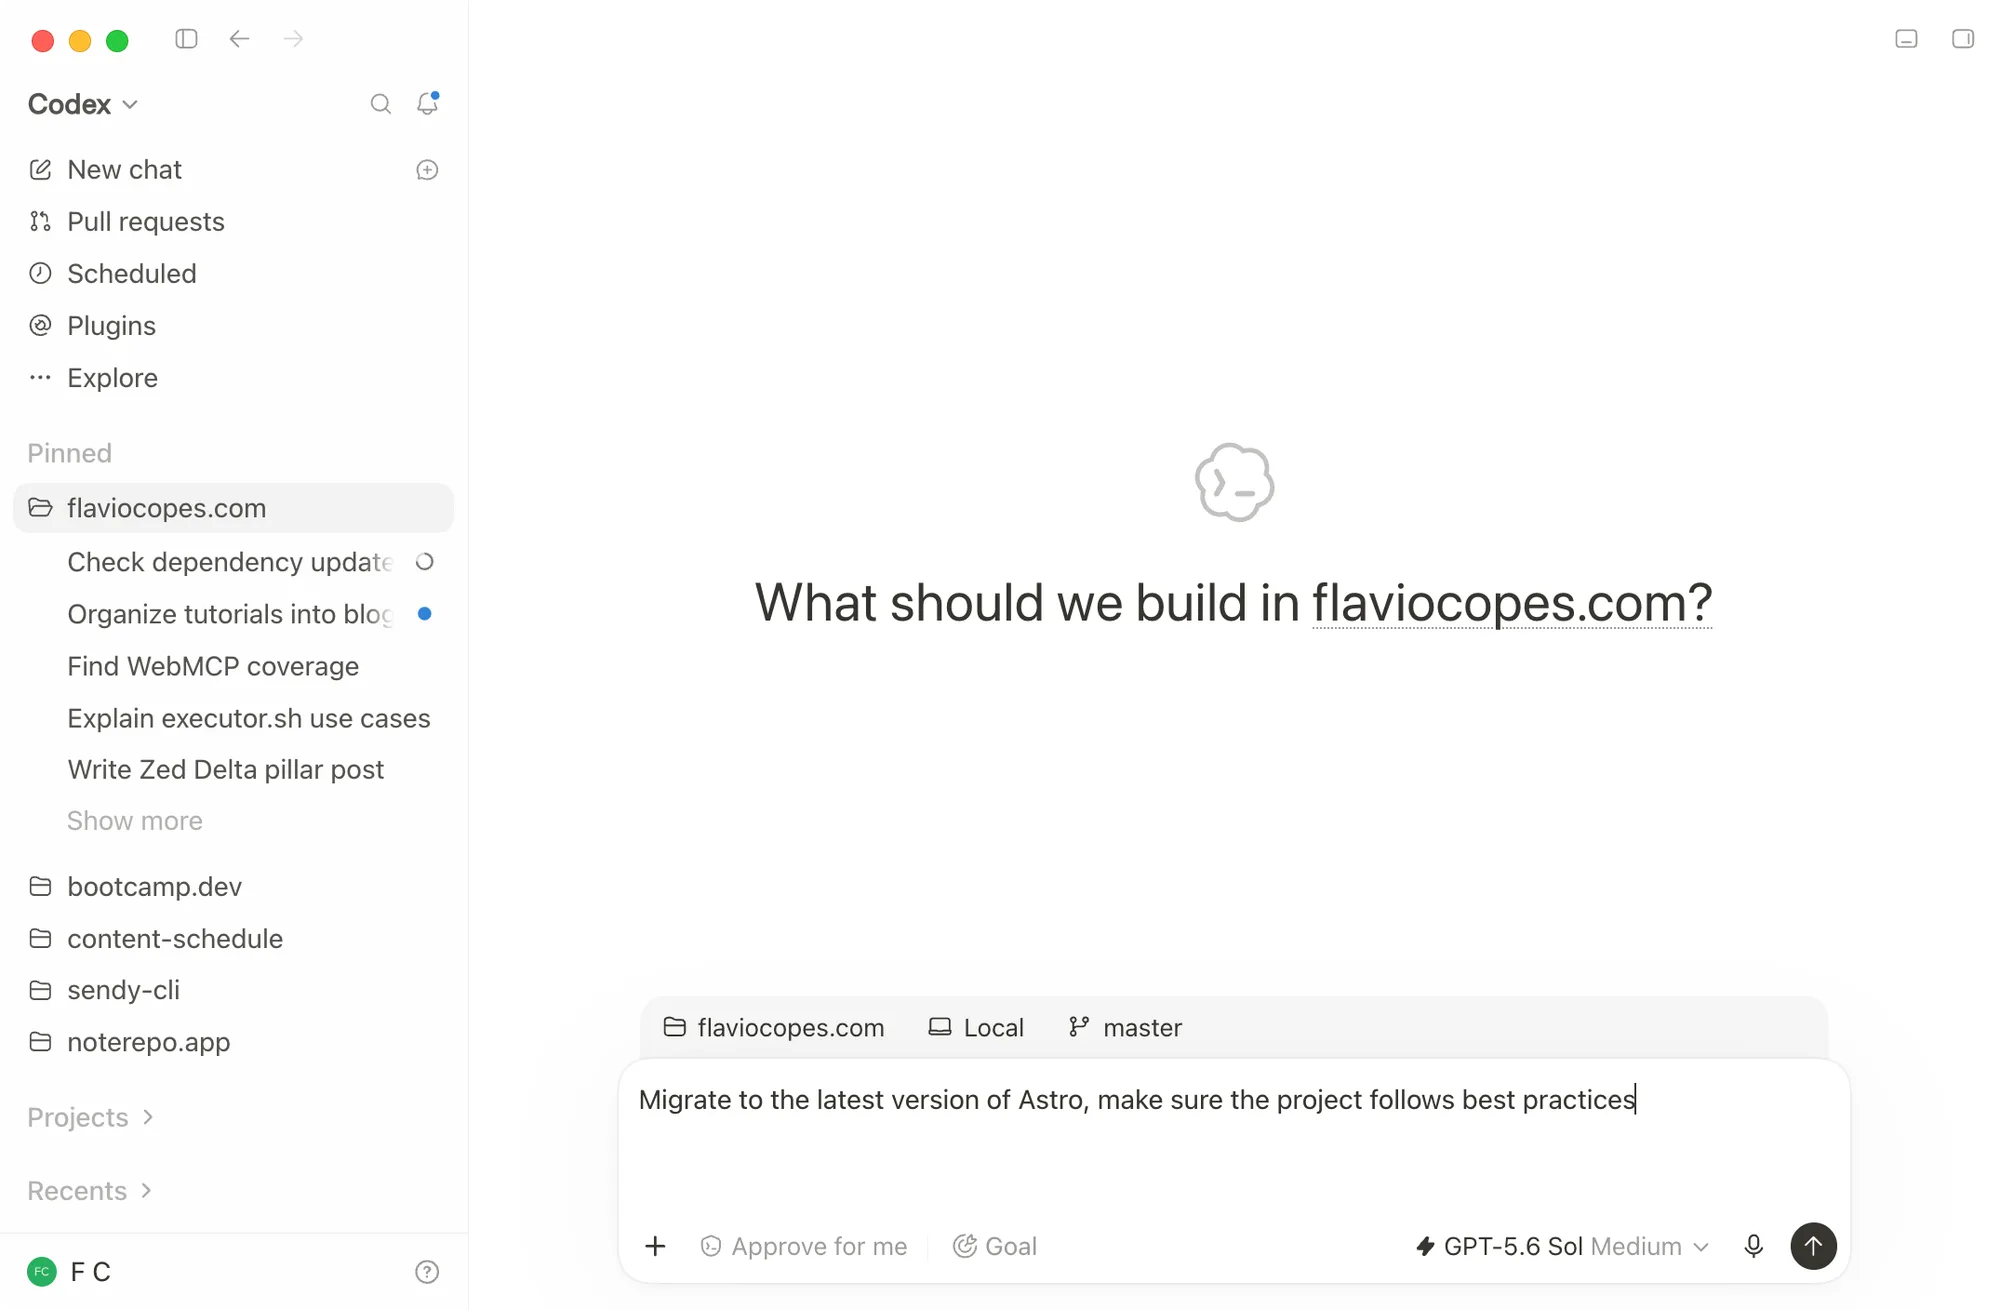
The goal should include the outcome, constraints, and verification.
You can pause, resume, edit, or clear a goal. It keeps the same sandbox and permission boundaries as a normal task.
I tested Goal mode by asking Codex to recreate PocketBase with two different stacks. It ran for over 24 hours and produced two impressive prototypes, but both still needed a lot of manual work.
My preferred workflow is still one feature at a time, followed by a review. I use a long-running goal when the destination is precise enough for Codex to know when it’s done.
Review every change
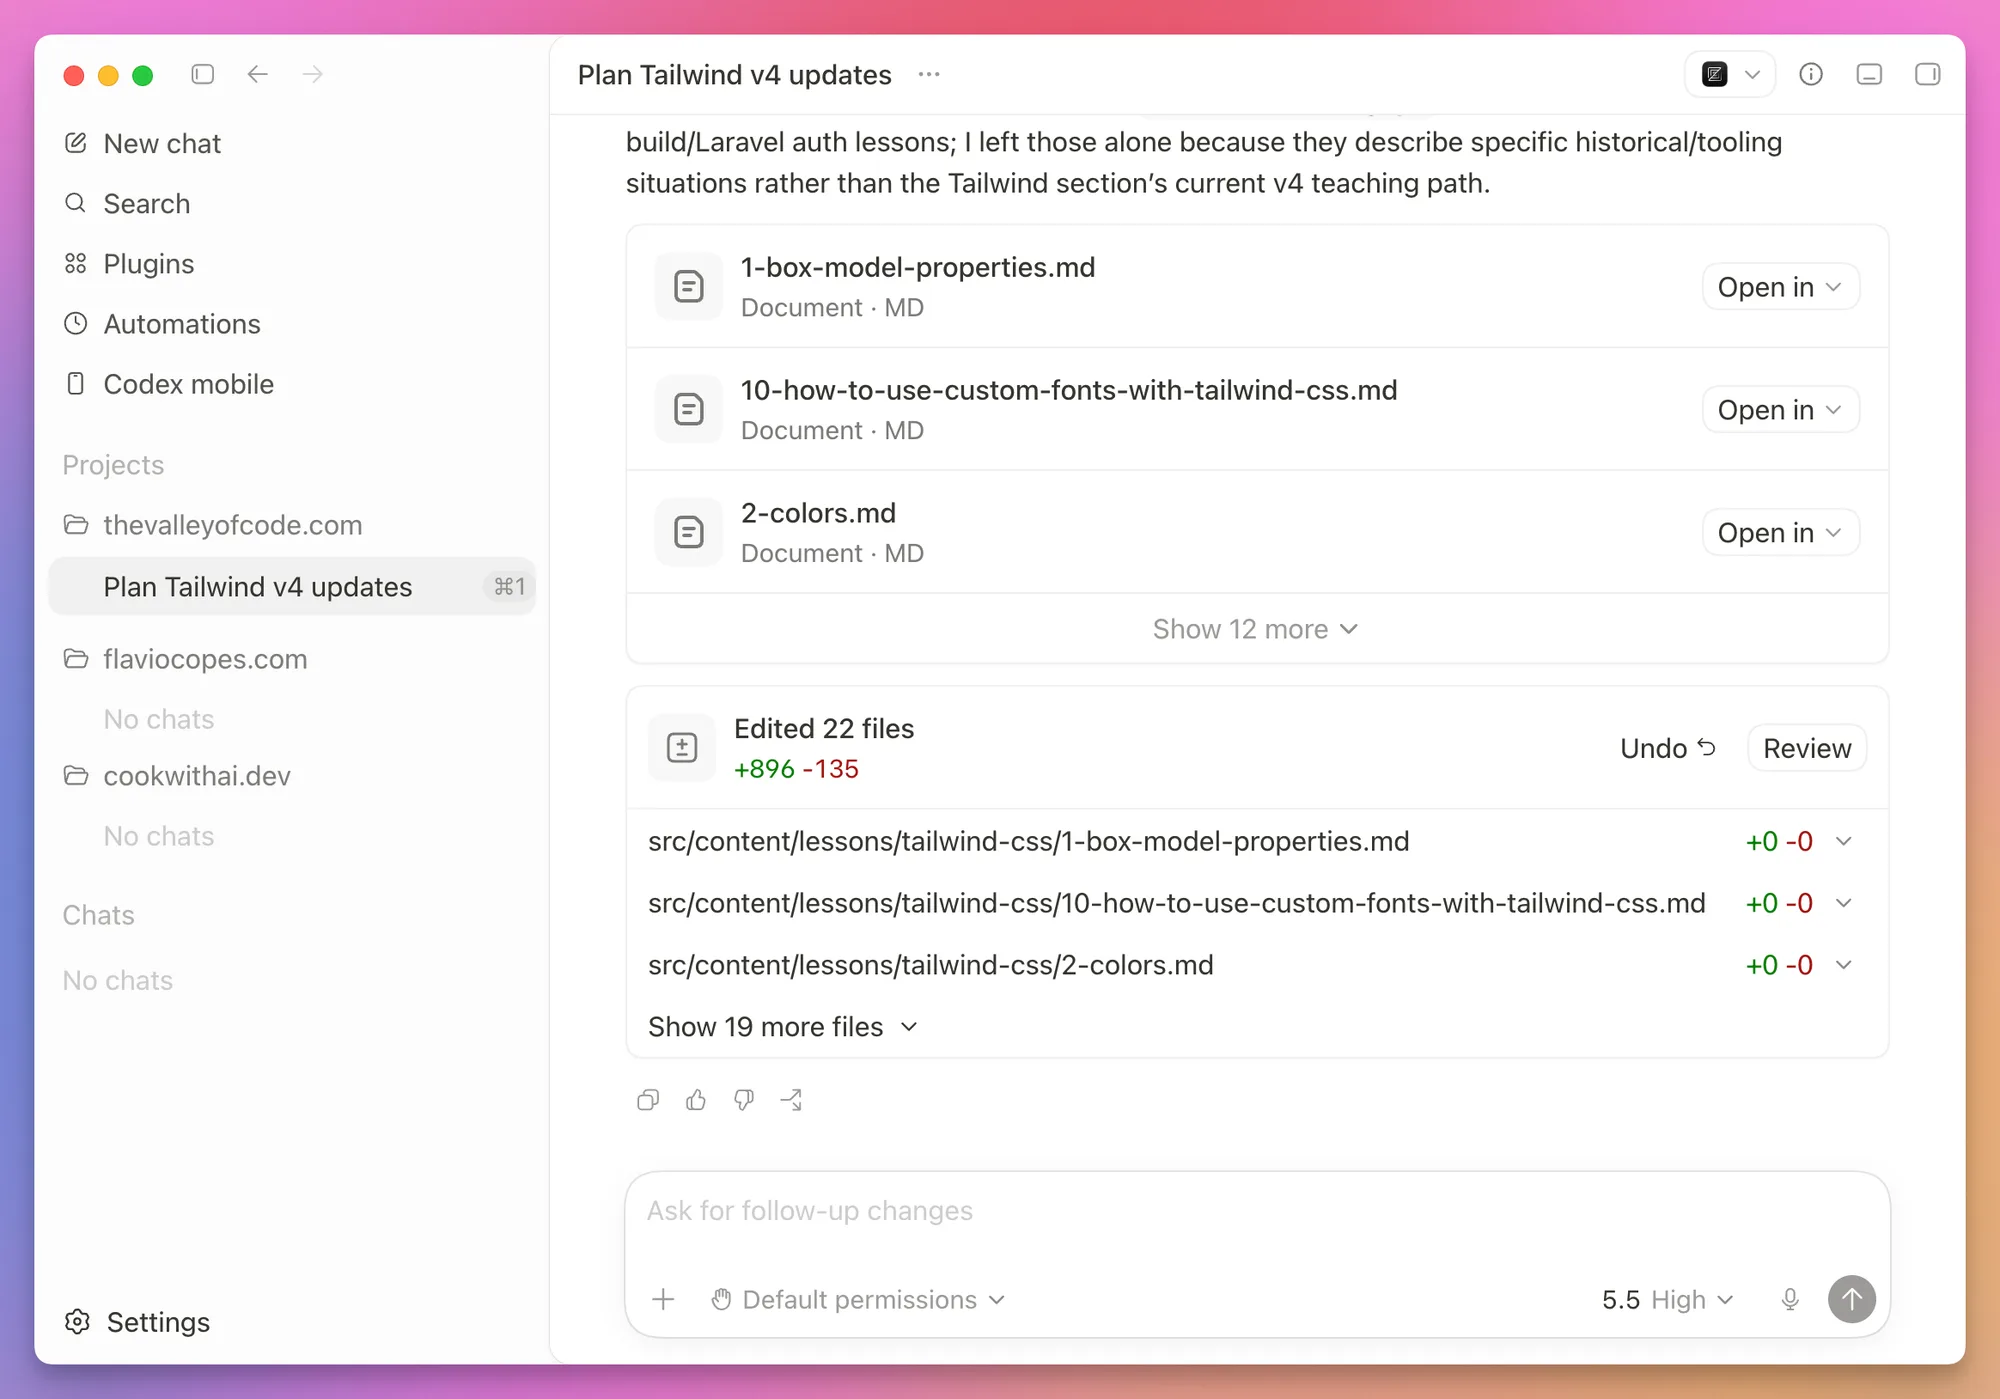
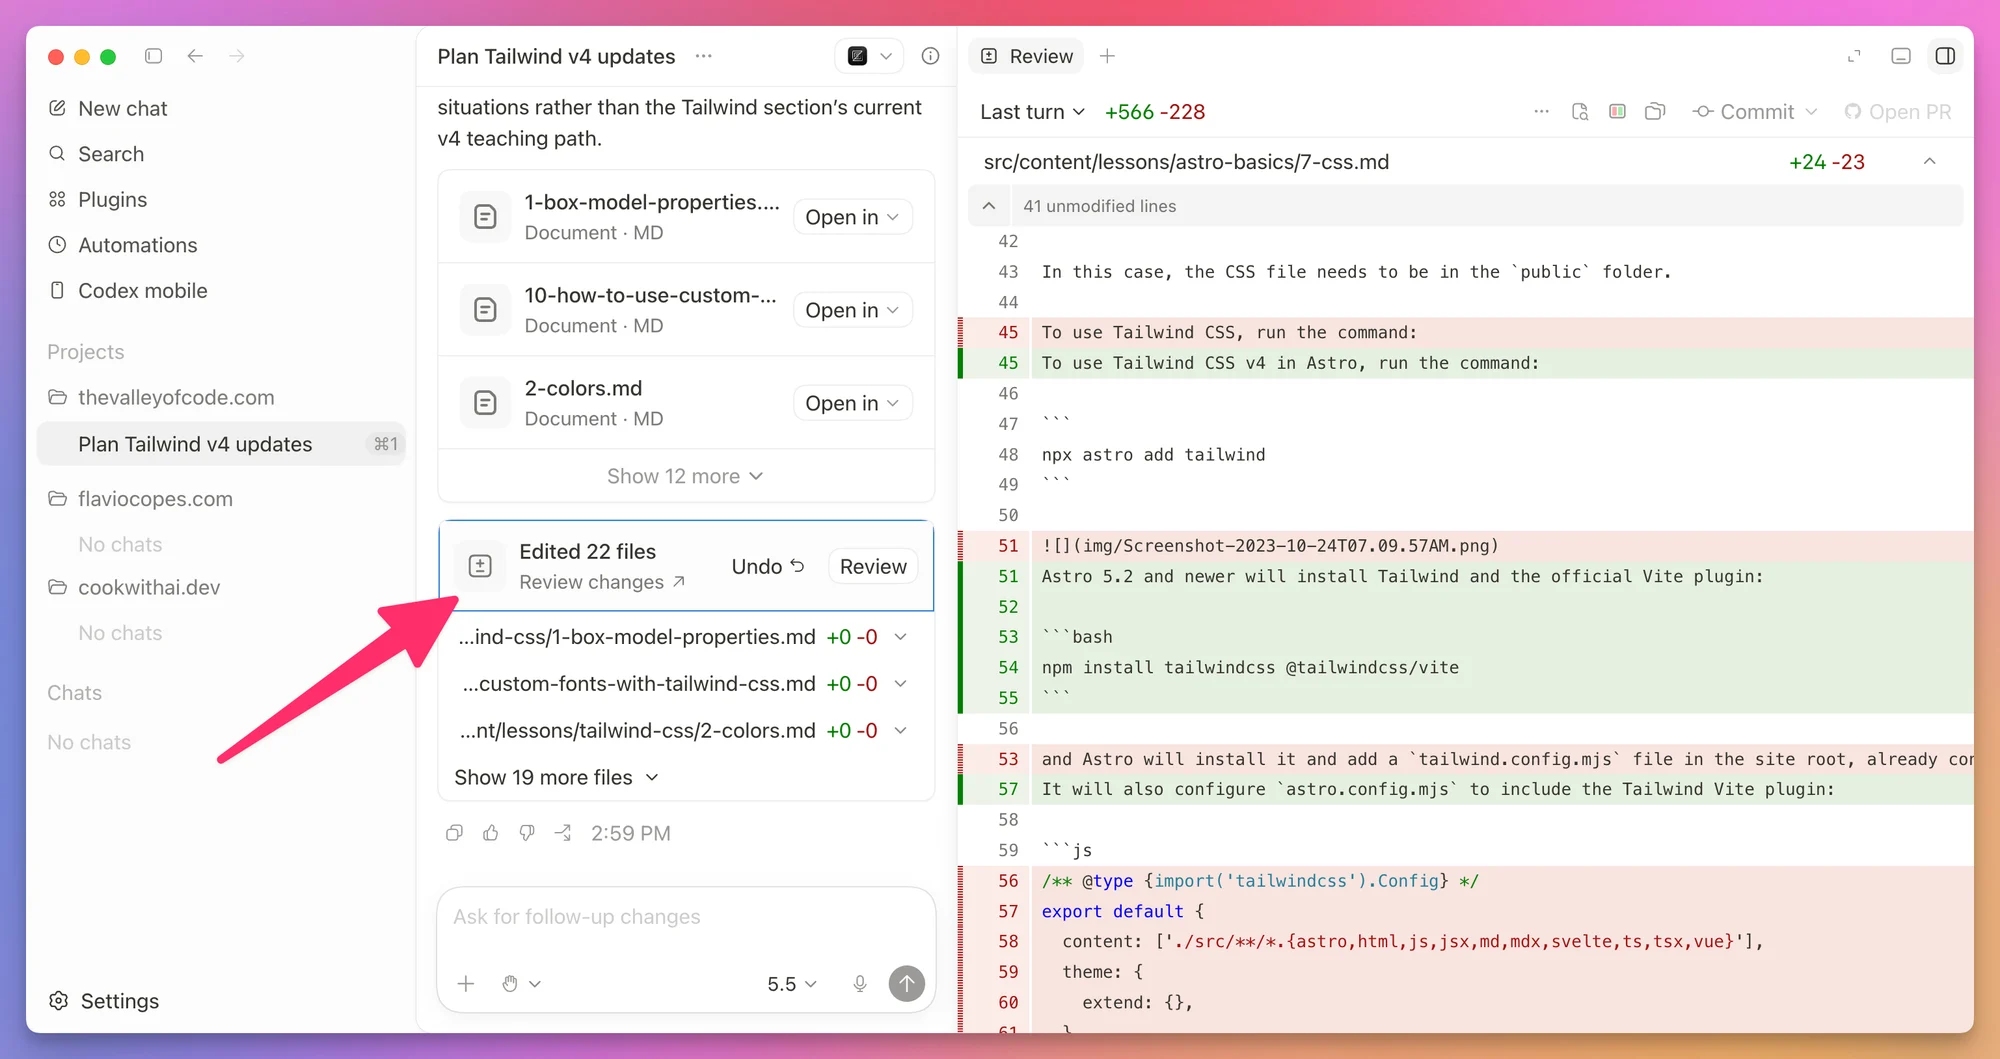
When Codex finishes, open the review panel. The green and red counters show how many lines changed. Click them to see the diff:
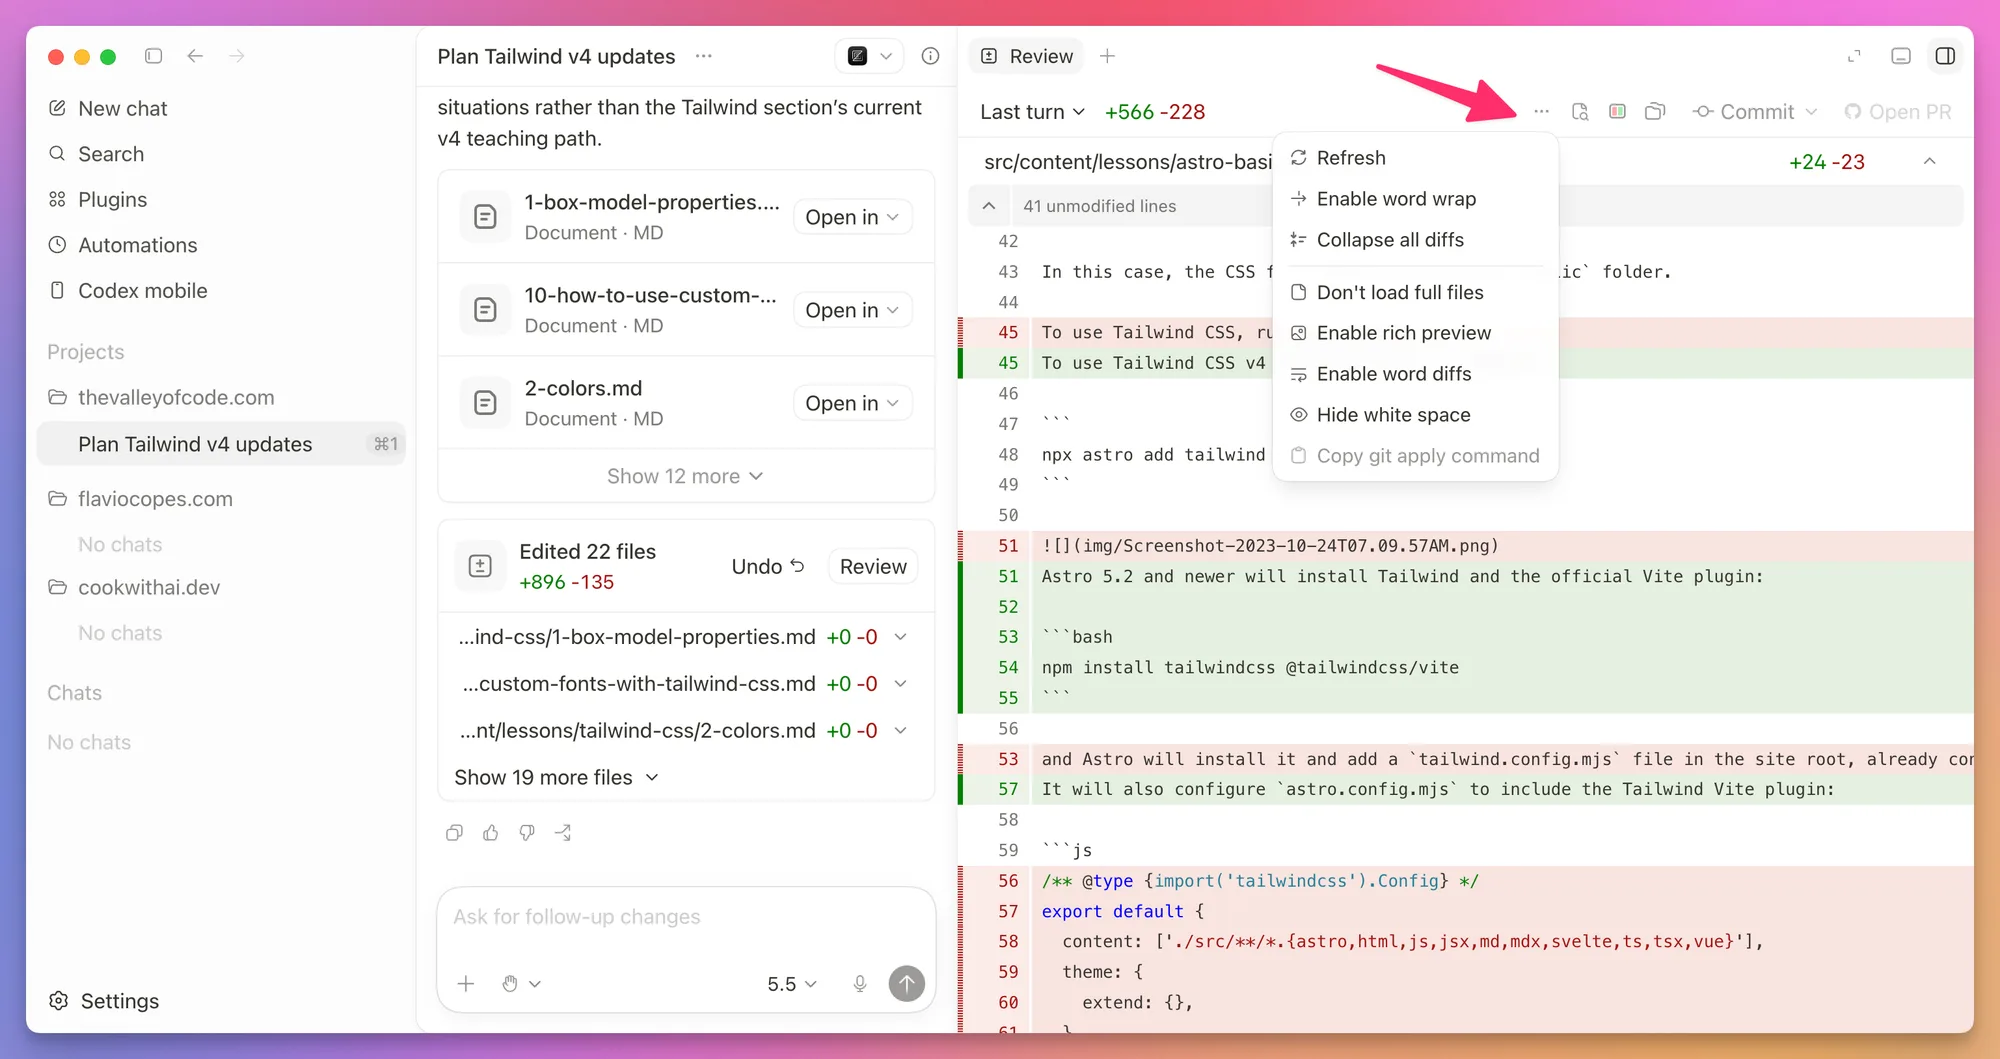
The review menu lets you switch how the changes are displayed.
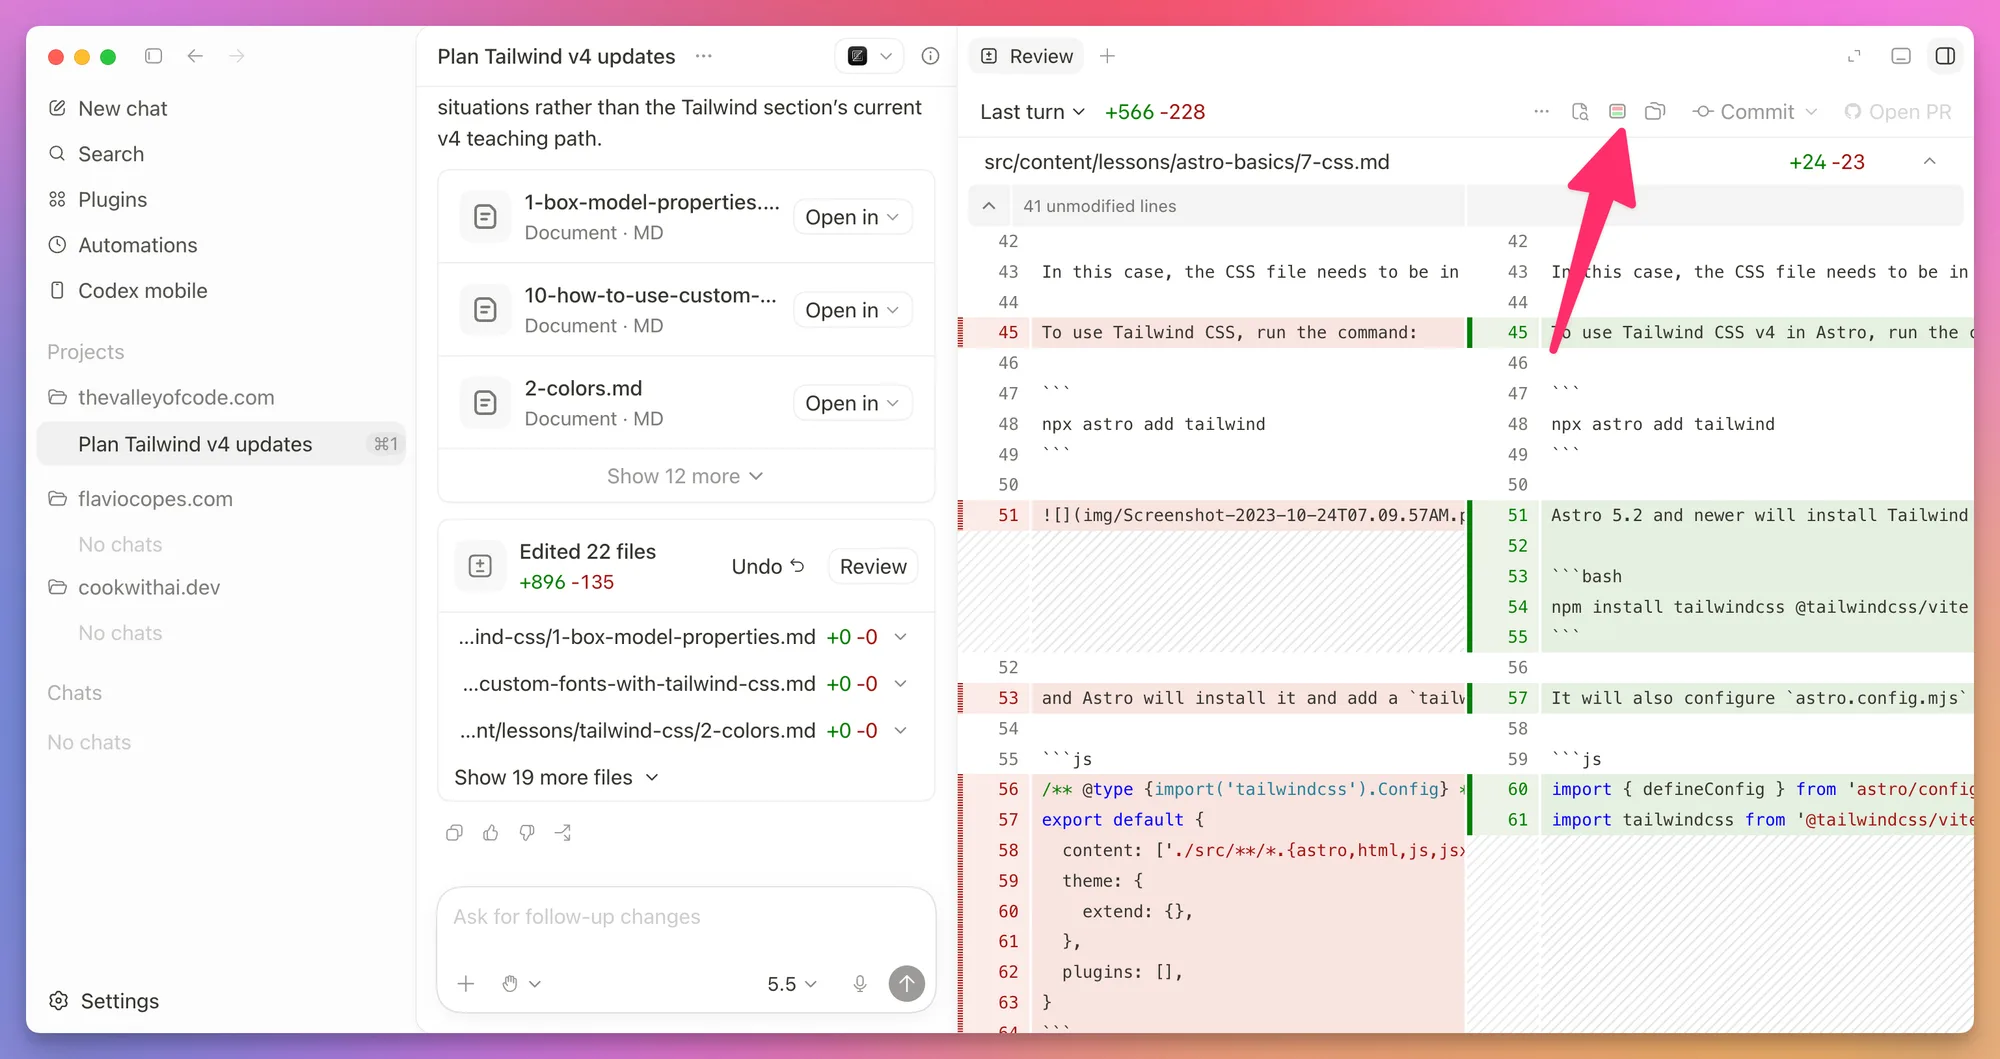
I like the split view when I want to compare the old and new versions side by side.
Read the diff before you commit. Check that:
- the change matches the request
- unrelated files were left alone
- errors and edge cases are handled
- tests cover the important behavior
- no secret or generated file slipped into Git
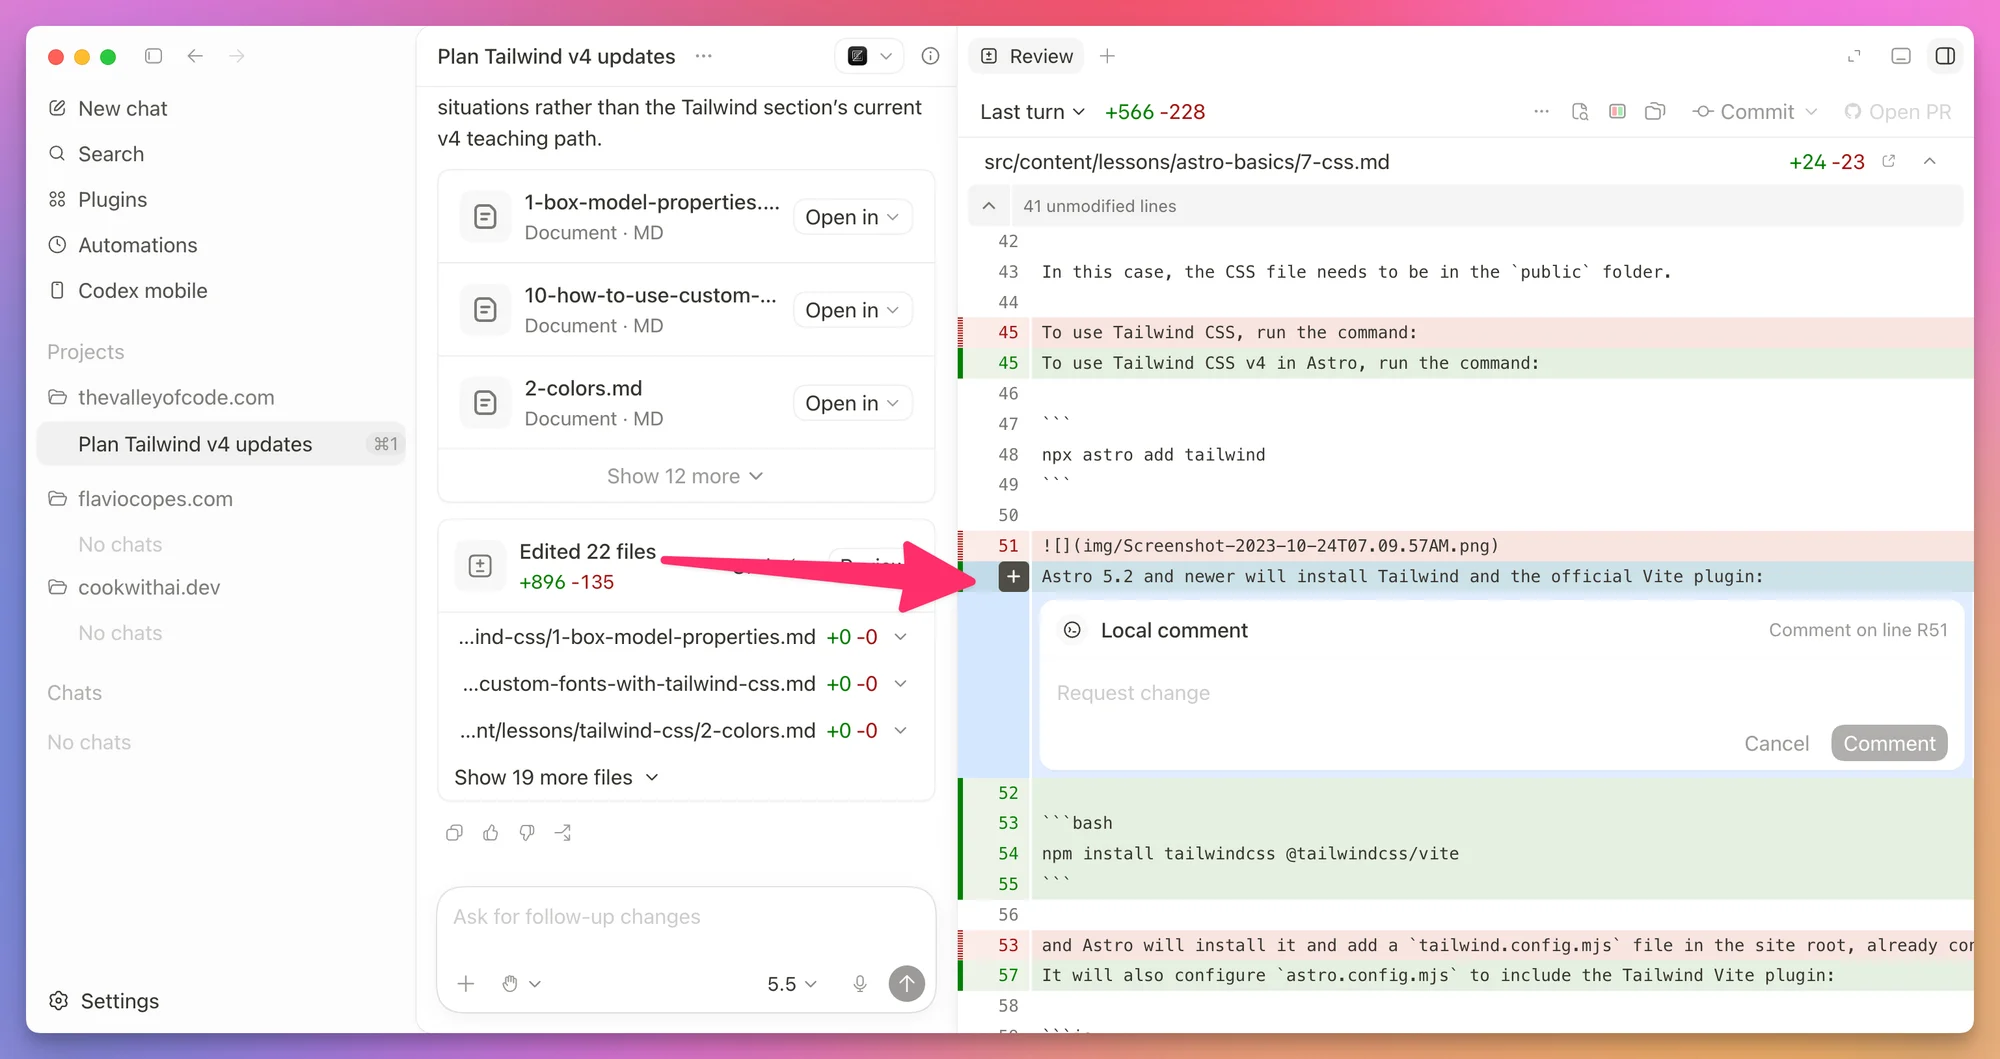
You can leave a comment on a specific line and ask Codex to address it:
I often ask for one final check after the tests pass:
Review the full diff for regressions, unnecessary complexity, and anything
that does not match the request. Fix real issues, then run the checks again.
Codex has a built-in version of this. Type /review in the composer and choose whether to review against a base branch or the uncommitted changes. A separate reviewer reads that diff and reports prioritized findings, without changing your working tree. In Settings > General > Code review you can make it run in a detached chat, so the review doesn’t fill up the chat that did the work.
Commit and push with Git
The desktop review panel can stage, revert, commit, push, and open a pull request.
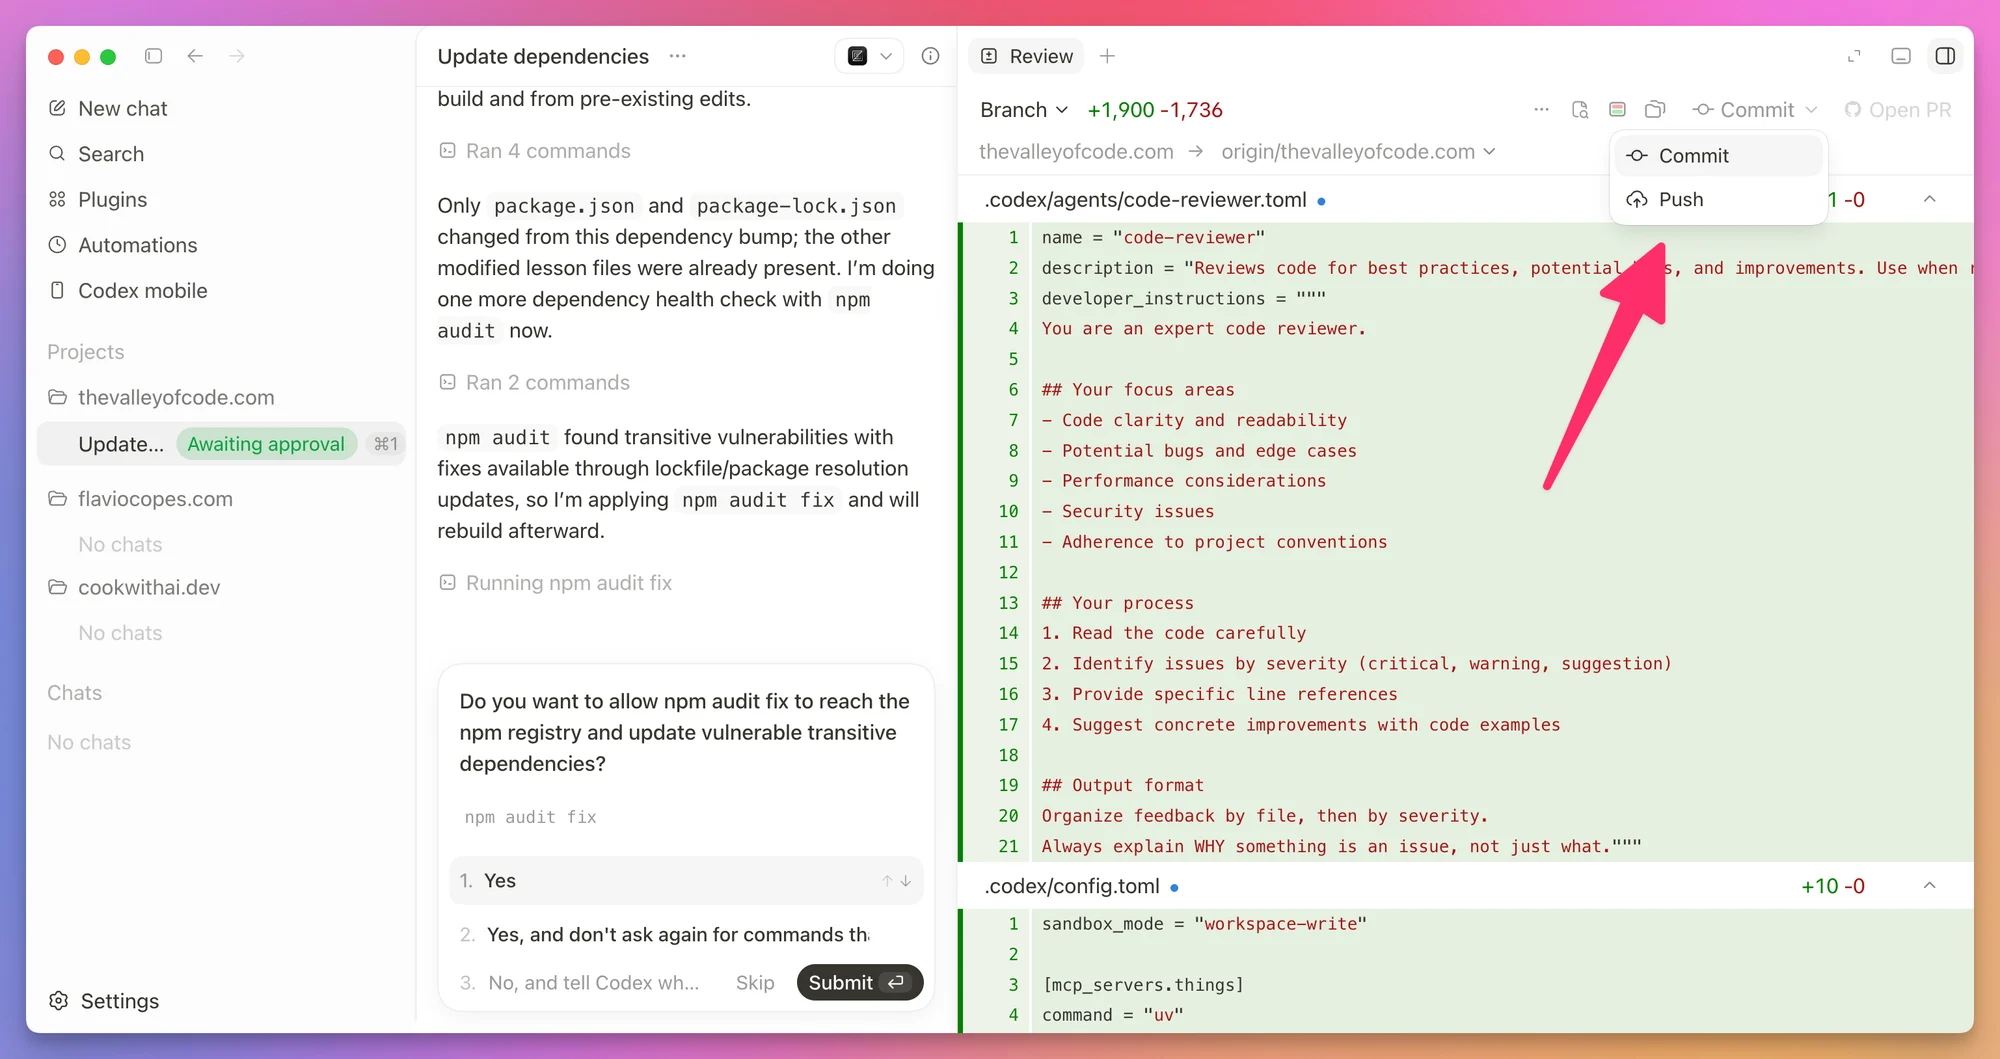
You can write the commit message yourself or let Codex propose one.
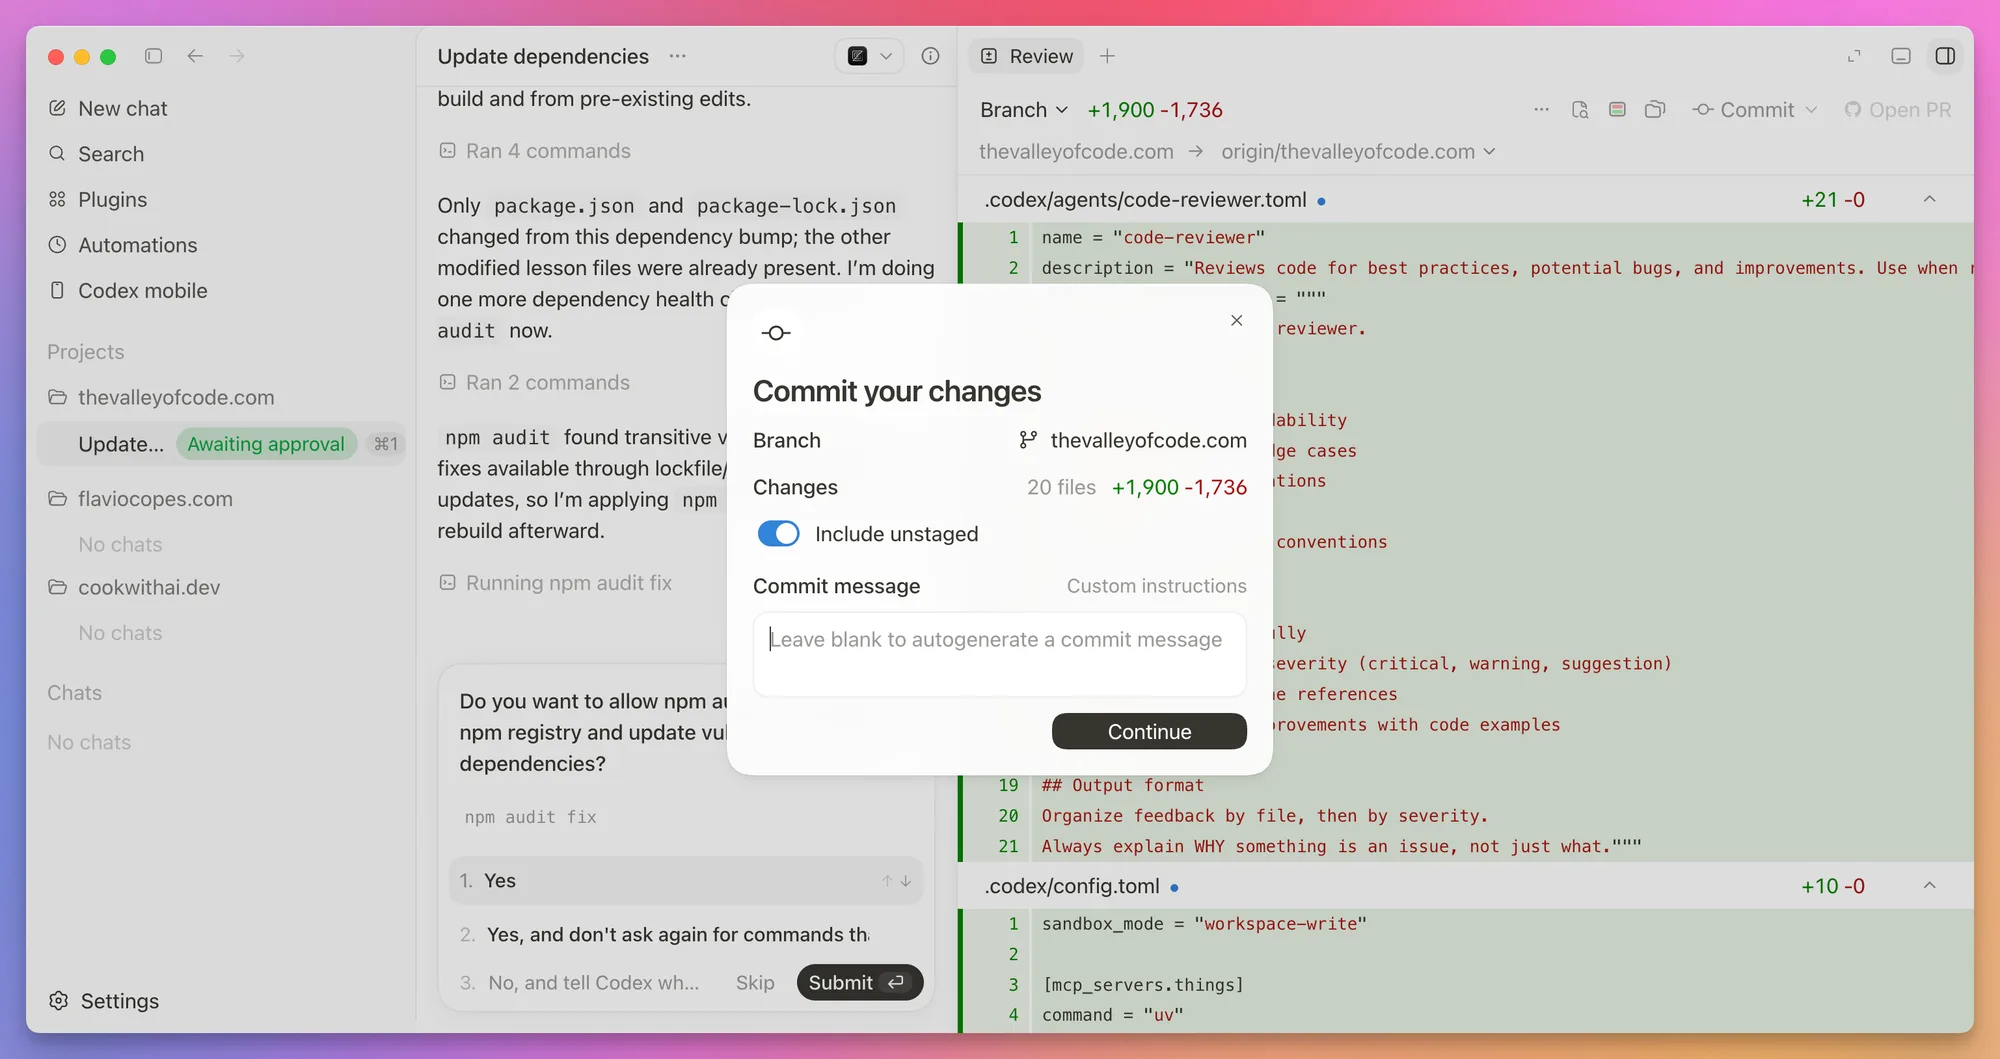
For a personal project, I often work directly in my normal checkout and commit after reviewing the result. In a team, I would use a branch and open a pull request so CI and other people can review the change.
I run the checks before committing, because a successful commit only tells me Git stored the changes.
Browse the project files
The desktop app has a file panel for quickly opening files without switching to an editor.
Open the panel menu and choose Files.
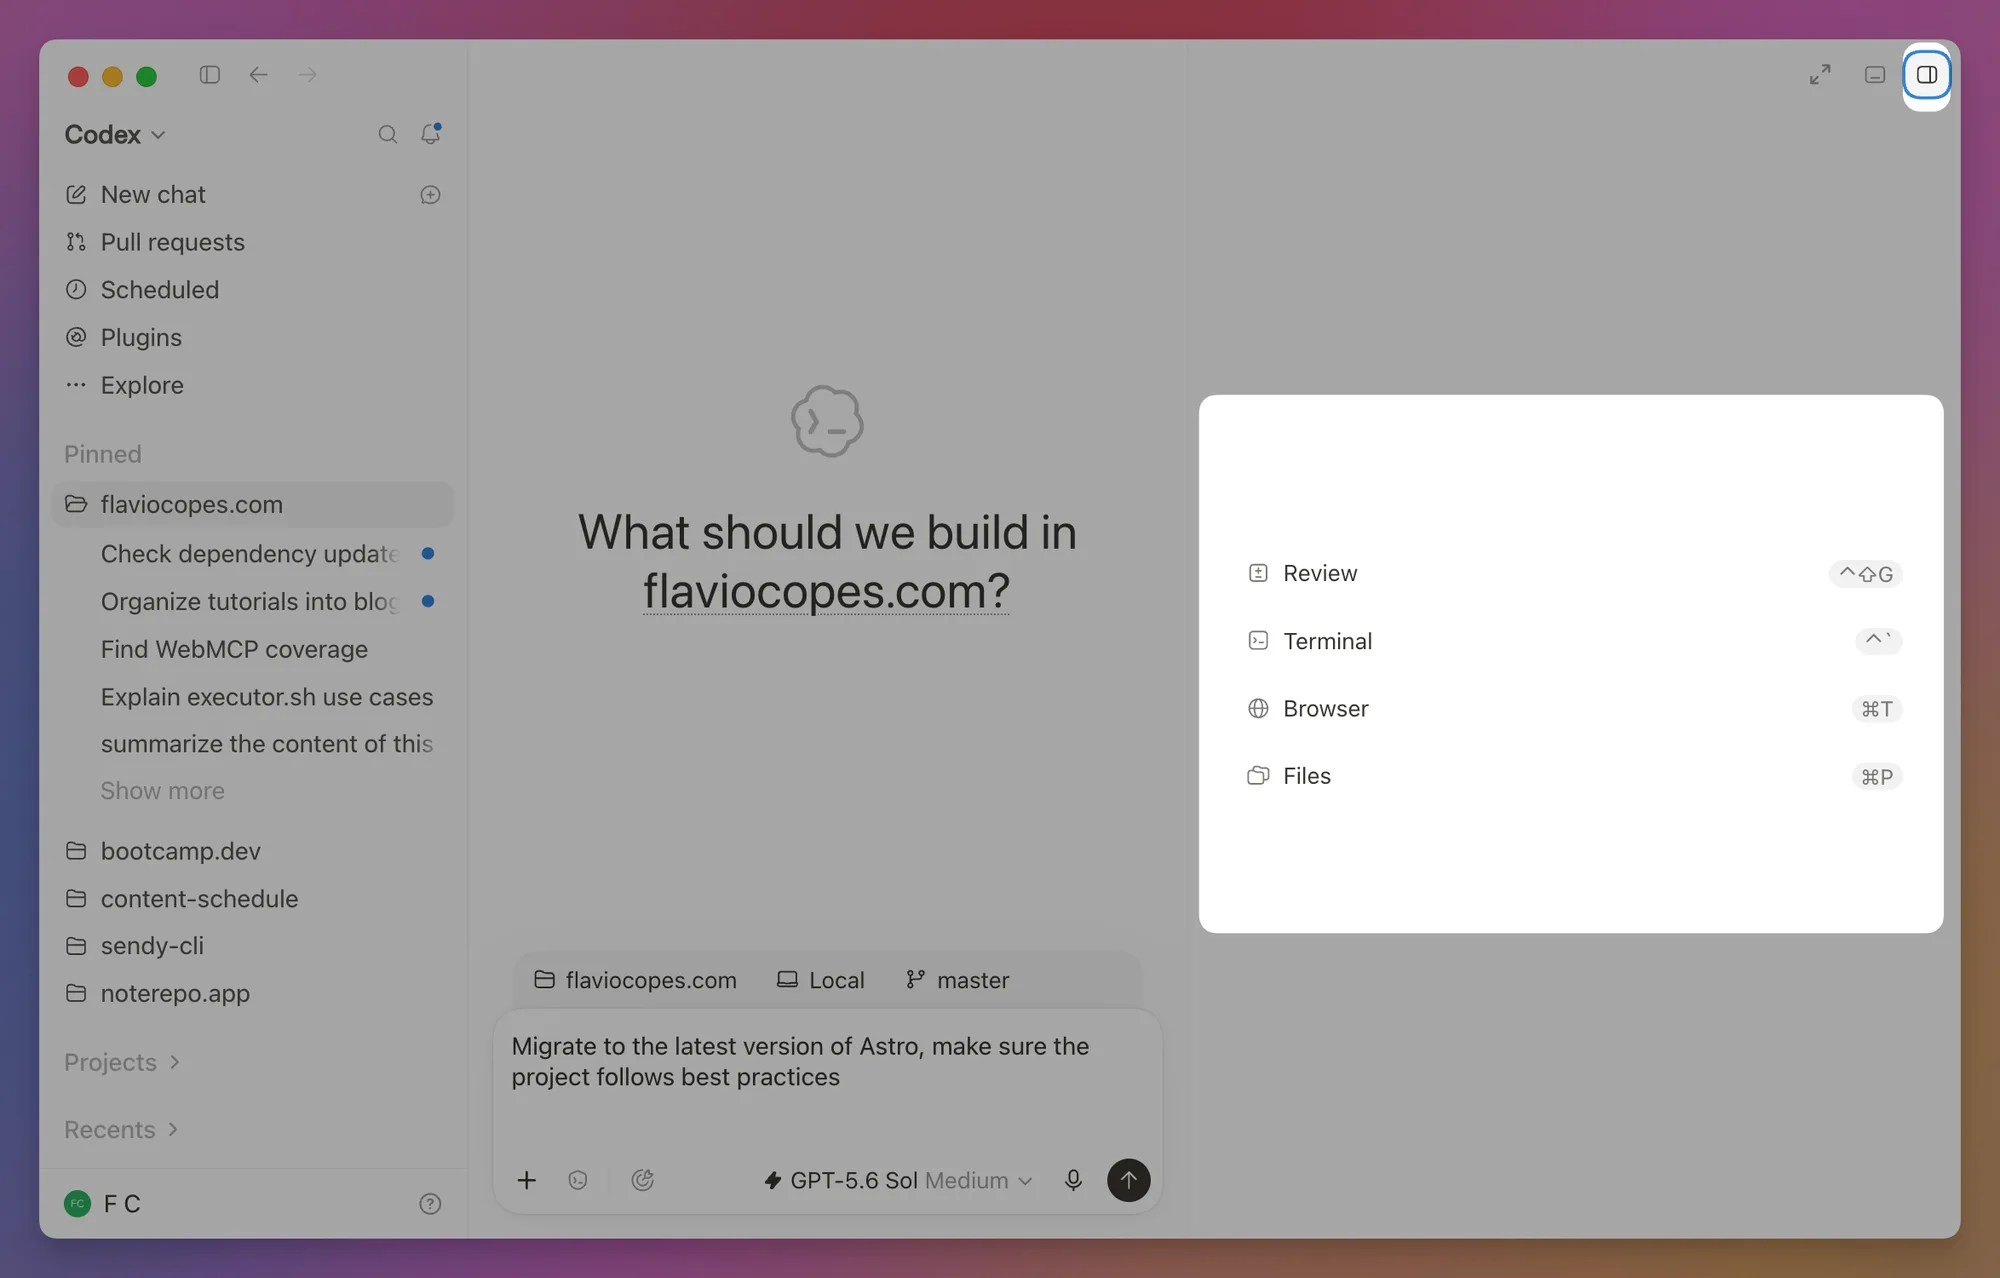
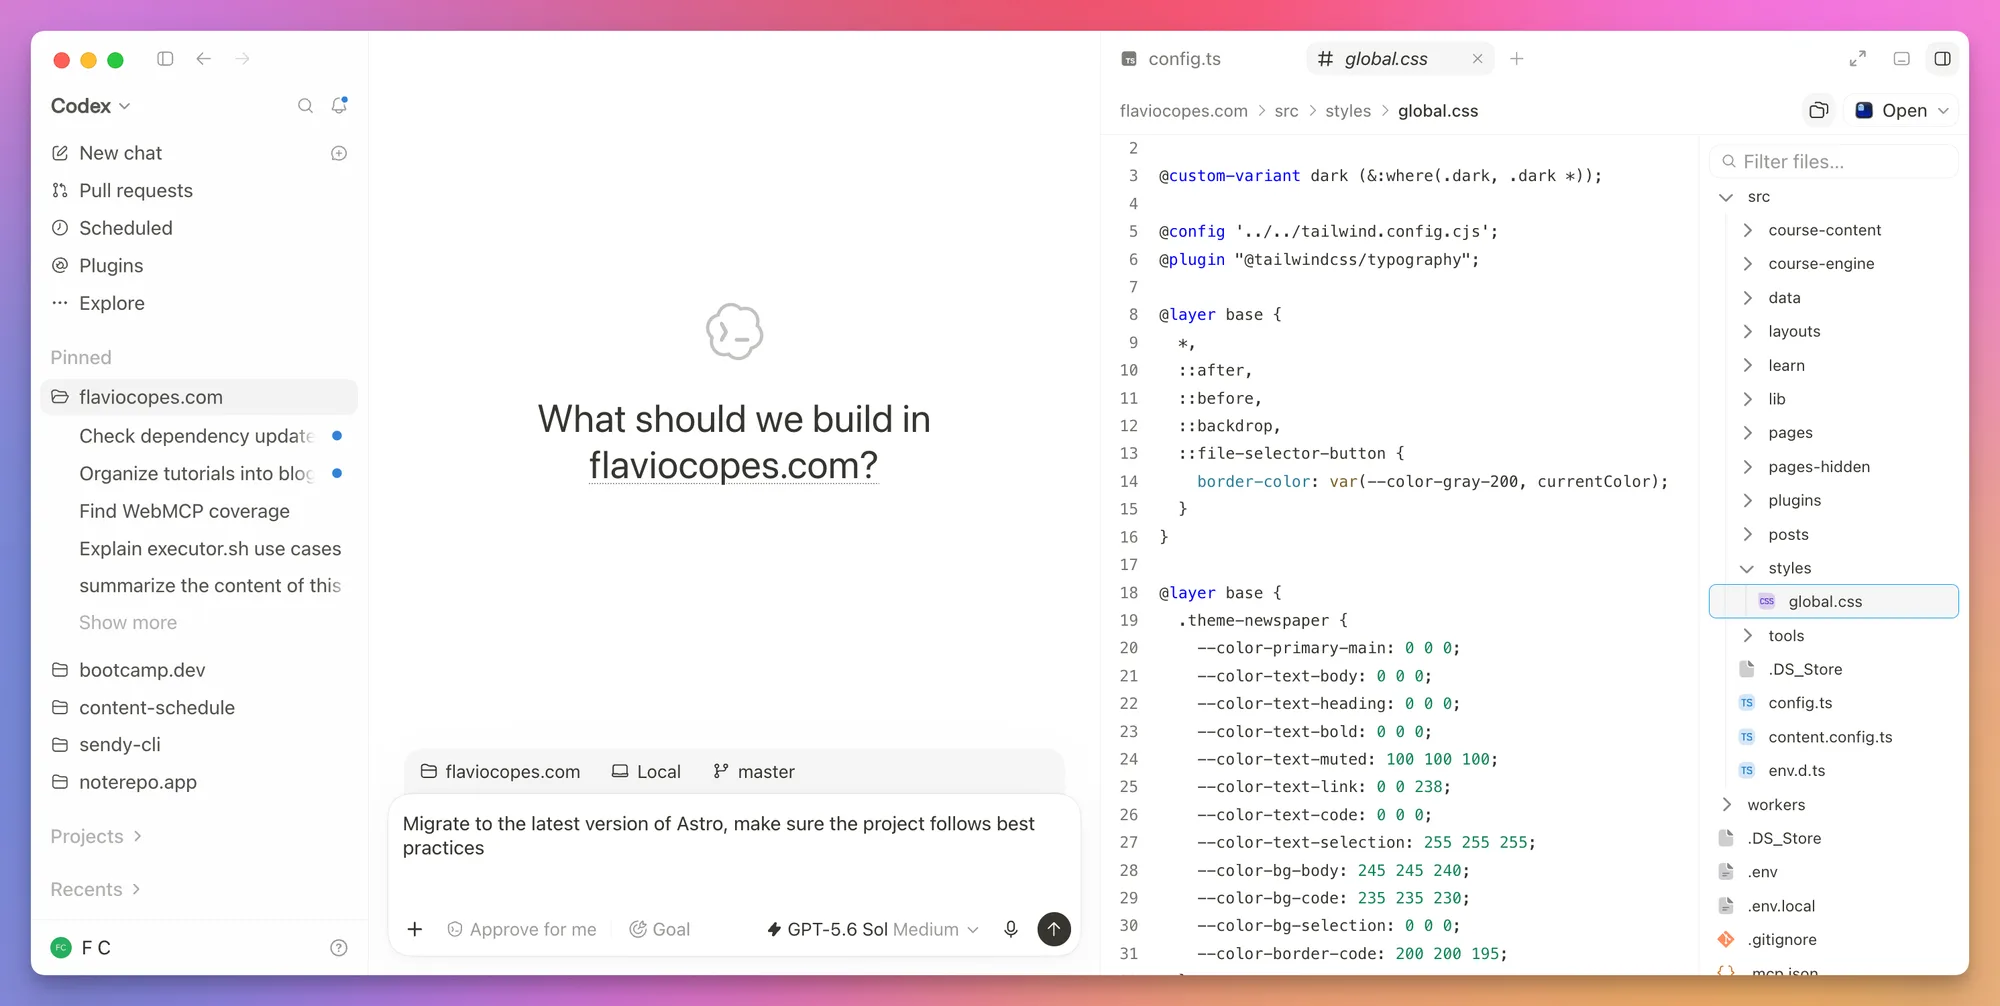
I use this while reviewing an explanation or comparing a changed file with its neighbors. For a long editing session, I still prefer a full editor.
You can also attach a file directly from the prompt panel. Pointing at the right file reduces search time, but do not attach twenty files just in case. Let Codex search the repository when the path is unclear.
Use the integrated terminal
Every desktop chat has a terminal scoped to its project or worktree. Open the panel menu and choose Terminal.
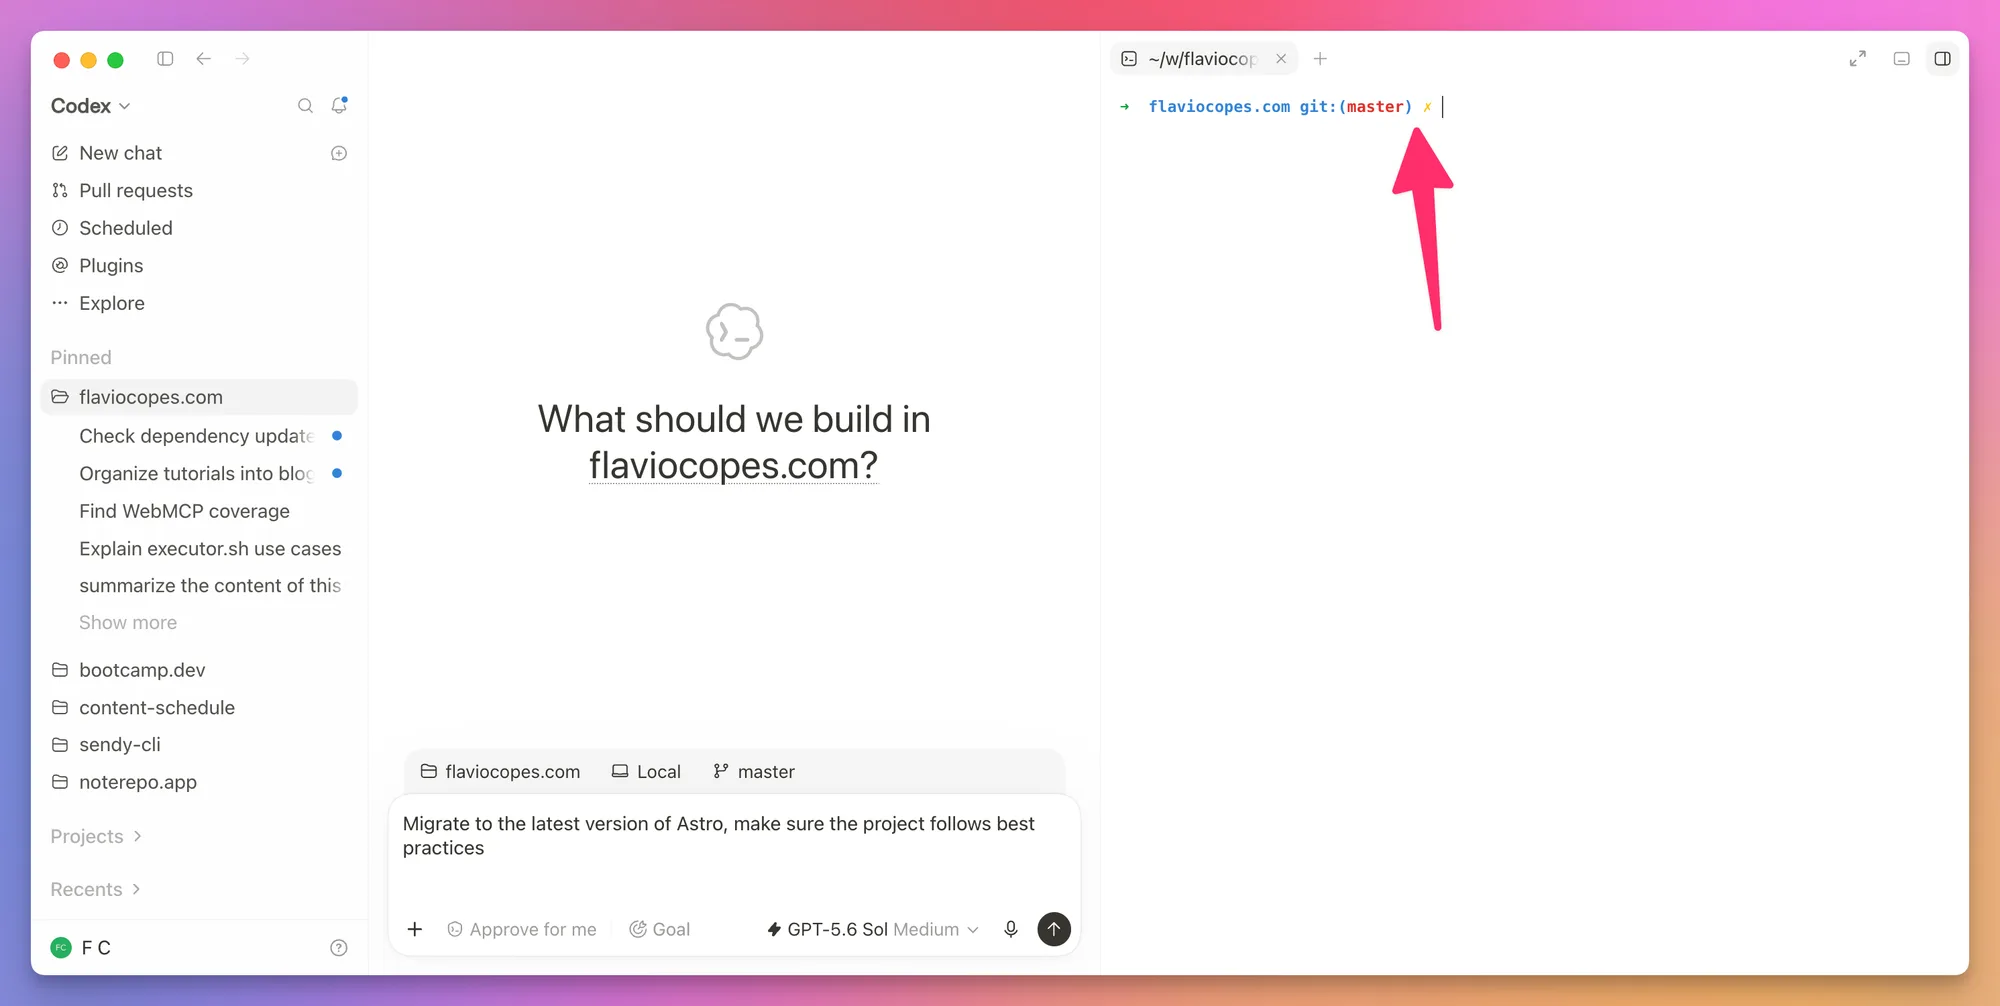
Use it to start the development server, run Git commands, inspect logs, or try the result yourself.
When I want a real terminal, I use the Open button at the top of the chat instead. It opens the project, or the worktree, in your editor or terminal app. Click the arrow next to it to pick one: VS Code, Cursor, Zed, Ghostty, iTerm2, Warp, and a few more. Mine defaults to Ghostty.
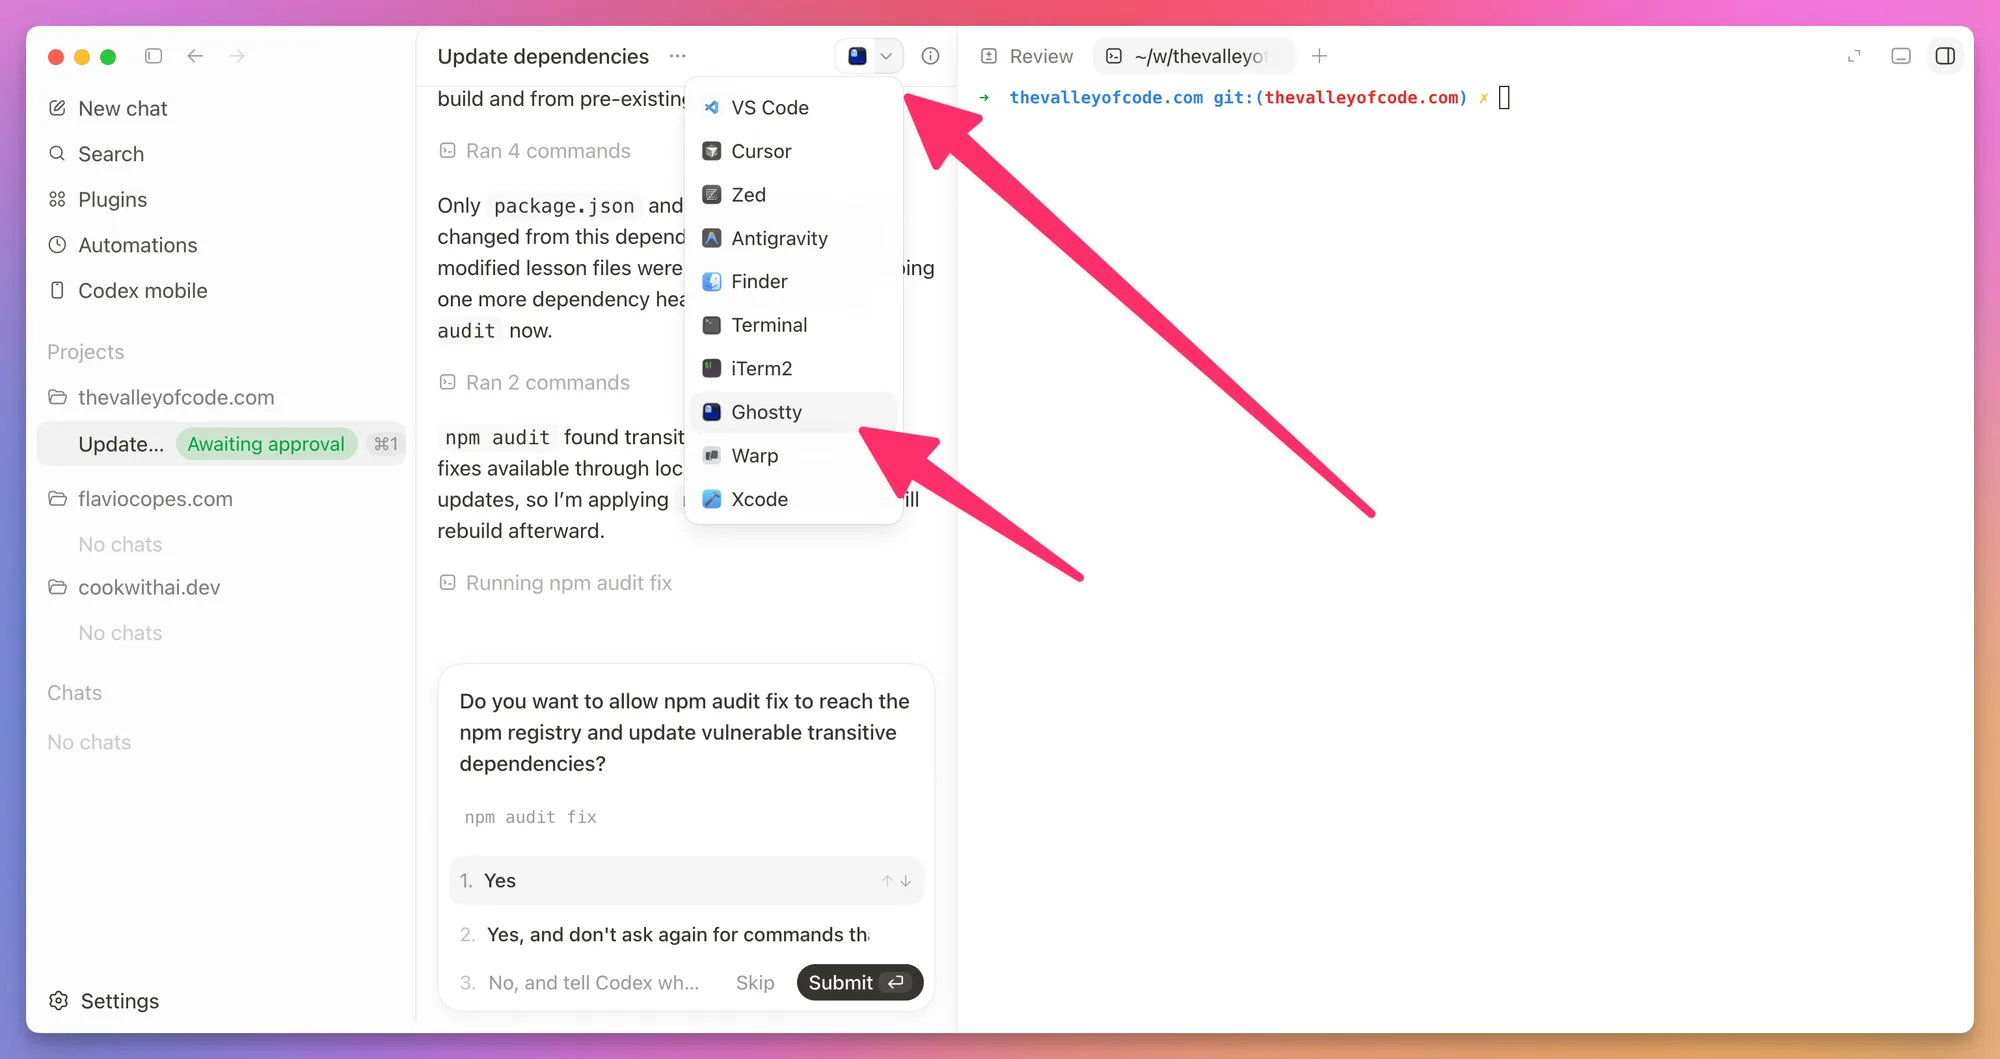
Codex can read the current terminal output. If a build fails, you can ask:
Read the terminal output, find the first real error, and fix it.The terminal is also useful when a process must keep running while Codex works. Start npm run dev, leave it open, and let the agent use the browser against the local URL.
Test web apps in the built-in browser
The desktop app includes a browser. Open it from the panel menu or mention @Browser in your prompt.
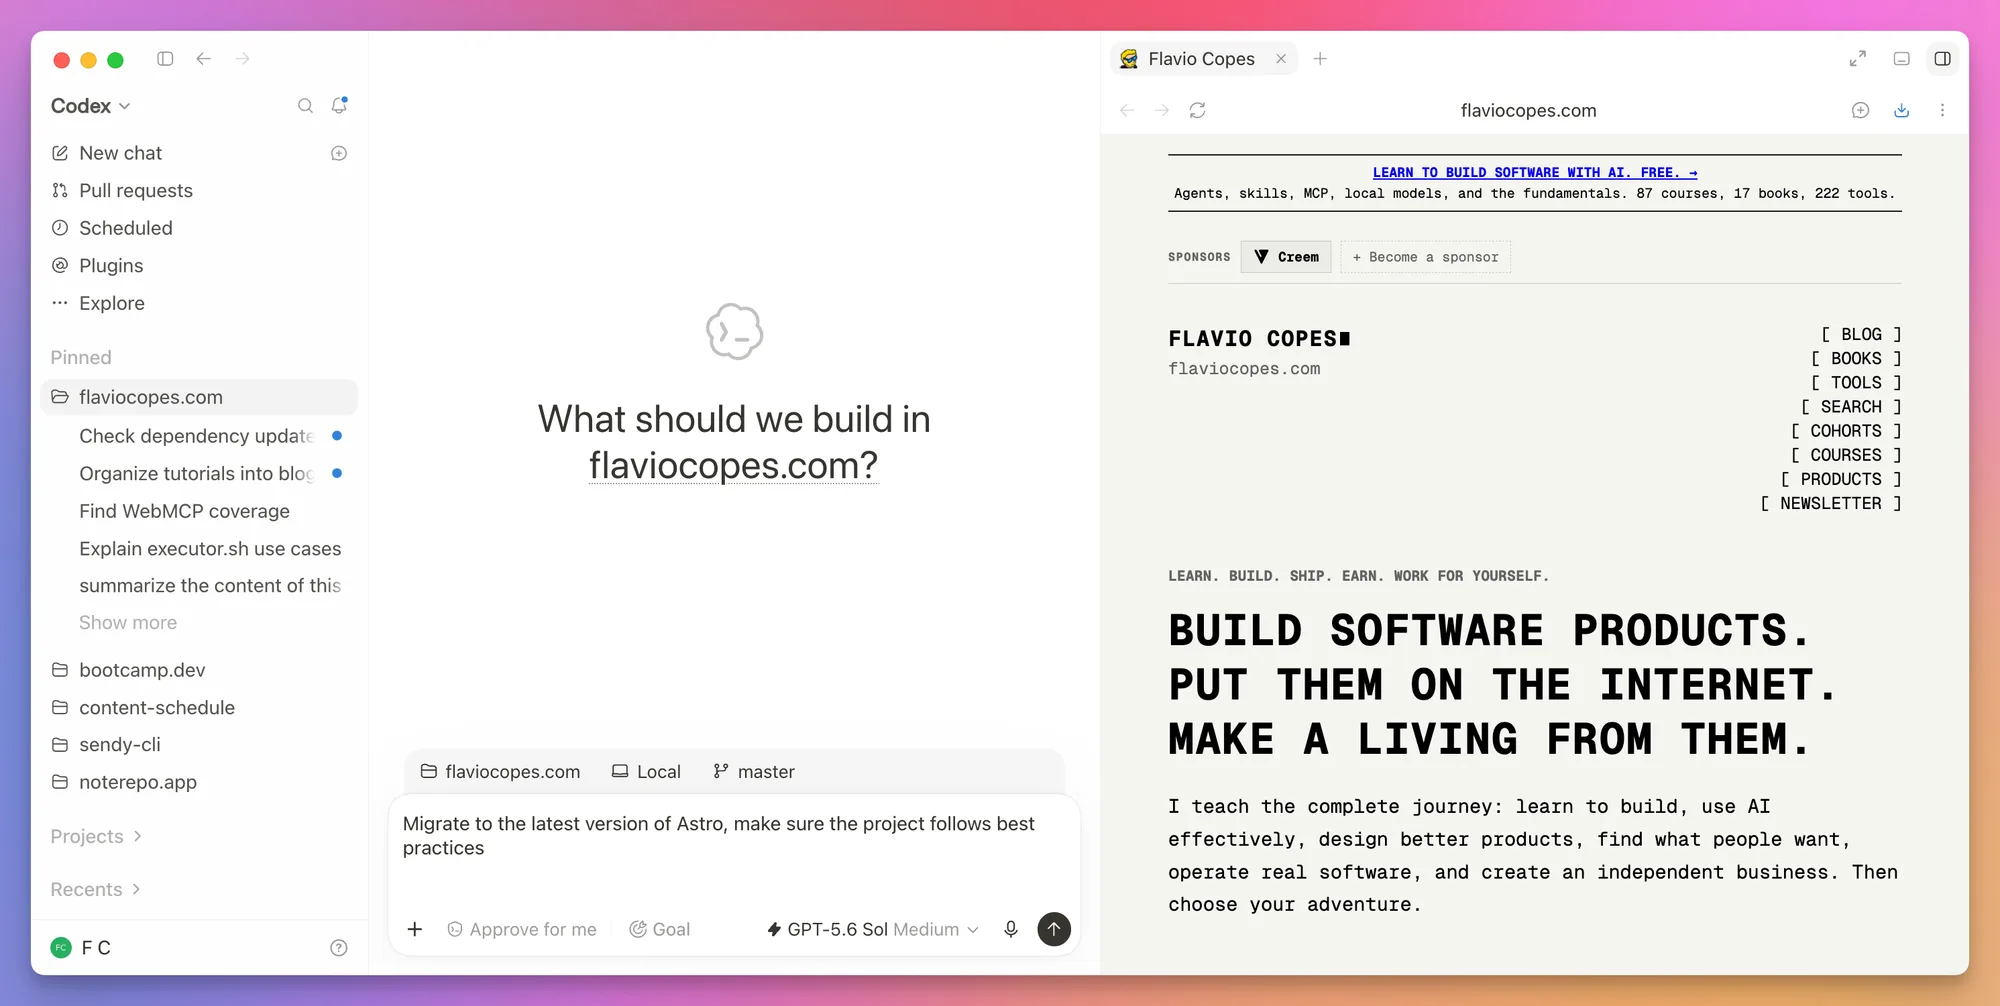
The built-in browser has its own profile. Your open Chrome or Safari tabs, cookies, and logged-in sessions are not carried over. When a task needs your real browser with its logins, the browser extension connects Codex to Chrome, Edge, Brave, Opera, or Vivaldi. Set it up from Settings > Computer use and mention @Chrome in the prompt.
For a local web app, ask Codex to start the server and open the route:
Start the development server, open http://localhost:4321/settings in @Browser,
and verify the form at desktop and mobile widths.
You can turn on annotation mode, click an element, and describe the exact change you want:
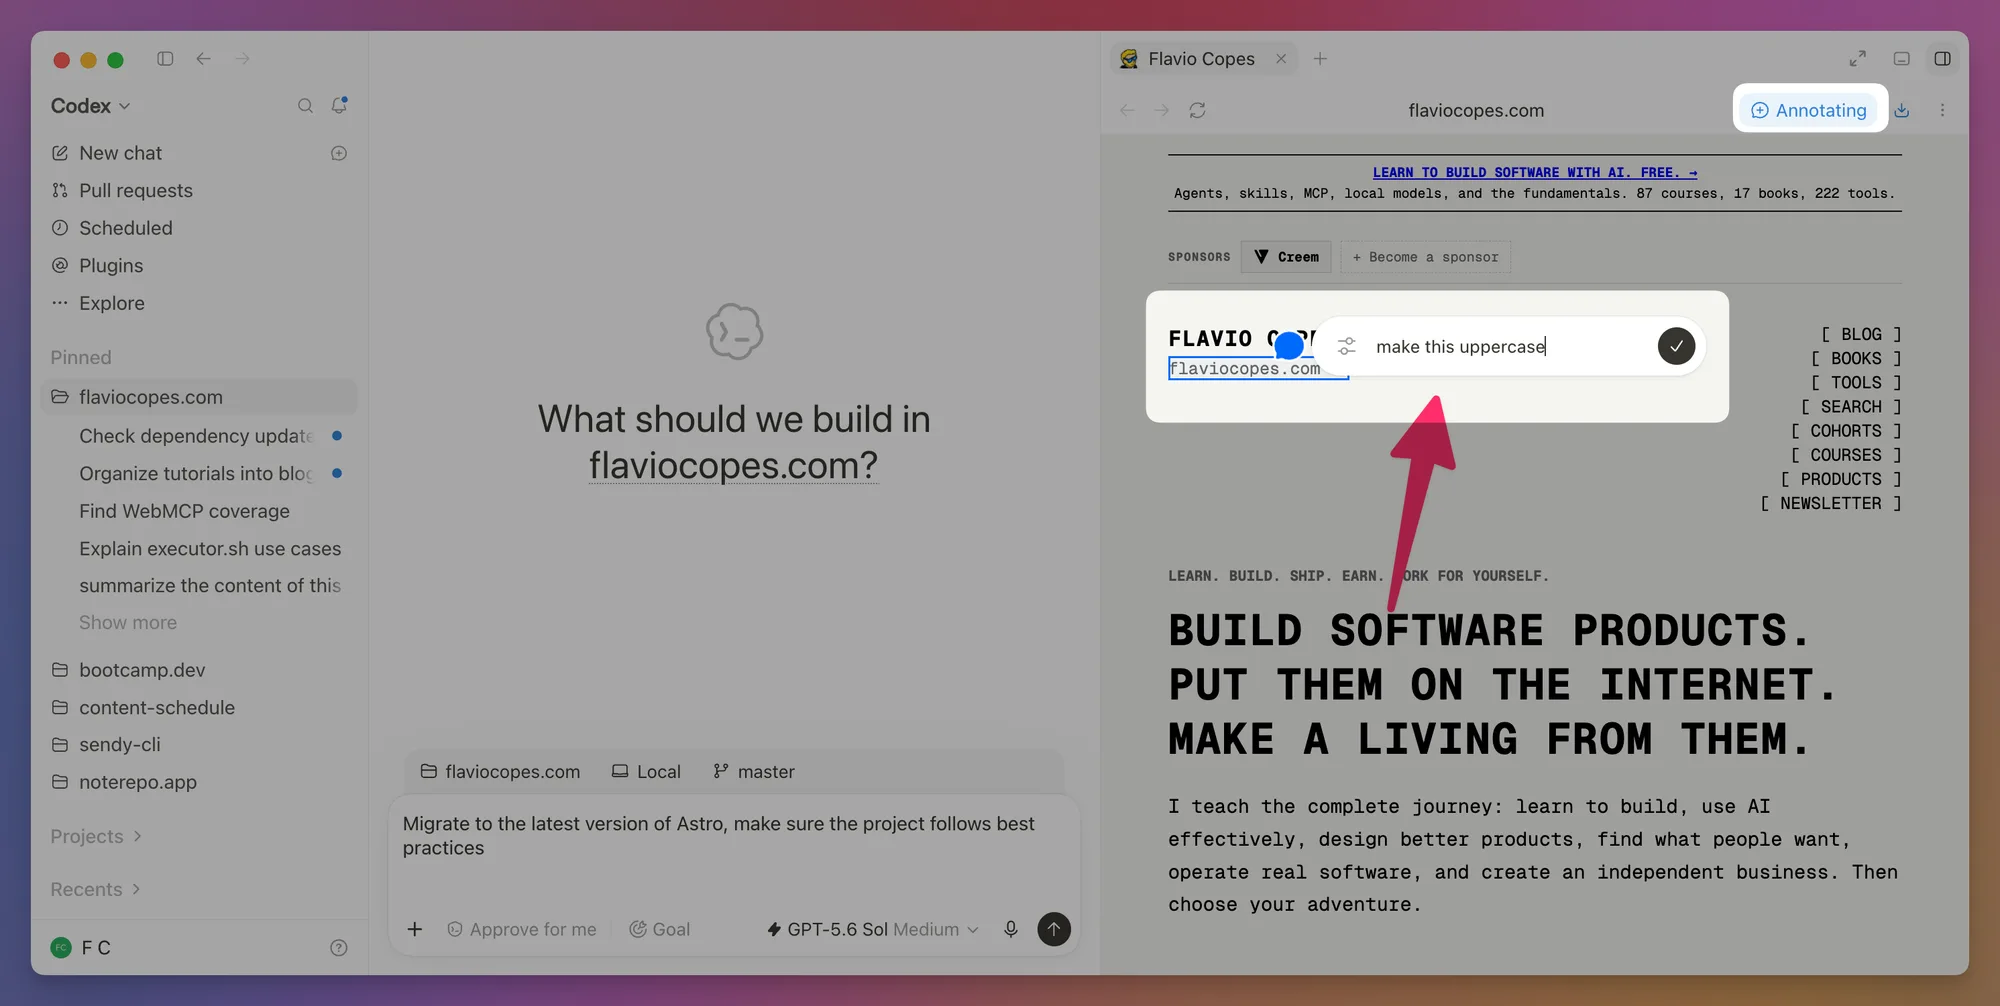
This is one of my favorite parts of the app. Instead of describing “the text block on the right under the second heading”, I click it and write “make this font larger”.
Codex receives the selected element with the prompt and can work on that exact part of the page. After the change, ask it to reopen the page and verify the result.
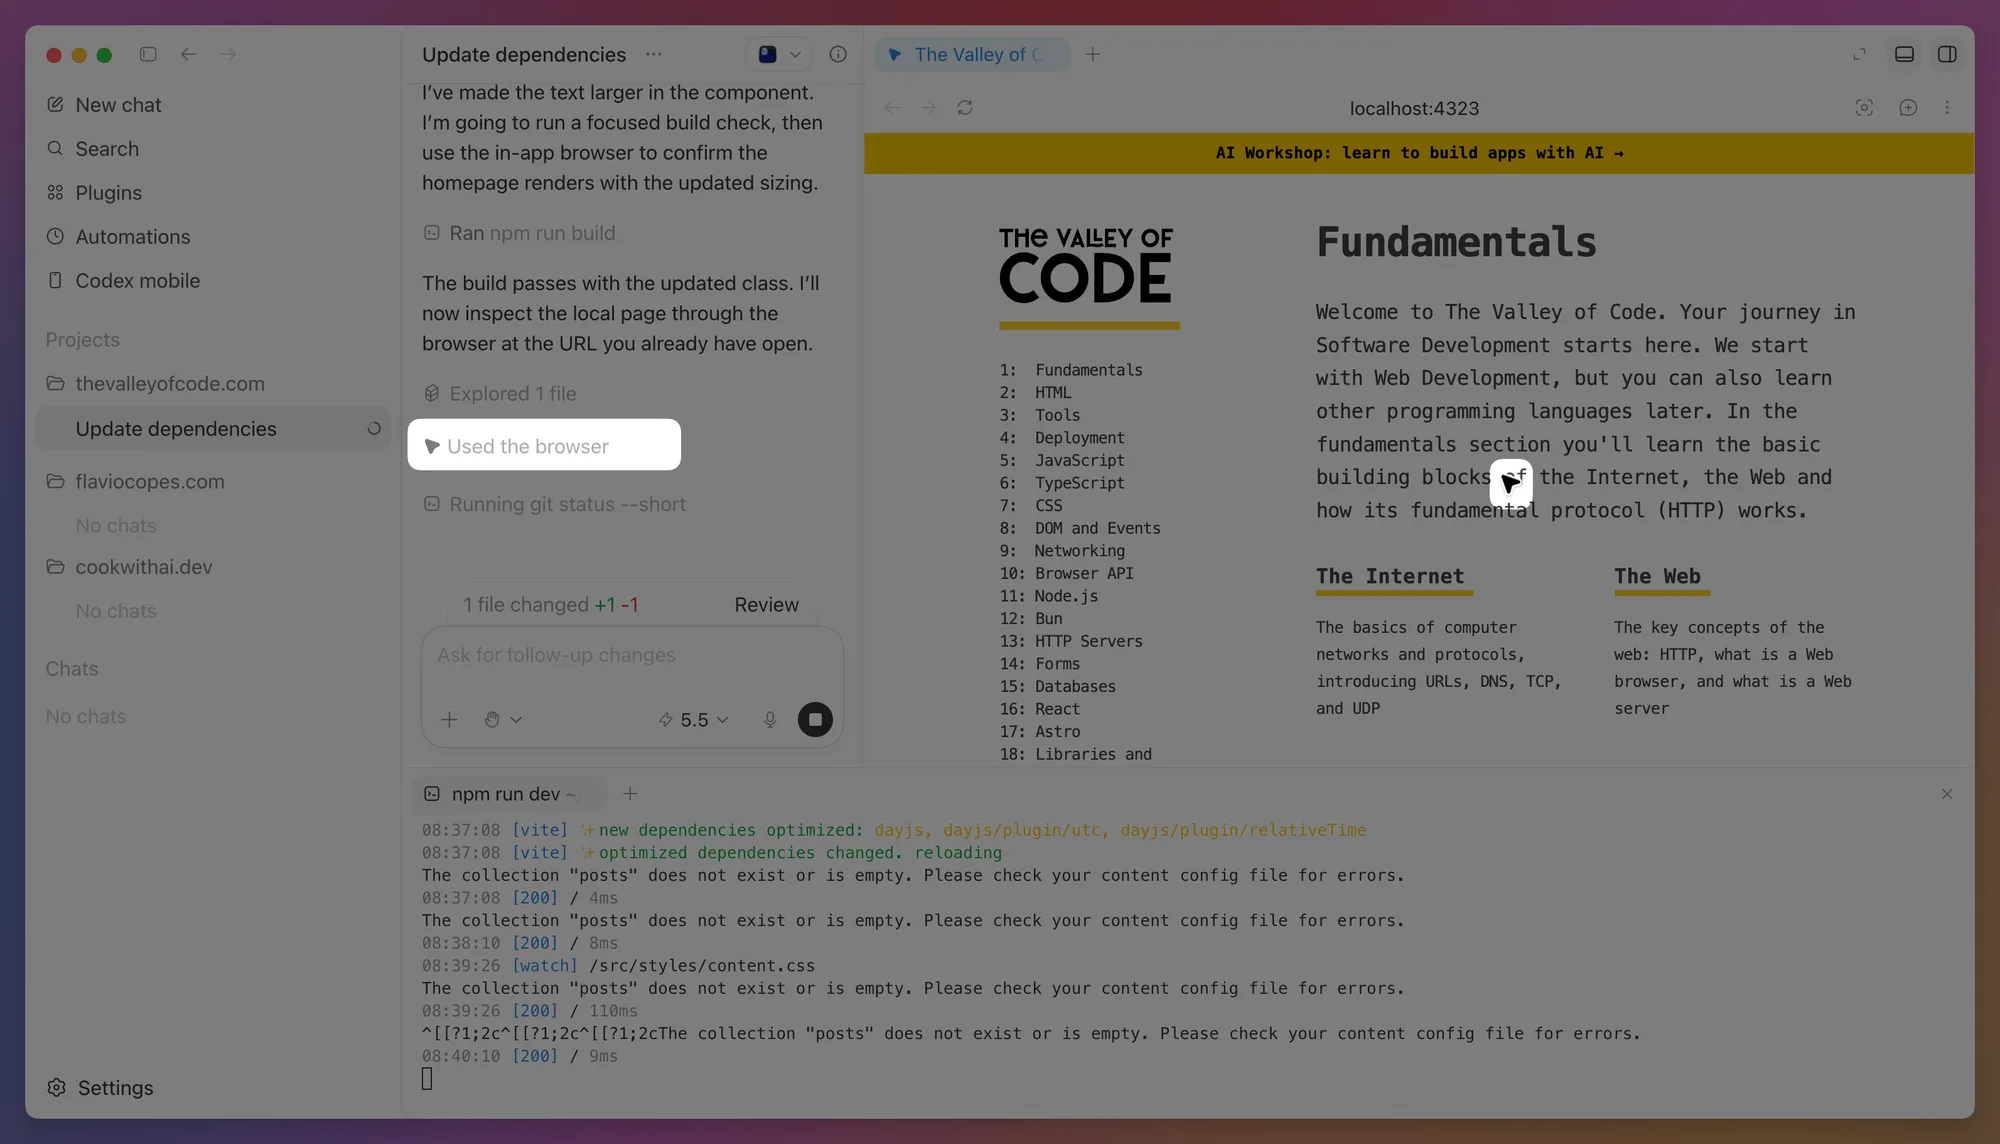
Codex can also inspect the DOM, console, network requests, and performance data when browser Developer mode is enabled.
I use the browser again after the last change. In the prompt I name the page, the state I want to test, and anything that must stay unchanged.
Give Codex images and screenshots
Codex can inspect screenshots, mockups, diagrams, and error messages.
In the desktop app, attach an image and explain what matters:
Compare this screenshot with the current checkout page. Fix spacing and
typography only. Do not change the form behavior. Verify with @Browser.
Tell Codex what to inspect in the image and what result you want.
Codex can also generate and edit images. Ask in natural language or explicitly invoke the image generation skill with $imagegen when it is installed. Image generation isn’t available on the Free plan, and it uses your allowance three to five times faster than a normal turn.
Use Computer Use for desktop apps
The built-in browser handles web apps. Computer Use lets Codex work with graphical interfaces outside the browser.
In supported regions, Computer Use can operate macOS and Windows apps, reproduce a desktop-only bug, change settings, or work across several applications.
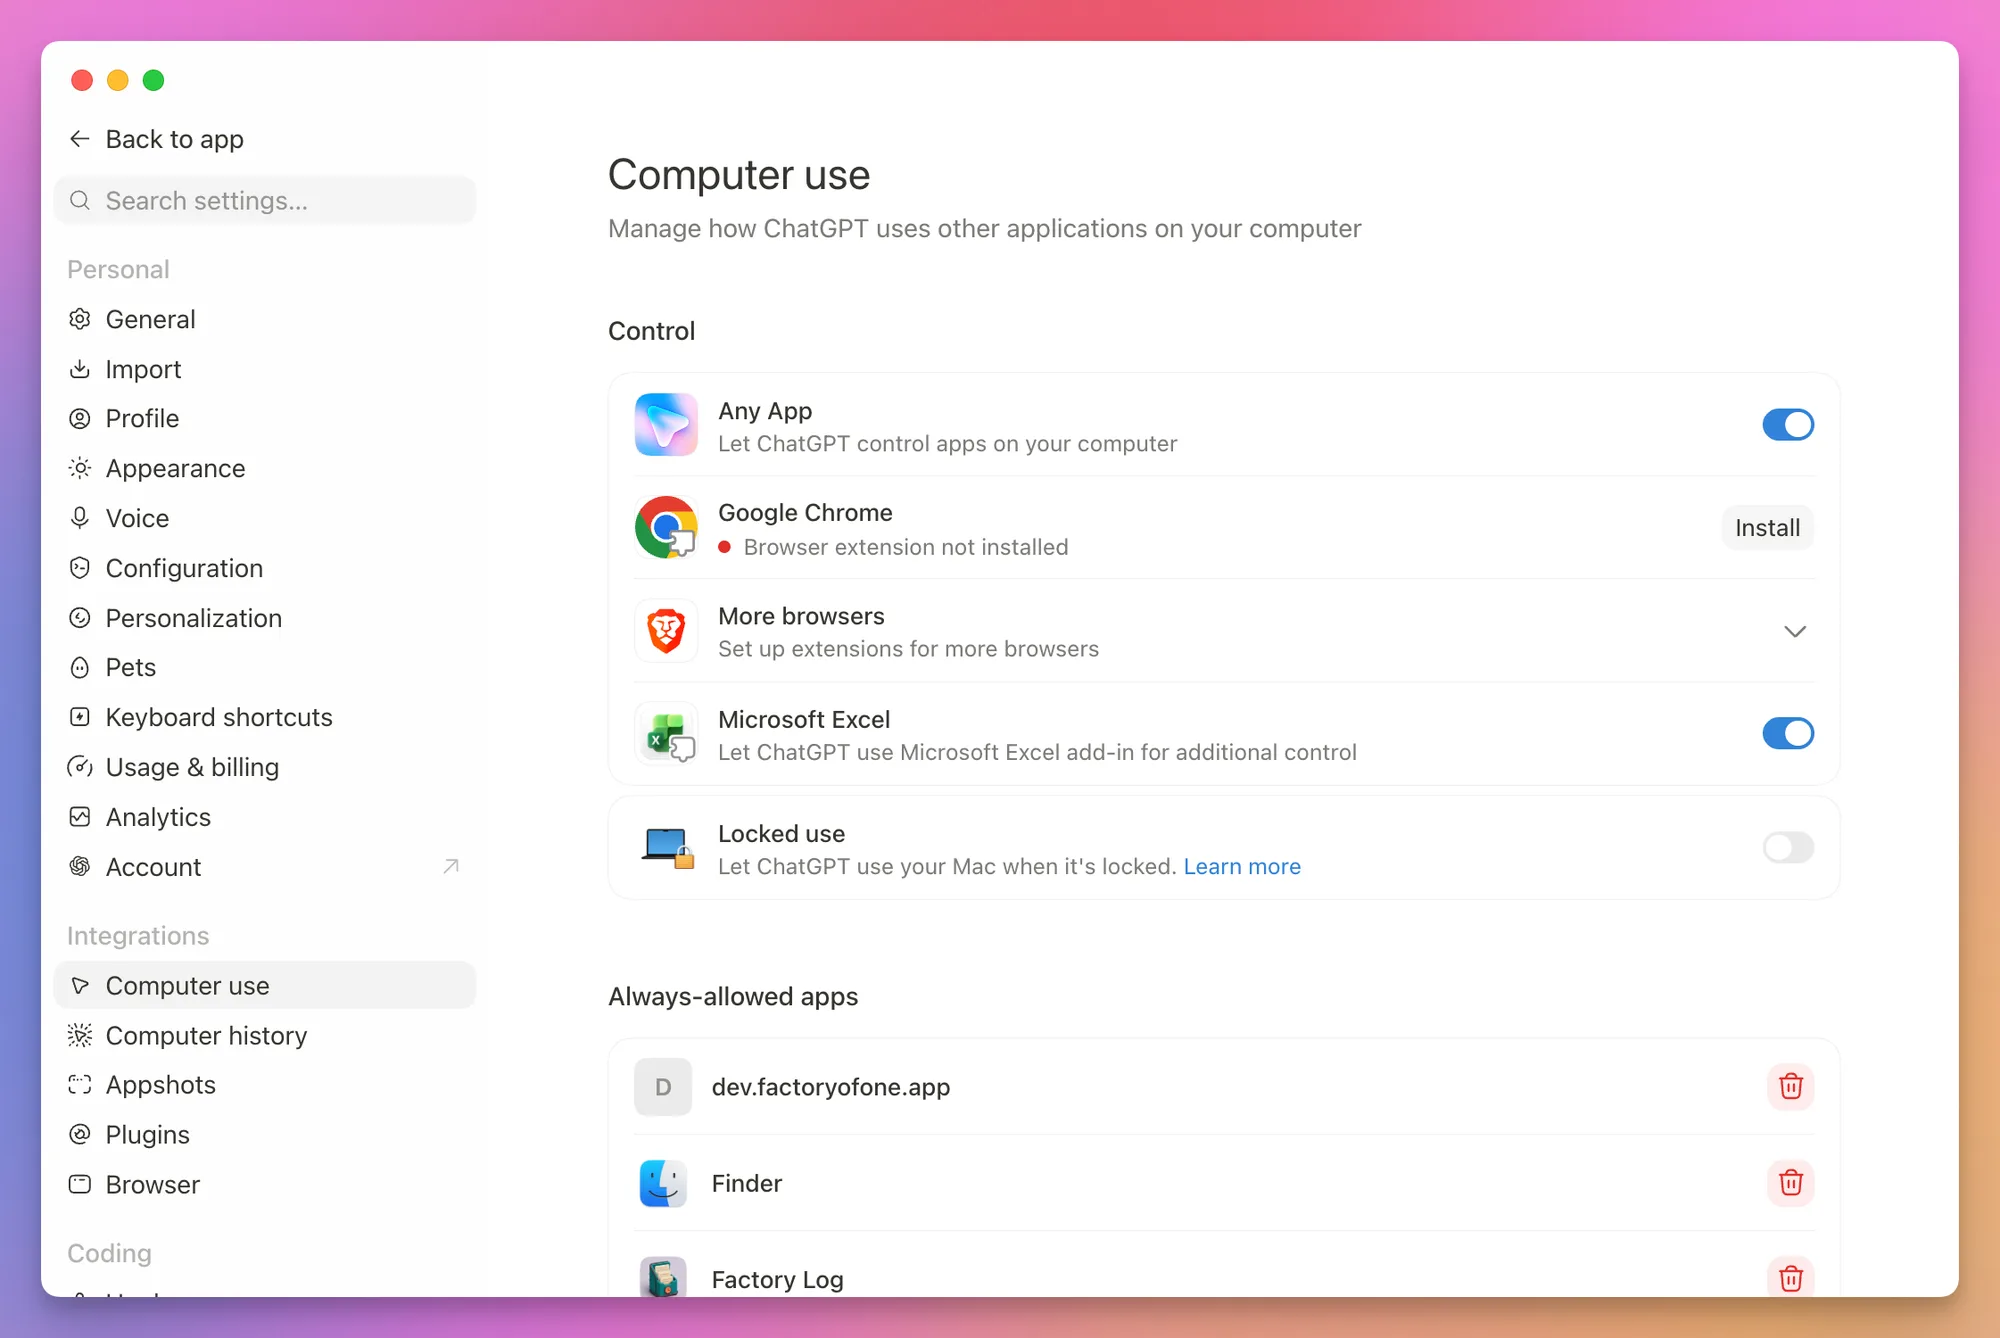
Computer Use is a plugin. Open Plugins > Computer Use, install it, and turn on its server and skill toggles. On macOS, grant Screen Recording and Accessibility when the system asks for them.
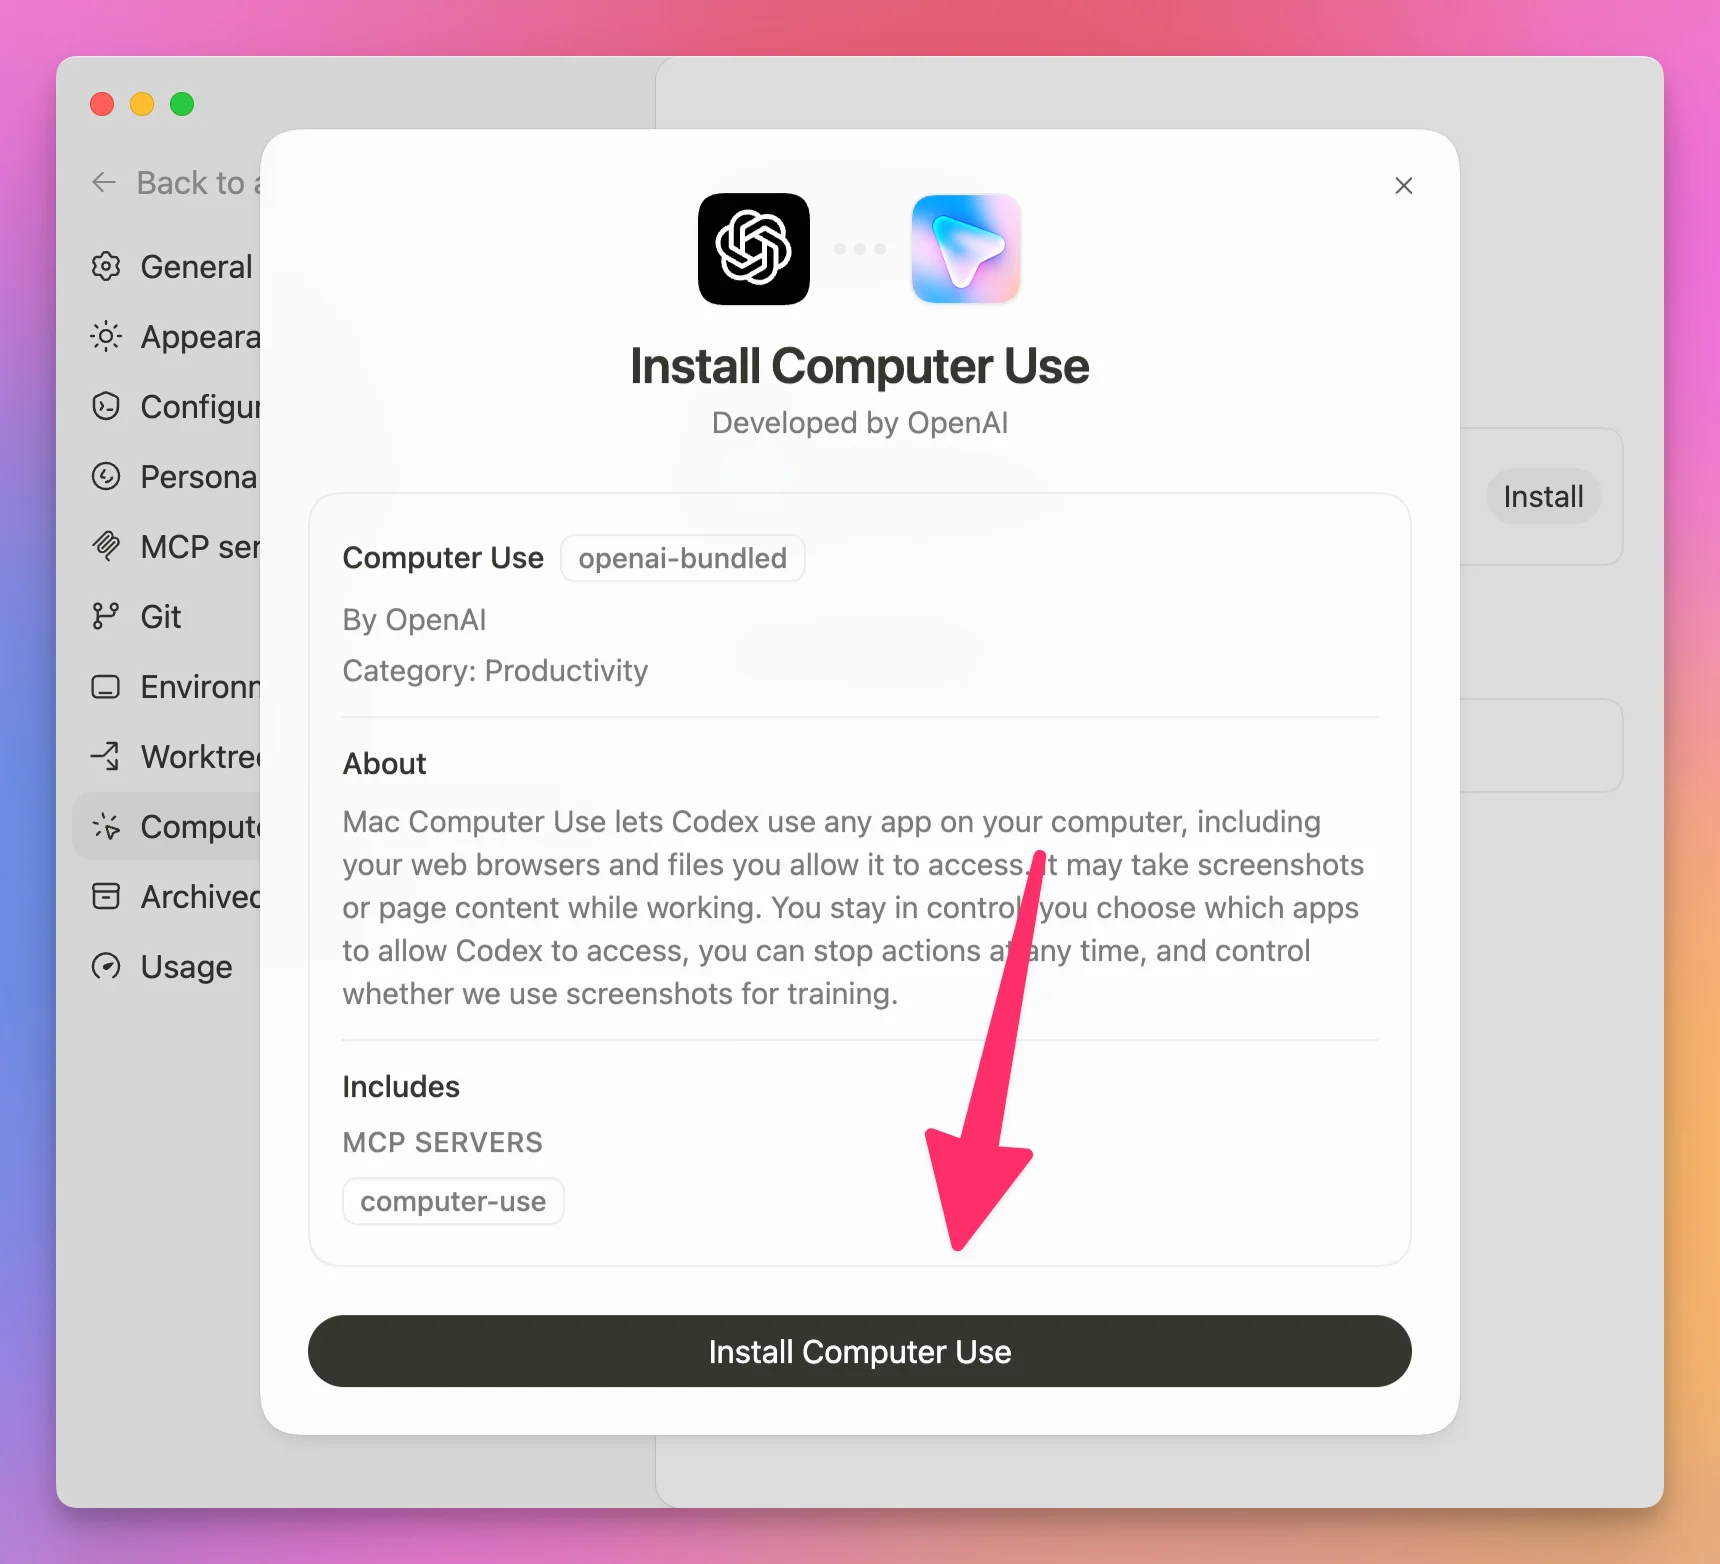
Settings > Computer use is where you review the apps Codex may use, and where you remove an app you allowed for future tasks.
Mention @Computer or the app name in the prompt:
Open the app with Computer Use, reproduce the onboarding bug, and fix the
smallest code path that causes it. Run the same UI flow after each change.
Computer Use acts outside the project folder. I keep these tasks narrow and read every permission prompt carefully.
If a service has a dedicated plugin or MCP server, prefer that structured connection. Use Computer Use when the task truly depends on what is visible in the interface.
Connect external tools with MCP
The context Codex needs is not always in the repository. It might be in GitHub, Slack, Notion, Google Drive, a database, or an internal service.
MCP stands for Model Context Protocol. It gives Codex structured tools for working with those systems.
An MCP server defines what Codex can read or do. It can expose tools such as:
- list open pull requests
- read an issue
- query deployment logs
- create a task
- fetch a document
In the desktop app, open Settings > Plugins > MCPs to see what is connected and add a server.
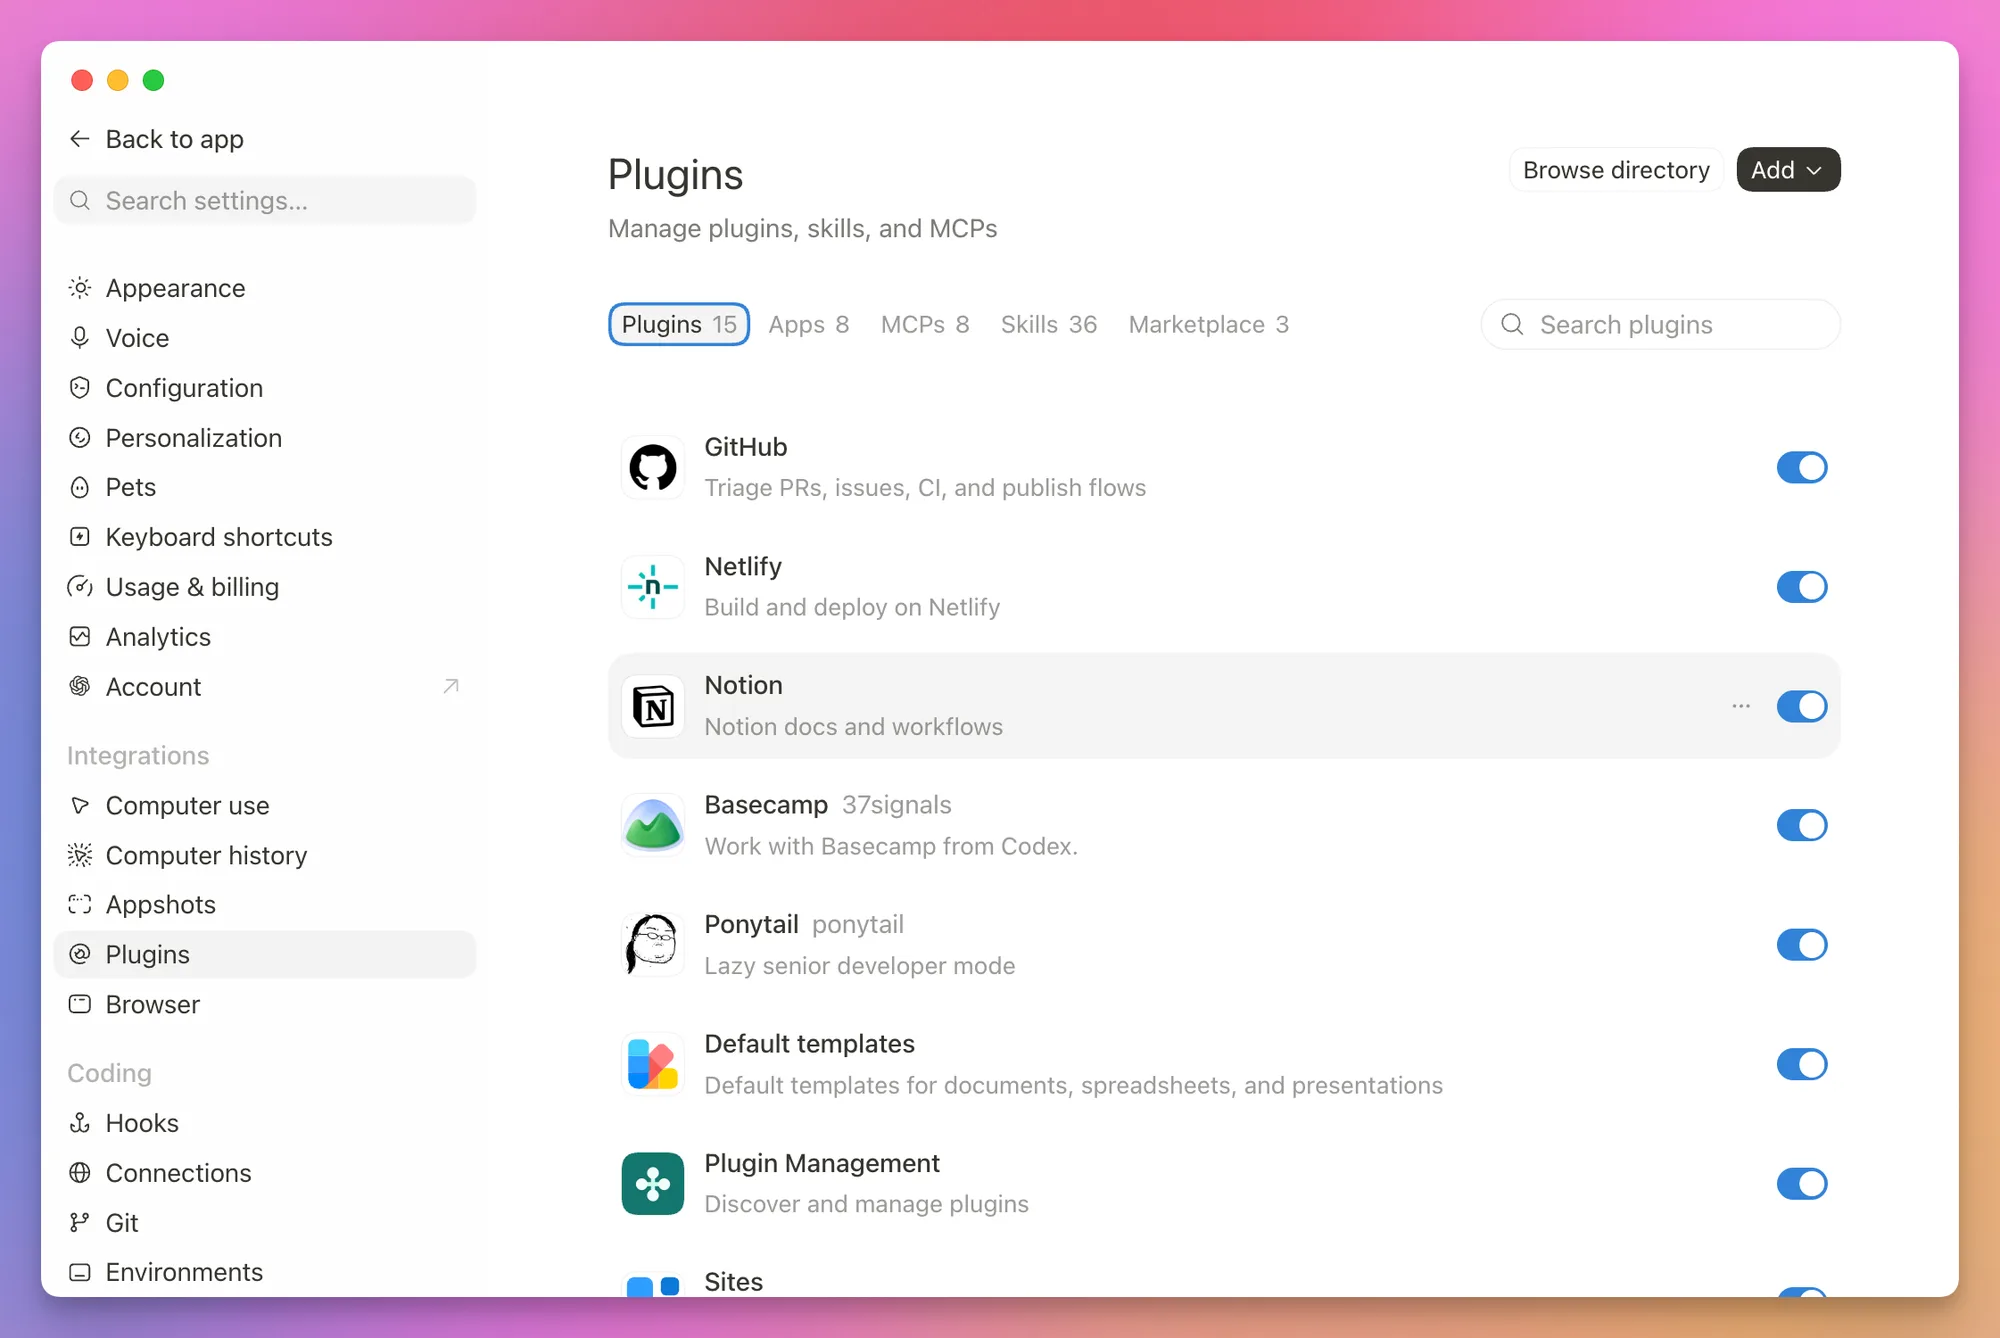
Start with one service that removes a real manual step from your work. There’s no reason to install every integration in advance. If you want a starting point, here are the MCP servers I actually use and how the same servers work in Codex.
Reuse workflows with skills
A skill teaches Codex how to perform one repeatable job. It’s a folder with a SKILL.md file and, when needed, scripts, references, templates, or assets.
For example, a skill could explain how to:
- publish a post on this site
- review a database migration
- prepare release notes
- diagnose a failed deployment
A skill tells Codex how to do the work. An MCP server gives it live data and actions.
Browse skills in the desktop app. A good skill has a narrow job, clear trigger phrases, and an output you can verify.
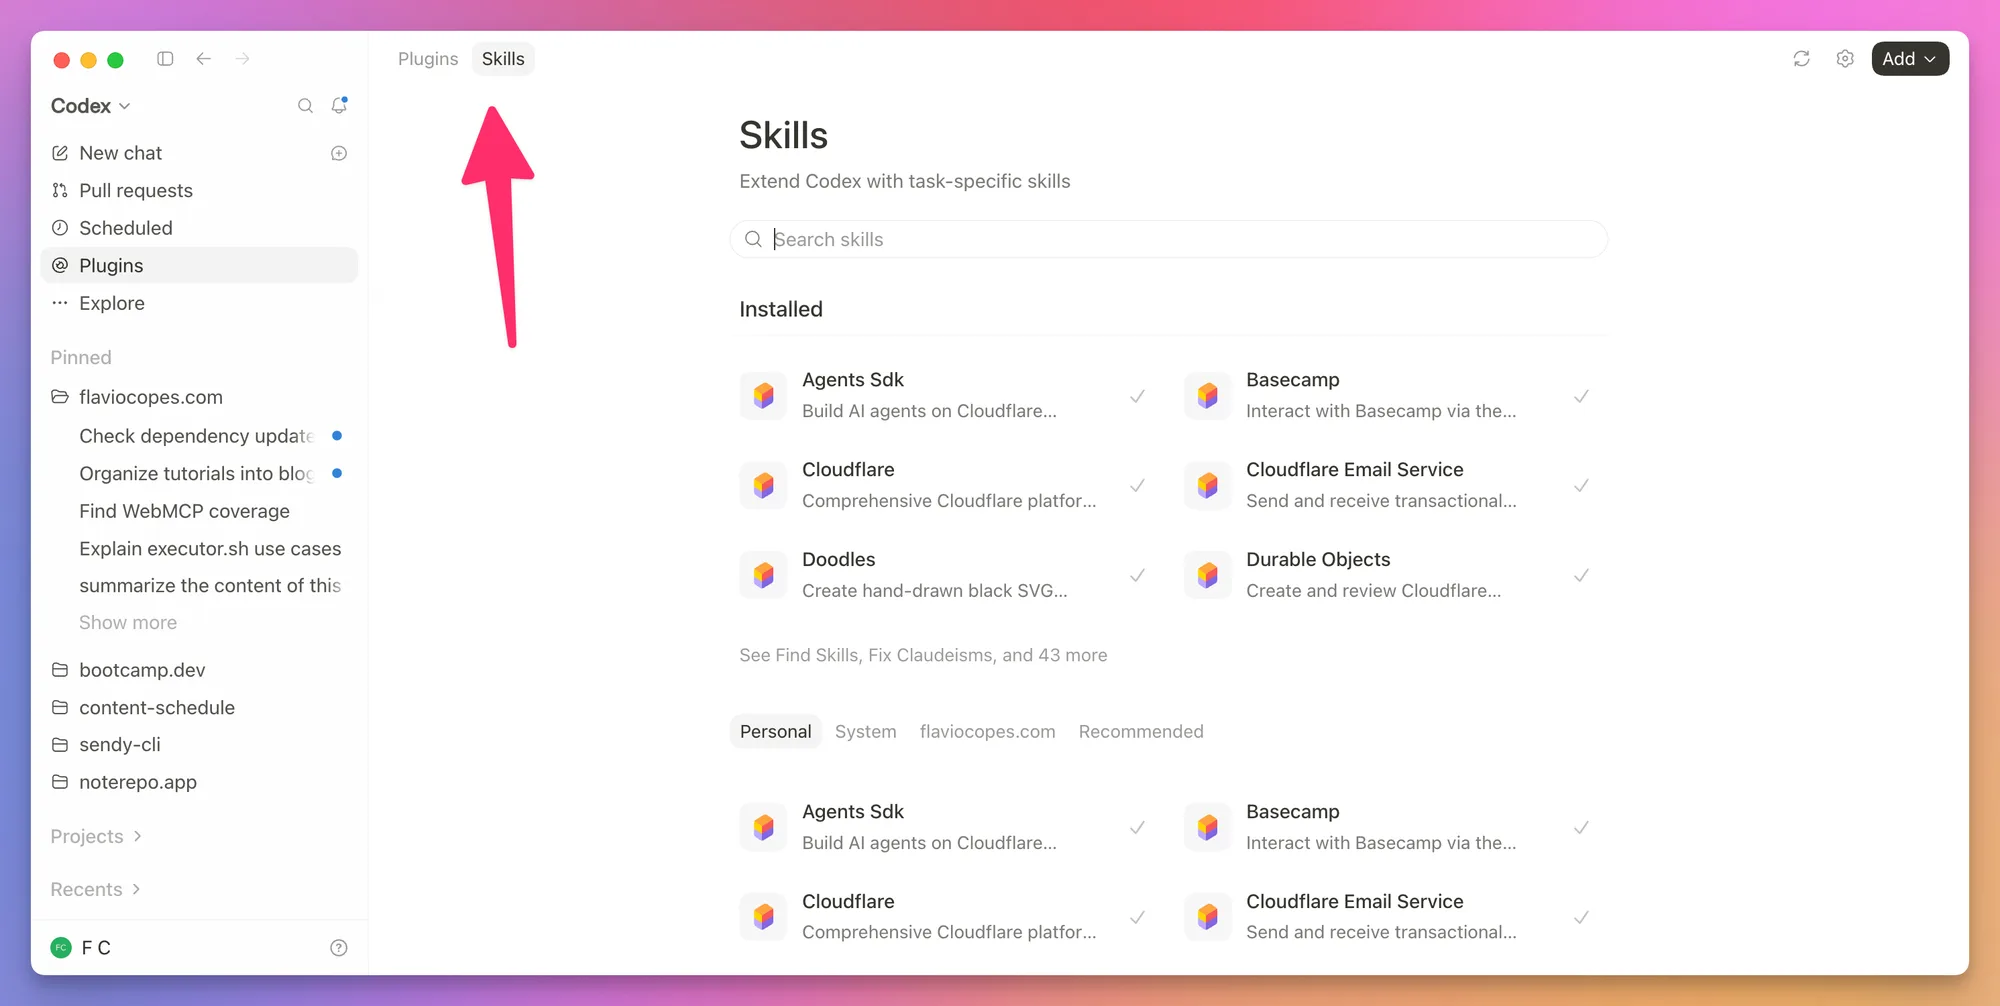
If you keep pasting the same instructions into prompts, turn them into a skill.
Skills add up quickly, and several end up doing nearly the same job. I built Skill Cabinet to see every skill on my Mac, which agents load it, and to merge the ones that read alike.
My free AI Agent Skills course walks through building, testing, and packaging one.
Install plugins
Plugins bundle several Codex capabilities. A plugin can contain skills, MCP servers, hooks, browser features, and other resources.
Browse them from the Plugins section:
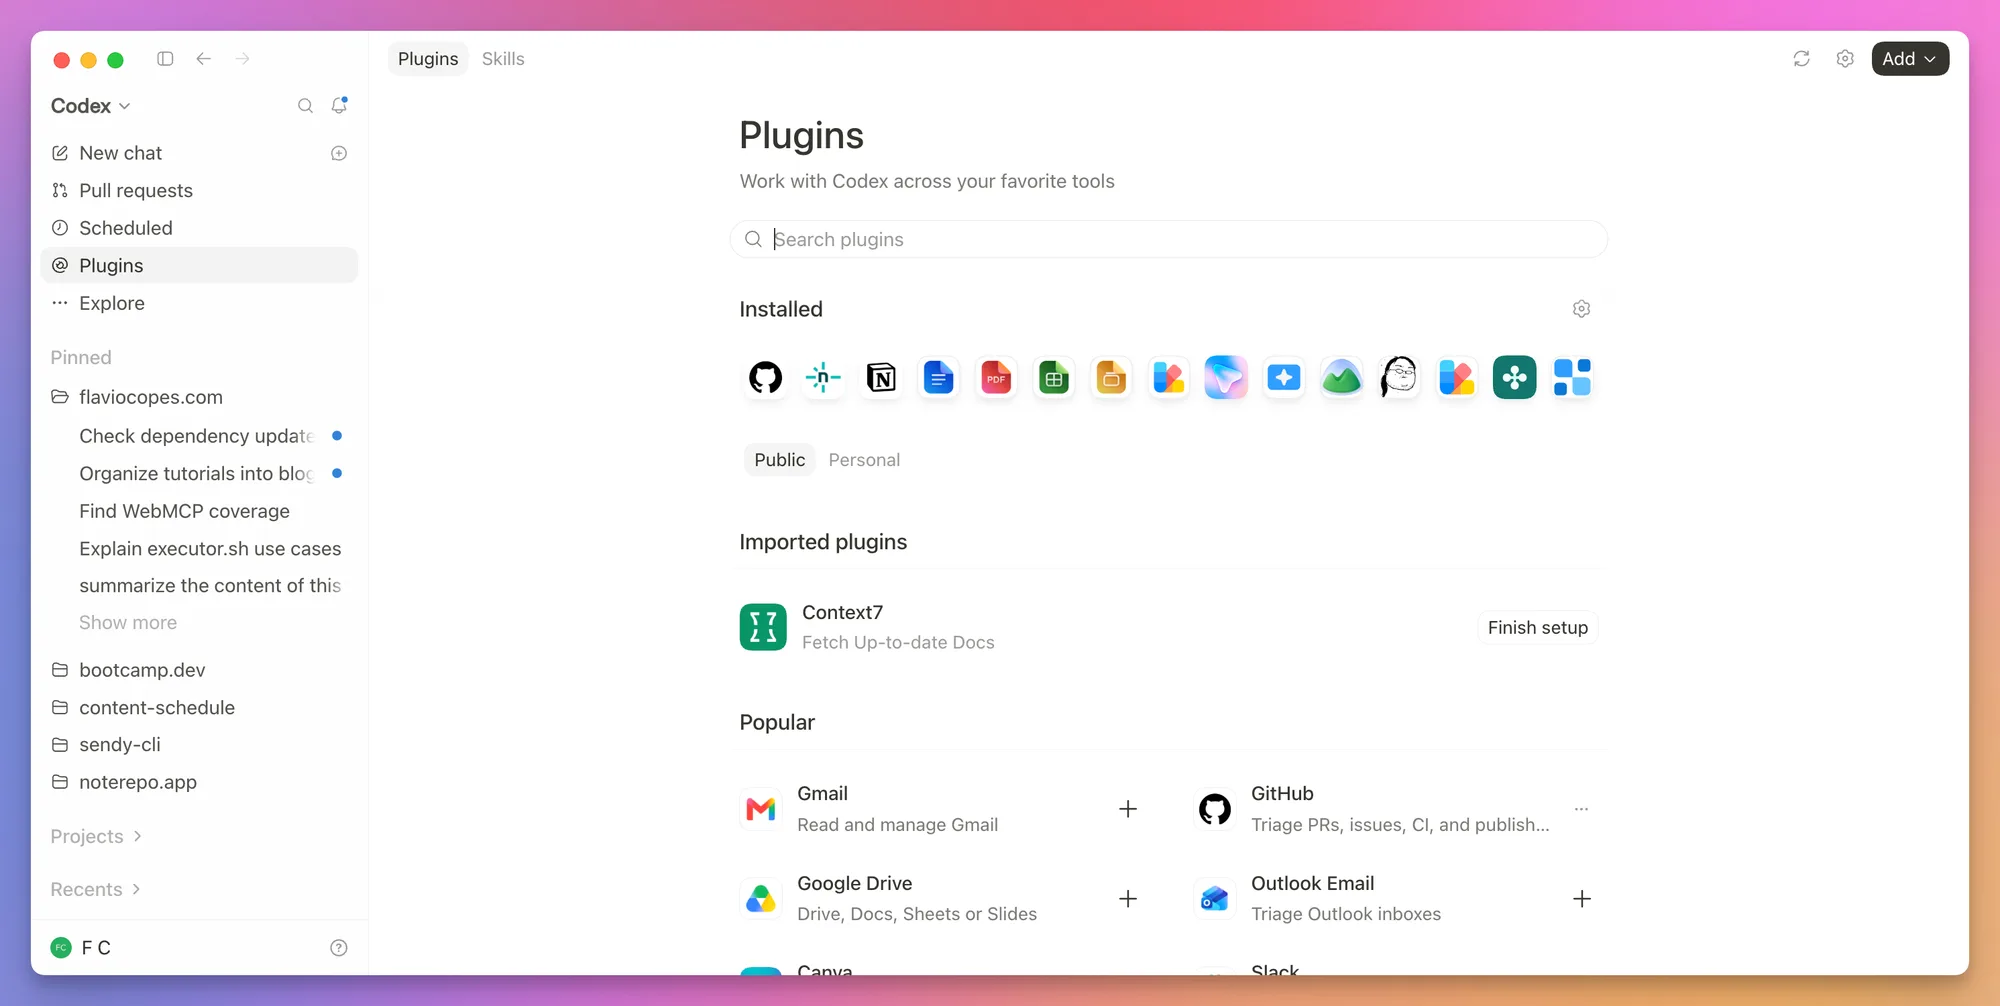
The directory shows installed plugins and services you can connect. Open one to see the apps and skills it provides. ChatGPT and Codex share the same plugin directory, and I explained how to build and publish one (a plugin.json plus MCP servers and skills) in how to create and publish a ChatGPT plugin.
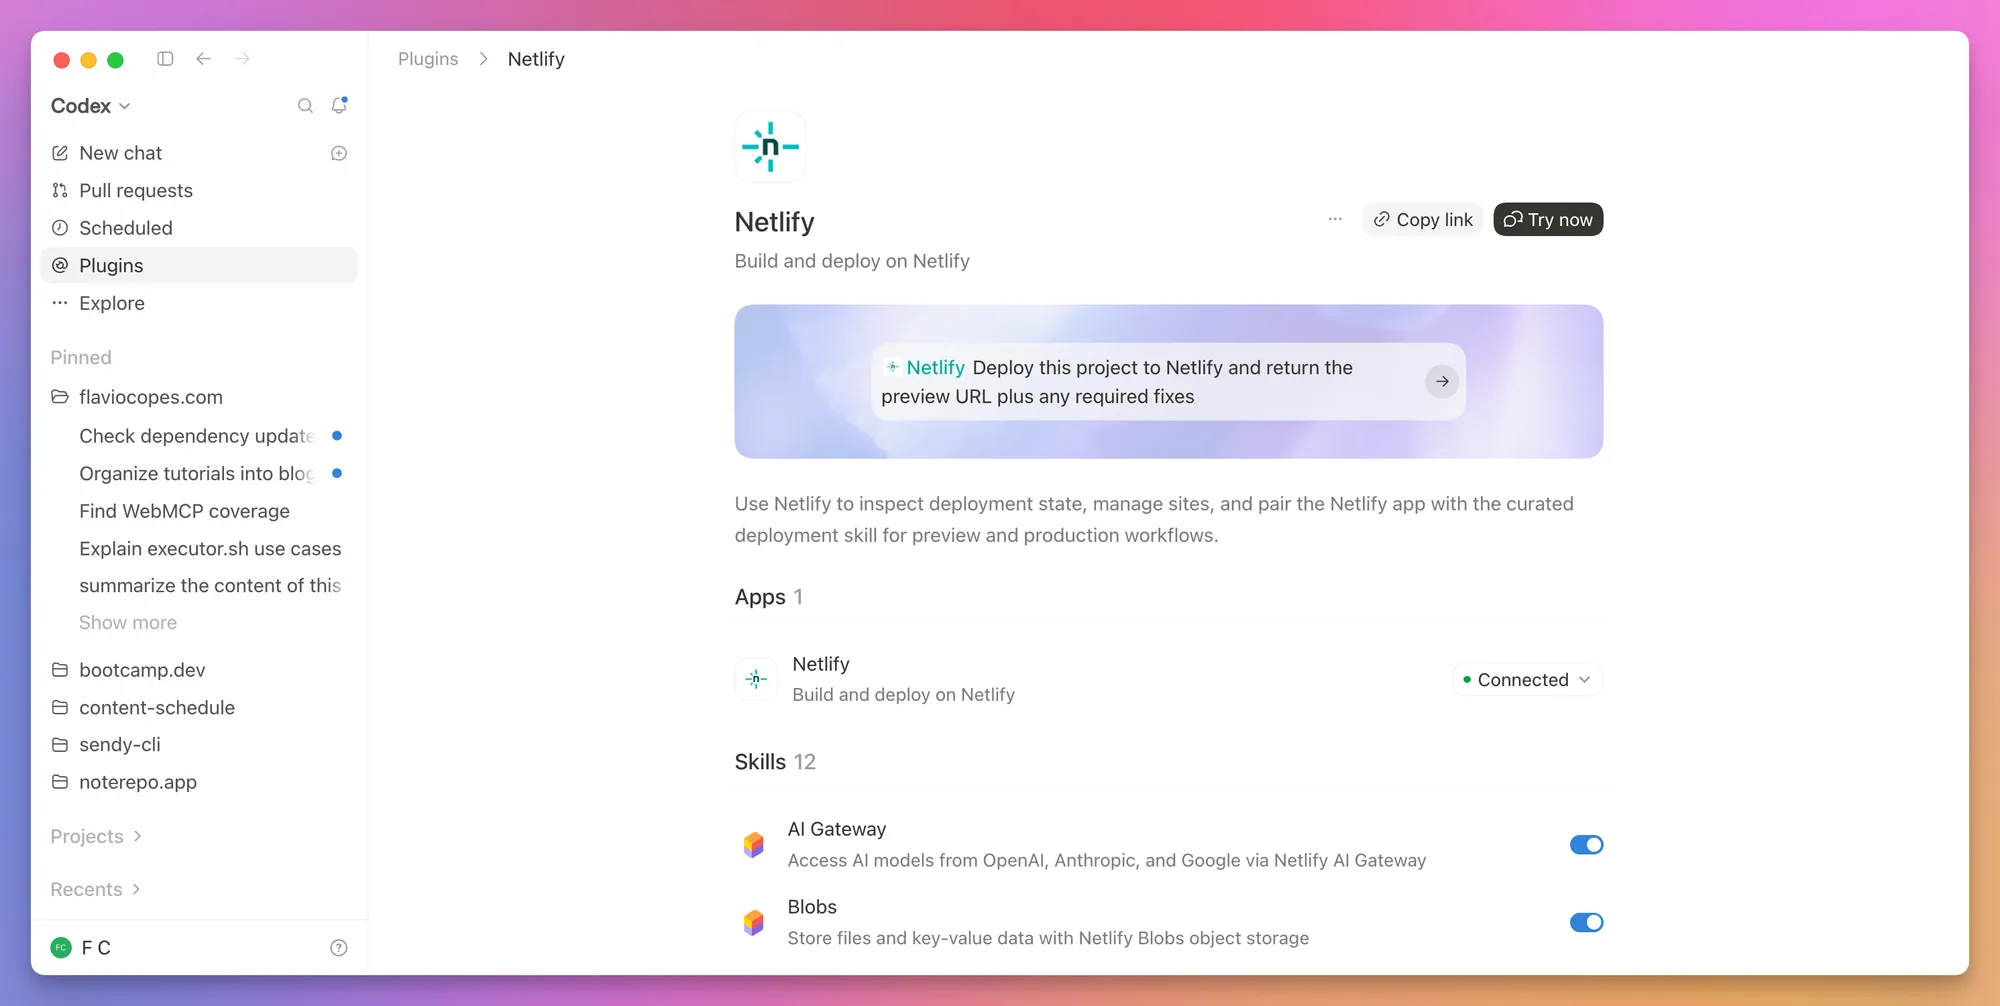
The Netlify plugin, for example, includes an app connection and a set of deployment skills. Once it is connected, you can click Try now or mention Netlify in a prompt.
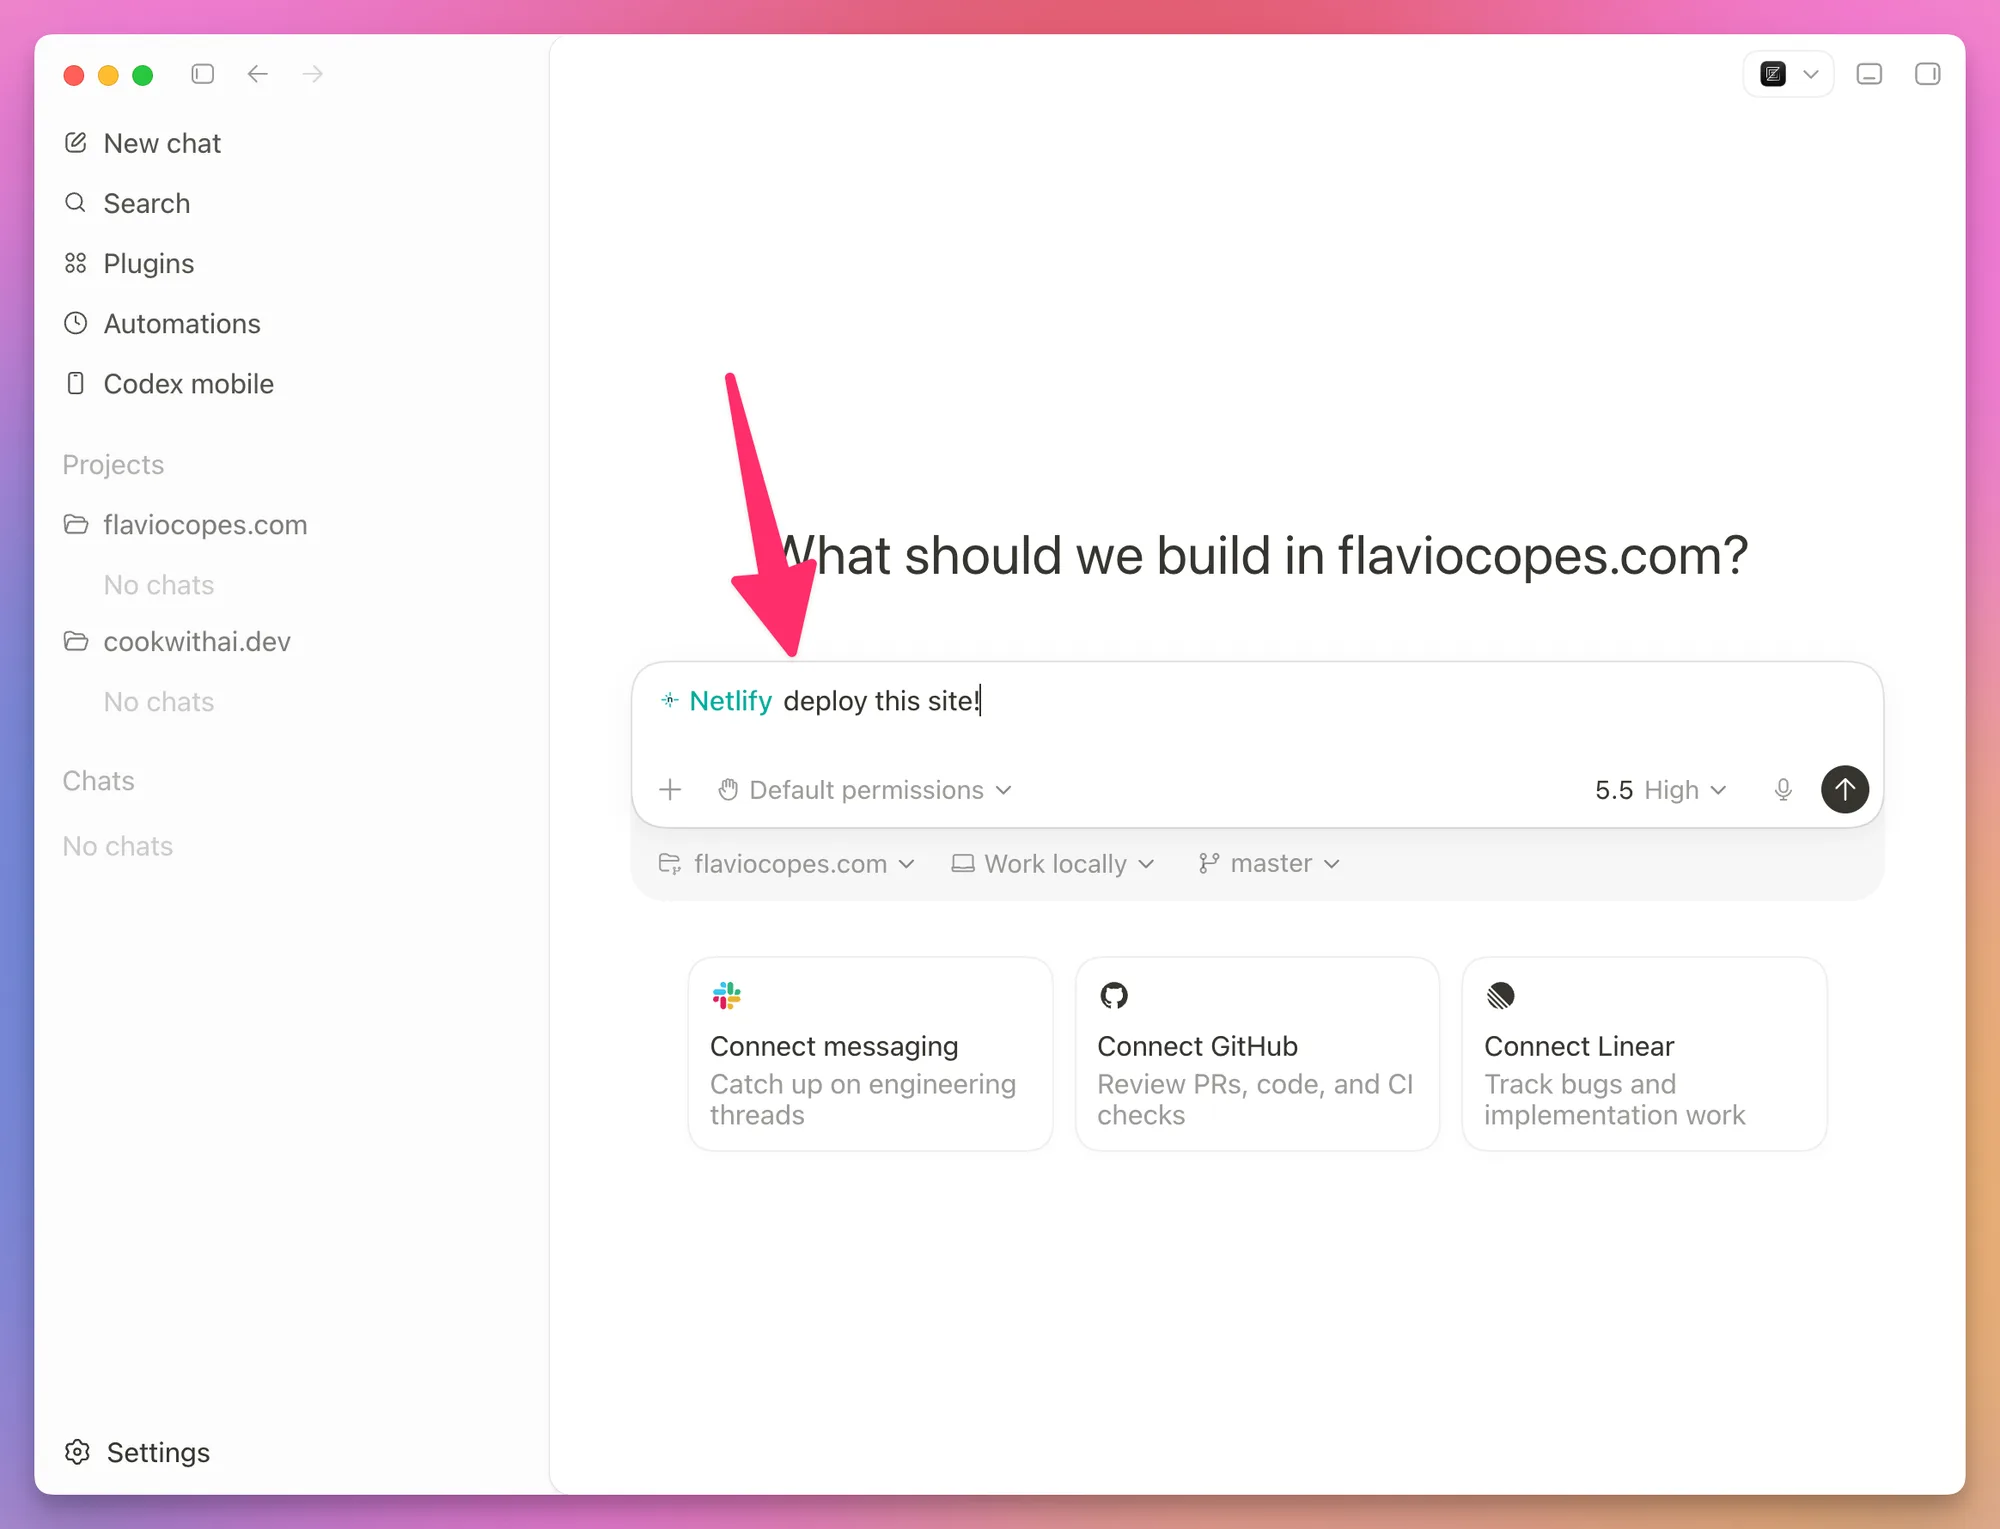
Cloudflare, Vercel, Render, and Railway offer something similar, as a plugin or an MCP server. I compared them in Cloud platform plugins and skills for AI coding agents.
Some plugins work entirely on your computer. Others connect to an external service and ask you to authorize an account, so check what a plugin can access before installing it. The install dialog spells it out: what the plugin can reference, what data it shares with the service, and the risk that comes with elevated access.
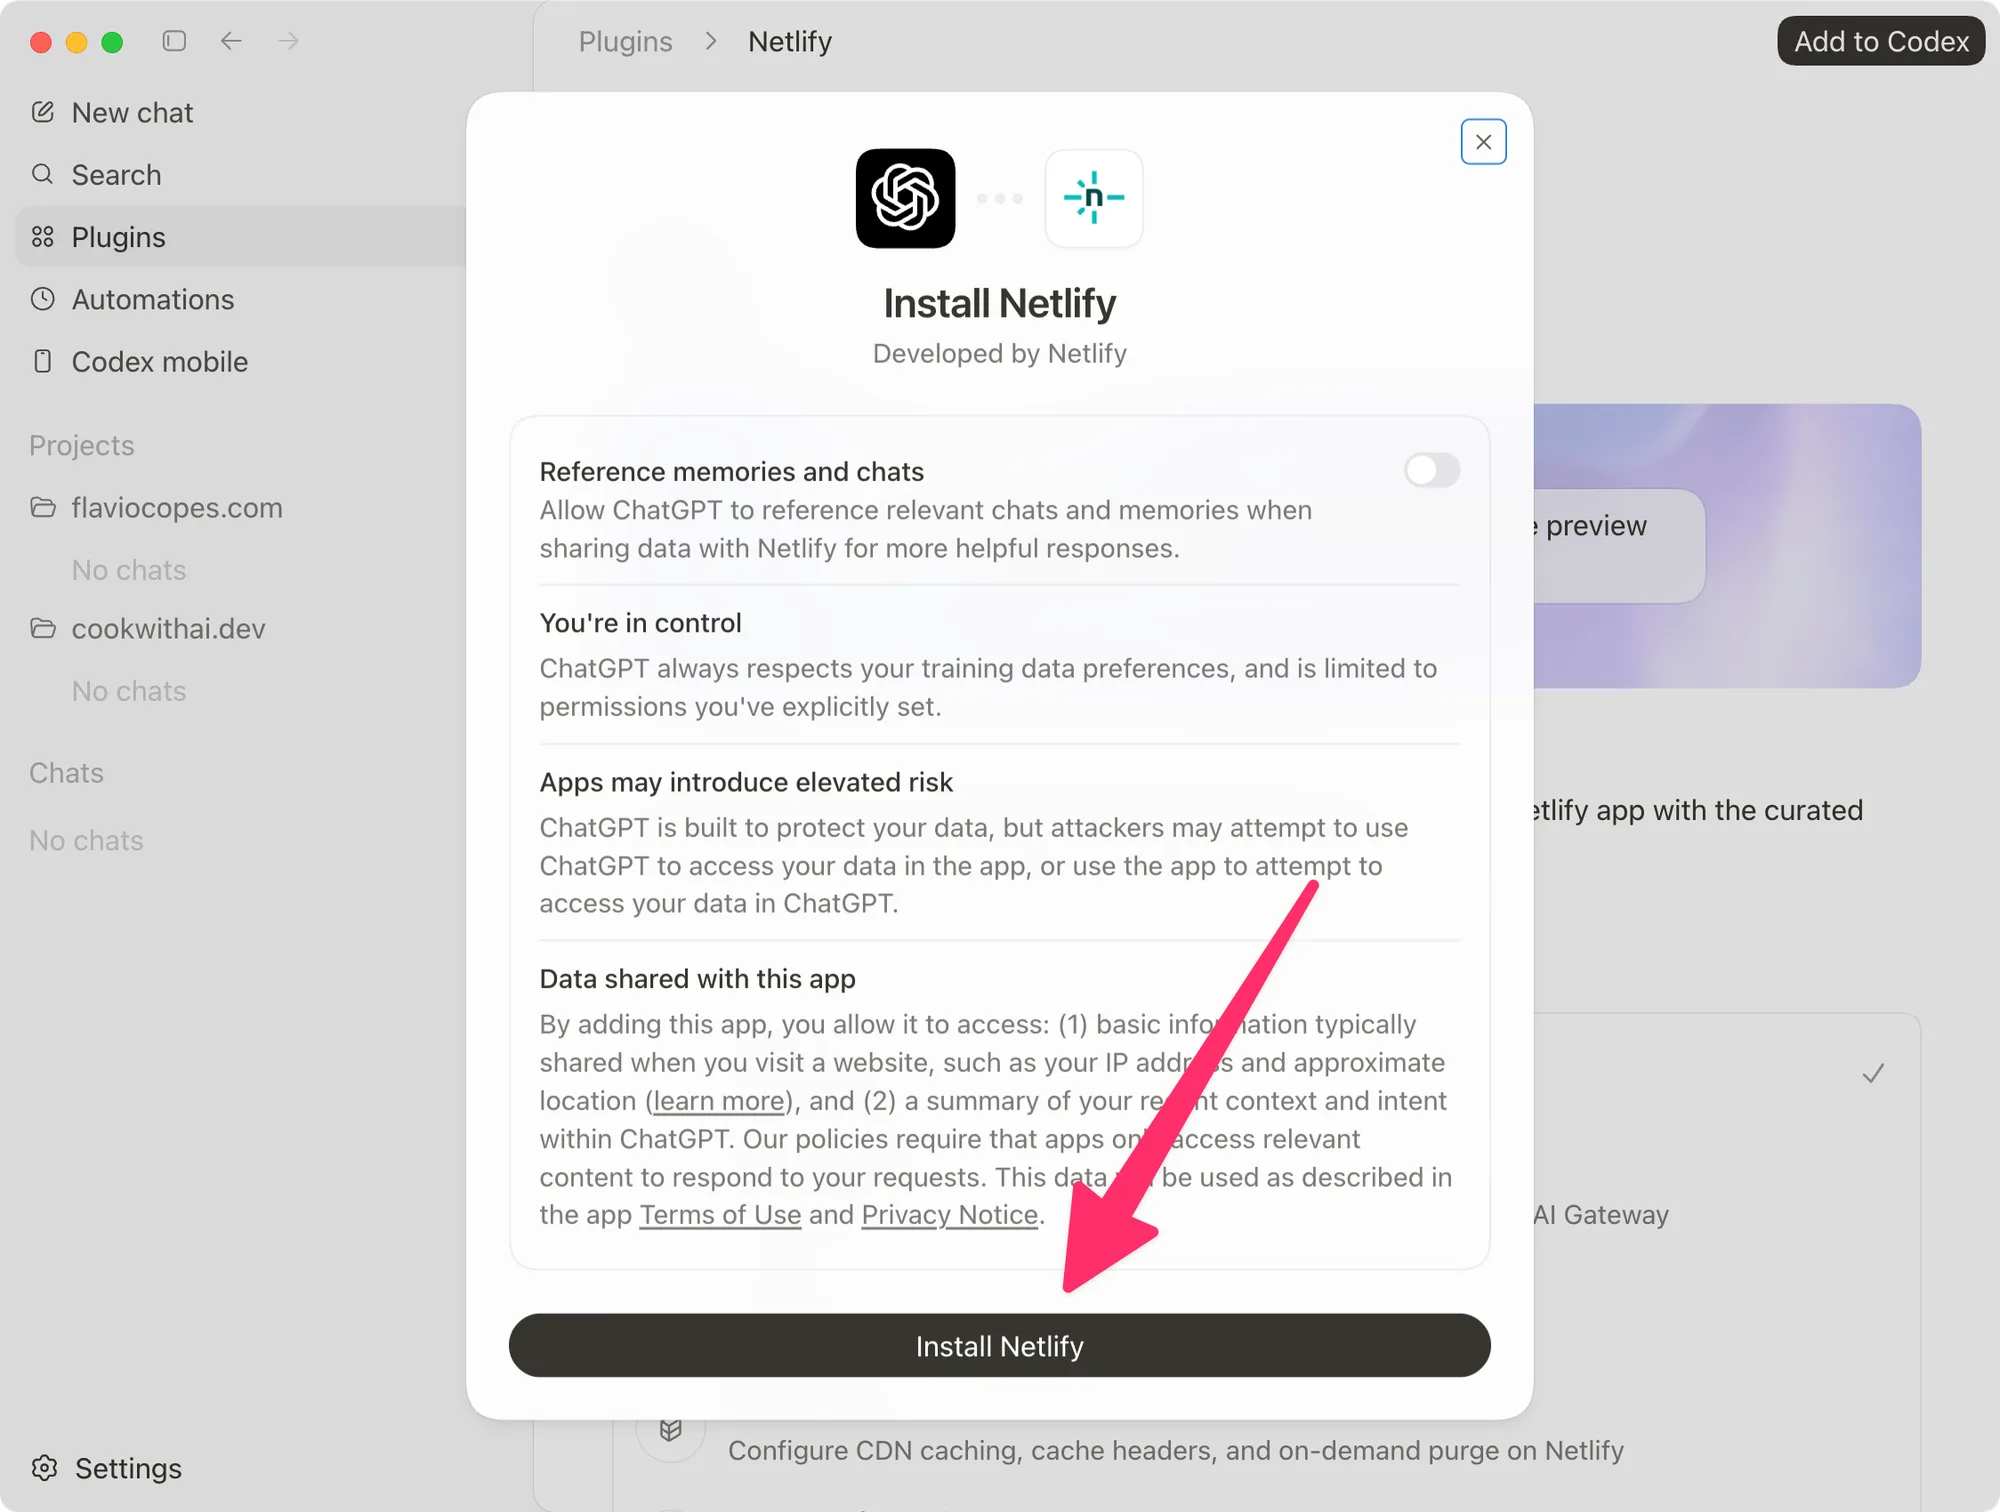
One plugin worth knowing about is Codex Security. It scans a repository for vulnerabilities, validates the plausible findings, and gives you evidence and remediation guidance for each one. Install it from Plugins and a Security item appears in the sidebar, where you set up scans and review the findings. Only scan code you own or have permission to assess.
The same scanner exists as a standalone CLI. I covered it in How to scan your code with the Codex Security CLI.
Use hooks for mechanical rules
Hooks run commands at specific points while Codex works. I use them for mechanical jobs such as logging completed work, checking a command before it runs, or validating a file after an edit.
You define them in ~/.codex/hooks.json, or in a .codex/hooks.json inside the project.
The one I use every day is a PreToolUse hook. Before Codex runs a git commit, it installs a Git post-commit logger in the repository, so every commit lands in the same plain text work log I keep with Cursor. I described the setup in How I use the same Git work log with Codex and ChatGPT.
Advice Codex needs to remember belongs in AGENTS.md or a skill instead.
Hooks can execute code. Review and trust them before enabling them, especially when they come from a plugin.
Local work, worktrees, and handoff
When you start a desktop chat for a Git repository, you can work in your normal local checkout or an isolated Git worktree.
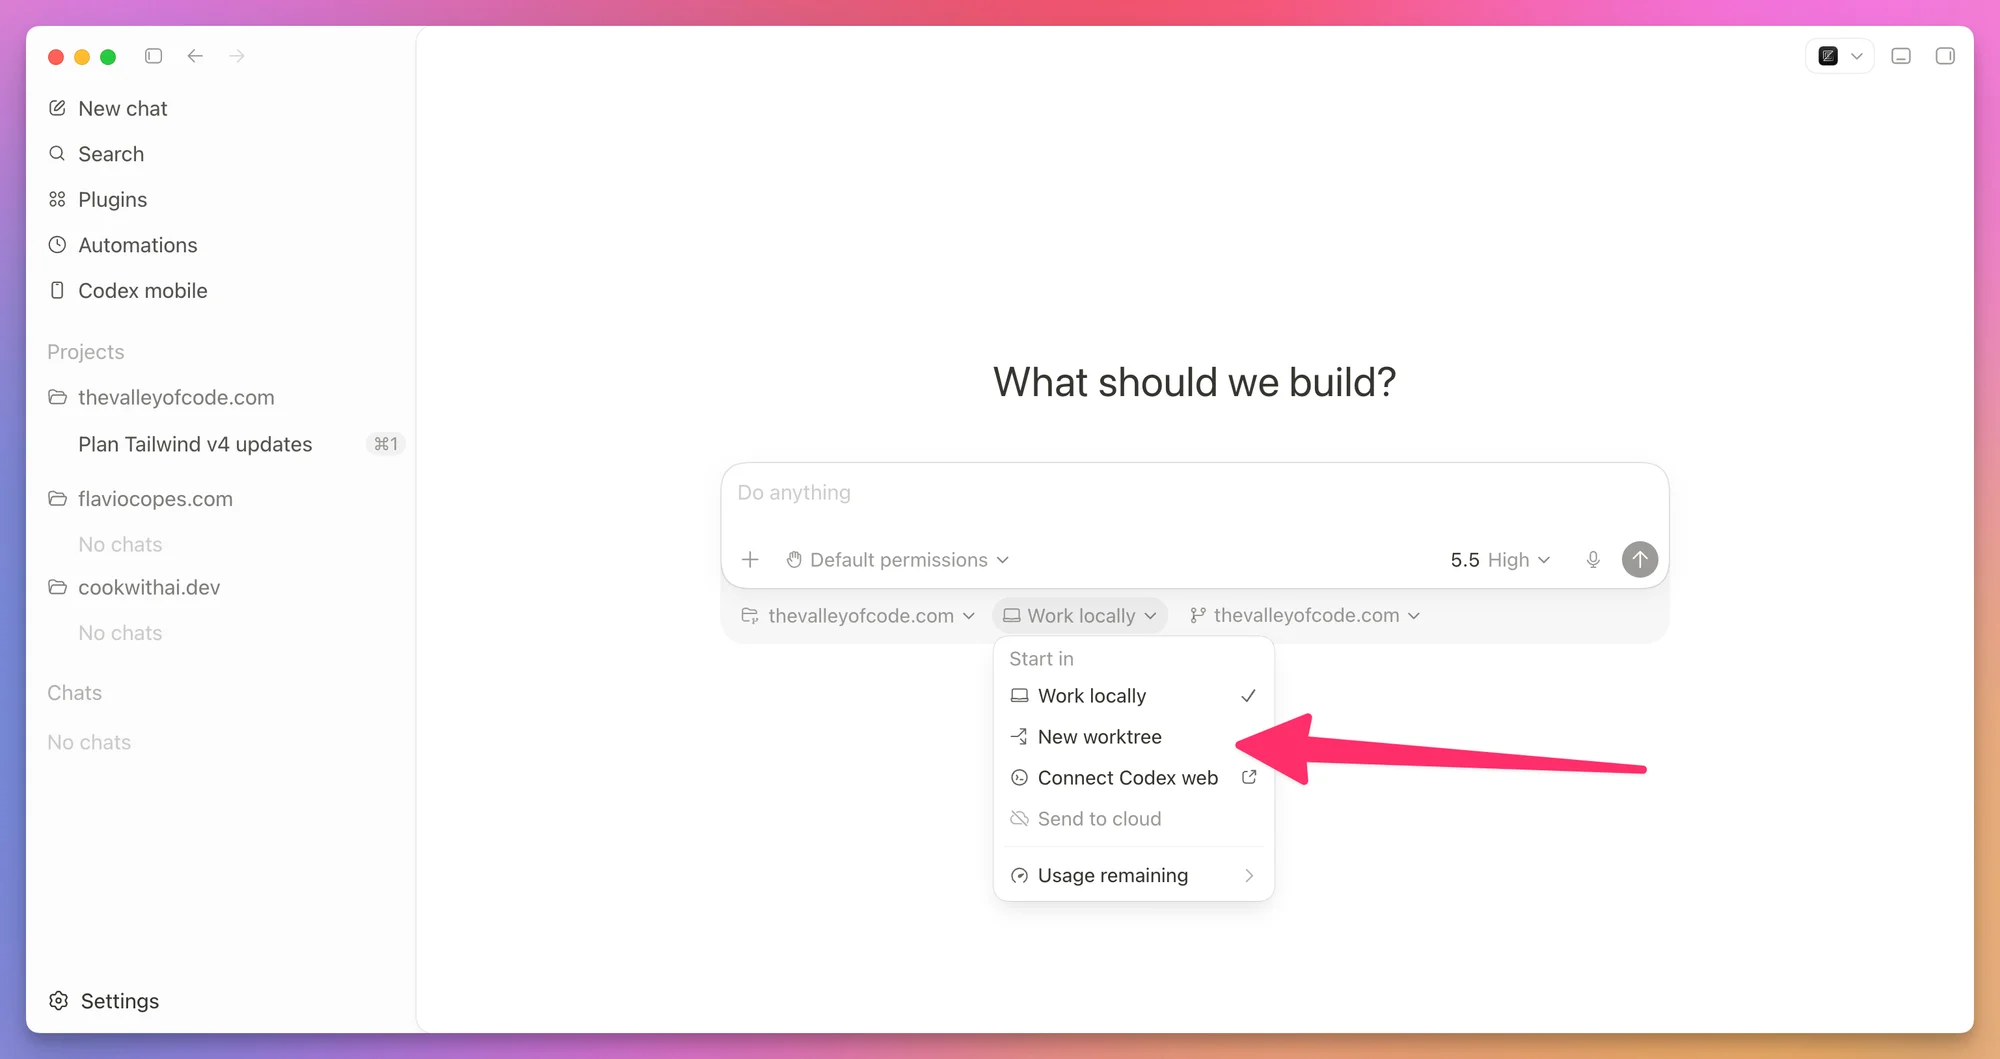
A worktree gives the chat a separate copy of the repository. Several agents can then work on the same repository without editing the same checkout.
Codex-managed worktrees live under $CODEX_HOME/worktrees by default. Tracked files are present, but ignored files such as .env are not copied unless you list them in .worktreeinclude.
# .worktreeinclude
.env
.env.local
You can hand a chat from a worktree to your local checkout, or move local work into a worktree. Codex takes care of the Git operations behind the move.
I normally work locally, one task at a time. I want direct control of the current checkout.
I use worktrees when tasks are genuinely independent. I still avoid sending two agents into the same files because I would have to merge both sets of decisions afterward.
I explain the underlying Git feature in my Git Worktrees guide.
Split work across subagents
Codex can spawn subagents. Each one is a separate agent that takes one part of the job, runs in parallel with the others, and reports back to the main chat. Current releases have this on by default.
Speed helps, but the main reason to use them is a cleaner main chat. A long chat fills up with exploration notes, test logs, and stack traces, and the model gets worse at the actual decisions as the noise piles up. Subagents keep that noise in their own threads and return a summary.
Ask for them directly, and say how to split the work and what to return:
Review this branch against main with three subagents: one for security risks,
one for missing tests, one for maintainability. Wait for all three, then
summarize the findings by category with file references.
Use them for read-heavy work: exploration, tests, triage, review. Be careful with several agents writing code at the same time, because they step on each other’s changes. Each subagent does its own model and tool work, so the run costs more tokens than a single agent would.
Subagents inherit the permission mode of the chat that spawned them. Set it before you delegate. In the CLI, /agent switches between the running agent threads.
You can also define your own agents. Put one TOML file per agent in ~/.codex/agents/, or in the project’s .codex/agents/, with a name, a description, and instructions. The file can set its own model, reasoning effort, and sandbox mode:
# .codex/agents/reviewer.toml
name = "reviewer"
description = "Reviews a diff for correctness, security, and missing tests."
model_reasoning_effort = "high"
sandbox_mode = "read-only"
developer_instructions = """
Review the code like an owner. Lead with concrete findings and skip
style-only comments unless they hide a real bug.
"""
Anything the file doesn’t set is inherited from the parent chat. A read-only explorer on a cheaper model plus a reviewer on higher reasoning is the usual pair.
Create scheduled tasks
Scheduled tasks run a prompt later, or repeat it on a schedule. You can ask Codex to create one or set it up from the Scheduled section in the app.
Each task has a project, prompt, cadence, model, and execution environment.
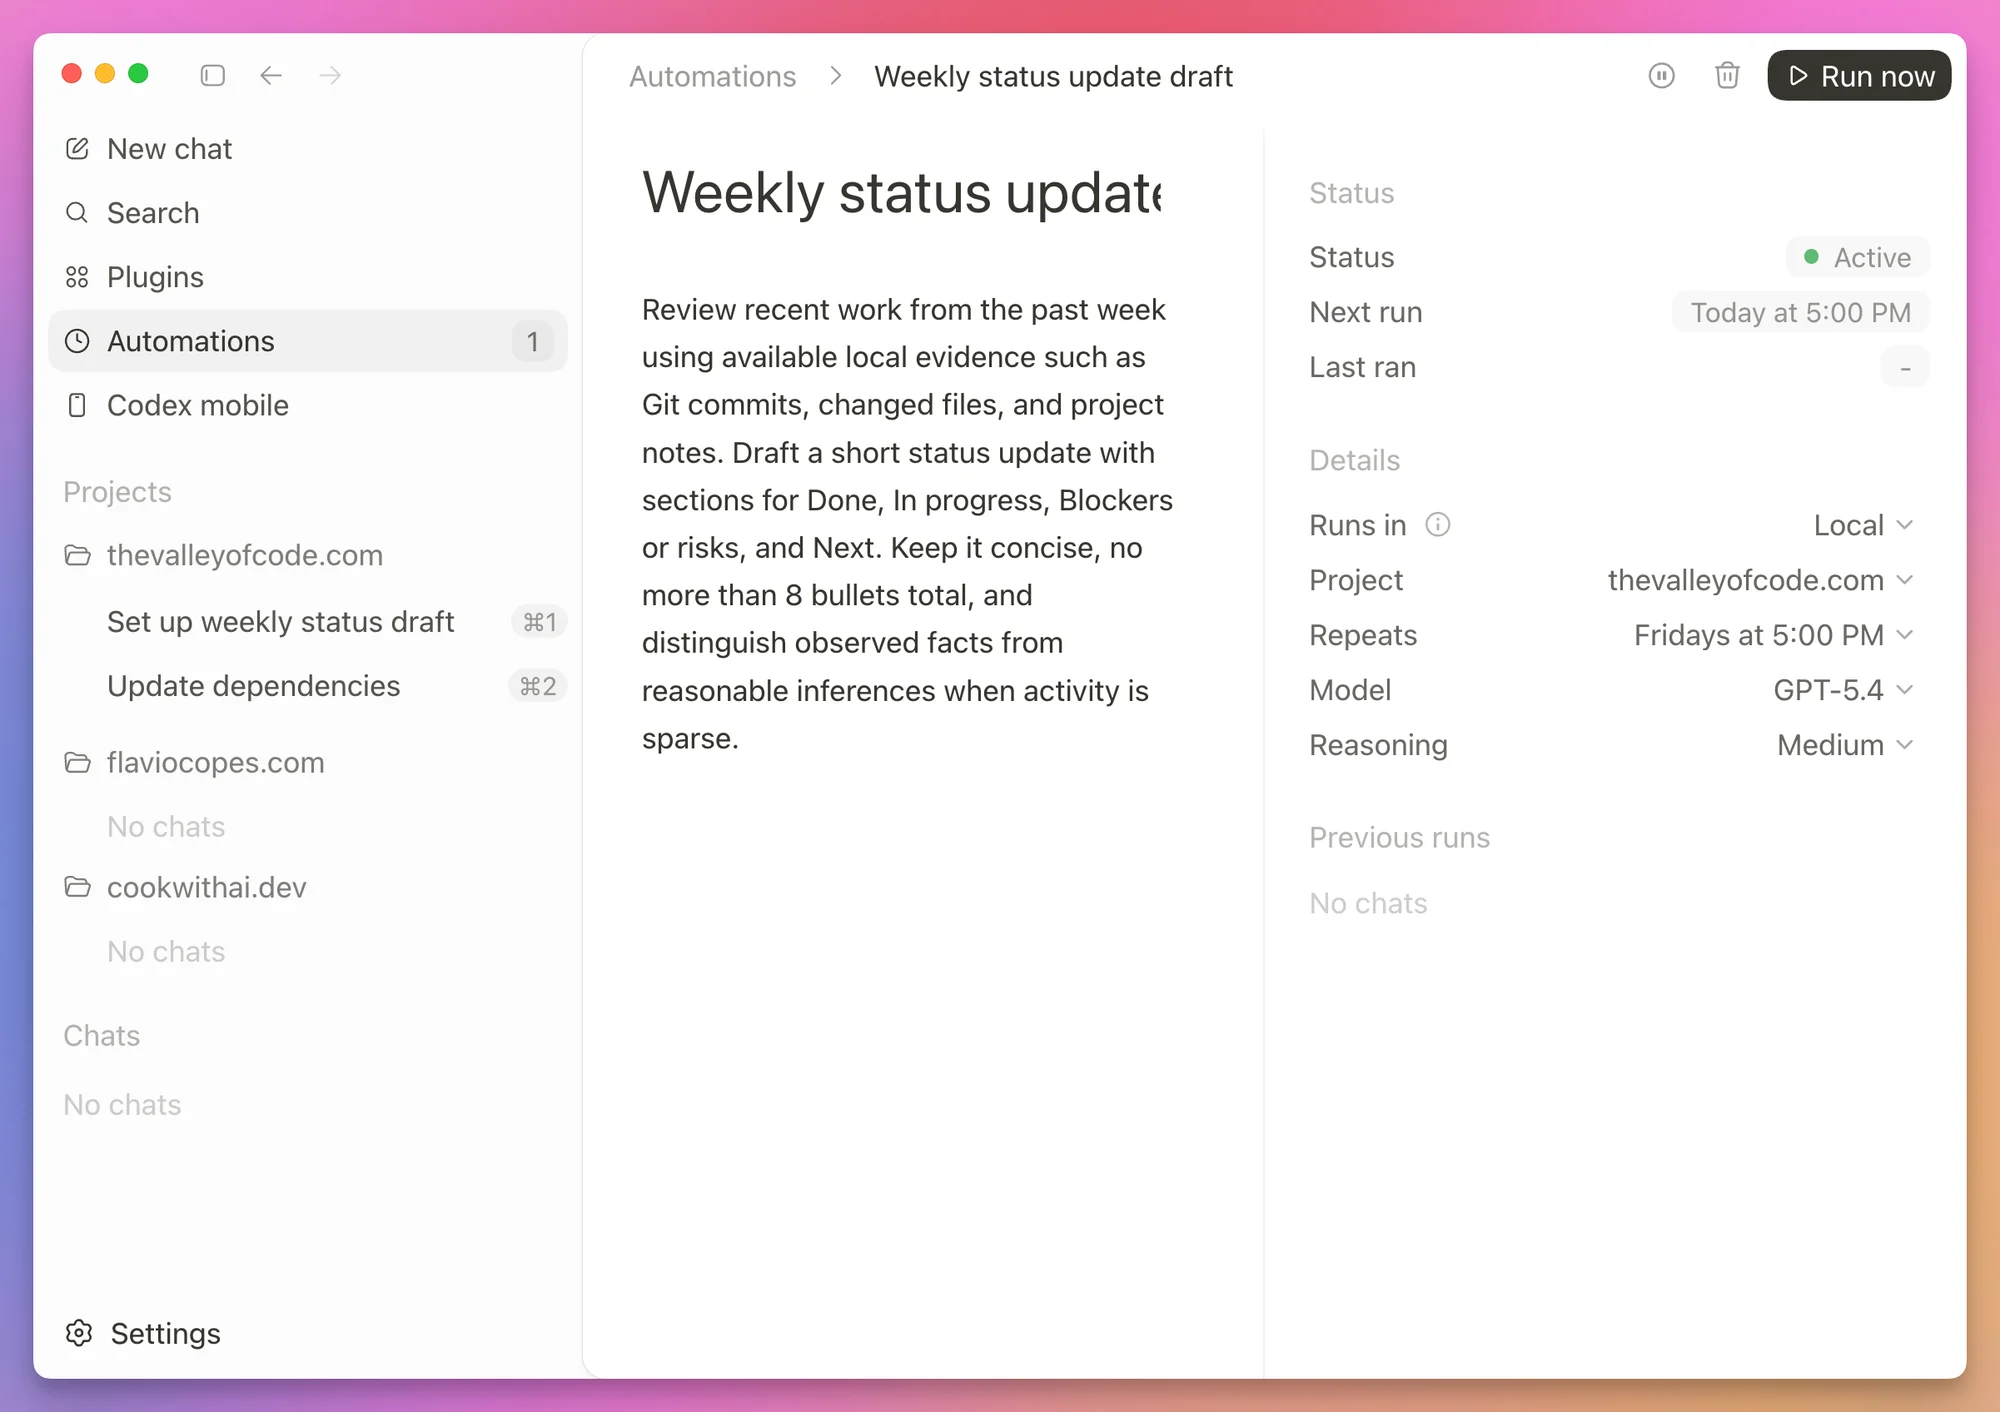
Useful scheduled tasks include:
- scan recent commits for likely bugs
- summarize yesterday’s Git activity
- check outdated dependencies and propose safe upgrades
- draft a weekly changelog
- check CI failures
Run the prompt yourself before scheduling it. If you keep correcting the workflow, it is not ready to run unattended.
For local projects, the computer must be on and the desktop app must be running. Scheduled tasks use your sandbox settings, and unattended work cannot stop to negotiate every action. Give them the narrowest access that lets them succeed.
In a Git repository, a scheduled task can run in your local checkout or on a dedicated background worktree. Pick the worktree unless the task must touch the files you are editing right now. The unattended changes then stay away from your unfinished work.
You can also name the skill a task should use by writing $skill-name in its prompt. The task no longer depends on Codex picking the right skill on its own.
This is how I separate the two concepts:
skill = how the work should be done
scheduled task = when it should run
Use Codex from the terminal
The CLI runs Codex inside your terminal. Once you know the desktop workflow, it feels familiar. I wrote a separate guide on how to use the Codex CLI if you want the full tour.
I use it when I’m already working in a shell, or when I connect to a remote server over SSH. I go back to the app when I want its browser, diff, file panels, and multiple chats.
On macOS and Linux, install it with:
curl -fsSL https://chatgpt.com/codex/install.sh | shSee the official CLI setup guide for Windows and the other installation options.
Move into a project and run:
cd ~/Sites/my-app
codex
The first time, Codex asks you to sign in with ChatGPT or use an OpenAI API key. ChatGPT sign-in uses the Codex allowance included with your plan. An API key bills usage through the OpenAI API.
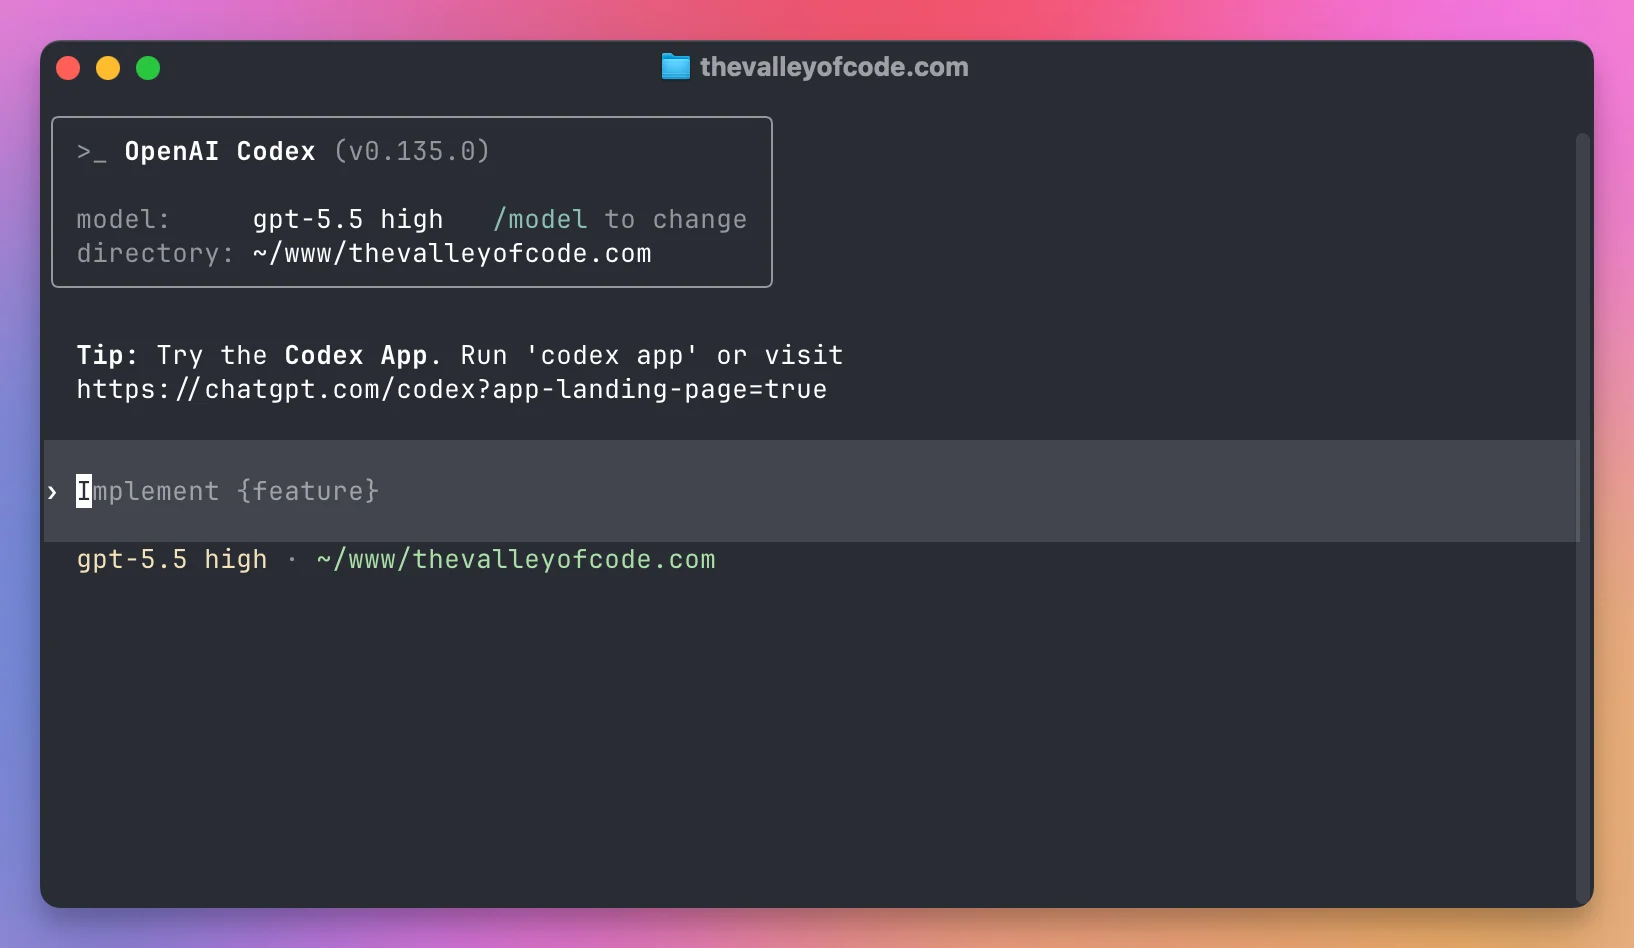
You can open the interactive interface with a prompt already filled in:
codex "Explain how authentication works in this project. Don't change anything."For a non-interactive task, use codex exec:
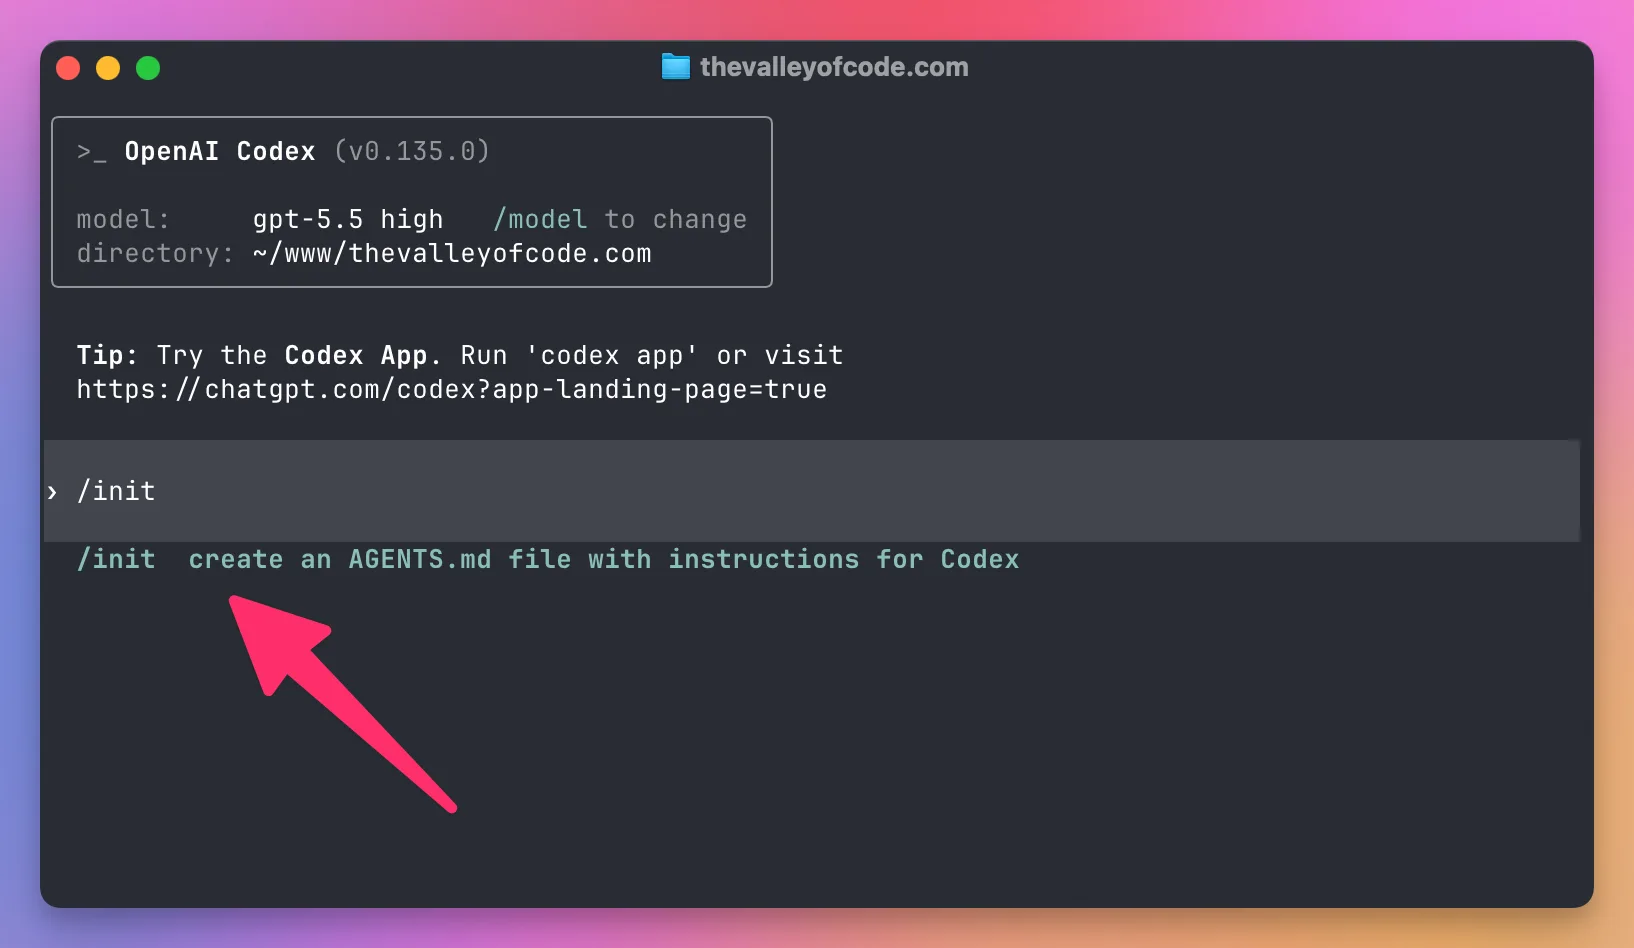
codex exec "Run the test suite and summarize any failures"The current directory becomes the CLI workspace. Run /init if you want Codex to generate a starting AGENTS.md, then edit the file for your project.
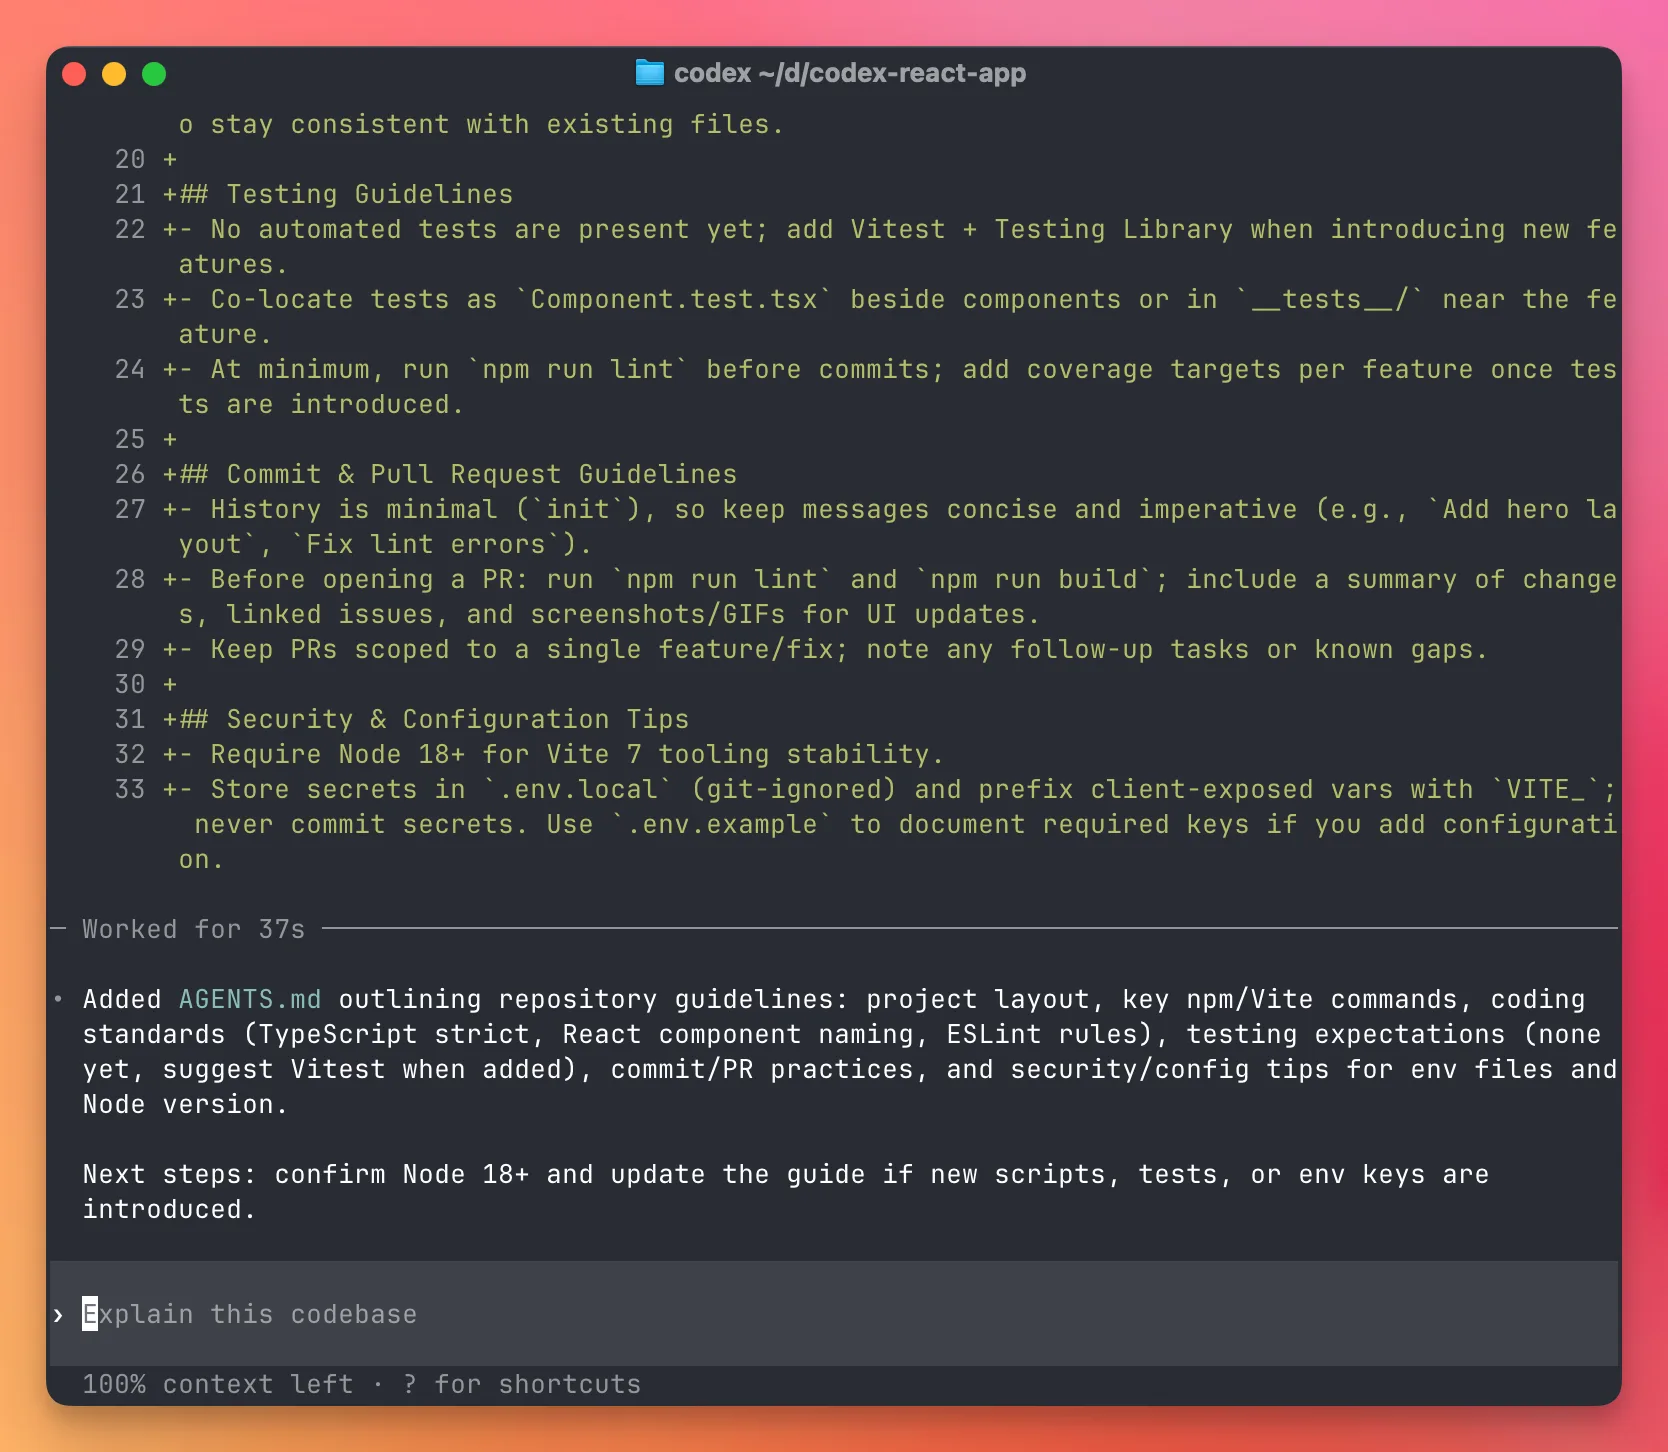
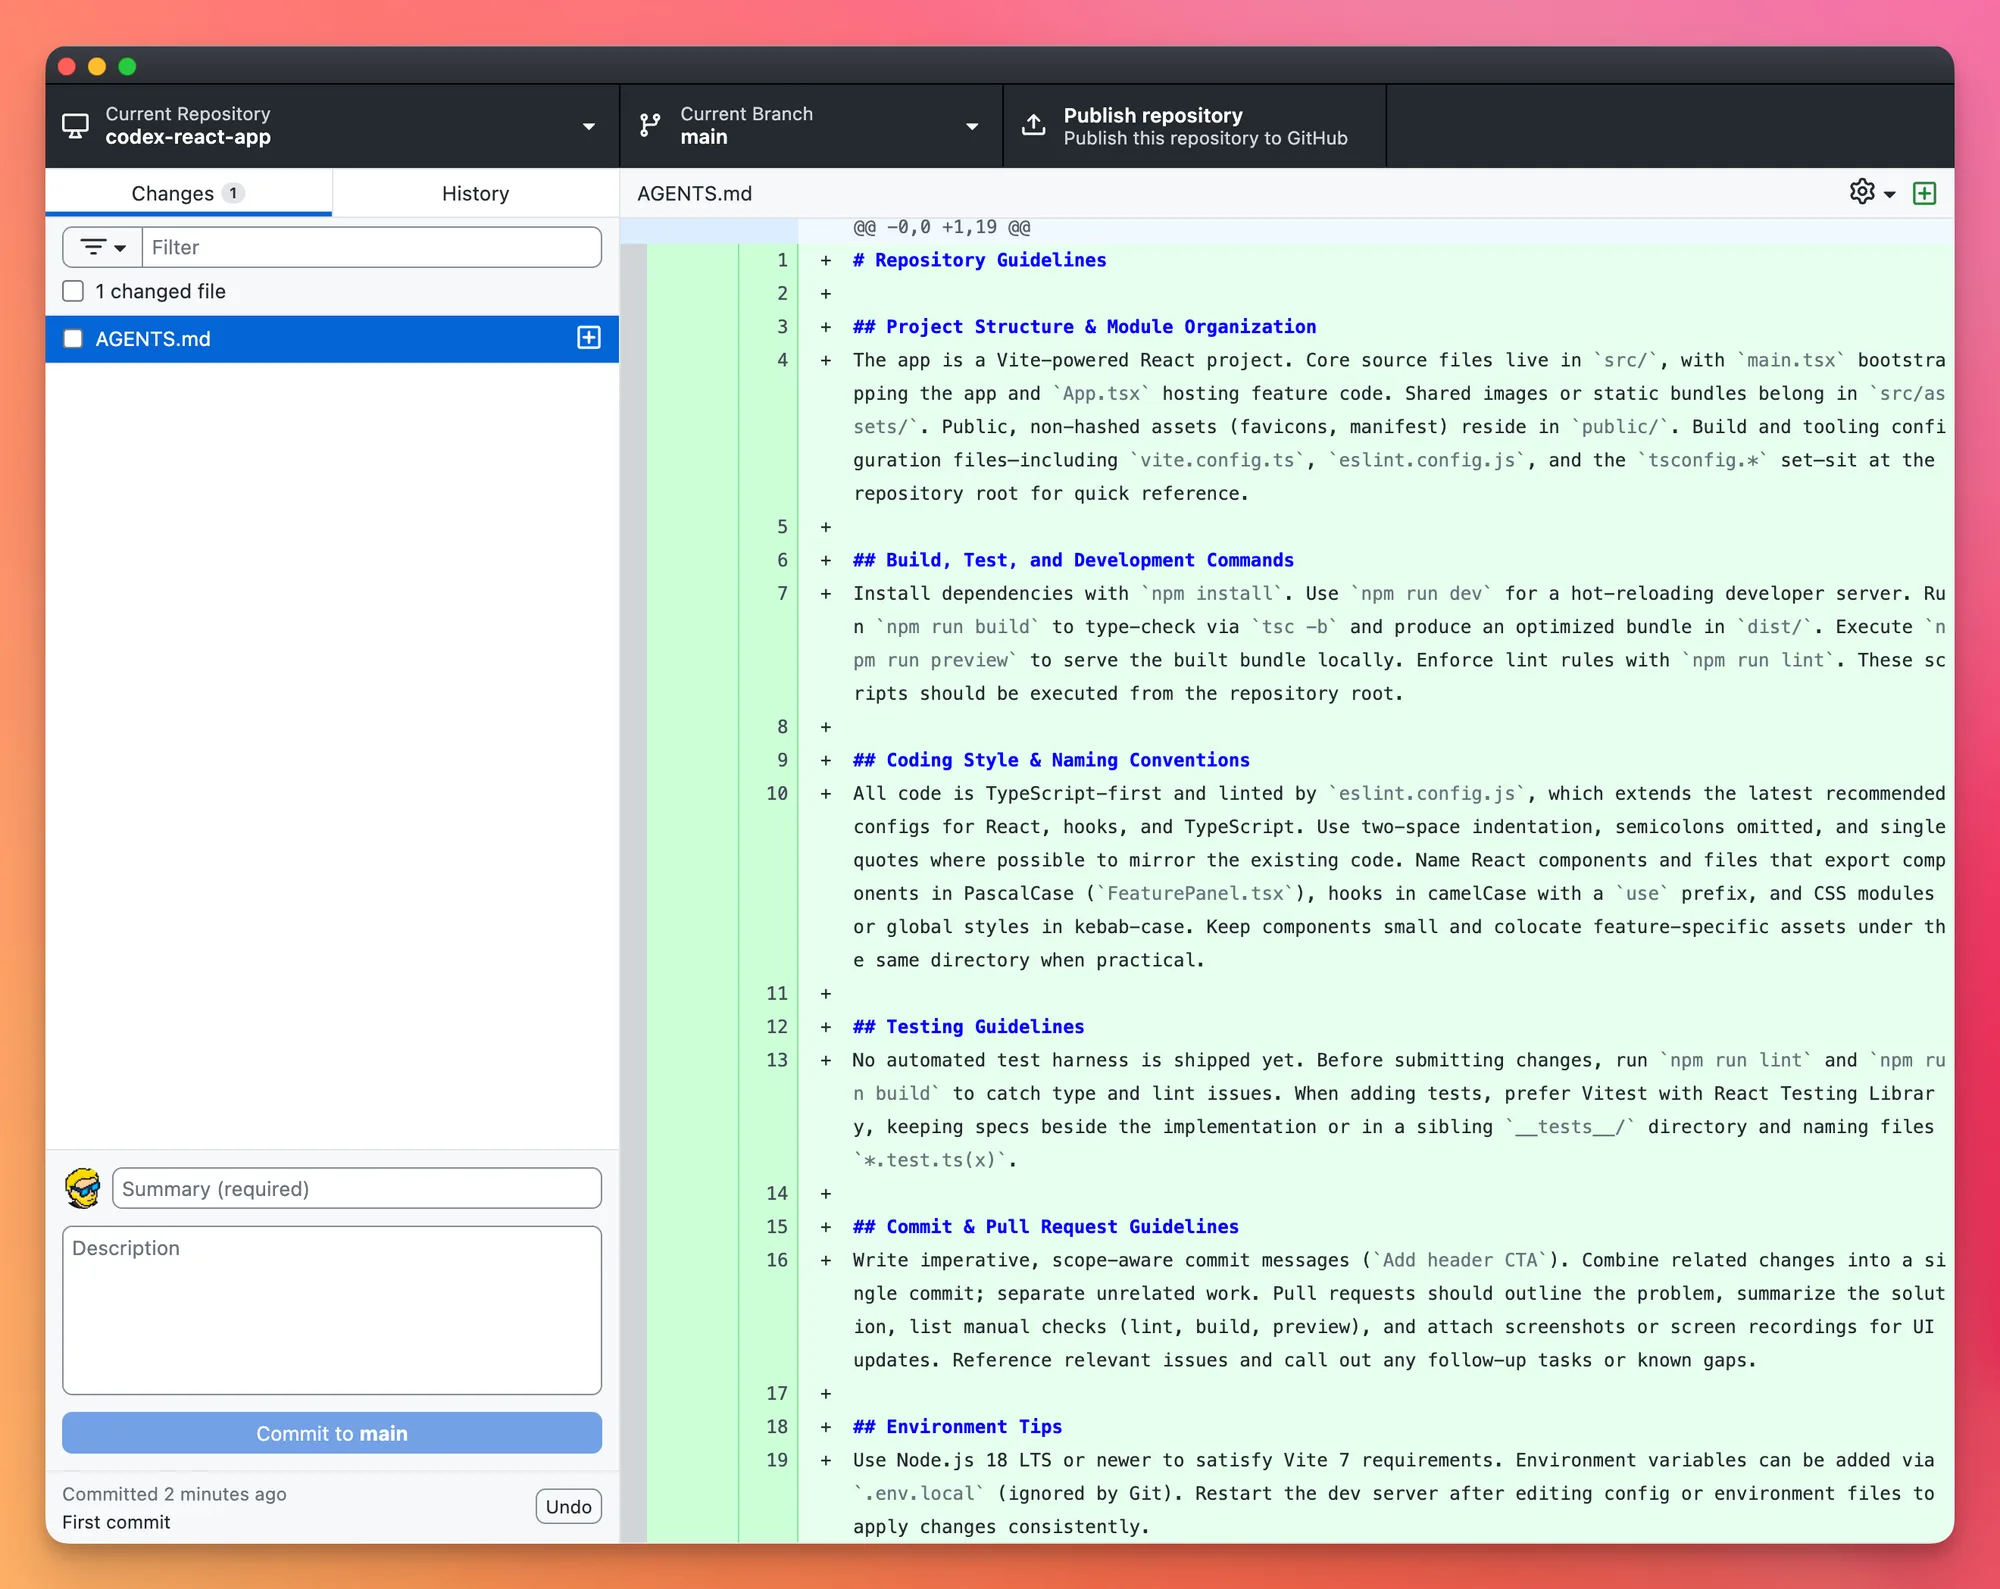
Codex writes the generated project instructions to AGENTS.md.
Use /mention to add a file or folder to the prompt:
/mention src/lib/auth.jsYou can pass one or more images with -i or --image:
codex -i screenshot.png "Explain this error and suggest the smallest fix"
codex --image before.png,after.png "List the visual regressions"
Web search is on by default in cached mode, so Codex answers from an OpenAI-maintained index instead of fetching pages live. Pass --search when one run needs live results:
codex --search "Summarize the latest release notes for this dependency"Set web_search = "live" in config.toml to make that the default, or web_search = "disabled" to turn the tool off.
Run /mcp, /skills, or /plugins to see what the current session loaded. You can add an MCP server with codex mcp add. Start a new CLI session after installing a plugin, otherwise its tools and skills will not be available yet.
Make a change from the CLI
The same prompt-writing rules apply in the terminal. Tell Codex exactly what to change and where it should connect to the existing project.
In this example I asked it to add a Counter component with increment, decrement, and reset controls, then use it from App.tsx.
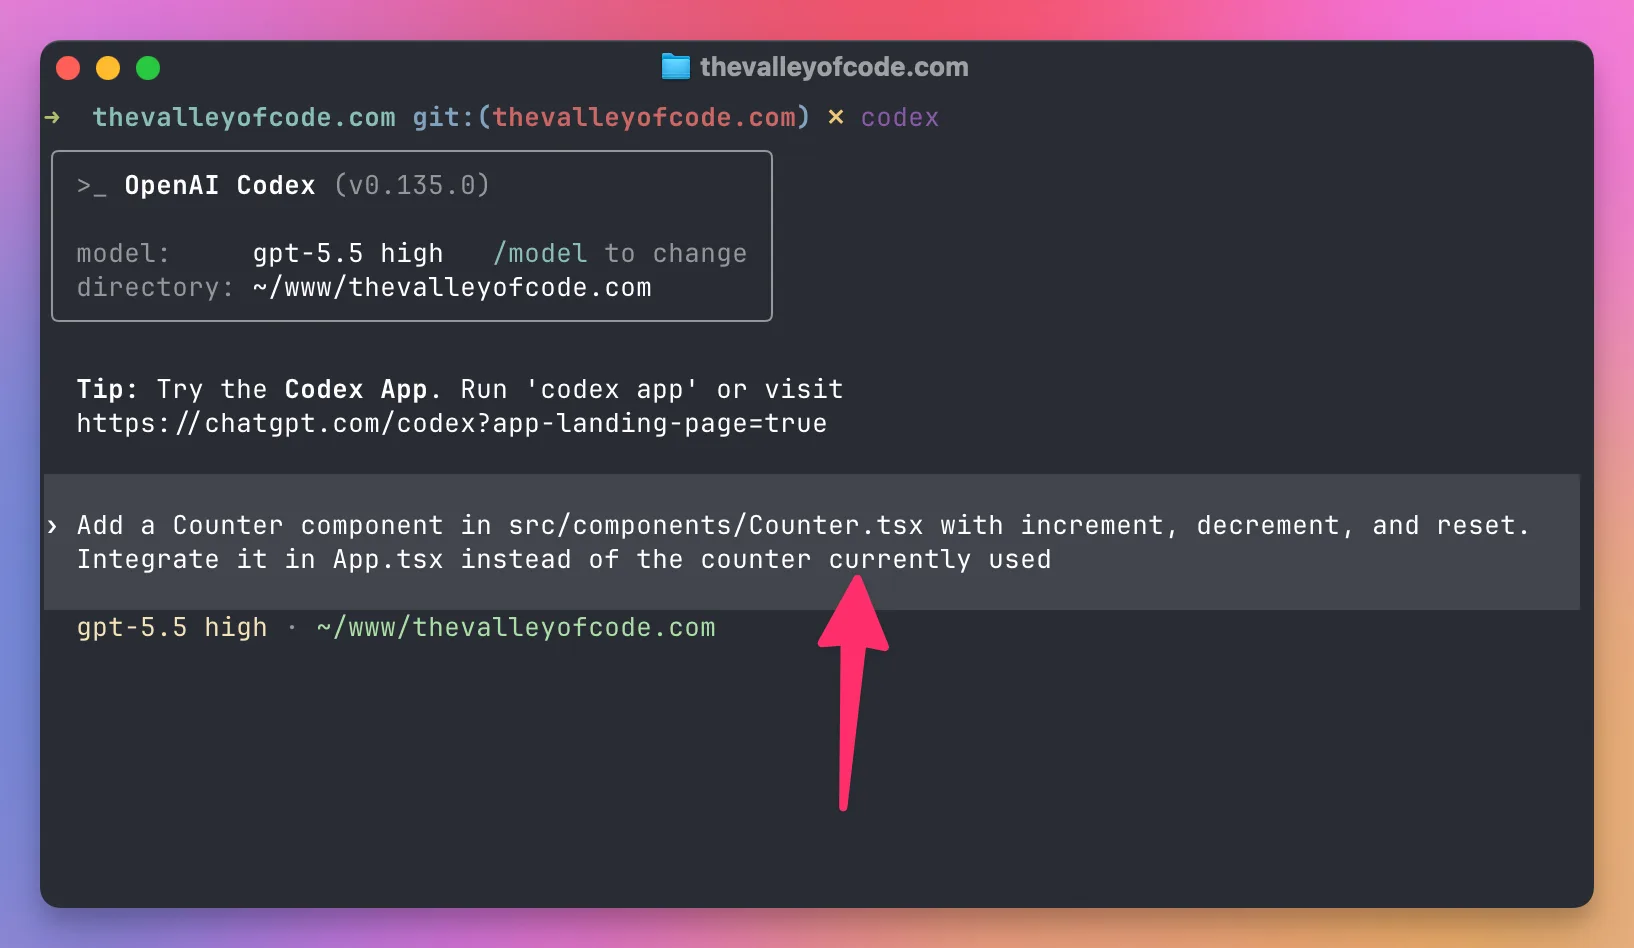
Codex inspected the project, changed the files, and reported the result in the same terminal session.
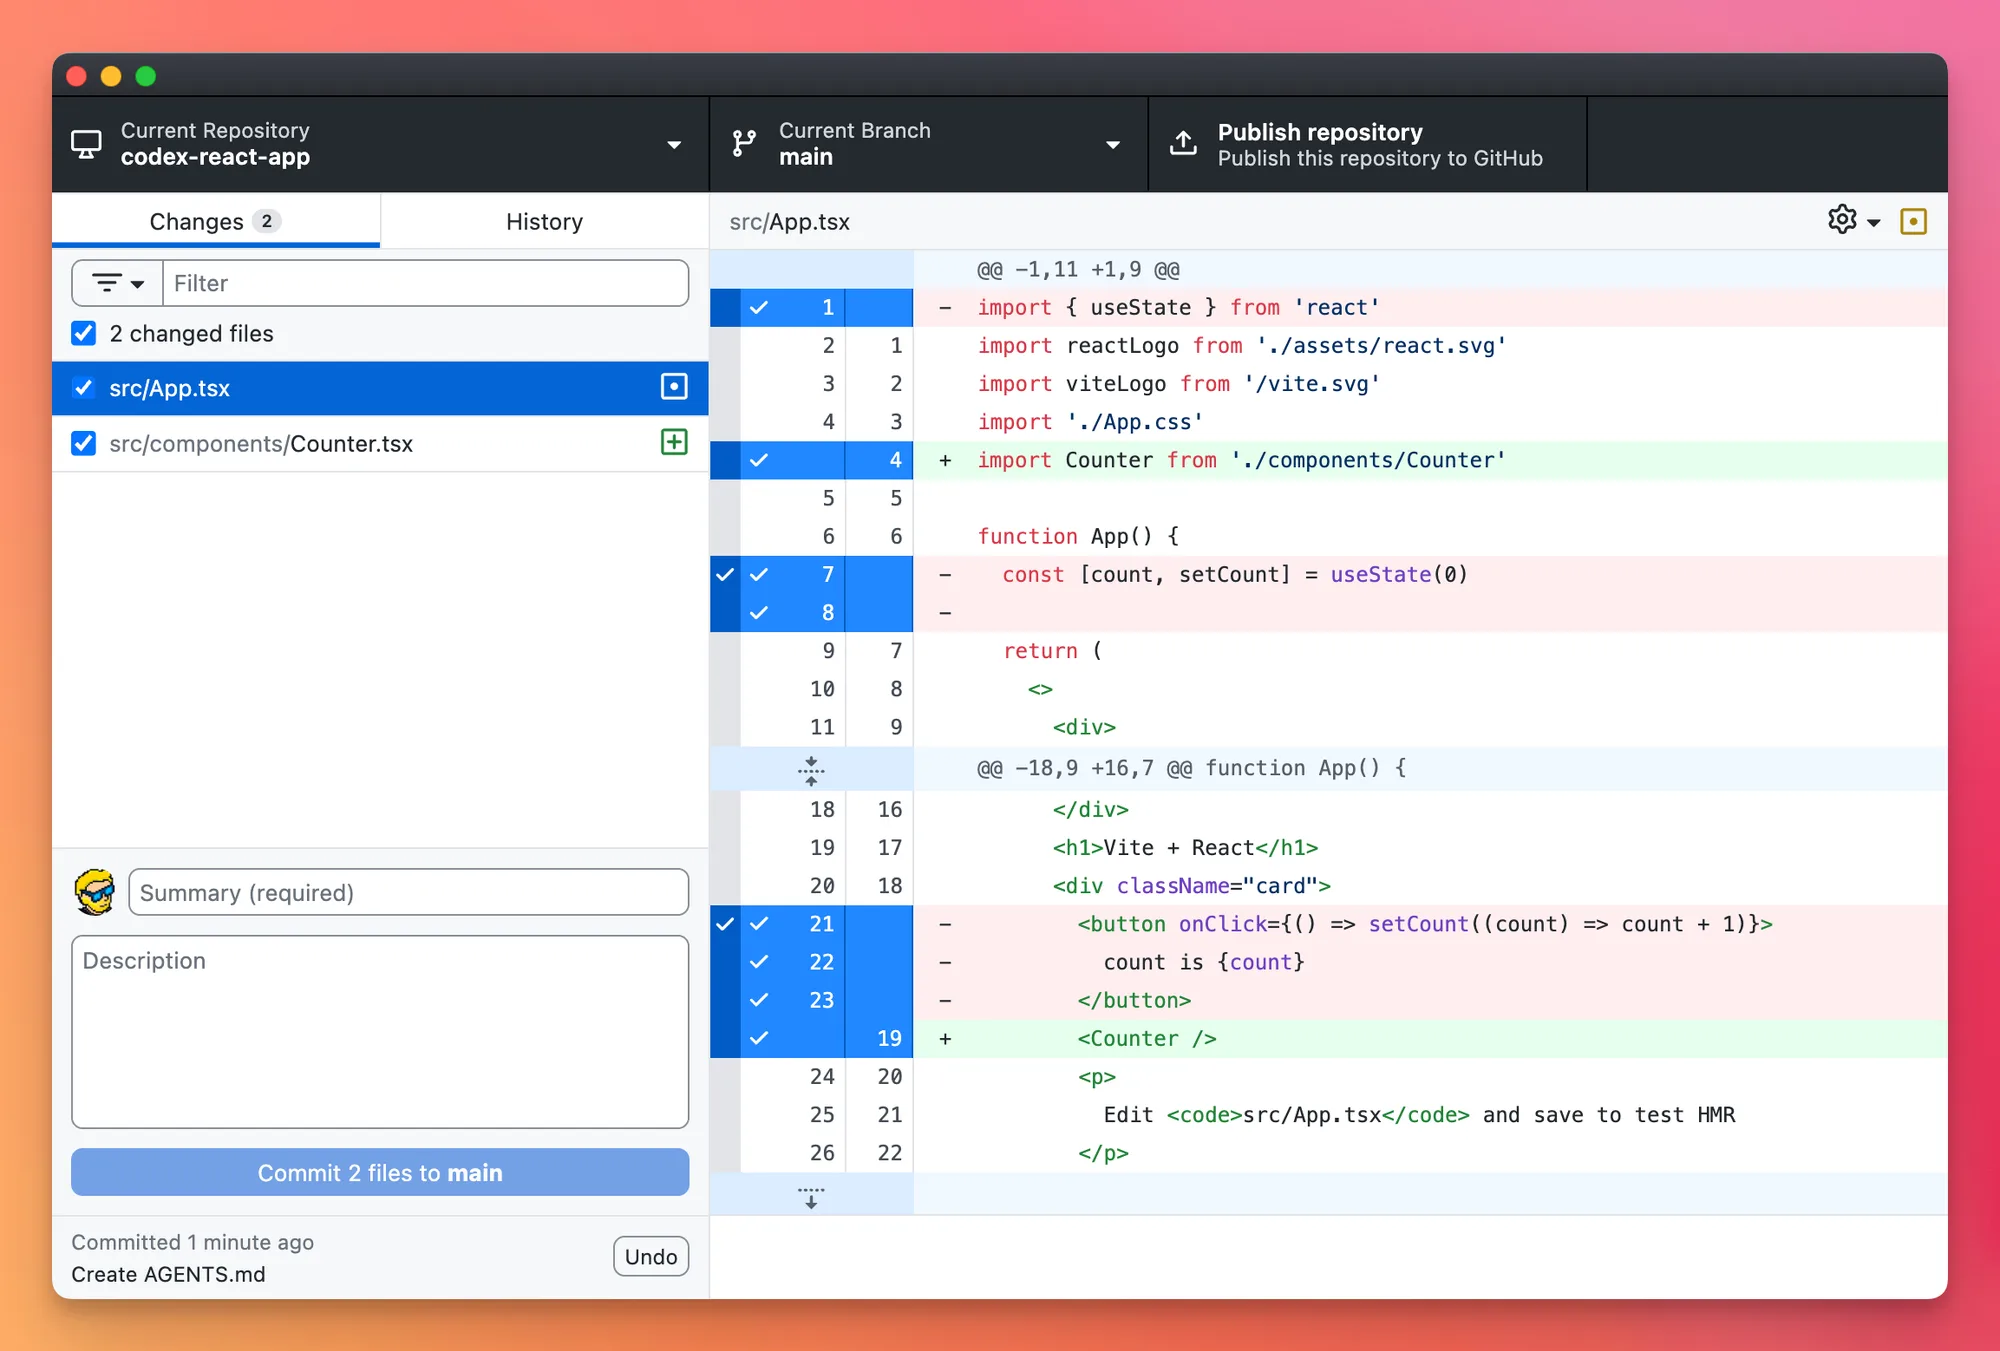
You can review those files in your usual Git client too. Here they are in GitHub Desktop.
The CLI commands I use most
Type / to open the command list. It changes as Codex adds features, but these are the commands I use most:
/initcreates a startingAGENTS.md/planenters Plan mode/goalstarts or manages a persistent goal/modelchanges the model and reasoning level/permissionschanges what Codex can do without asking/mentionadds a file or folder to the prompt/diffshows the Git diff/reviewstarts a separate reviewer on a diff: against a base branch, the uncommitted changes, one commit, or with your own instructions/agentswitches between running subagent threads/compactsummarizes a long chat to recover context space/statusshows the current model, permissions, workspace, and context usage/usageshows account usage/resumecontinues a saved chat/forkbranches the current chat without losing the original/mcp,/skills, and/pluginsshow the installed extensions/quitexits
The CLI also has normal subcommands:
codex resume
codex review --uncommitted
codex exec "Run the tests and return only the failures"
codex doctor
Run codex --help and codex <command> --help for the version installed on your computer. The official command reference documents every option.
Other ways to use Codex
The IDE extension
The Codex IDE extension puts the agent beside your editor. It can use open files, your current selection, and the repository as context.
I would use it when a task starts from code already open in the editor. I prefer the desktop app when I want the diff, terminal, browser, and several chats visible together.
Codex cloud
Codex cloud runs work in an isolated environment. You can delegate a task without keeping your computer busy. I walk through the setup in How to use Codex Cloud.
The cloud environment needs its own setup. Dependencies, environment variables, and services available on your laptop are not automatically present there.
A real debugging workflow
I once woke up to an angry email because the unsubscribe link for my newsletter did not work. The entire server was down, and the disk was 99% full.
I could have given Codex SSH access. This was a production server with almost no free space, so I wanted to see every command. I ran each command myself and pasted the output back.
The loop looked like this:
I pasted df -h
Codex suggested the next safe inspection
I ran it
I pasted the result
Codex narrowed the search
We found that the Sendy database used only 528 MB. MySQL binary logs used around 41 GB.
Codex told me not to delete files manually from /var/lib/mysql. It gave me the MySQL command to purge old binary logs safely, and the disk went from 99% used to 41% used.
I don’t let the agent execute everything on a risky system. In this case Codex guided the investigation, while I ran one command at a time and made the final decisions.
What I learned building a full app with Codex
I also used Codex to build a local web app that generates multi-page comics from a story and reference photos.
I started with a detailed prompt about characters, story projects, storyboards, image generation, exports, and local storage. Later I changed the stack, added reusable comic styles, switched the image API, and fixed mistakes I only noticed when I used the app.
The first prompt produced a lot of software, but it wasn’t the exact product I had in mind. Some product decisions in my detailed prompt were wrong, and I only discovered missing requirements by using the app.
The generated UI needed more work too. When image generation failed silently, I asked Codex to add progress and error messages before touching the API. With the failure visible in the app and the logs, we could see what needed fixing.
That experience is why I now give Codex one coherent outcome at a time. I make the result observable, try it myself, review the changes, and continue from there.
What I don’t like about Codex
The naming. The app is called ChatGPT, Codex is a mode inside it, and most documentation pages describe ChatGPT Work and Codex together. It takes a while to work out which sentence applies to you.
Goal mode is impressive, but it isn’t how I want to work. My PocketBase experiment ran for over 24 hours and both prototypes still needed a lot of manual work. I’d rather spend that budget on ten well-scoped tasks I can review one by one.
The built-in browser doesn’t know my logins. It has its own profile, so a page behind Google sign-in means signing in again inside Codex. The browser extension can drive your real Chrome instead, at the price of an extension that can read and change data on every site you visit.
Computer Use only exists in some regions, and it’s a plugin rather than a built-in, so the setup has more steps than the browser.
Scheduled tasks for local projects need the computer awake and the app running. A task set for 7am does nothing if the laptop is closed. For anything that must run no matter what, I still use a cron job on a server or a scheduled GitHub Action.
When I pick Codex over Cursor or Claude Code
I use all three. Cursor gets most of my days, because I’m in the editor anyway and I like a local agent that works on my checkout, one task at a time. Claude Code is my other terminal agent, and the one I ran on a disposable server to build and ship a small app from the same box.
Codex wins for me when:
- I’m working on something visual. Clicking an element in the built-in browser and describing the change beats writing a paragraph about where it is.
- I want a task to run on a schedule, or unattended in a worktree while I do something else.
- I want the whole loop in one window: plan, change, terminal, browser, diff, commit.
- It comes with a ChatGPT plan. If you already pay for one, trying Codex costs nothing extra.
None of the three replaced the others for me. The prompting, the review, and the one-outcome-at-a-time habit are the same everywhere. The tools differ in where the agent runs and what it can see. To compare the models behind them head-to-head, see Which AI model is best for coding?.
My Codex workflow
This is the loop I follow for most project work:
- Open the correct project.
- Ask Codex to inspect the relevant code without changing it.
- Use Plan mode if the task crosses several files or has unclear decisions.
- Review the plan.
- Ask Codex to implement one coherent outcome.
- Let it run the tests and build.
- Verify the behavior in the browser or app.
- Read the full diff.
- Ask for one final review.
- Commit and push only when I understand the result.
For a long job with a precise end state, I use Goal mode. If a workflow becomes stable and repetitive, I turn the instructions into a skill and test it before scheduling anything.
None of this is specific to Codex. I wrote down where the loop comes from, after six months of working with Cursor, Claude Code, and Codex, in What I learned in the past 6 months about using agentic AI.
Start with a project you know well and give Codex one small change. Let it inspect the code, make the change, run the checks, and then read the diff yourself. You’ll learn much more from that first complete loop than from changing every setting in advance.
Want me to talk about your product? You can sponsor this site.
Related posts about ai: