The Notification API Guide
By Flavio Copes
Learn how to use the browser Notifications API to show system notifications to users, from requesting permission to creating, customizing, and closing them.
Introduction to the Notification API
The Notifications API is the interface that browsers expose to the developer to allow showing messages to the user, with their permission, even if the web site / web app is not open in the browser.
Those messages are consistent and native, which means that the receiving person is used to the UI and UX of them, being system-wide and not specific to your site.
In combination with the Push API this technology can be a successful way to increase user engagement and to enhance the capabilities of your app.
The Notifications API interacts heavily with Service Workers, as they are required for Push Notifications. You can use the Notifications API without Push, but its use cases are limited.
if (window.Notification && Notification.permission !== 'denied') {
  const status = await Notification.requestPermission()
  // status is "granted", if accepted by user
  if (status === 'granted') {
    const n = new Notification('Title', {
      body: 'I am the body text!',
      icon: '/path/to/icon.png', // optional
    })
  }
}n.close()Permissions
To show a notification to the user, you must have permission to do so.
You get it by calling Notification.requestPermission(), which returns a promise, so you can await it (inside an async function, or at the top level of a module). The method also accepts a callback, but that form is deprecated and you should not use it in new code.
Two more things to know. The API only works in a secure context, so on HTTPS or on localhost. And browsers expect you to ask from a user gesture, like a click on a button. Some of them ignore the request if it does not come from one. Asking on the first page load is a bad idea anyway. The user has no idea yet if they want alerts from you.
You can call it like this:
const permission = await Notification.requestPermission()That shows the permission panel, unless the user already answered before.
Handle the result:
const permission = await Notification.requestPermission()

if (permission === 'granted') {
  // ok, we can show a notification
}
permission is a string with one of these values:
granted: the user accepted, we can show a notificationdenied: the user denied, we can’t show any notificationdefault: the user has not answered yet
You can read the same value at any time from the Notification.permission property. If you have not asked yet, it is default.
If you want notifications to arrive while the site is closed, you need to pair this API with the Push API and a Service Worker.
Create a notification
The Notification object exposed by the window object in the browser allows you to create a notification and to customize its appearance.
Here is the simplest example, after you asked for permissions:
await Notification.requestPermission()
new Notification('Hey')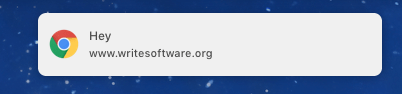
You have a few options to customize the notification.
Add a body
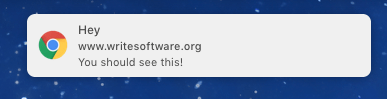
First, you can add a body, which is usually shown as a single line:
new Notification('Hey', {
  body: 'You should see this!',
})
Add an image
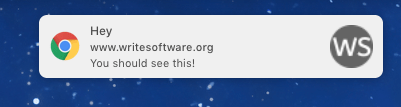
You can add an icon property:
new Notification('Hey', {
  body: 'You should see this!',
  icon: '/user/themes/writesoftware/favicon.ico',
})
More customization options, with platform-specific properties, can be found at https://developer.mozilla.org/docs/Web/API/Notification
Close a notification
You might want to close a notification once you opened it.
To do so, create a reference to the notification you open:
const n = new Notification('Hey')and then you can close it later, using:
n.close()or with a timeout:
setTimeout(() => n.close(), 1 * 1000)Want me to talk about your product? You can sponsor this site.
Related posts about platform: