The History API
The History API is the way browsers let you interact with the address bar and the navigation history
React Masterclass
Launching on November 4th
- Introduction
- Access the History API
- Navigate the history
- Add an entry to the history
- Modify history entries
- Access the current history entry state
- The
onpopstateevent
Introduction
The History API lets you interact with the browser history, trigger the browser navigation methods and change the address bar content.
It’s especially useful in combination with modern Single Page Applications, on which you never make a server-side request for new pages, but instead the page is always the same: just the internal content changes.
A modern JavaScript application running in the browser that does not interact with the History API, either explicitly or at the framework level, is going to be a poor experience to the user, since the back and forward buttons break.
Also, when navigating the app, the view changes but the address bar does not.
And also the reload button breaks: reloading the page, since there is no deep linking, is going to make the browser show a different page
The History API was introduced in HTML5 and is now supported by all modern browsers. IE supports it since version 10, and if you need to support IE9 and older, use the History.js library.
Access the History API
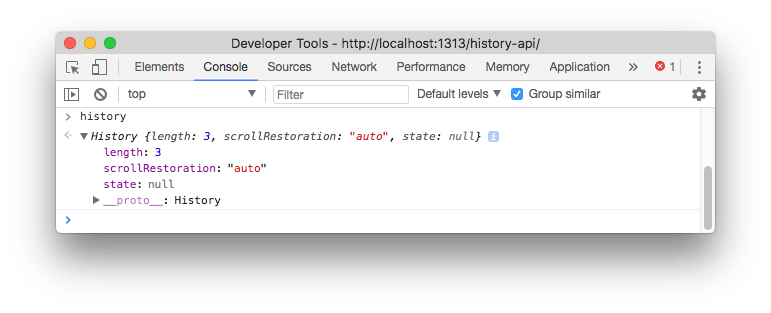
The History API is available on the window object, so you can call it like this: window.history or history, since window is the global object.

Navigate the history
Let’s start with the simplest thing you can do with the History API.
Go back to the previous page:
history.back()this goes to the previous entry in the session history. You can forward to the next page using
history.forward()This is exactly just like using the browser back and forward buttons.
go() lets you navigate back or forward multiple levels deep. For example
history.go(-1) //equivalent to history.back()
history.go(-2) //equivalent to calling history.back() twice
history.go(1) //equivalent to history.forward()
history.go(3) //equivalent to calling history.forward() 3 times
To know how many entries there are in the history, you can call
history.lengthAdd an entry to the history
Using pushState() you can create a new history entry programmatically. You pass 3 parameters.
The first is an object which can contain anything (there is a size limit however, and the object needs to be serializable).
The second parameter is currently unused by major browsers, so you generally pass an empty string.
The third parameter is a URL associated to the new state. Note that the URL needs to belong to the same origin domain of the current URL.
const state = { name: 'Flavio' }
history.pushState(state, '', '/user')
Calling this won’t change the content of the page, and does not cause any browser action like changing window.location would.
Modify history entries
While pushState() lets you add a new state to the history, replaceState() allows you to edit the current history state.
history.pushState({}, '', '/posts')
const state = { post: 'first' }
history.pushState(state, '', '/post/first')
const state = { post: 'second' }
history.replaceState(state, '', '/post/second')
If you now call
history.back()the browser goes straight to /posts, since /post/first was replaced by /post/second
Access the current history entry state
Accessing the property
history.statereturns the current state object (the first parameter passed to pushState or replaceState).
The onpopstate event
This event is called on window every time the active history state changes, with the current state as the callback parameter:
window.onpopstate = (event) => {
  console.log(event.state)
}
will log the new state object (the first parameter passed to pushState or replaceState) every time you call history.back(), history.forward() or history.go().
I wrote 20 books to help you become a better developer:
- JavaScript Handbook
- TypeScript Handbook
- CSS Handbook
- Node.js Handbook
- Astro Handbook
- HTML Handbook
- Next.js Pages Router Handbook
- Alpine.js Handbook
- HTMX Handbook
- React Handbook
- SQL Handbook
- Git Cheat Sheet
- Laravel Handbook
- Express Handbook
- Swift Handbook
- Go Handbook
- PHP Handbook
- Python Handbook
- Linux/Mac CLI Commands Handbook
- C Handbook