Emmet Tutorial
Emmet is a pretty cool tool that helps you write HTML very very fast. It's like magic. Emmet is not something new, it's been around for years and there is a plugin for every editor out there.
React Masterclass
Launching on November 4th
- Create an HTML file from scratch
- > and +
- Level up
- Multipliers
- Group an expression to make it more readable
idandclassattributes- Adding an unique class or id
- Other attributes
- Adding content
- Adding an incremental number in your markup
- A reference for tags used in the page
head - A reference for common tags
- A reference for semantic HTML tags
- A reference for form elements
Emmet is a pretty cool tool that helps you write HTML very very fast.
It’s like magic.
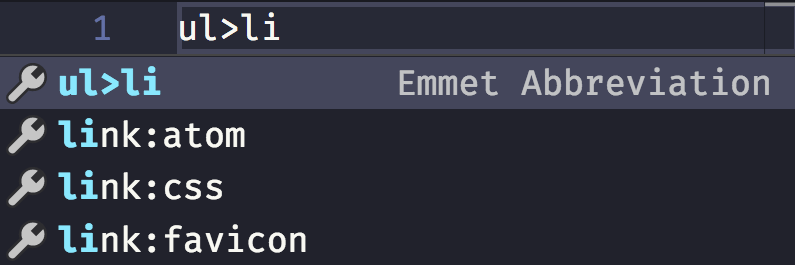
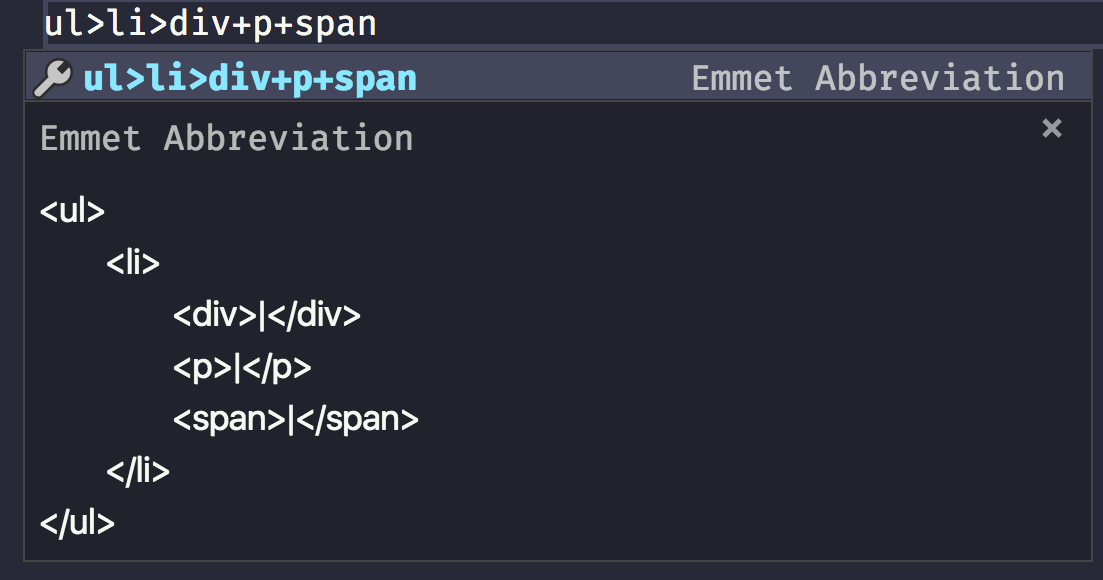
Emmet is not something new, it’s been around for years and there is a plugin for every editor out there. On VS Code, Emmet is integrated out of the box, and whenever the editor recognizes a possible Emmet command, it will show you a tooltip.

If the thing you write has no other interpretations, and VS Code thinks it must be an Emmet expression, it will preview it directly in the tooltip, nicely enough:

Yet I didn’t really know how to use it in all its intricacies until I set out to research and write about it, so I had to learn how to use it in depth.
I want to use it in my day to day work, so here’s what I learned about it.
Create an HTML file from scratch
Type ! and you will get a basic HTML boilerplate to work with:
<!DOCTYPE html>
<html lang="en">
<head>
    <meta charset="UTF-8" />
    <title>Document</title>
</head>
<body>

</body>
</html>
> and +
>means child+means sibling
nav>ul>li

<nav>
    <ul>
        <li></li>
    </ul>
</nav>
div+p+span
<div></div>
<p></p>
<span></span>You can combine those to perform more complex markups. VS Code is so nice to show a preview when the Emmet snippet has no
ul>li>div+p+span

<ul>
    <li>
        <div></div>
        <p></p>
        <span></span>
    </li>
</ul>
Level up
Using ^ you can level up from any time you used > to create a children:
ul>li>div+p^li>span

<ul>
    <li>
        <div></div>
        <p></p>
    </li>
    <li><span></span></li>
</ul>
You can use it multiple times to “up” more than once:
ul>li>div+p^^p

<ul>
    <li>
        <div></div>
        <p></p>
    </li>
</ul>
<p></p>
Multipliers
Any tag can be added multiple times using *:
ul>li*5>p

<ul>
    <li>
        <p></p>
    </li>
    <li>
        <p></p>
    </li>
    <li>
        <p></p>
    </li>
    <li>
        <p></p>
    </li>
    <li>
        <p></p>
    </li>
</ul>
Group an expression to make it more readable
With multiplication in the mix, things start to get a bit more complex. What if you want to multiply 2 items? You group them in parentheses ( ):
ul>li>(p+span)*2

<ul>
    <li>
        <p></p>
        <span></span>
        <p></p>
        <span></span>
    </li>
</ul>
id and class attributes
id and class are probably the most used attributes in HTML.
You can create an HTML snippet that includes them by using a CSS-like syntax:
ul>li>p.text#first

<ul>
    <li>
        <p class="text" id="first"></p>
    </li>
</ul>
You can add multiple classes:
ul>li>p.text.paragraph#first

<ul>
    <li>
        <p class="text paragraph" id="first"></p>
    </li>
</ul>
Adding an unique class or id
id must be unique in your page, at any time.
class can be repeated, but sometimes you want an incremental one for your elements.
You can do that using $:
ul>li.item$*2>p

<ul>
    <li class="item1">
        <p></p>
    </li>
    <li class="item2">
        <p></p>
    </li>
</ul>
Other attributes
Attributes other than class and id must be added using [] parentheses:
ul>li.item$*2>p[style="color: red"]

<ul>
    <li class="item1">
        <p style="color: red"></p>
    </li>
    <li class="item2">
        <p style="color: red"></p>
    </li>
</ul>
You can add multiple attribute at once:
ul>li.item$*2>p[style="color: red" title="A color"]

<ul>
    <li class="item1">
        <p style="color: red" title="A color"></p>
    </li>
    <li class="item2">
        <p style="color: red" title="A color"></p>
    </li>
</ul>
Adding content
Of course you can also fill the HTML with content:
ul>li.item$*2>p{Text}

<ul>
    <li class="item1">
        <p>Text</p>
    </li>
    <li class="item2">
        <p>Text</p>
    </li>
</ul>
Adding an incremental number in your markup
You can add an incremental number in the text:
ul>li.item$*2>p{Text $}

<ul>
    <li class="item1">
        <p>Text 1</p>
    </li>
    <li class="item2">
        <p>Text 2</p>
    </li>
</ul>
That number normally starts at 1, but you can make it start at an arbitrary number:
ul>li.item$@10*2>p{Text $@3}

<ul>
    <li class="item10">
        <p>Text 3</p>
    </li>
    <li class="item11">
        <p>Text 4</p>
    </li>
</ul>
A reference for tags used in the page head
| Abbreviation | Rendered html |
|---|---|
| link | <link rel="stylesheet" href="" /> |
| link:css | <link rel="stylesheet" href="style.css" /> |
| link:favicon | <link rel="shortcut icon" type="image/x-icon" href="favicon.ico" /> |
| link:rss | <link rel="alternate" type="application/rss+xml" title="RSS" href="rss.xml" /> |
| meta:utf | <meta http-equiv="Content-Type" content="text/html;charset=UTF-8" /> |
| meta:vp | <meta name="viewport" content="width=device-width, user-scalable=no, initial-scale=1.0, maximum-scale=1.0, minimum-scale=1.0" /> |
| style | <style></style> |
| script | <script></script> |
| script:src | <script src=""></script> |
A reference for common tags
| Abbreviation | Rendered html |
|---|---|
| img | <img src="" alt="" /> |
| a | <a href=""></a> |
| br | <br /> |
| hr | <hr /> |
| c | <!-- --> |
| tr+ | <tr><td></td></tr> |
| ol+ | <ol><li></li></ol> |
| ul+ | <ul><li></li></ul> |
A reference for semantic HTML tags
| Abbreviation | Rendered html |
|---|---|
| mn | <main></main> |
| sect | <section></section> |
| art | <article></article> |
| hdr | <header></header> |
| ftr | <footer></footer> |
| adr | <address></address> |
| str | <strong></strong> |
A reference for form elements
| Abbreviation | Rendered html |
|---|---|
| form | <form action=""></form> |
| form:get | <form action="" method="get"></form> |
| form:post | <form action="" method="post"></form> |
| label | <label for=""></label> |
| input | <input type="text" /> |
| inp | <input type="text" name="" id="" /> |
| input:hidden, input:h | <input type="hidden" name="" /> |
| input:text, input:t | <input type="text" name="" id="" /> |
| input:search | <input type="search" name="" id="" /> |
| input:email | <input type="email" name="" id="" /> |
| input:url | <input type="url" name="" id="" /> |
| input:password, input:p | <input type="password" name="" id="" /> |
| input:datetime | <input type="datetime" name="" id="" /> |
| input:date | <input type="date" name="" id="" /> |
| input:datetime-local | <input type="datetime-local" name="" id="" /> |
| input:month | <input type="month" name="" id="" /> |
| input:week | <input type="week" name="" id="" /> |
| input:time | <input type="time" name="" id="" /> |
| input:tel | <input type="tel" name="" id="" /> |
| input:number | <input type="number" name="" id="" /> |
| input:color | <input type="color" name="" id="" /> |
| input:checkbox, input:c | <input type="checkbox" name="" id="" /> |
| input:radio, input:r | <input type="radio" name="" id="" /> |
| input:range | <input type="range" name="" id="" /> |
| input:file, input:f | <input type="file" name="" id="" /> |
| input:submit, input:s | <input type="submit" value="" /> |
| input:image, input:i | <input type="image" src="" alt="" /> |
| input:button, input:b | <input type="button" value="" /> |
| input:reset | <input type="reset" value="" /> |
| button:submit, button:s, btn:s | <button type="submit"></button> |
| button:reset, button:r, btn:r | <button type="reset"></button> |
| button:disabled, button:d, btn:d | <button disabled="disabled"></button> |
| btn | <button></button> |
| fieldset:disabled, fieldset:d, fset:d, fst:d | <fieldset disabled="disabled"></fieldset> |
| fst, fset | <fieldset></fieldset> |
| optg | <optgroup></optgroup> |
| select | <select name="" id=""></select> |
| select:disabled, select:d | <select name="" id="" disabled="disabled"></select> |
| select+ | <select name="" id=""><option value=""></option></select> |
| option, opt | <option value=""></option> |
| table+ | <table><tr><td></td></tr></table> |
| textarea | <textarea name="" id="" cols="30" rows="10"></textarea> |
| tarea | <textarea name="" id="" cols="30" rows="10"></textarea> |
I wrote 20 books to help you become a better developer:
- JavaScript Handbook
- TypeScript Handbook
- CSS Handbook
- Node.js Handbook
- Astro Handbook
- HTML Handbook
- Next.js Pages Router Handbook
- Alpine.js Handbook
- HTMX Handbook
- React Handbook
- SQL Handbook
- Git Cheat Sheet
- Laravel Handbook
- Express Handbook
- Swift Handbook
- Go Handbook
- PHP Handbook
- Python Handbook
- Linux/Mac CLI Commands Handbook
- C Handbook