Canvas UI puts WebGL shaders over real, interactive HTML
By Flavio Copes
Canvas UI uses the experimental HTML-in-Canvas API to combine real DOM content with WebGL shaders, without giving up links, forms, or accessibility.
Canvas UI is a component library that applies canvas and WebGL effects to real DOM content. It can make HTML ripple, refract, burn, or dissolve into particles without turning the interface into a dead image.
For years, web developers had to choose between the DOM and <canvas>.
The DOM gives us text, links, forms, accessibility, browser search, translation, and all the other things that make the web useful.
Canvas gives us pixels.
Once something becomes pixels, we can bend it, blur it, break it into particles, pass it through a shader, or make it behave like water. But the browser no longer sees a heading, a button, or an input. It sees a rectangle full of color.
Canvas UI tries to remove that choice.
David Haz, the creator of React Bits, launched Canvas UI as an HTML-in-canvas component library.
Canvas UI lets WebGL effects use your live DOM as their input.
Your text can ripple like water. A glass lens can refract a real interface. A page can break into particles around the pointer. But the content underneath is still HTML.
Links stay links. Text stays selectable. Forms keep working.
This is not how canvas effects usually work.
What is Canvas UI?
Canvas UI is a collection of creative visual components for websites.
At the time of writing, the library includes 33 effects. There is liquid, glass, fire, cloth, rain, a VHS effect, particle reveals, ripples, glitches, 3D objects, and more.
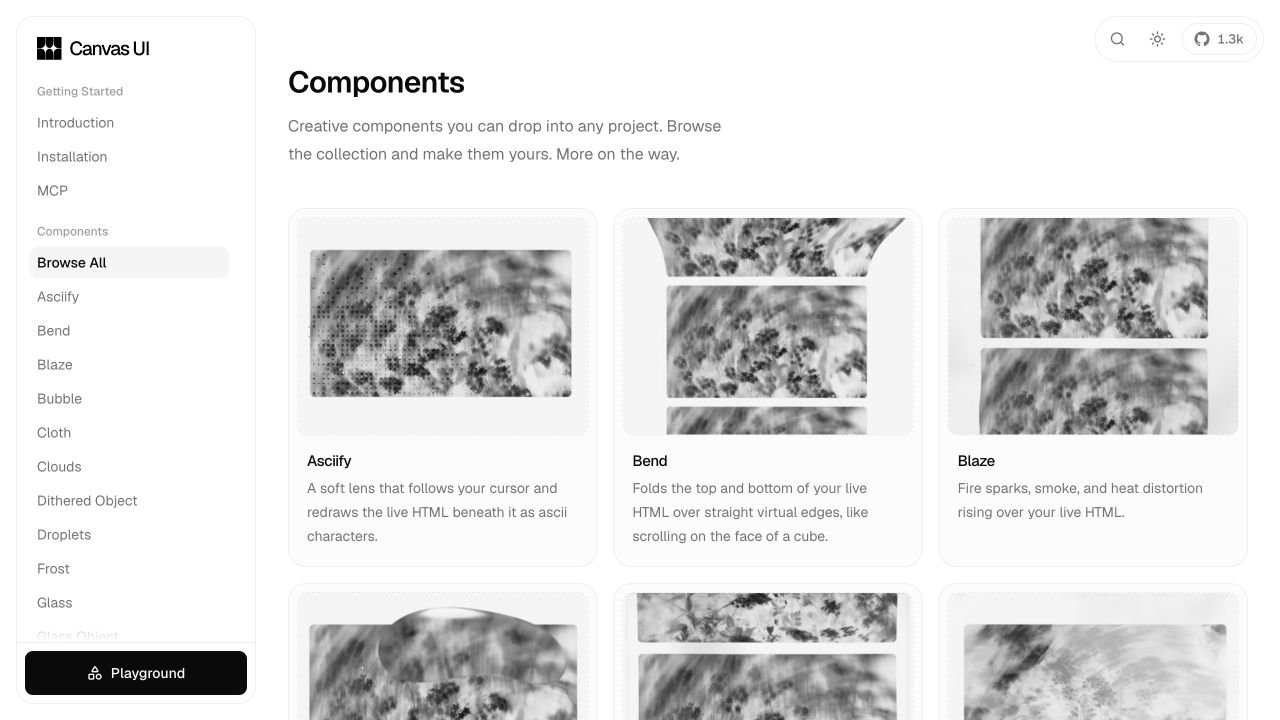
Some effects are pure WebGL or Three.js. Those work in modern browsers today.
Some components use a new browser feature called HTML-in-Canvas. They take live HTML, turn its rendered output into a texture, then process that texture using WebGL.
Canvas UI is not trying to replace HTML with a canvas UI framework.
You still write normal interface code. Canvas UI becomes a visual layer around it.
For example, the React version of the Liquid component wraps existing content:
import { Liquid } from '@/components/canvasui/Liquid'

export default function Hero() {
  return (
    <Liquid rainbow style={{ height: 480 }}>
      <h1>Build something memorable</h1>
      <button>Get started</button>
    </Liquid>
  )
}
The heading and button do not become fake canvas controls. They are still DOM elements.
Liquid just changes how they are painted.
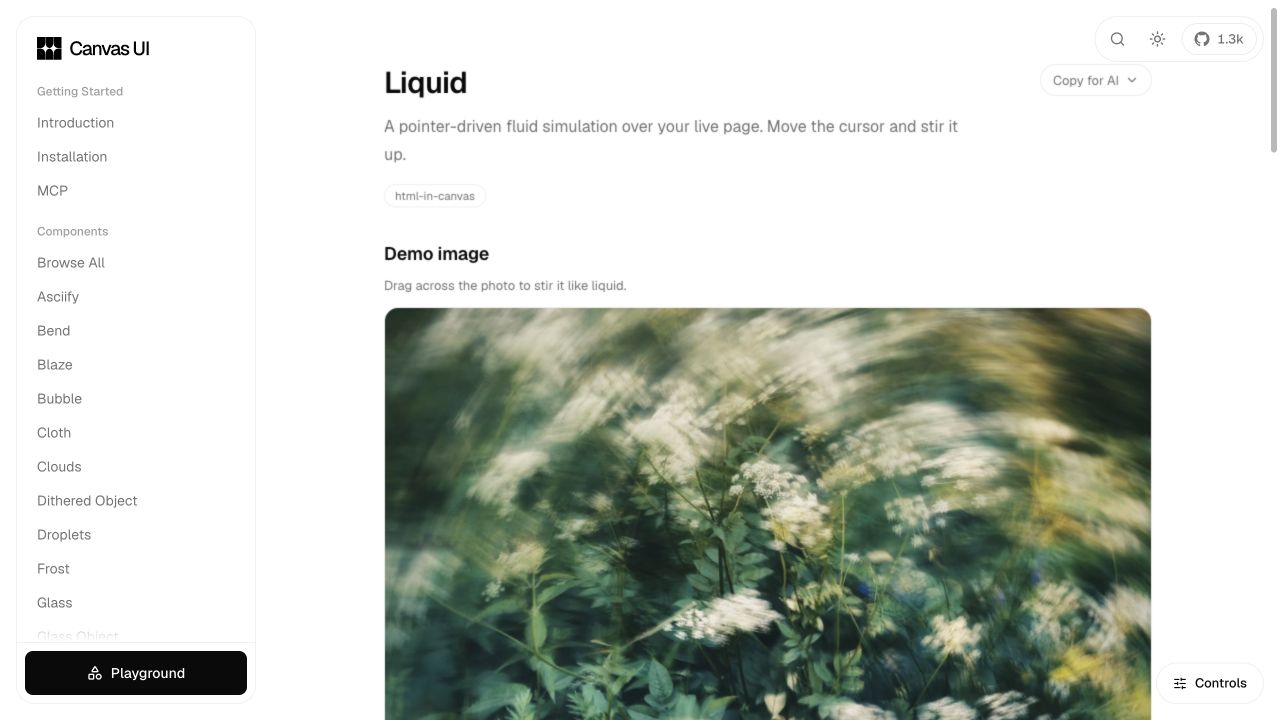
Here is the Liquid demo after dragging across the image:
Why putting HTML inside canvas is a big deal
The canvas API is an immediate-mode drawing API.
You tell it to draw a rectangle, some text, or an image. Canvas changes the pixels and forgets the object that produced them.
Example:
context.fillText('Hello', 20, 40)After this runs, the canvas does not contain a text node with the word Hello. It contains pixels shaped like the word.
The browser cannot select those pixels as text. Find-in-page cannot find them. A screen reader cannot infer that they form a heading. A translation extension cannot replace them.
Developers building canvas-heavy applications must recreate those features themselves, or maintain a hidden DOM representation beside the canvas.
This is why the DOM and canvas usually live in separate layers.
We put normal controls in HTML. We place a canvas behind or in front of them. Then we try to keep both layers synchronized.
This works for backgrounds and decorative particles. It gets much harder when the effect needs to distort the interface itself.
Before HTML-in-Canvas, developers often used screenshots, DOM-to-image libraries, SVG <foreignObject>, or carefully duplicated layouts. Every approach has limitations. Live form controls, videos, fonts, cross-origin content, and frequently changing interfaces make the problem harder.
The browser already knows how to paint the DOM. HTML-in-Canvas exposes that work to canvas.
How HTML-in-Canvas works
HTML-in-Canvas is an experimental browser API.
The basic idea starts with a new layoutsubtree attribute:
<canvas layoutsubtree>
  <div id="content">
    <h1>Hello</h1>
    <button>Click me</button>
  </div>
</canvas>
Normally, elements inside <canvas> are fallback content. Browsers show them when canvas is unavailable.
With layoutsubtree, the browser lays out that HTML as content connected to the canvas. It also keeps the elements in the accessibility tree.
The API then adds methods for drawing a DOM element into a 2D canvas, WebGL texture, or WebGPU texture.
The 2D version looks like this:
canvas.onpaint = () => {
  context.reset()
  context.drawElementImage(content, 0, 0)
}
The browser fires the paint event when the content changes. Typing into an input, selecting text, or changing a style can trigger a repaint.
There are equivalent primitives for WebGL and WebGPU.
The final piece is spatial synchronization.
If a shader bends a button, the browser needs to know where that button appears on screen. Otherwise, its visual position and clickable area would disagree. The API provides transforms that let the page keep rendering and interaction aligned.
These transforms keep the transformed pixels aligned with the live DOM.
How Canvas UI builds an effect
Let’s look at the mental model behind the Liquid component.
The full source is available in the Canvas UI repository. It is a large file because it contains the component, the WebGL setup, the fluid simulation, the shaders, event handling, and cleanup.
First, Canvas UI creates a source canvas containing the HTML.
When the browser asks it to repaint, the component calls drawElementImage():
canvas.onpaint = () => {
  context.reset()
  context.drawElementImage(content, 0, 0)
  contentDirty = true
}
Next, it uploads the source canvas into a WebGL texture:
gl.texImage2D(
  gl.TEXTURE_2D,
  0,
  gl.RGBA,
  gl.RGBA,
  gl.UNSIGNED_BYTE,
  source
)
Now the shader can sample the rendered interface like any other texture.
The Liquid component also maintains textures for velocity, dye, pressure, curl, and divergence. Pointer movement injects force into the simulation. The display shader uses the simulated flow to shift the coordinates where it reads the content texture.
In plain words: your pointer stirs a tiny fluid simulation, and the fluid changes which part of the interface each pixel comes from.
The final result appears in a second canvas placed over the content. That output canvas has pointer-events: none, so it does not steal interaction from the real interface.
HTML provides the meaning and Canvas provides the image. WebGL transforms it while the browser keeps the two synchronized.
The content is still part of the web
The visual demos get the attention, but keeping the original DOM content is just as useful.
When developers draw an entire interface manually on canvas, they leave many browser features behind. Rebuilding them is a huge job.
HTML-in-Canvas keeps the original DOM content available to the browser. According to the Chrome team, this includes:
- text selection, copy, and paste
- native form controls
- accessibility tools and screen readers
- find-in-page
- browser translation and extensions
- browser zoom and autofill
- DevTools inspection
- indexing by search engines and AI agents
A crawler does not need computer vision to understand a button painted inside a 3D scene. The button still exists as a button in the DOM.
The visuals can become more ambitious without making the content invisible to machines.
Because the button remains in the DOM, HTML-in-Canvas works with browser features that a graphics-only trick would lose.
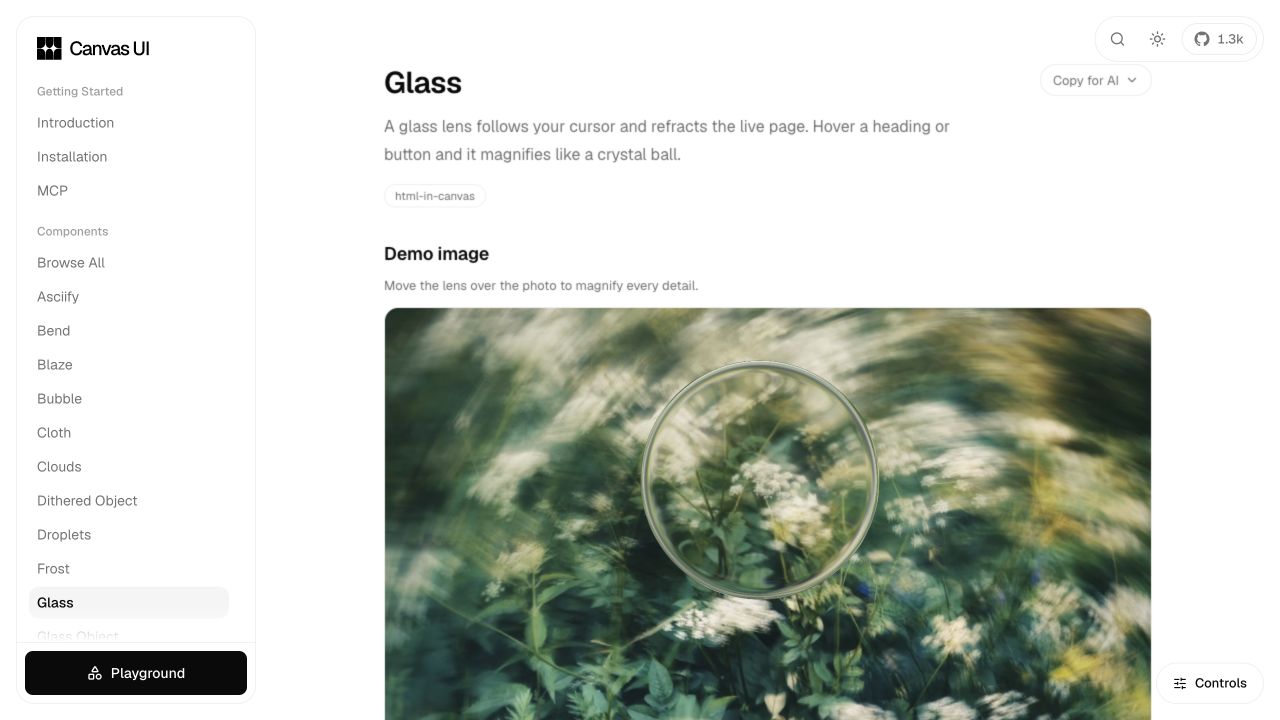
The Glass component makes this easy to see. The circular lens refracts and magnifies the live content beneath the pointer:
Browser support is the big limitation
HTML-in-Canvas is not a standard feature you can assume is available everywhere.
At the time of writing, it is in an origin trial in Chrome 148 through 150. You can experiment locally in a recent Chrome Canary build by enabling:
chrome://flags/#canvas-draw-elementTo enable it for visitors on your own domain, you must register for the origin trial and serve its token.
Safari and Firefox do not support the API today. The API is also still in early development, so its details can change.
Canvas UI handles this with feature detection:
function supportsHtmlInCanvas() {
  const canvas = document.createElement('canvas')
  const context = canvas.getContext('2d')

  return Boolean(
    context &&
      typeof context.drawElementImage === 'function' &&
      typeof canvas.requestPaint === 'function'
  )
}
When the API is missing, the content renders as ordinary HTML.
Effects that can run as standalone WebGL overlays keep working. Effects that need the live page texture lose that part of the experience, but the page itself does not break.
With this fallback, the page works without the experimental feature and adds the effect when the browser supports it.
How Canvas UI limits GPU work
A collection of full-screen WebGL effects can become a laptop fan controller very quickly.
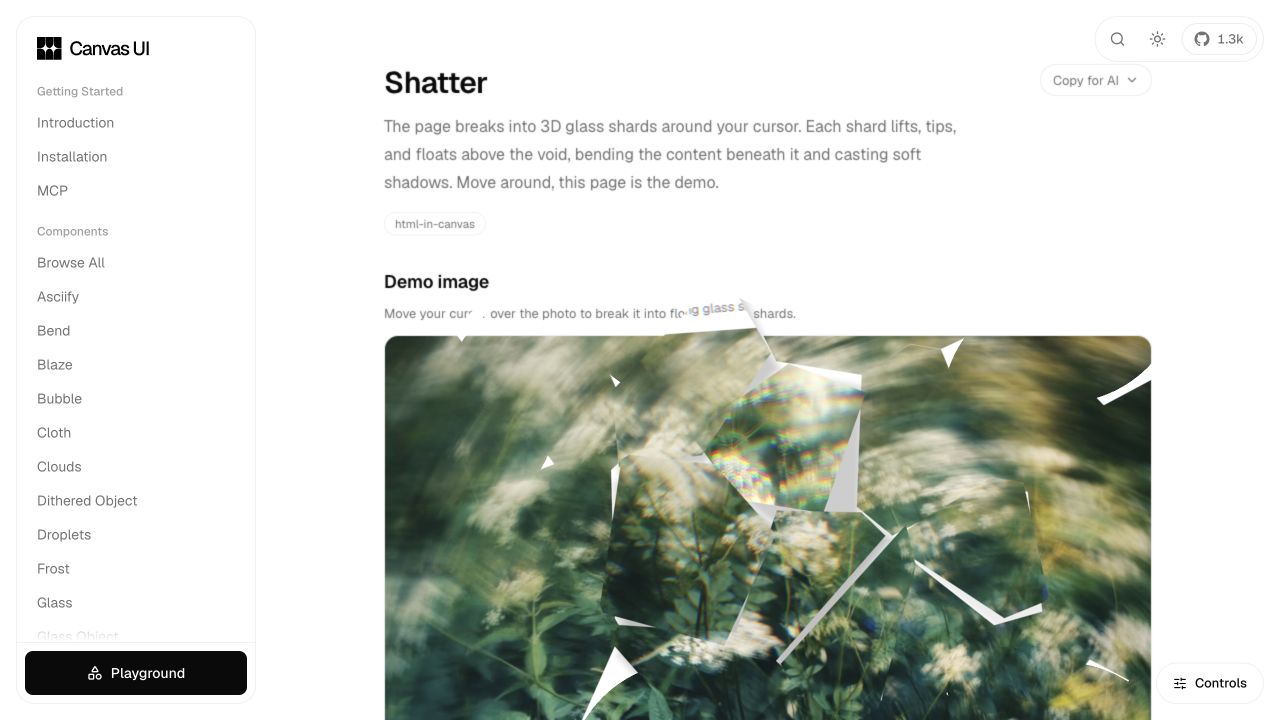
The Shatter demo, for example, lifts parts of the page into distorted glass fragments around the pointer:
Canvas UI cannot make GPU work free. Some of its components are intentionally substantial. Particle Object, for example, can load a 3D model and rebuild it using thousands of particles.
The Liquid component uses IntersectionObserver to stop its animation loop when the output leaves the viewport. It also stops rendering after the fluid settles and nothing has changed.
It watches prefers-reduced-motion and avoids pointer-driven movement when the user asks for less motion.
When the component is removed, it cancels the animation frame, disconnects observers, removes event listeners, deletes textures and shader programs, and releases buffers.
Those details make the component practical in a real application, even if they do not make a good launch video.
You should still measure the result on the devices your visitors use. A fluid simulation on a desktop GPU and the same simulation on an older phone are very different things.
My advice is to use one strong effect, not six competing effects.
You copy the code into your project
Canvas UI follows the shadcn distribution model.
You do not add one large Canvas UI package as a permanent dependency. You use the shadcn CLI to copy a component’s source into your project:
npx shadcn@latest add @canvas-ui/liquid-reactThe component lands in components/canvasui/.
There are versions for React, Solid, Vue, Svelte, and dependency-free vanilla TypeScript. The same effect has the same options across frameworks.
I like this model for creative components.
Shader code often needs project-specific adjustments. You might want a different color model, lower simulation resolution, another pointer response, or a stripped-down version for mobile.
When the source lives in your repository, changing it is normal. You do not have to fight an abstraction designed for every possible user.
The tradeoff is that updates are your responsibility. Re-running the install command can pull a newer version, but you must review how it interacts with your changes.
The project is licensed under MIT with the Commons Clause. You can use the components in personal and commercial projects, but you cannot resell or redistribute the library itself as a competing product.
It is also designed for coding agents
Canvas UI exposes its components through a shadcn-compatible registry.
This means an AI coding agent using the shadcn MCP server can browse the components, read their metadata, and install one by name.
You can ask:
Add the Canvas UI liquid effect to my hero sectionThe agent can find the right registry entry and bring the source into the project.
Documentation used to be written only for humans. Now a good library also needs structured metadata, predictable files, installable source, and enough context for an agent to choose the correct component.
The Canvas UI MCP setup is not a separate custom server. It uses the existing shadcn MCP server and the registry protocol.
Using standards and existing tools makes the library easier to discover.
Where I would use Canvas UI
Canvas UI is made for moments where the visual effect is part of the message.
I would consider it for:
- a product launch page
- a portfolio
- a game or interactive story
- a hero section
- an art project
- a focused product demo
- an experimental interface
I would be careful using it across an entire documentation site, dashboard, checkout flow, or long article.
Motion draws attention, so I would not make everything move.
There is also a practical issue. The full HTML-in-Canvas experience currently depends on an origin trial. A production design must still look good without it.
The best Canvas UI integration is probably one where unsupported browsers get a clean, normal page, while supported browsers get an extra visual layer.
What HTML-in-Canvas could enable
The components are fun. Open the Canvas UI gallery, move the pointer around, and it is hard not to try every demo.
The DOM handles meaning and interaction well, while Canvas and WebGL provide more visual freedom. Until now, the browser kept a wall between them.
HTML-in-Canvas turns the DOM into a possible input for the graphics pipeline.
A 3D game terminal could contain a real text input. Diagram editors could attach accessible HTML controls to objects in the scene. Design tools could place normal, searchable text on a WebGL surface, while other interfaces change visually without hiding their meaning from a screen reader or an AI agent.
Canvas UI is an early, practical exploration of that idea.
It is experimental, browser support is limited, and the API may change. I still like the idea of making the web visually richer without losing the HTML underneath.
Want me to talk about your product? You can sponsor this site.
Related posts about js: