v0 tutorial: build and deploy a full-stack app
By Flavio Copes
Use v0 to build a full-stack feedback board, connect a database, manage environment variables, sync with GitHub, and deploy to Vercel.
v0 is Vercel’s AI application builder — a vibe coding tool that turns a prompt into a running app.
You describe an application in a chat. v0 plans the work, writes the code, shows a live preview, and deploys the result to Vercel.
It works best with React and Next.js, but it can work with other frameworks too. You can start with a text prompt, a screenshot, or a sketch of the interface you want.
In this tutorial we’ll build a small feedback board. Visitors can submit ideas, and the application stores them in a database.
We’ll build the app in small, testable steps instead of trying to get everything from one perfect prompt.
The screenshots below come from a SaaS landing page I built while preparing the AI Workshop. The project is different, but the v0 interface and workflow are the same.
Create a v0 account
Open v0 and sign in. Your v0 account is also your Vercel account.
Once you’re in, you’ll see a large prompt box where you can describe what you want to create:
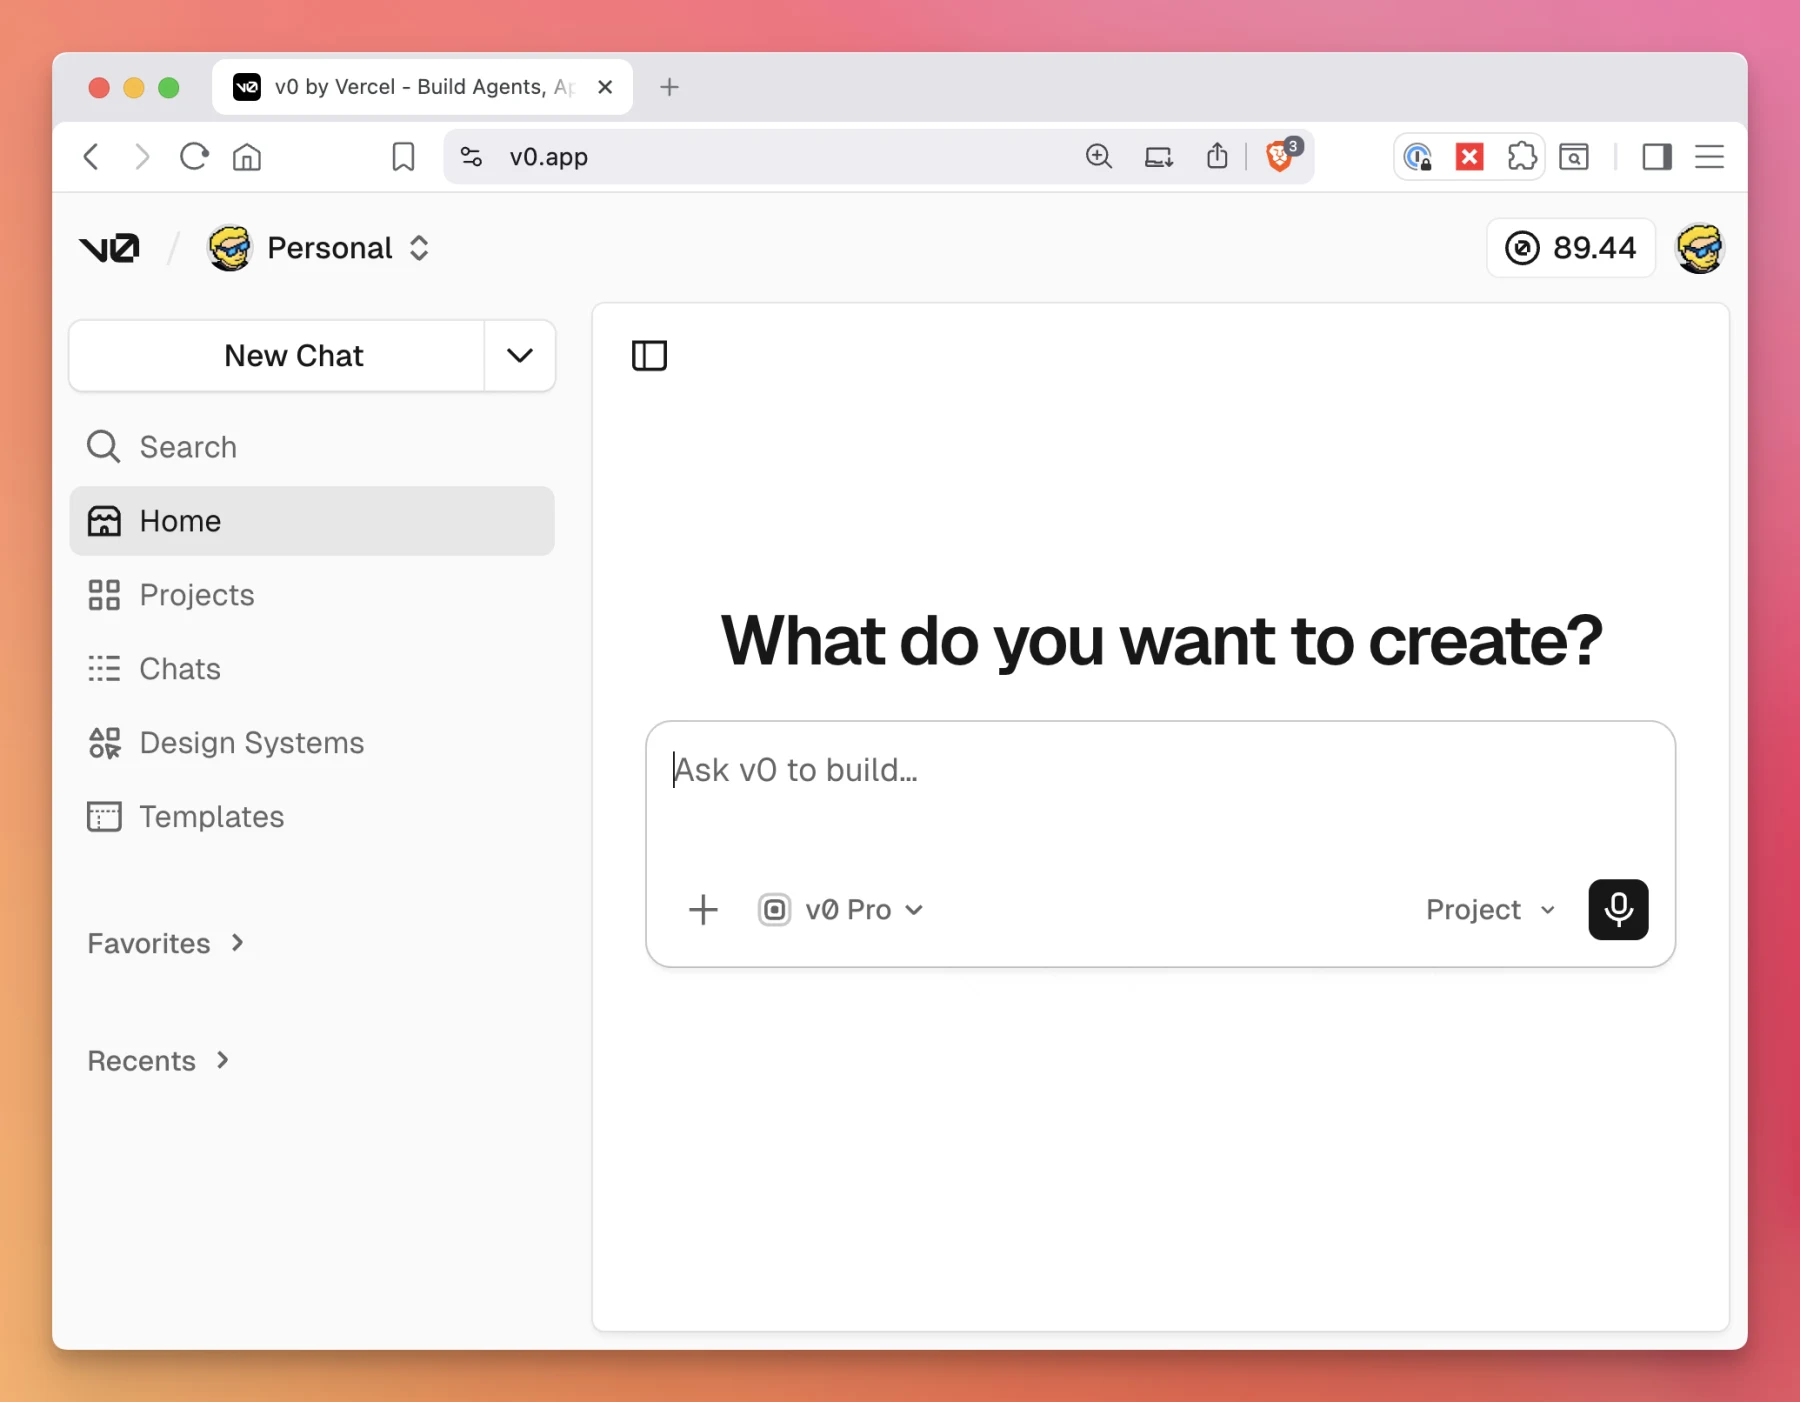
The + button lets you attach screenshots and other files. This is useful when you already have a visual reference.
Start with a clear first prompt
Create a new chat.
Use this prompt:
Build a customer feedback board with Next.js and TypeScript.

The home page should:
- show a short introduction
- list feedback items
- have a form with name, email, and feedback fields
- show a success message after submission

Use a simple black and white design.
Do not add authentication yet.
Use temporary in-memory data until we connect a database.
This prompt defines the product, technology, page, fields, and visual direction. It also says what we do not want yet.
That last part matters. If you ask for every feature at once, it becomes harder to check what v0 changed.
Check the first version
When v0 finishes, use the preview instead of reading every generated file immediately.
The v0 interface has the chat on the left and the running application on the right:
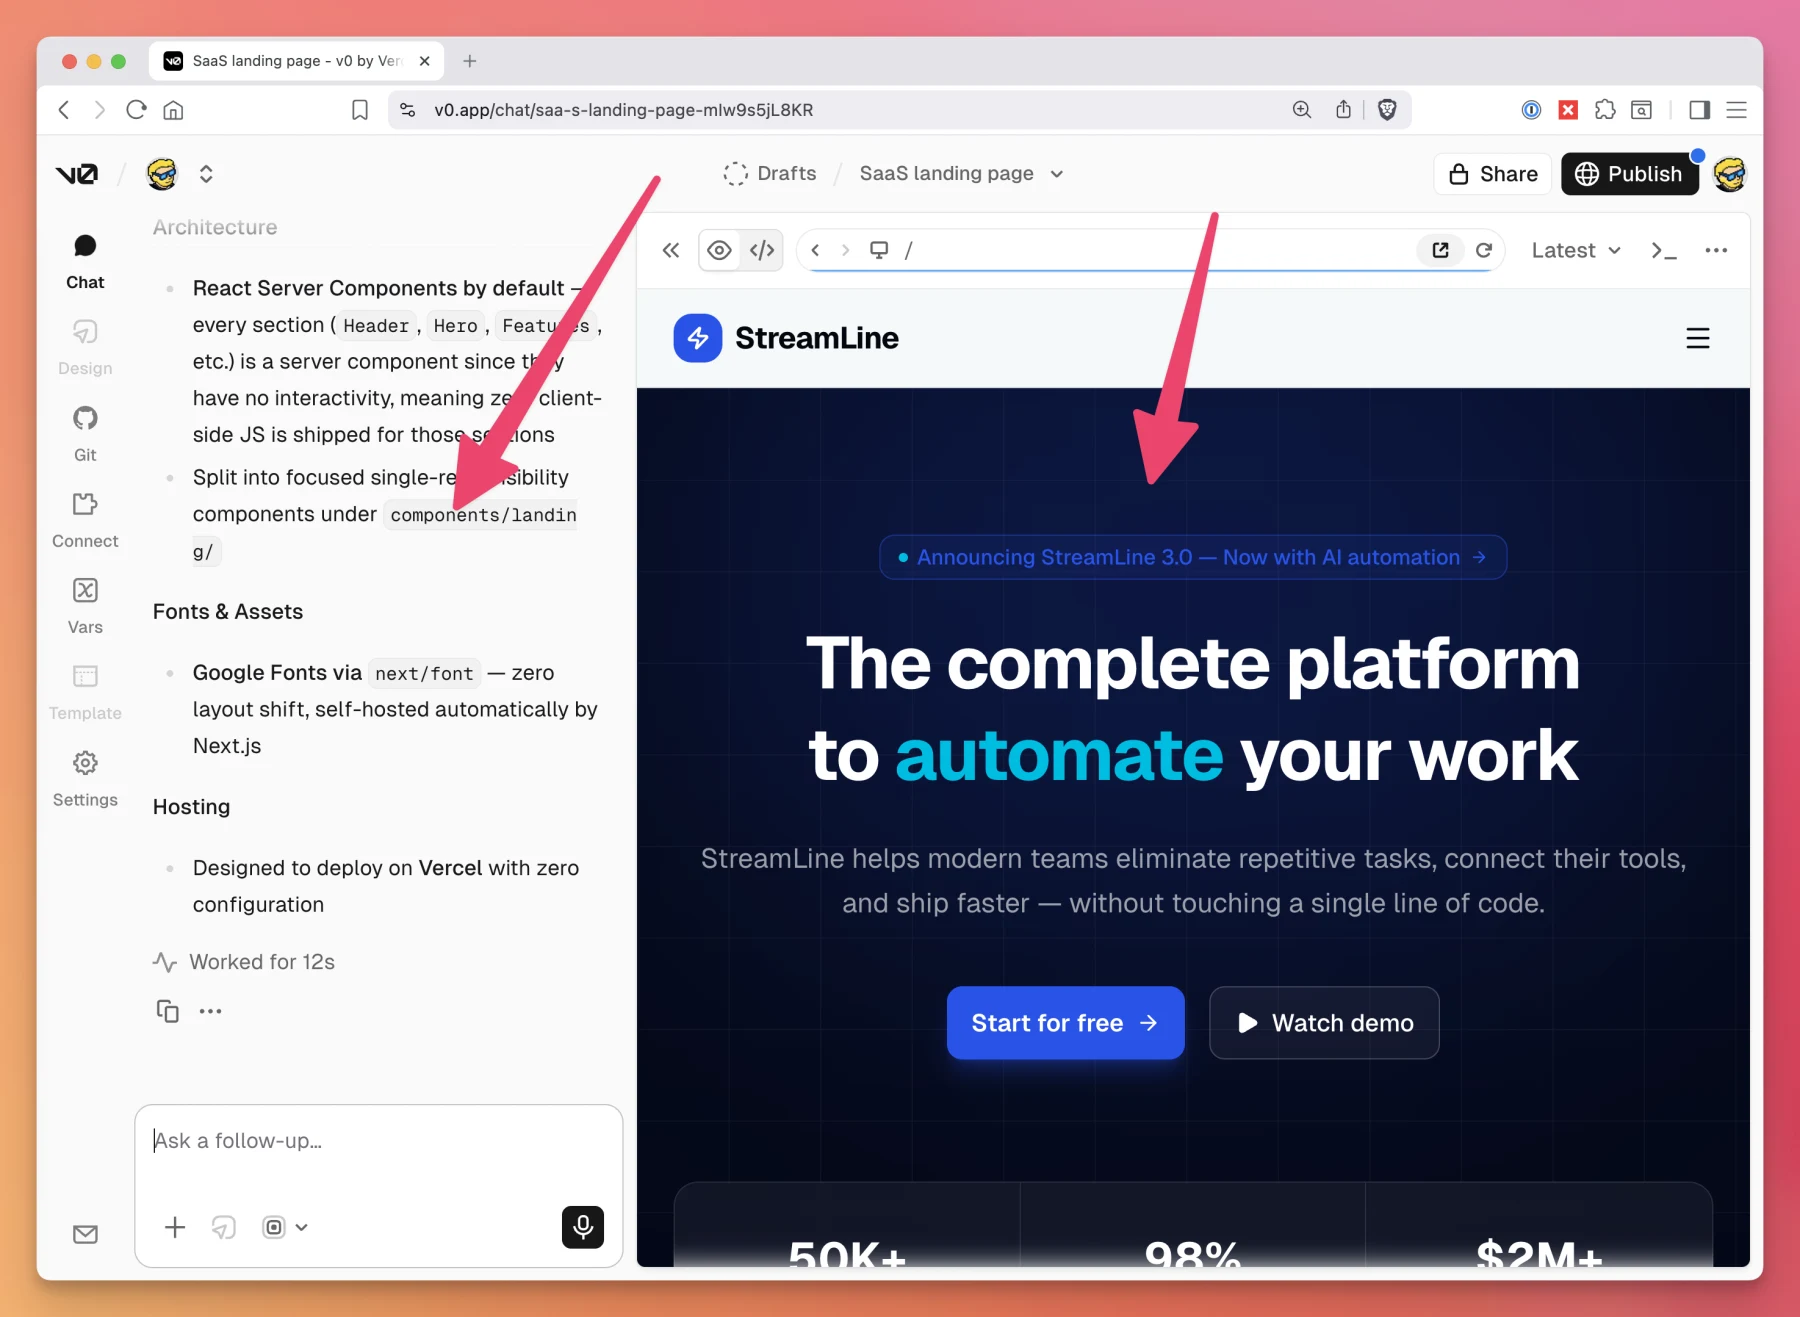
Use the icons above the preview to switch between Preview and Code. The same toolbar lets you move between pages, test different screen sizes, refresh the app, open it in a new window, and open the console.
Try these things:
- Submit the form with empty fields
- Submit a real feedback message
- Reload the page
- Check the page on a narrow screen
The data will probably disappear after a reload. We asked for temporary data, so this is expected.
Now open the code view. Find the form submission code and the component that renders the list.
You don’t need to understand every line. Confirm that the application is using Next.js and TypeScript, and that the structure matches the preview.
Don’t worry if your result looks different from mine. AI generation is not deterministic, so the same prompt can produce a different design and different code.
Ask for one change at a time
Suppose the form works, but it has too much decoration.
Give v0 a focused instruction instead of asking it to redesign the entire application:
Remove rounded corners, shadows, gradients, and colored backgrounds.
Use one-pixel black borders and keep the layout responsive.
Do not change the form behavior.
The final sentence protects working behavior while v0 changes the design.
Review the preview again. If the change is wrong, tell v0 exactly what changed and what you expected.
For example:
The mobile form now overflows the page.
Keep the current desktop layout and make every form control fit at 320px.
Specific feedback gives better results than “fix the design.”
Connect a database
Our feedback disappears because it only lives in memory.
The left toolbar gives you access to GitHub, integrations, environment variables, and the project settings:
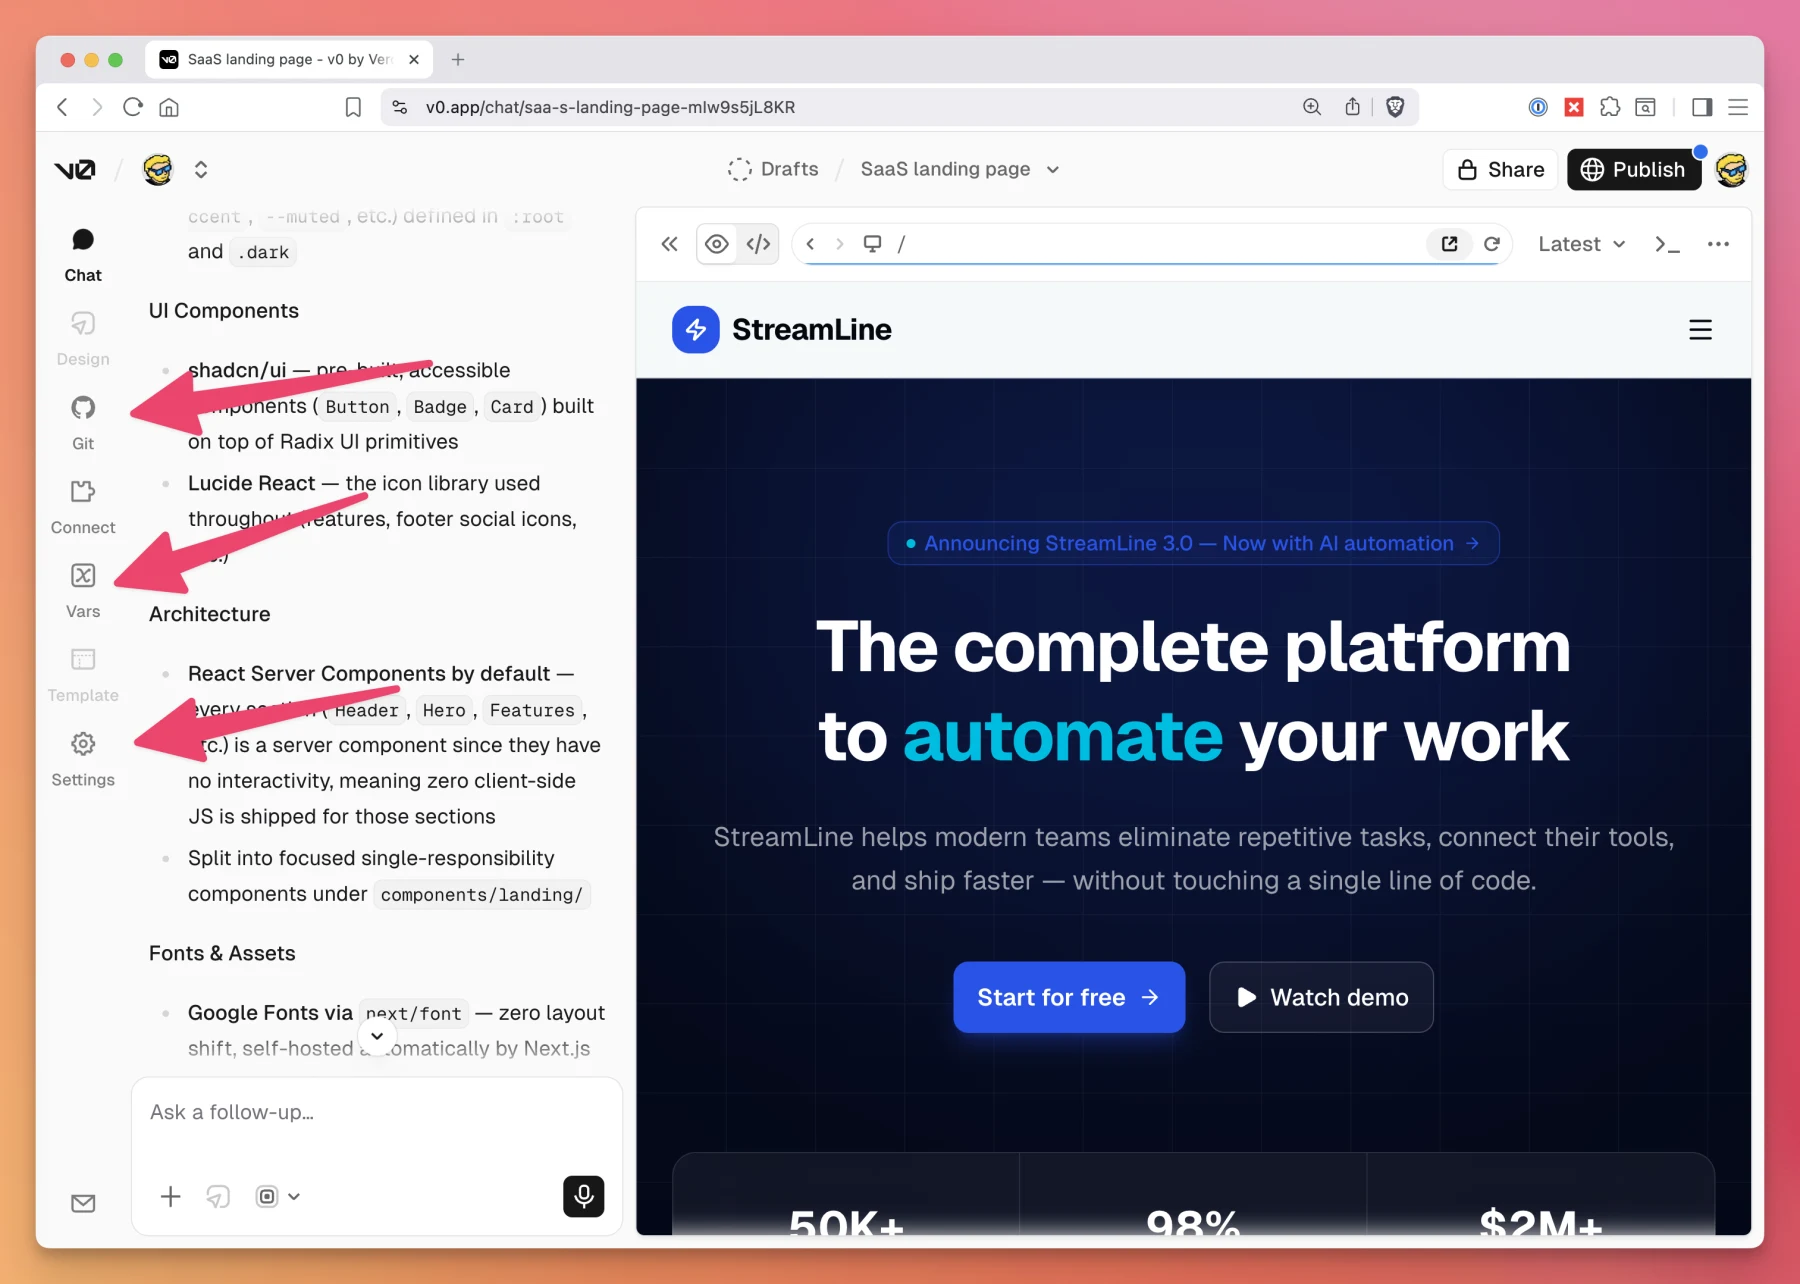
Open the project menu, choose Integrations, and connect a Postgres provider from the Vercel Marketplace. v0 and the connected Vercel project will share the integration.
The provider adds the required database environment variables to the project.
Now ask v0 to use it:
Persist feedback in the connected Postgres database.

Create the smallest schema needed for:
- id
- name
- email
- message
- createdAt

Validate the form on the server.
List newest feedback first.
Keep the current design.
v0 should update the schema, submission code, and query.
Run the same test again:
- Submit feedback
- Reload the page
- Confirm the feedback remains
Inspect generated database changes
AI-generated database code deserves extra attention.
Check these points:
- The email field is not rendered publicly
- The server validates every required field
- The message has a reasonable maximum length
- The query selects only columns used by the page
- The form does not accept raw SQL
Ask v0 to fix one concrete issue at a time.
For example:
The feedback list must never send the email column to the browser.
Update the query and its TypeScript type.
Don’t assume a working preview means the application is secure.
Add an environment variable
Integrations create their own variables. You can also add variables yourself.
Open Project menu → Environment Variables and create:
FEEDBACK_TITLE=Product feedbackEnable it for Development, Preview, and Production.
Then tell v0:
Use the FEEDBACK_TITLE environment variable as the page heading.
Fall back to "Feedback" when it is missing.
The generated code should look similar to this:
const title = process.env.FEEDBACK_TITLE ?? 'Feedback'The v0 preview uses Development variables. The published site uses Production variables.
Be careful with secrets. Never put a private key in a variable whose name starts with NEXT_PUBLIC_. Next.js exposes those values to the browser.
Use design mode for small visual edits
Chat works well for behavior and larger design changes.
For a small spacing or typography adjustment, use v0’s design mode. Select the element in the preview and change it visually.
Click Design at the bottom of the chat panel to activate it:
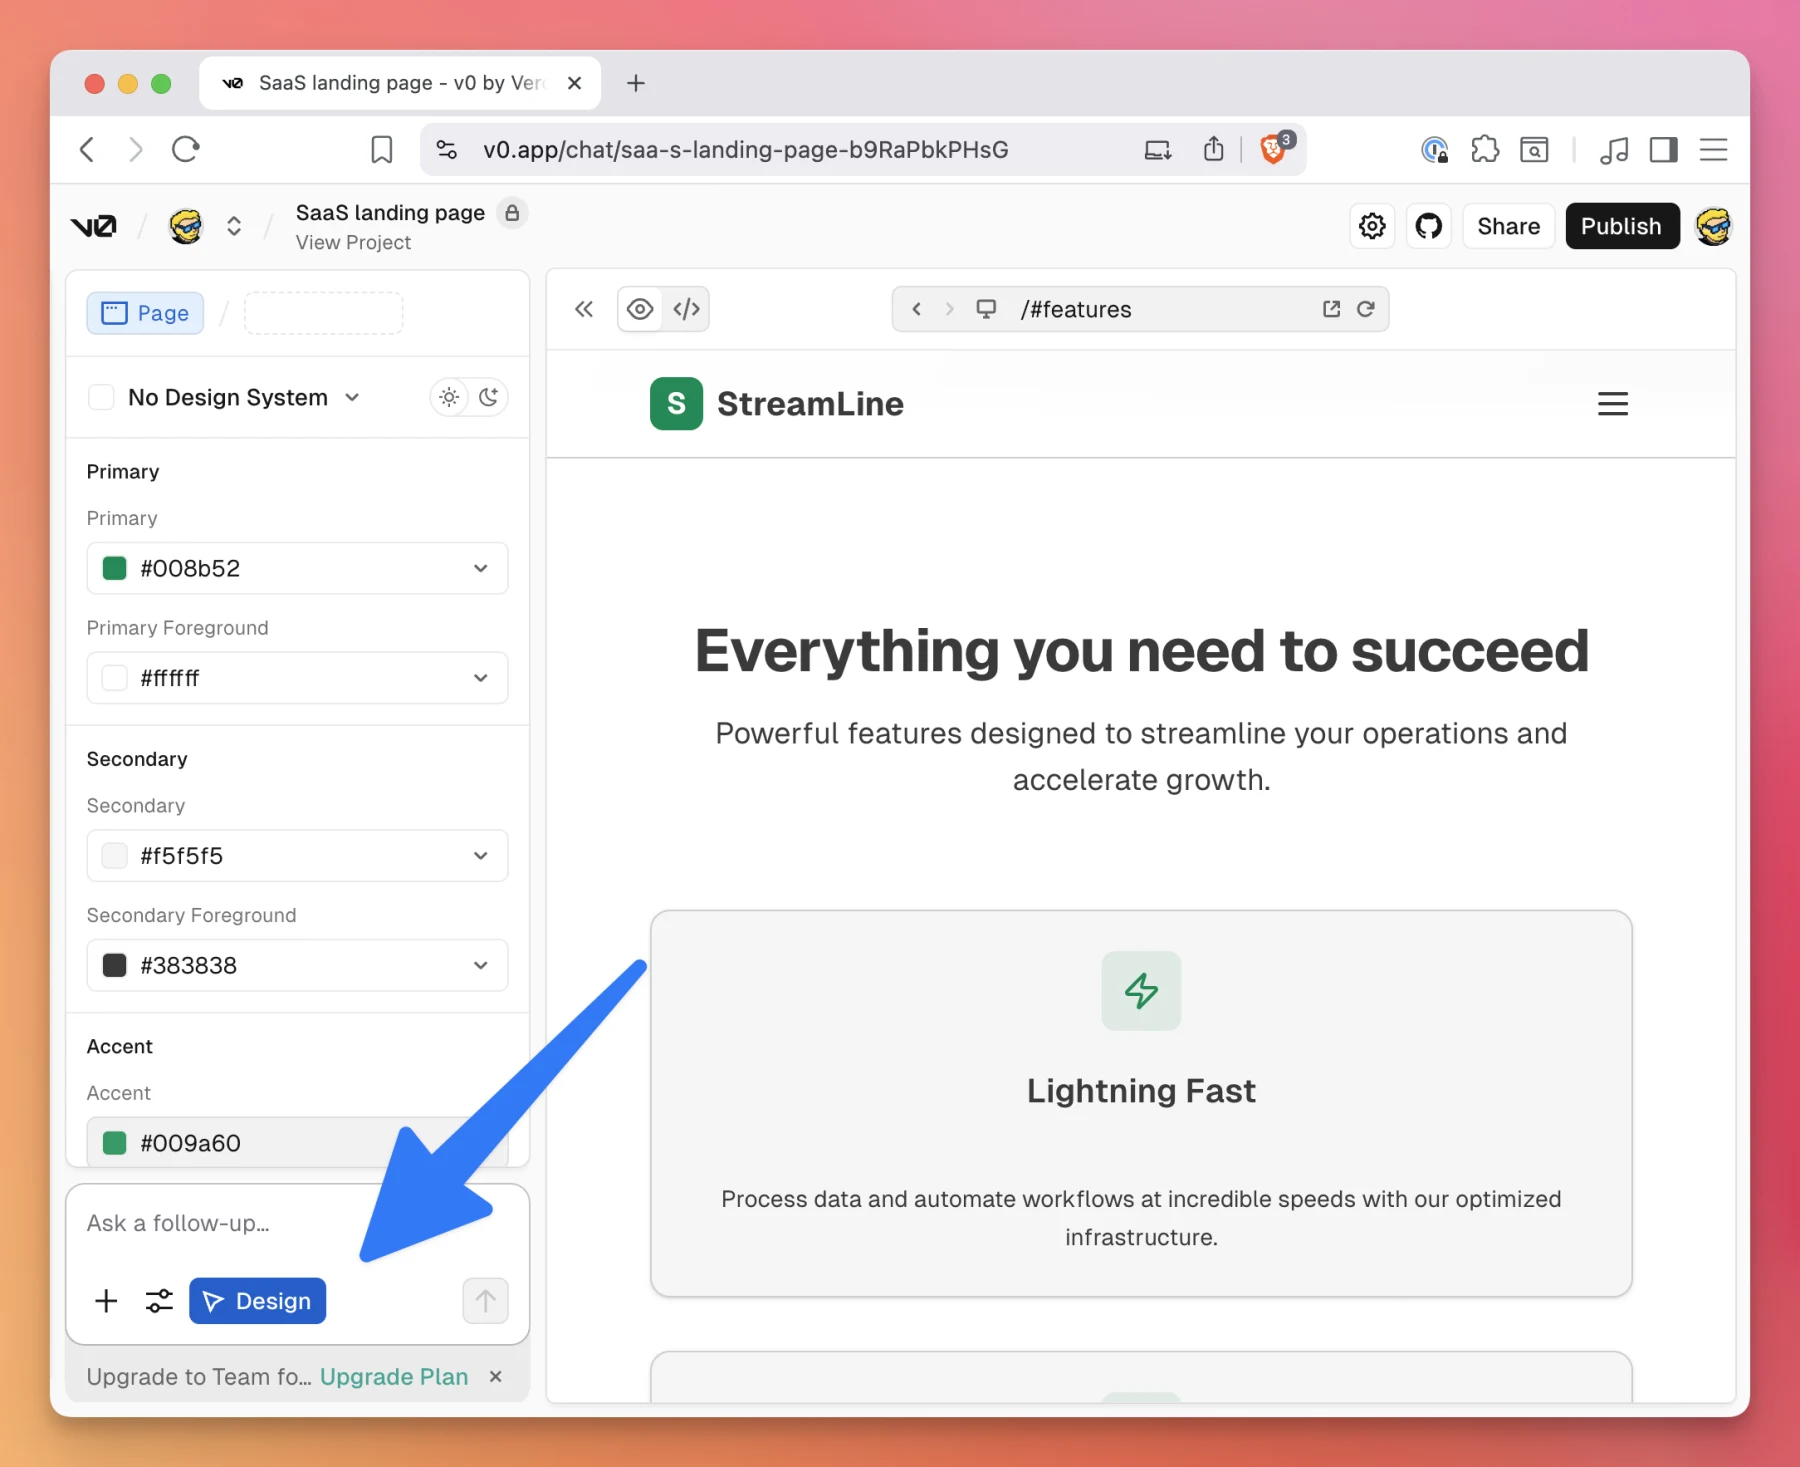
You can then click an element and edit its typography, colors, background, spacing, and layout:
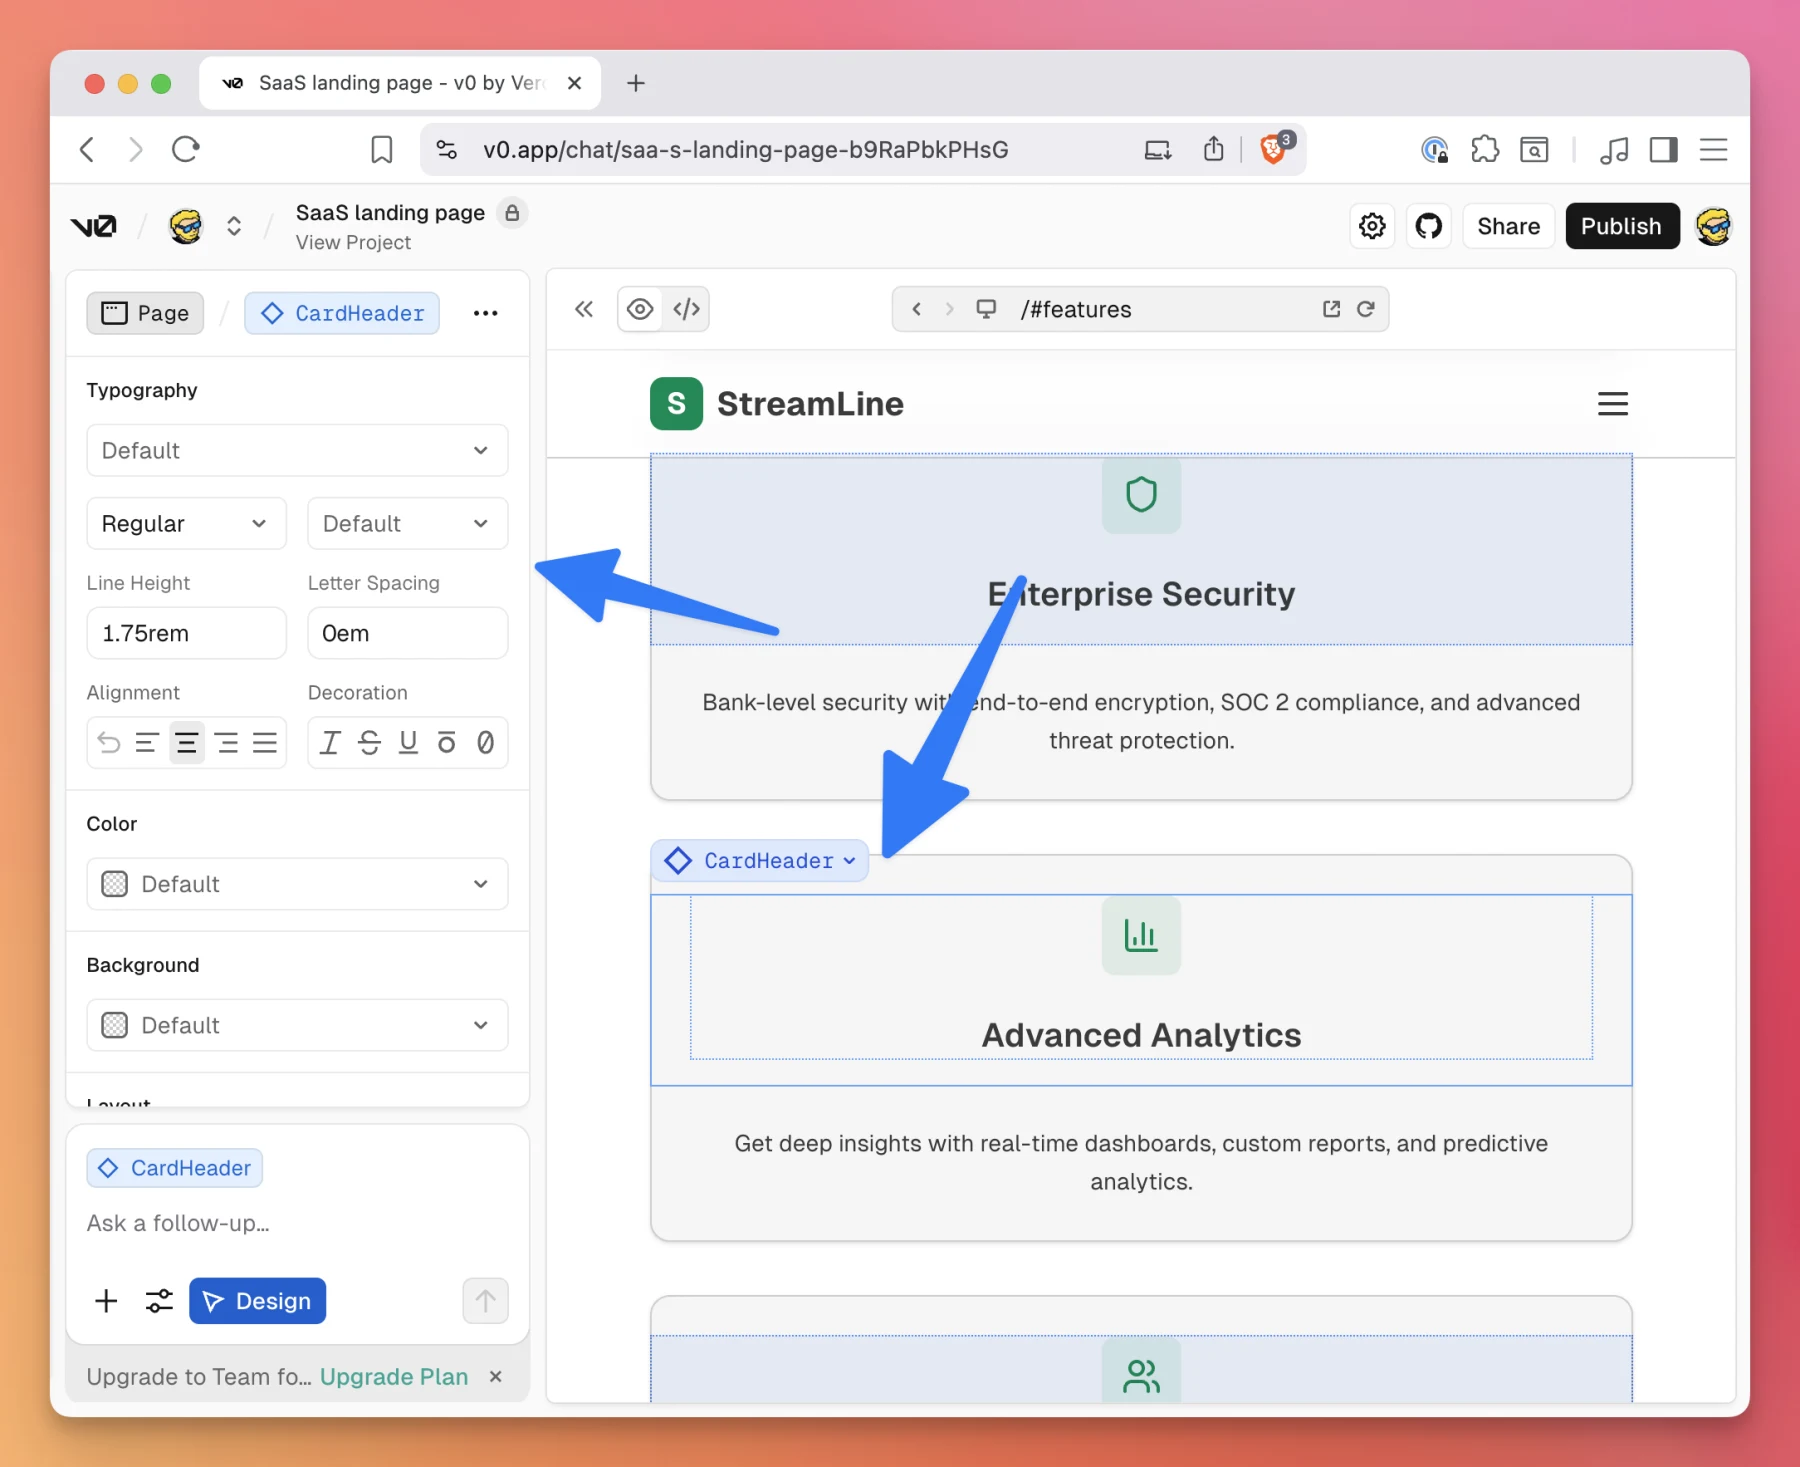
Use design mode for changes like:
- font size
- spacing
- width
- border
- alignment
Use chat when the change affects data, state, or application behavior.
Design mode updates the underlying code. You can save the changes or reset them if the result is wrong.
Connect the project to GitHub
The application should not live only inside a chat.
Open the project menu and choose GitHub. Create a repository or connect an existing one.
You can also open the Git panel from the left toolbar and click Connect:
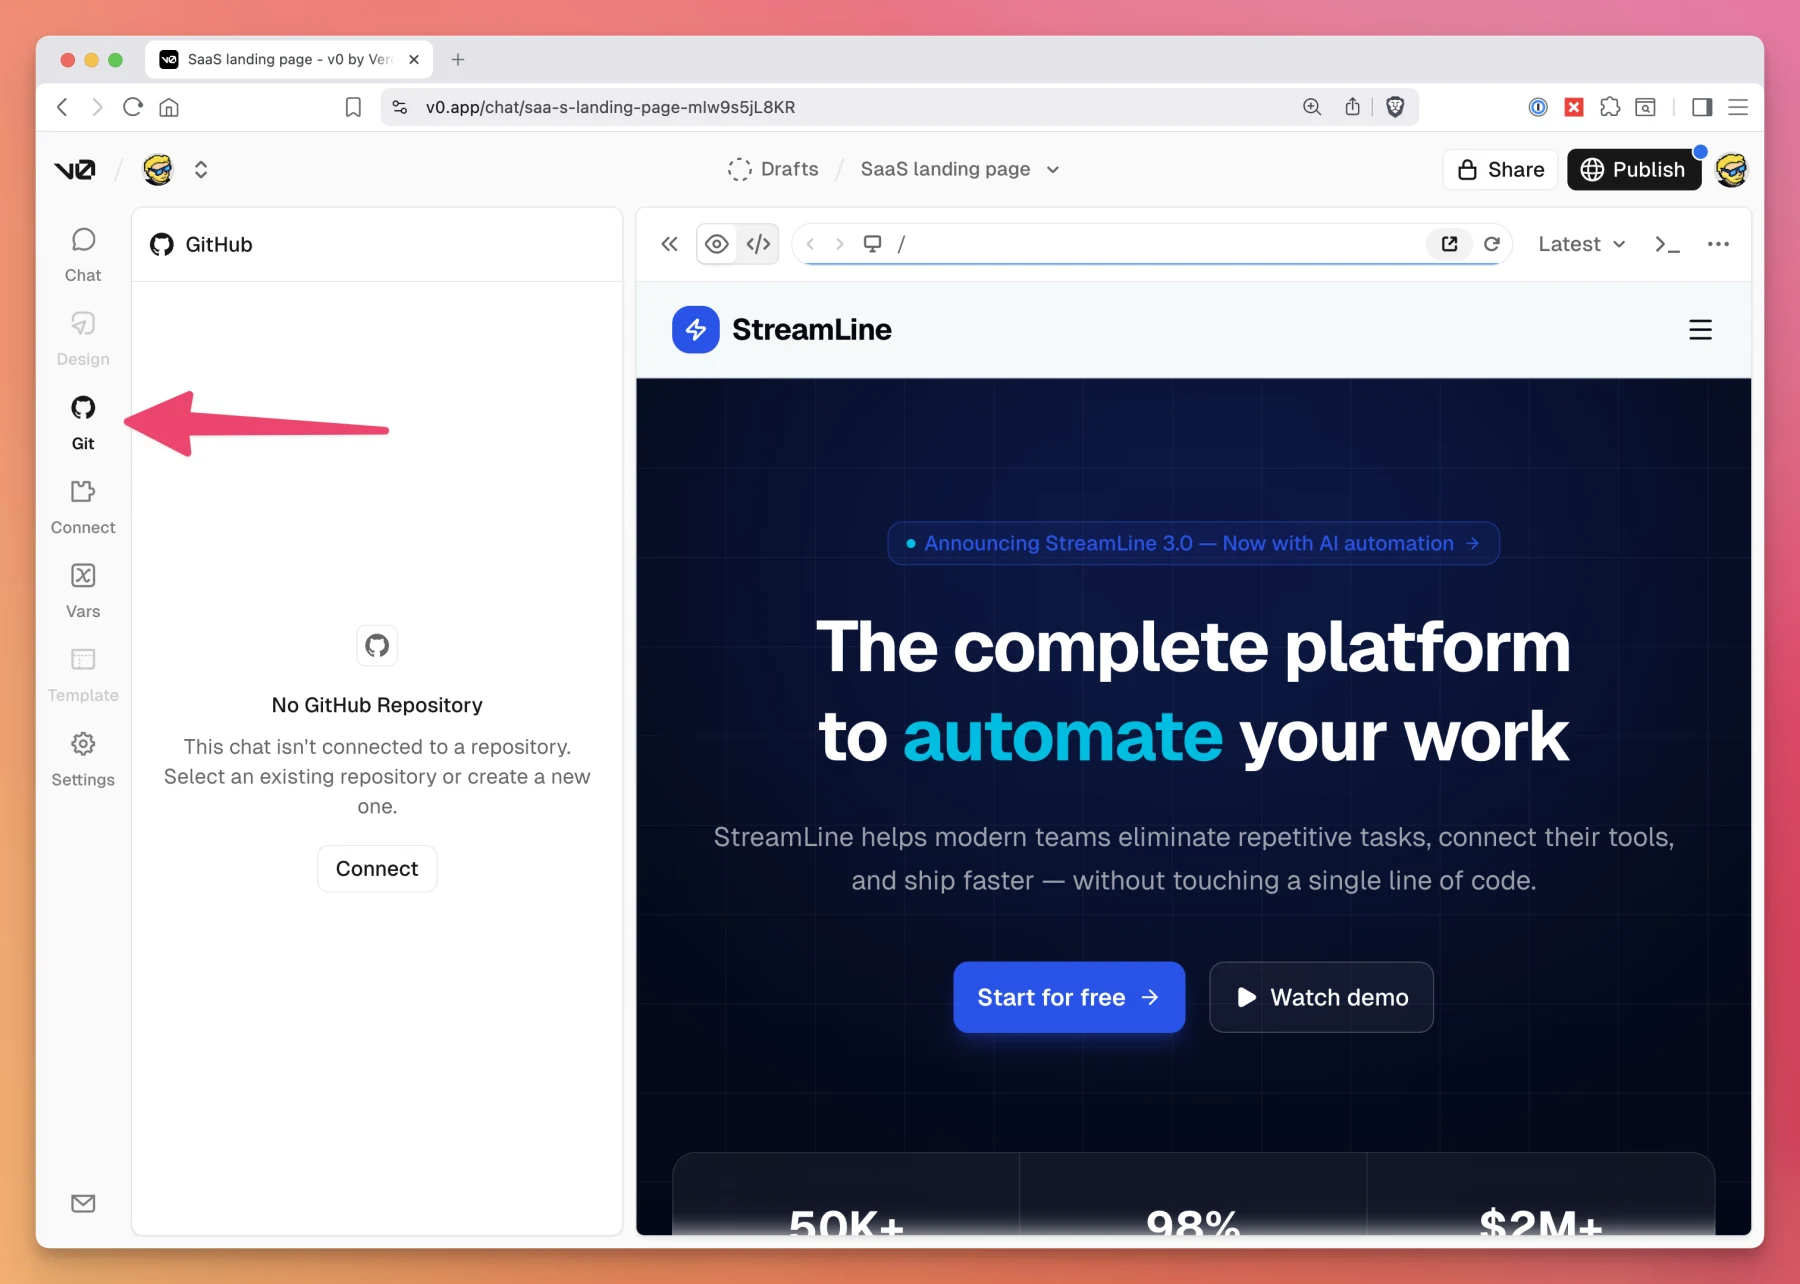
v0 creates a branch for the chat and commits code changes automatically. You can open a pull request when the feature is ready.
After connecting the repository, the Git panel shows the branch, target branch, status, pull request, and recent activity:
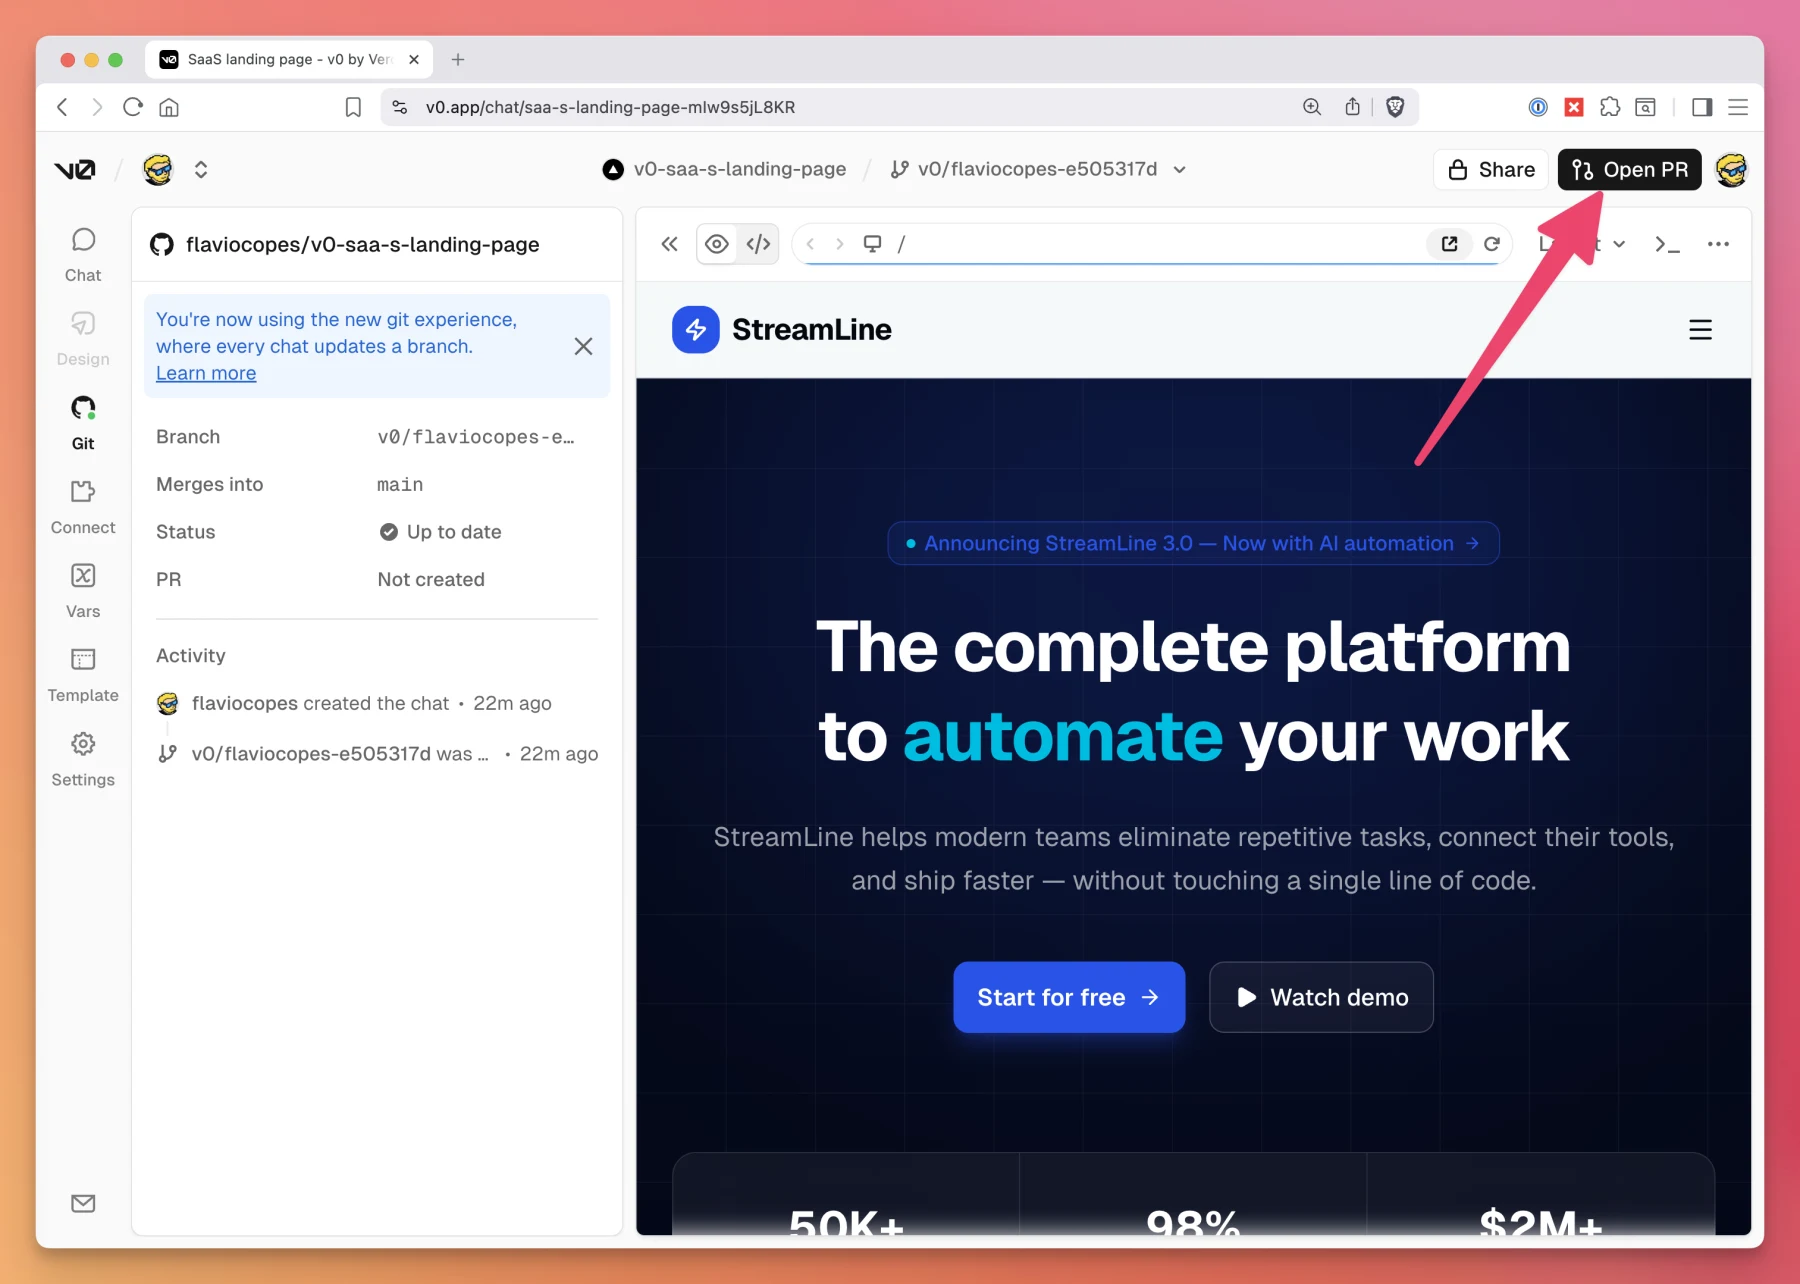
This gives you a normal Git history:
main
  └── v0/feedback-board-...
Review the pull request like any other code change.
Look at:
- files added
- dependencies installed
- database migrations
- server-side validation
- environment variable usage
My advice is to keep GitHub connected even when working alone. It gives you an independent copy of the code and makes every change reviewable.
Publish the app
Click Publish, then choose Publish to Production.
The first publish creates a connected Vercel project. Later publishes update the same production URL.
You can open the project settings, select the connected Vercel project, and choose View on Vercel:
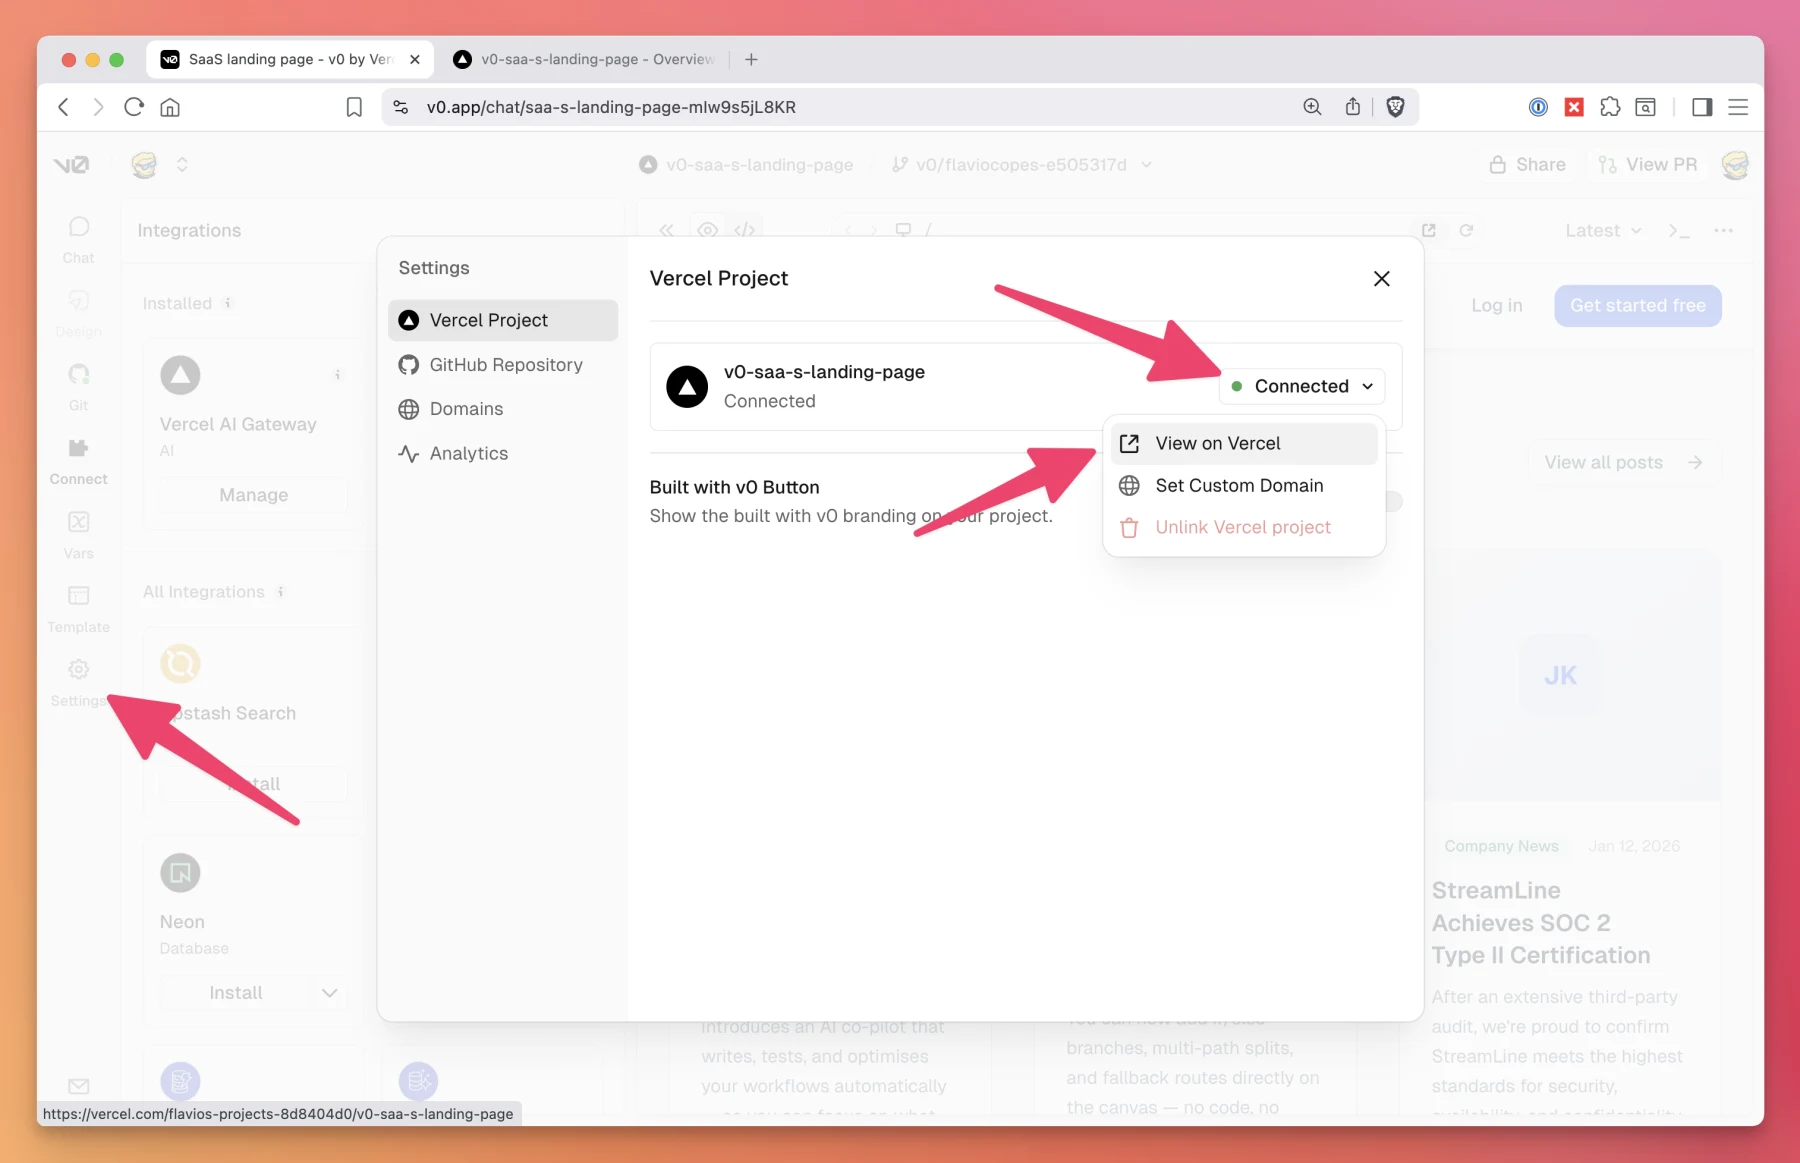
Vercel shows the generated production domain and every deployment.
Before sharing the app, open the Vercel project and confirm:
- Production has the database variables
FEEDBACK_TITLEexists in Production- The latest deployment is healthy
- The form works on the production URL
- Submitted feedback survives a new deployment
This tutorial deliberately leaves the feedback board public. Anyone who can reach the URL can submit data. Before using the pattern for private or sensitive feedback, add authentication, authorization, rate limits, and spam protection.
You can attach a custom domain from the Vercel project settings.
For Git deploys, preview URLs, env vars, Functions, domains, logs, and rollbacks, see my Vercel tutorial. The Vercel deployment documentation has the official reference.
Continue after publishing
A published v0 project is a normal application.
You can continue in three ways:
- keep prompting v0
- edit the connected GitHub repository locally
- use both, with separate branches and pull requests
If you make a large local change, start a new v0 chat from the updated repository. This reduces the chance that an old chat works from stale assumptions.
v0 is most useful when you treat it as a fast development environment, not a magic prompt box. Start with a narrow feature, test it, connect real infrastructure, and review the generated code before publishing. This turns a quick prototype into an application you can keep.
Want me to talk about your product? You can sponsor this site.
Related posts about ai: