Create your first app with Vue.js
By Flavio Copes
Build your first Vue.js 3 app from scratch, starting with a simple CDN example and then scaffolding a Vite project with create-vue to see how the files fit together.
If you’ve never created a Vue.js application, I am going to guide you through the task of creating one, and understanding how it works.
We’re on Vue 3 here. That’s the current default.
First example
First I’ll use the most basic example of using Vue: no build step, just a script tag.
You create an HTML file which contains
<html>
  <body>
    <div id="example">
      <p>{{ hello }}</p>
    </div>
    <script src="https://unpkg.com/vue@3/dist/vue.global.js"></script>
    <script>
      const { createApp } = Vue

      createApp({
        data() {
          return { hello: 'Hello World!' }
        }
      }).mount('#example')
    </script>
  </body>
</html>
and you open it in the browser. That’s your first Vue app! The page should show a “Hello World!” message.
I put the script tags at the end of the body so that they are executed in order after the DOM is loaded.
What this code does is, we create a Vue app with createApp, then .mount('#example') attaches it to that element (a CSS selector, or you can pass an HTMLElement).
Then, it associates that template to the data object. That is a special object that hosts the data we want Vue to render.
In the template, the special {{ }} tag indicates that’s some part of the template that’s dynamic, and its content should be looked up in the Vue app data.
Official CDN notes: https://vuejs.org/guide/quick-start
See on Codepen
You can see this example on Codepen: https://codepen.io/flaviocopes/pen/YLoLOp
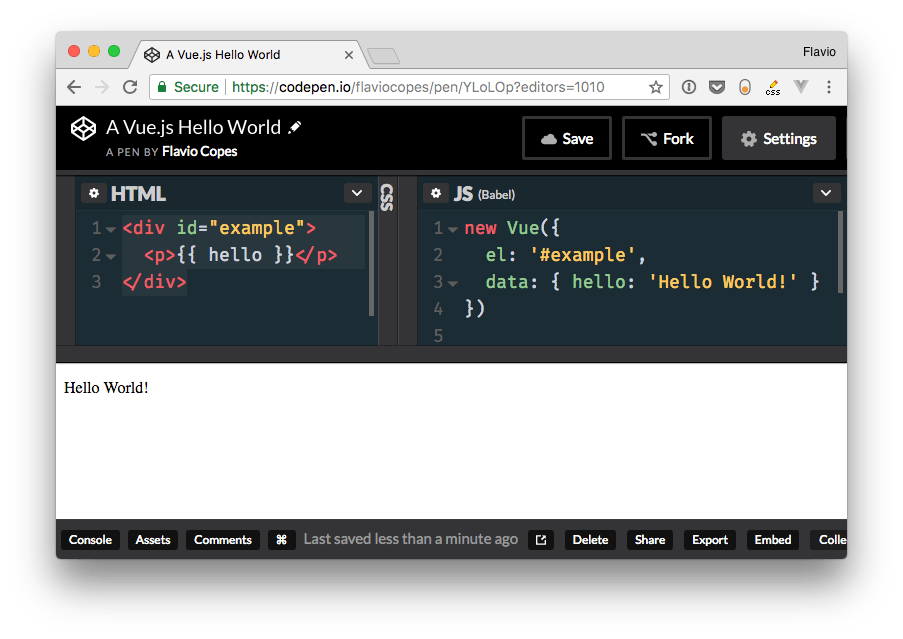
That pen is an older Vue 2 demo. For Vue 3, point the Pen at https://unpkg.com/vue@3/dist/vue.global.js and use createApp like above. Or use the CodePen demo linked from the Vue docs.
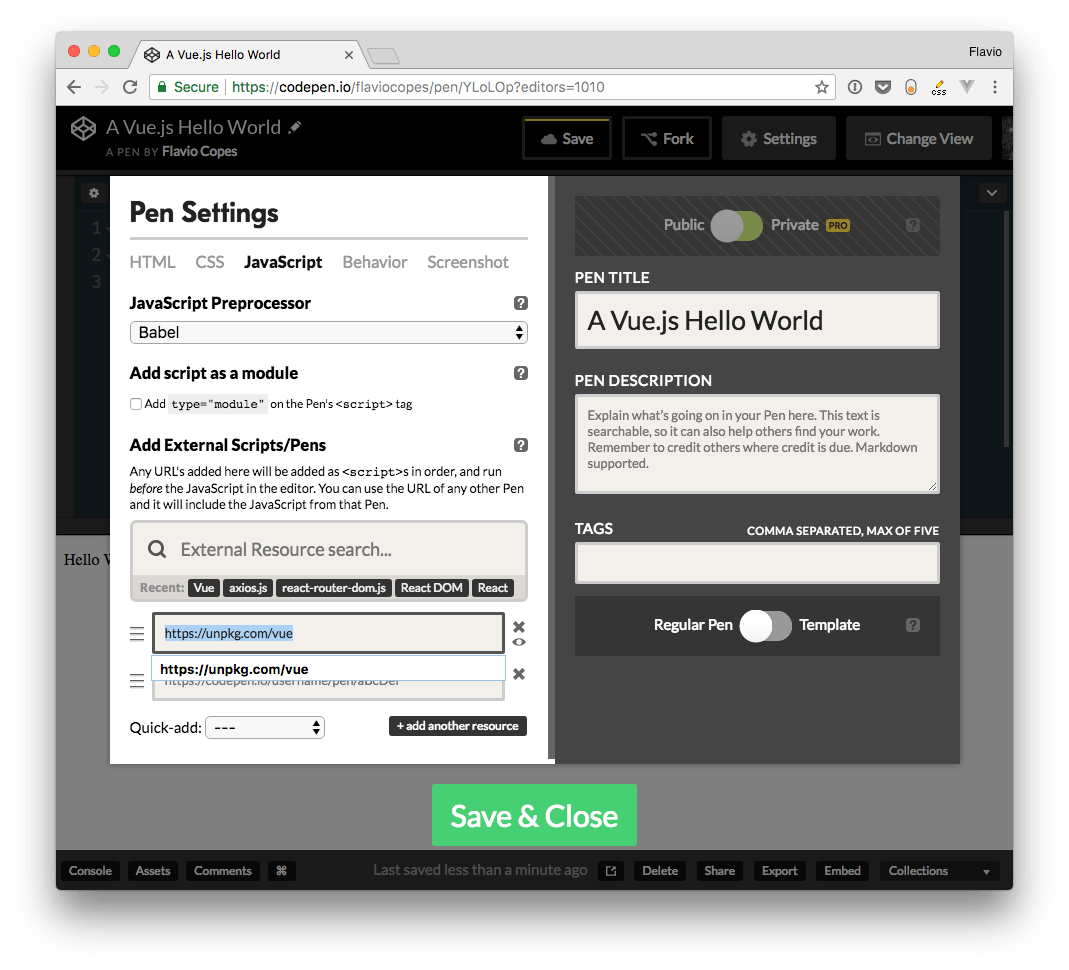
Codepen is a little different from using a plain HTML file, and you need to configure it to point to the Vue library location in the Pen settings:
Second example: the create-vue default app
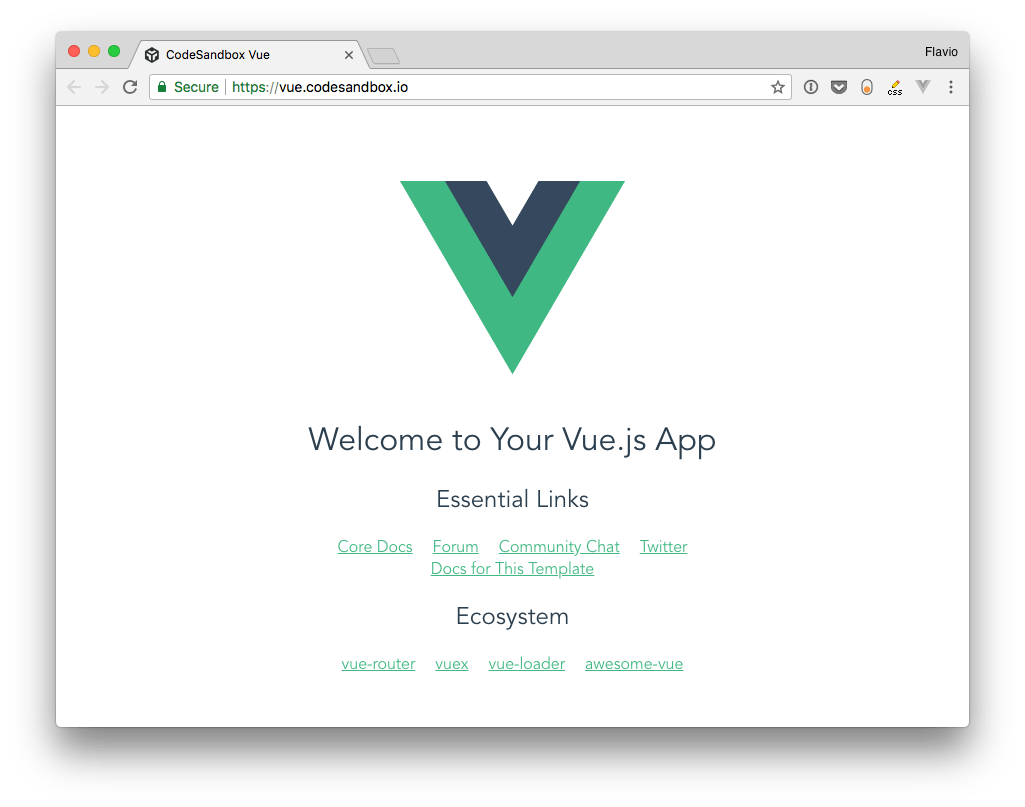
Let’s level up the game a little bit. The next app we’re going to build is already done, and it’s the create-vue default application.
create-vue is the official Vue project scaffolding tool. It sets up a Vite-based app with Single File Components for you, with a sample app in place.
Prerequisites from the Vue docs: familiarity with the command line, and a current supported Node.js install. As of this update the quick start asks for Node ^22.18.0 || >=24.12.0. Check https://vuejs.org/guide/quick-start if those ranges moved.
There are two ways you can get this application.
Use create-vue locally
Run (keep the @latest tag):
npm create vue@latestYou’ll get prompts for the project name, TypeScript, Router, Pinia, Vitest, and so on. If you’re unsure, choose No for now.
Then:
cd <your-project-name>
npm install
npm run dev
That’s it. Vite serves the app and you can open the local URL it prints.
Try Vue in the browser
Without installing anything locally, the Vue docs point you at:
- the Vue Playground
- a JSFiddle for a plain HTML setup
- StackBlitz for a full Vite + Vue setup in the browser
The files structure
Beside package.json, which contains the configuration, a typical create-vue project looks roughly like this:
index.htmlvite.config.js(or.ts)src/App.vuesrc/main.jssrc/assets/src/components/HelloWorld.vue
Exact names can vary with the options you picked (TypeScript, Router, and so on). The shape below matches a simple JavaScript scaffold.
index.html
The index.html file is the main app file.
In the body it includes just one simple element: <div id="app"></div>. This is the element the Vue application will use to attach to the DOM. Vite injects the script from src/main.js.
<!DOCTYPE html>
<html lang="en">
  <head>
    <meta charset="UTF-8" />
    <meta name="viewport" content="width=device-width, initial-scale=1.0" />
    <title>Vue App</title>
  </head>
  <body>
    <div id="app"></div>
    <script type="module" src="/src/main.js"></script>
  </body>
</html>
src/main.js
This is the main JavaScript file that drives our app.
We import createApp from Vue and the App component from App.vue, then mount the app on #app.
import { createApp } from 'vue'
import App from './App.vue'

createApp(App).mount('#app')
src/App.vue
App.vue is a Single File Component. It contains 3 chunks of code: HTML, CSS and JavaScript.
This might seem weird at first, but Single File Components are a great way to create self-contained components that have all they need in a single file.
We have the markup, the JavaScript that is going to interact with it, and style that’s applied to it, which can be scoped, or not. In this case, it’s not scoped, and it’s just outputting that CSS which is applied like regular CSS to the page.
The interesting part lies in the script tag.
We import a component from the components/HelloWorld.vue file, which we’ll describe later.
This component is going to be referenced in our component. It’s a dependency. We are going to output this code:
<div id="app">
  <img width="25%" src="./assets/logo.svg" />
  <HelloWorld />
</div>
from this component, which you see references the HelloWorld component. Vue will automatically insert that component inside this placeholder.
<template>
  <div id="app">
    <img width="25%" src="./assets/logo.svg" />
    <HelloWorld />
  </div>
</template>

<script>
import HelloWorld from './components/HelloWorld.vue'

export default {
  name: 'App',
  components: {
    HelloWorld
  }
}
</script>

<style>
#app {
  font-family: 'Avenir', Helvetica, Arial, sans-serif;
  -webkit-font-smoothing: antialiased;
  -moz-osx-font-smoothing: grayscale;
  text-align: center;
  color: #2c3e50;
  margin-top: 60px;
}
</style>
(create-vue’s default scaffold often uses the Composition API and <script setup> instead. Same idea: App imports HelloWorld and renders it.)
src/components/HelloWorld.vue
Here’s the HelloWorld component, which is included by the App component.
This component outputs a set of links, along with a message.
Remember above we talked about CSS in App.vue, which was not scoped? The HelloWorld component has scoped CSS.
You can easily determine it by looking at the style tag. If it has the scoped attribute, then it’s scoped: <style scoped>
This means that the generated CSS will be targeting the component uniquely, via a class that’s applied by Vue transparently. You don’t need to worry about this, and you know the CSS won’t leak to other parts of the page.
The message the component outputs is stored in the data property of the Vue instance, and outputted in the template as {{ msg }}.
Anything that’s stored in data is reachable directly in the template via its own name. We didn’t need to say data.msg, just msg.
<template>
  <div class="hello">
    <h1>{{ msg }}</h1>
    <h2>Essential Links</h2>
    <ul>
      <li>
        <a href="https://vuejs.org" target="_blank" rel="noopener">
          Core Docs
        </a>
      </li>
      <li>
        <a href="https://forum.vuejs.org" target="_blank" rel="noopener">
          Forum
        </a>
      </li>
      <li>
        <a href="https://chat.vuejs.org" target="_blank" rel="noopener">
          Community Chat
        </a>
      </li>
      <li>
        <a href="https://twitter.com/vuejs" target="_blank" rel="noopener">
          Twitter
        </a>
      </li>
    </ul>
  </div>
</template>

<script>
export default {
  name: 'HelloWorld',
  data() {
    return {
      msg: 'Welcome to Your Vue.js App'
    }
  }
}
</script>

<!-- Add "scoped" attribute to limit CSS to this component only -->
<style scoped>
h1,
h2 {
  font-weight: normal;
}
ul {
  list-style-type: none;
  padding: 0;
}
li {
  display: inline-block;
  margin: 0 10px;
}
a {
  color: #42b983;
}
</style>
Run the app
After npm run dev, open the URL Vite prints (usually http://localhost:5173). Edit anything in the source and the page updates.
Want me to talk about your product? You can sponsor this site.