An Express HTTPS server with a self-signed certificate
By Flavio Copes
Learn how to run an Express HTTPS server on localhost by creating a self-signed certificate with OpenSSL, enough for secure local development and testing.
To be able to serve a site on HTTPS from localhost you need to create a self-signed certificate.
A self-signed certificate is sufficient to establish a secure, HTTPS connection for development purposes. Although browsers will complain that the certificate is self-signed (and as such is not trusted).
To create the certificate you must have OpenSSL installed on your system.
You may have it installed already, just try typing openssl in your terminal.
If not, on a Mac you can install it using brew install openssl (if you use Homebrew). Otherwise, search on Google “how to install openssl on
Once OpenSSL is installed, run this command:
openssl req -nodes -new -x509 -keyout server.key -out server.certOpenSSL generates a 2048-bit RSA private key (the default in OpenSSL 3), saves it to server.key, then asks a few questions about who the certificate belongs to. The first is the country name:
Country Name (2 letter code) [AU]:Then your state or province:
State or Province Name (full name) [Some-State]:Your city:
Locality Name (eg, city) []:…and your organization name:
Organization Name (eg, company) [Internet Widgits Pty Ltd]:
Organizational Unit Name (eg, section) []:
You can leave all of these empty.
Just remember to set this to localhost:
Common Name (e.g. server FQDN or YOUR name) []: localhost…and to add your email address:
Email Address []:That’s it! Now you have 2 files in the folder where you ran the original command:
server.certis the self-signed certificate fileserver.keyis the private key of the certificate
The certificate is valid for 30 days. Add -days 365 to the command if you want it to last longer.
Both files will be needed to establish the HTTPS connection, and depending on how you are going to setup your server, the process to use them will vary.
Those files need to be put in a place reachable by the application, and then you’ll need to configure the server to use them.
This is an example using the https core module and Express 5 on Node.js. Install Express with npm i express. The code uses import, so save the file as server.mjs, or add "type": "module" to your package.json:
import https from 'https'
import express from 'express'

const app = express()

app.get('/', (req, res) => {
  res.send('Hello HTTPS!')
})

https.createServer({}, app).listen(3000, () => {
  console.log('Listening...')
})
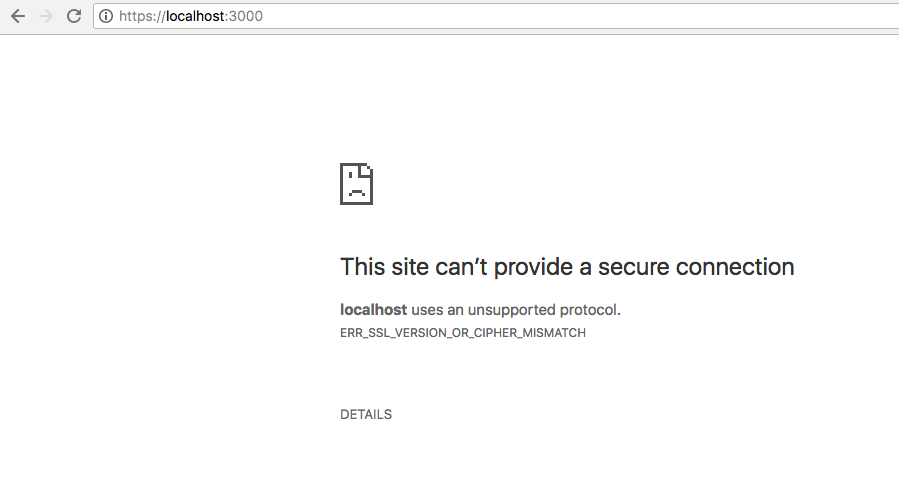
Without adding the certificate, if I connect to https://localhost:3000 this is what the browser will show:
With the certificate in place:
import https from 'https'
import fs from 'fs'
import express from 'express'

const app = express()

app.get('/', (req, res) => {
  res.send('Hello HTTPS!')
})

https.createServer({
  key: fs.readFileSync('server.key'),
  cert: fs.readFileSync('server.cert')
}, app).listen(3000, () => {
  console.log('Listening...')
})
Chrome will tell us that the certificate is invalid (since it’s self-signed), and will ask us to confirm before continuing (however, the HTTPS connection will still work).
Want me to talk about your product? You can sponsor this site.